Recorded Traffic
You may run into web applications that AppSpider cannot crawl. You can test the security of these applications by using a Web Proxy tool such as the Traffic Recorder. Using the Traffic Recorder, you can record the interactions, such as HTTP GET and POST requests and responses, between the front-end application and the back-end server in a traffic file. AppSpider can use these interactions to run attacks against the backend of your application. This approach is also useful if you have not built the frontend of your web application and want to begin testing early in the development process.
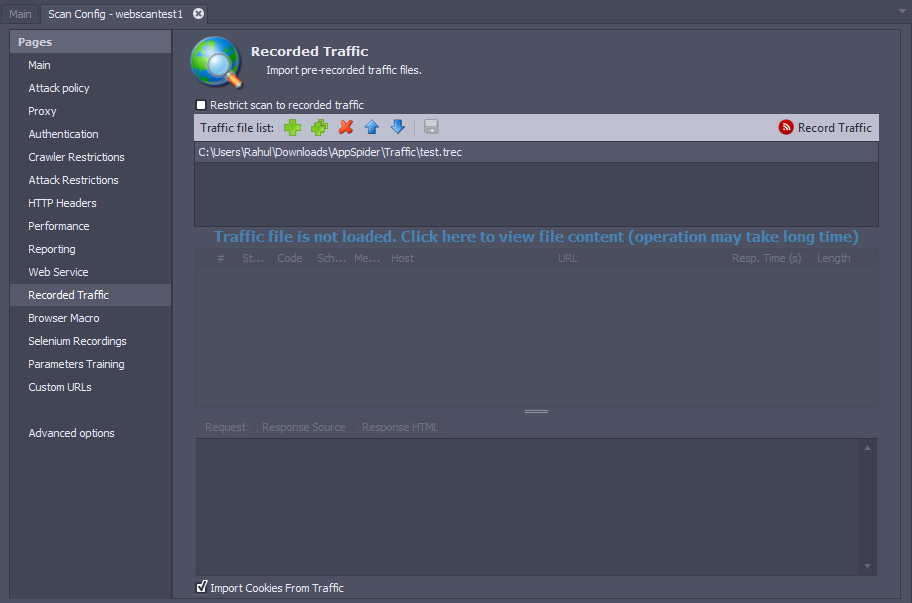
Traffic File List Toolbar
The toolbar contains the following options:
- Restrict scan to recorded traffic - AppSpider will only crawl the URLs imported from the traffic files. No other pages will be crawled or tested. AppSpider will not crawl or test any other pages.
- Add - Adds a traffic file from your file system for scanning.
- Bulk Add - Opens the “Bulk Files Import” window so you can add all traffic files from a selected directory on your filesystem.
- Delete - Removes the selected traffic file from the list.
- Up - Moves the selected recording higher in the scan queue.
- Down - Moves the selected recording lower in the scan queue.
- Save - Saves any modifications made to the traffic file on this screen.
- Record Traffic - Launches the Traffic Recorder tool. If you close the tool after recording and saving the traffic, a file automatically gets added to the Traffic File list.
Scan using Recorded Traffic
To scan traffic files:
- Complete the steps in your app that you wish to test, and record the interactions in a traffic file on your computer. Traffic files can be of the following formats:
- AppSpider Traffic Files (*.trec)
- Burp Files (*.xml)
- Paros Files (*.txt)
- WebScarab Files (conversationlog)
- HAR (HTTP Archive) Files (*.har)
- Fiddler Files (*.saz)
- Open the “Recorded Traffic” screen and click Add File in the toolbar. This will open the “Open log file for manual crawling” popup.
- Navigate to the location of your traffic file on the filesystem and select it. The path to the script will now appear in the “Traffic file list” table.
- Repeat the previous steps to add multiple traffic files. If your traffic files are all under one directory, you can use the Bulk Add button to add multiple traffic files to your scan.
- If the traffic files need to be run in a specific order, rearrange the sequence using the Up and Down buttons.
- The traffic files are not loaded in the application at this point. If you wish to modify any traffic files, you can click on the text below the Traffic file list that says “Traffic file is not loaded. Click here to view file content”. This will load all the interactions into the traffic table.
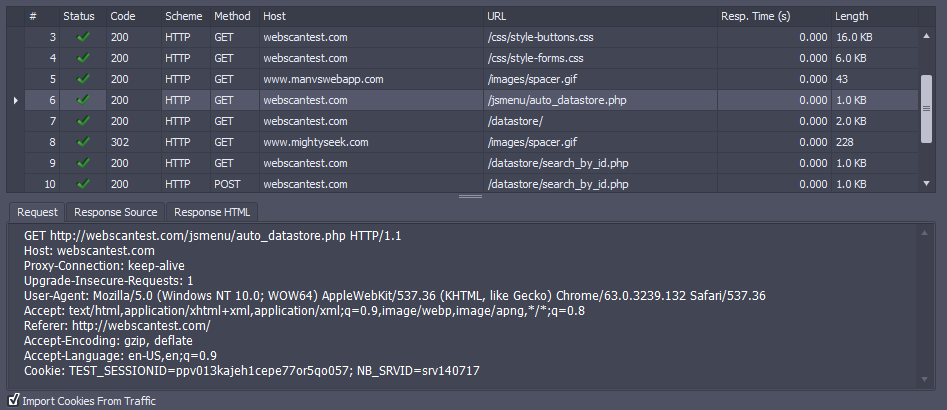
When the traffic is loaded in the table, you can right-click any row to replay the request, or delete it from the file. Click the Save button to save any changes to the files. 7. Select the Restrict scan to recorded traffic option if you are only interested in scanning the URLs from the imported traffic files.
Import Cookies from Traffic
You should deselect this option if:
- You use a different authentication method for the web app and are using traffic logs to increase the crawl coverage.
- The traffic log was recorded a long time, so the cookies may be obsolete.