Web Service
You can test your REST and SOAP web services by adding Swagger or WSDL files to AppSpider. Swagger and WSDL files define a standard interface to APIs that is agnostic to programming languages. AppSpider parses these documents to generate function calls to your API and create test values for the expected parameters. AppSpider then executes these function calls against your API and checks the interactions for vulnerabilities.
Swagger/OpenAPI file compatibility
AppSpider only supports Swagger/OpenAPI files that are parsable through https://editor.swagger.io/
Files that are rejected by https://editor.swagger.io/ are not compatible with our engine.
You can upload a WSDL or Swagger file for scanning or provide a URL to the file. If this URL is only available on your internal network, you will have to install a scan engine within the same network and ensure that the engine is able to access the file.
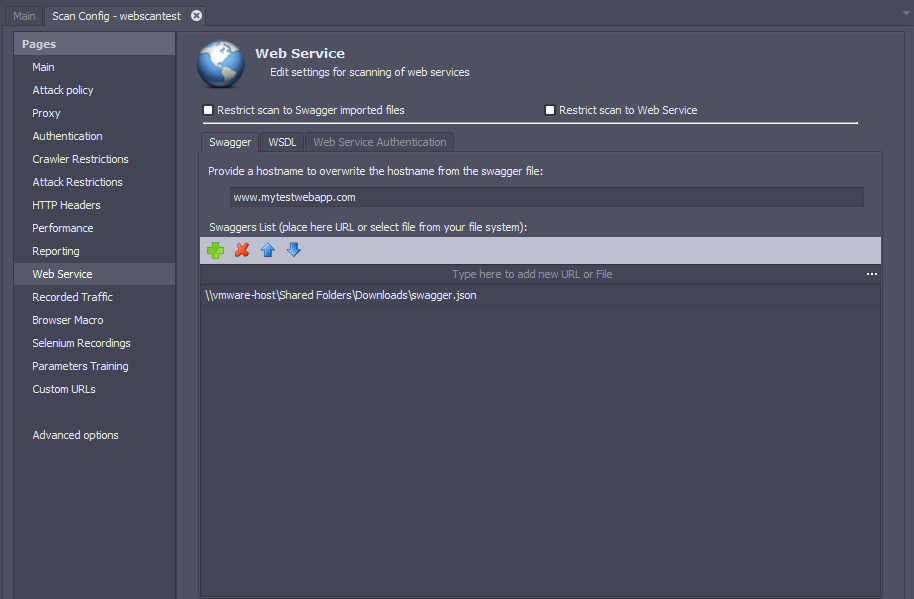
Scan RESTful APIs using Swagger Files
To scan REST APIs:
- Open the Web Services > Swagger screen.
- Under the Swaggers List section, click Add to provide a Swagger file from your computer for scanning. If the file is hosted online, add the URL in the first line of the table and press Enter. Repeat this process if there are multiple Swagger files.
- Select the Restrict scan to Swagger imported files option to ensure that the scan is limited to the API functionality described in the Swagger file.
- If the API requires authentication, you can set the credentials in the Authentication tab. If the API requires an API key or other special headers, add them to the Extra Headers field of the HTTP Headers screen.
Scan APIs using WSDL Files
To scan APIs with WSDL files:
- Open the Web Services > WSDL screen.
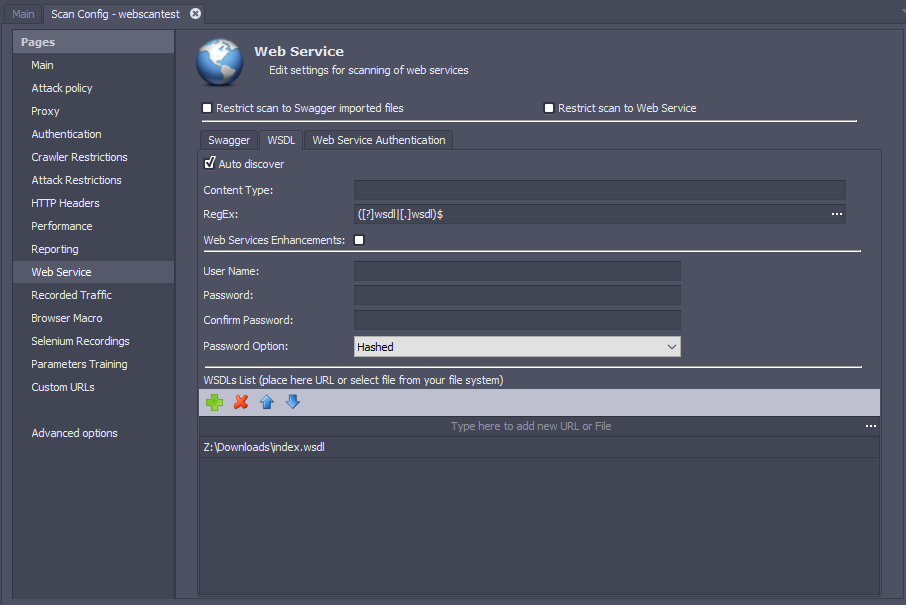
- If the target app hosts WSDL files, select the Auto discover option and set the RegEx field to a regular expression matching the URL of the WSDL files.
- In the Content Type field, enter the content type to send to the web server in the SOAP requests when the scanner fails to extract the content-type information from the WSDL.
- If your API utilizes the Web Services Enhancements add-on for .NET, check the Web Services Enhancements option.
- If your API requires authentication, enter the username and password in the respective fields.
- If you have additional WSDL files that cannot be discovered automatically, add them to the WSDLs List section. Click Add to provide a WSDL file from your computer for scanning. If the file is hosted online, add the URL in the first line of the table and press enter. Repeat this process if there are multiple WSDL files.
- Select the Restrict scan to Web Service option to ensure that the scan is limited to the API functionality described in the WSDL file.
Web Service Authentication
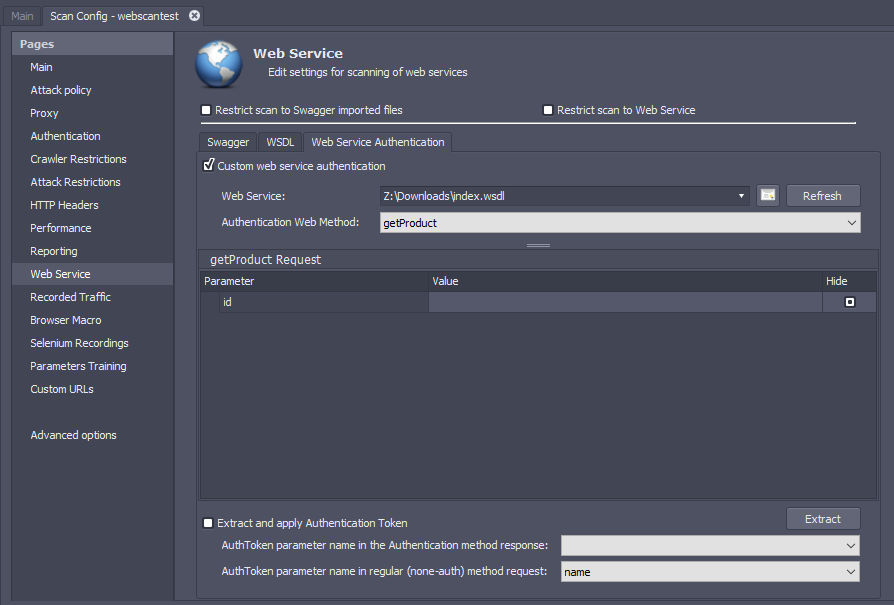
To configure AppSpider to authenticate into your web service:
- Open the Web Service > Web Service Authentication screen.
- Select the web service for authentication. The web service must be online for the next steps to be successful.
- Click Refresh. The methods from the WSDL file will be populated in the “Authentication Web Method” dropdown.
- Select the authentication method from the Authentication Web Method dropdown.
- Enter the parameter values for the authentication method.
- The authentication method may return a token that must be sent with all subsequent method calls. Select the Extract and apply Authentication Token option if an authentication token will be received from the web service.
- Click the Extract button. This will execute the authentication method and populate the AuthToken parameter name in the Authentication method response dropdown.
- Select the parameter from the authentication method response which contains the authentication token.
- In the AuthToken parameter name in regular (non-auth) method request dropdown, provide the parameter where the extracted token needs to go.