Test Vulnerability Remediation
Testing whether a fix works is an integral part of application security. You can try code changes and test whether they fix the vulnerability by replaying the attack from the Vulnerability Details window. To validate whether a remediation worked, you can also re-run the same scan that the vulnerability was found in.
Replay attack
You can replay the attack using the Rapid7 AppSec Plugin for Chrome browsers. Replaying attacks allows you to watch the attack traffic to determine whether a vulnerability is valid. You can also edit the request in the Request Builder to see if a change fixes or further validates a vulnerability.
In Application Security (InsightAppSec), you can access vulnerabilities and replay attacks from the scan report or vulnerability.
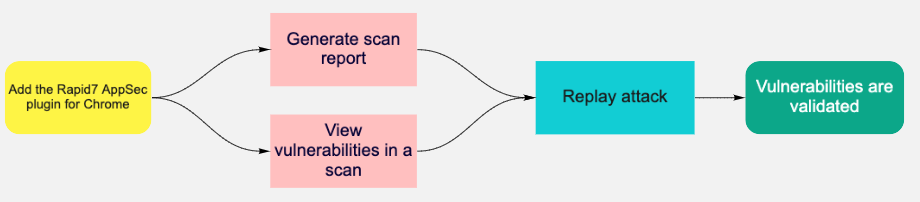
After installing the plugin, you can generate a scan report or view vulnerabilities within a scan and replay the attack.
Validate by scan report
- On the Apps page, select the app you want to validate.
- On the app details page, select the scan you want to generate a report for.
- Click Generate Report
- Give the report a name and choose HTML export.
- When the report is available, replay the attack. a. Select an attack type and then click Replay Attack. b. In the Vulnerability Validator window, use the tabs at the top to switch between the steps in the attack traffic that occurred. c. On each tab, click Send to validate each attack with the Request Builder. The response headers and response body will return with the attack information.
Validate by vulnerability
- On the Apps page, select the app you want to validate.
- On the Vulnerabilities tab, select the vulnerability you want to validate.
- When the Vulnerability Validator window opens, replay the attack.
- Select an attack type and then click Replay Attack.
- In the Vulnerability Validator window, use the tabs at the top to switch between the steps in the attack traffic that occurred.
- On each tab, click Send to validate each attack with the Request Builder. The response headers and response body will return with the attack information.
Test remediation by re-running a scan
Validation scans use the scan engine. To test a fix on a single vulnerability without scanning, you can Replay an Attack.
Validate vulnerabilities
Run Validate Vulns to check the status of vulnerabilities previously discovered in scans that have been remediated. If the scan doesn’t find it, the vulnerability status changes to Remediated.
- In your app, select the scan that you want to validate.
- In the Vulnerabilities tab, select the vulnerabilities that you want to run a validation scan on. Click Validate Vulns. If you want to validate all vulnerabilities, simply click Validate Vulns.
- To view scan progress, click Validation History.
- When the scan completes, on the Vulnerabilities table, you can review the results in the Status column.
- On the Vulnerabilities page, verify that the vulnerability is not listed.
To see any validation crawl logs and scan logs, see the Validation History tab.
Why should I test remediation this way?
Only vulnerabilities that still exist in your app will be listed in the validation scan results. Vulnerabilities that were attacked and not found to be no longer vulnerable will have their status updated to Remediated and will not be included in the validation scan results.
You can see how many vulnerabilities were remediated by checking the Remediated field in the Scan Information drawer. Any vulnerabilities that could not be attacked will not be included in the validation scan results and their status will not be updated.
How do I know if the vulnerability is remediated?
Validation scans automatically change the vulnerability status depending on whether the vulnerability was found, not found, or unconfirmed when run against the parent scan:
- Found - This vulnerability has been found in the validation scan and status will be updated as per table below.
- Not found - This vulnerability was not discovered by the scan, the status is therefore updated and shown in the vulnerabilities table.
- Unconfirmed - The validation scan could not replicate the original attacks, the unconfirmed status will be assigned to the scan output as a result.
- Not validated - the vulnerability has not yet been validated and therefore has a default result of not validated.
The statuses in bold in the table indicate a change in vulnerability status based on the validation reason code assigned. For example, where the status of a vulnerability was listed as Verified after a parent scan but a validation scan returns a validated status of Not Found, the vulnerability status is updated to Remediated from Verified as the vulnerability is deemed to no longer exist.
| Original status | Found vuln | Not found | Unknown |
|---|---|---|---|
| Unreviewed | Unreviewed | Remediated | Unreviewed |
| Ignored | Ignored | Remediated | Ignored |
| Verified | Verified | Remediated | Verified |
| Remediated | Unreviewed | Remediated | Remediated |
| False Positive | False Positive | False Positive | False Positive |
| Duplicate | Duplicate | Duplicate | Duplicate |
Scanning recommendation
Use Validate Vulns to test for remediation for a complete view of your app security. Validation scans run against the attack findings from the parent scan will attempt to only find vulnerabilities that were discovered in the parent scan. A validation scan is not as comprehensive as running a full scan on the parent scan.
Validation scans can only be run against a parent scan and cannot be run against an existing validation scan.