Workday
The Workday plugin for Automation (InsightConnect) is a custom built plugin which connects to Workday via API to pull Worker data, Trigger off of Events and Enable/Disable accounts.
- You can enable/disable accounts, search workers and trigger off of completed Business Process events in Workday with the Workday plugin for Automation (InsightConnect) .
- To use the Workday plugin, you need to import Workday Custom Reports from the Solution Catalog and set up appropriate security.
Depending on your support model, you may need the assistance of HRIS to assist with the set up required for Workday configuration.
Required Knowledge and Skills
This configuration guide is intended for Workday System Integrators, Workday Customer IT Departments and Automation (InsightConnect) Administrators.
This guide assumes you are familiar with the following:
- Workday Security Configuration (e.g. Integration System Users, Security Groups, Business Process policies)
- Workday Solutions
- Workday Calculated Field Creation and Custom Reports
- Automation (InsightConnect) Plugin Configuration
Configuration Steps
This part will of the guide will be split into two parts - steps to perform in your Workday Tenant and steps to perform in Automation (InsightConnect). Both parts are to be completed to enable the integration between Automation (InsightConnect) Workday plugin, and your Workday tenant.
List of configuration steps to perform in Workday:
- Required Knowledge and Skills
- Configuration Steps
- Importing the Workday Solution
- Workday Security Setup
- Create the Integration System User
- Recommended: Add the Integration System User to the Password Expiration Exemption list
- Create the Security Group
- Transfer Custom Report Ownership
- Recommended: Modify the Custom Report Sharing
- Get and Save the Custom Report REST URLs
- Configure the Workday Events Filter
- Automation (InsightConnect) Workday Plugin Connection Configuration
List of configuration steps to perform in Automation (InsightConnect):
Importing the Workday Solution
Login to a non-Preview Workday tenant with a user who has Security Administrator and Security Configurator access.
The easiest way to get the configuration setup in the Workday tenant is to use Workday’s Solution functionality to pull in the required configuration and make modifications from there.
Rapid7 has made a solution available to install the required Custom Reports and Calculated Fields for Event and Worker details.
Prerequisites:
- Workday User with Security
- “PUT Solution”
- Custom Report Administrator
- Security Configurator
- Security Administrator
- Business Process Administrator
- Non-Preview Workday Tenant
- Solutions Enabled in the tenant
Enable Security for Solutions
For more details on how to enable Solutions in your Workday tenant please visit Workday Administrator Guide .
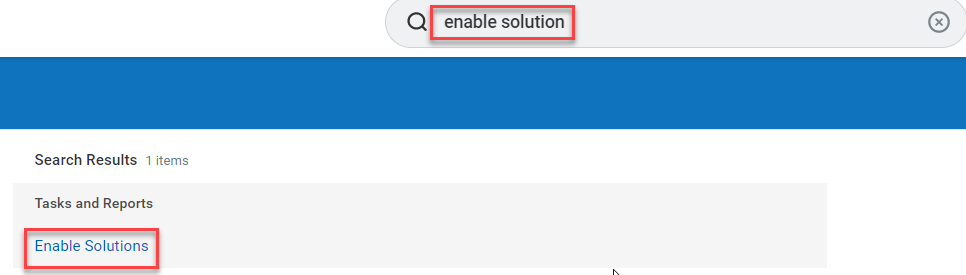
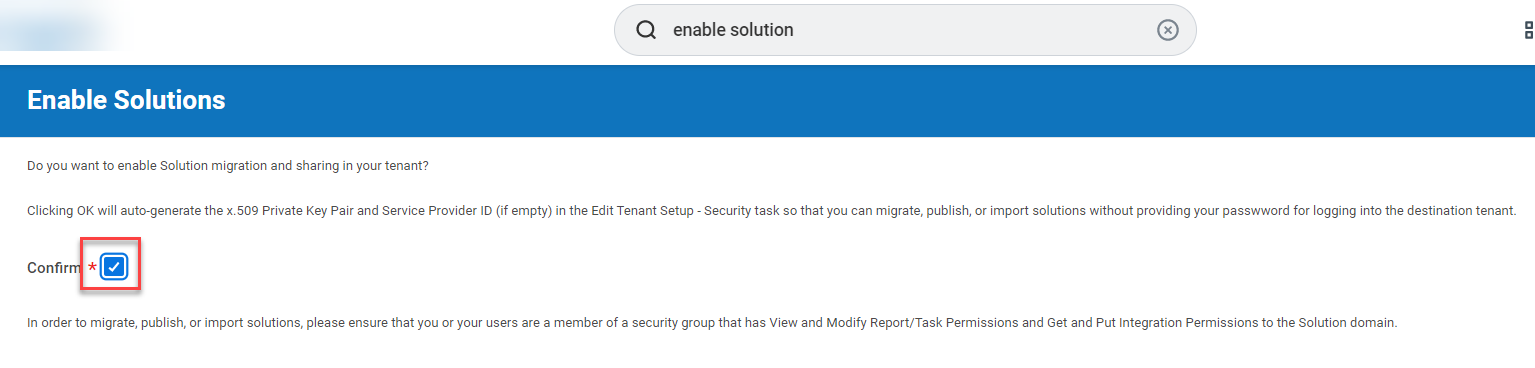
You can run the Enable Solutions task which sets up the necessary certificates in the Workday tenant to import solutions.
Import the Solution
-
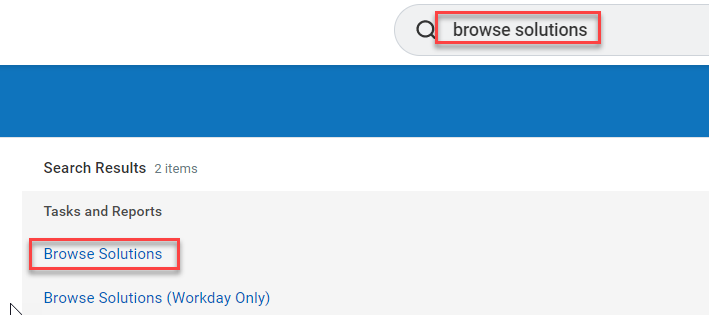
Search for browse solutions in Workday.
-
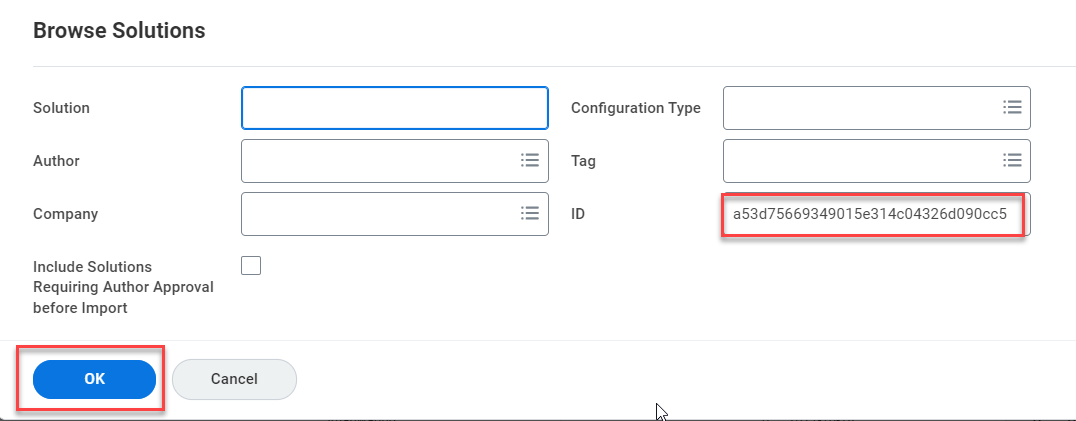
Search for solution ID a53d75669349015e314c04326d090cc5 and click OK to confirm.
-
You should get the following result. Click on Import All to being the process.

-
Confirm the Solution Import and click OK.

-
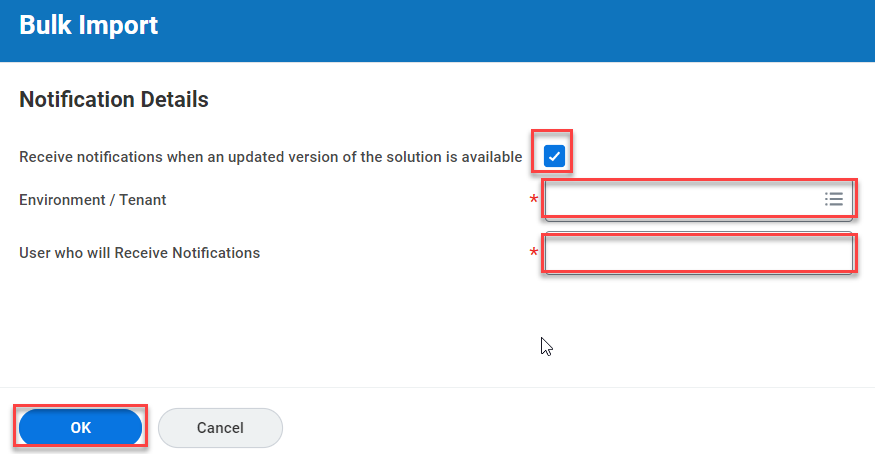
Optionally, if you wish to receive notifications when the Solution has been updated, click the Checkbox, select the Tenant (recommend using the Production tenant so tenant refreshes don’t clear the notification) and type the username of the user who should receive the notification.
-
Accept the Importing Agreement by ticking the Accept box.

-
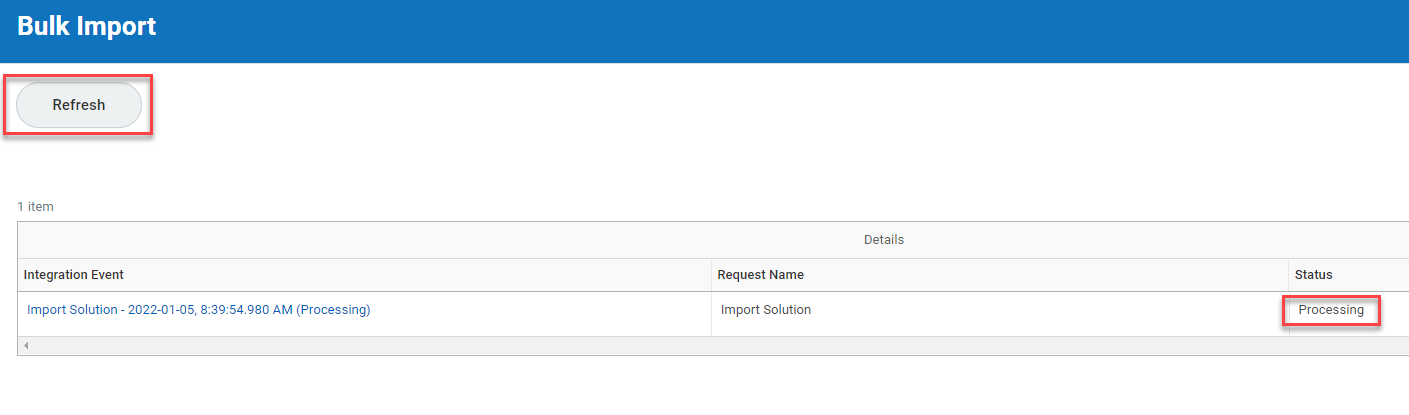
The import process will begin. Click on the refresh button peridically, until the process completes.
-
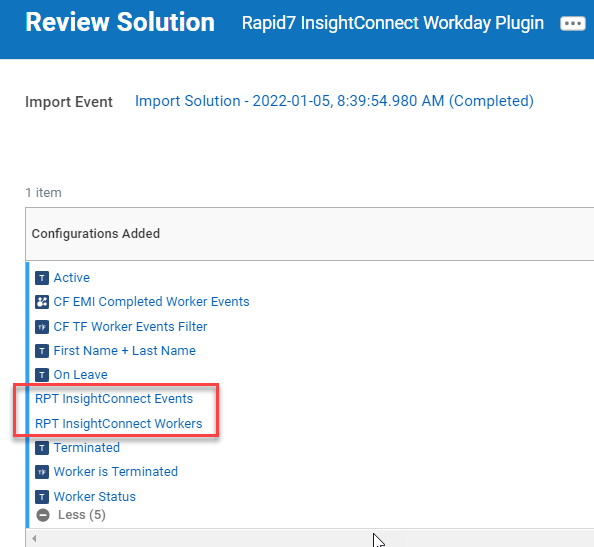
Once the process is completed, select the Review Import button.

This will show the Objects that were imported as part of the solution. Two key objects are the Custom Reports named RPT Automation (InsightConnect) Events and RPT Automation (InsightConnect) Workers. Make sure that these are listed in the import.
Workday Security Setup
The plugin should be set up to run with the permissions of an Integration System User with narrow permissions to only access the data and APIs it needs.
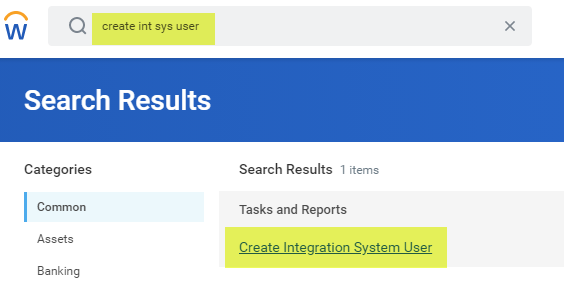
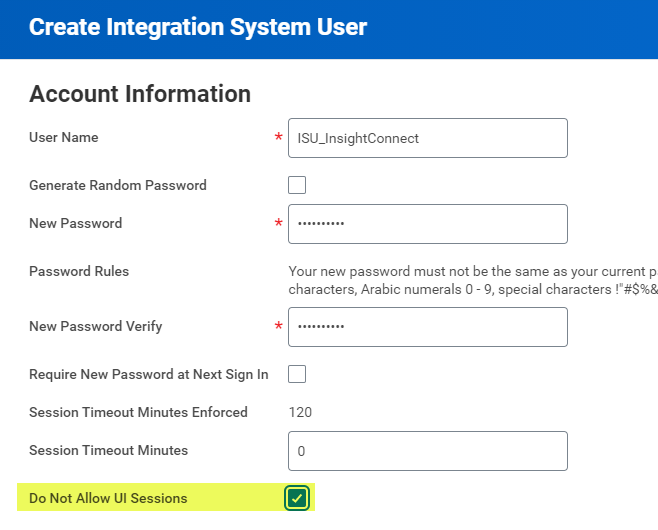
Create the Integration System User
-
Search and run the Create Integration System User task
-
Give the account a meaningful name (e.g. “ISU_InsightConnect”) and a complex password. Make sure to save this for later use. Then tick the Do Not Allow UI Sessions checkbox.
-
Click OK to save.
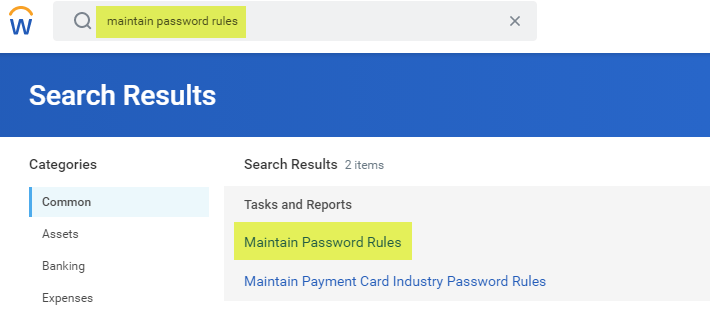
Recommended: Add the Integration System User to the Password Expiration Exemption list
To prevent the password for the ISU from periodically expiring, you can add this user to the Password Expiration Exemption list. If you don’t configure this, you will have to periodically update the ISU password in Workday and in the Automation (InsightConnect) plugin so that it retains valid credentials.
-
Navigate and run the Maintain Password Rules task.
-
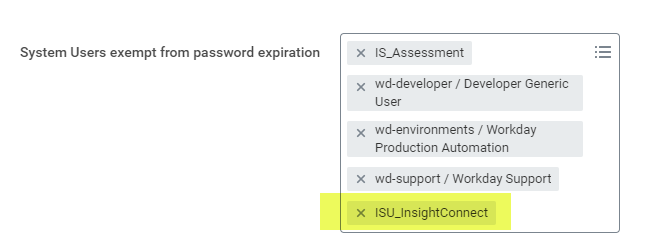
Scroll down to the bottom and select the username of your Integration System User to add them to the list and click OK.
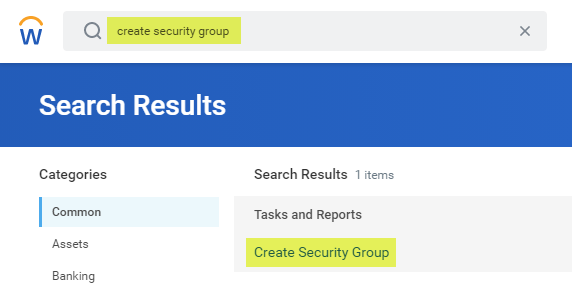
Create the Security Group
-
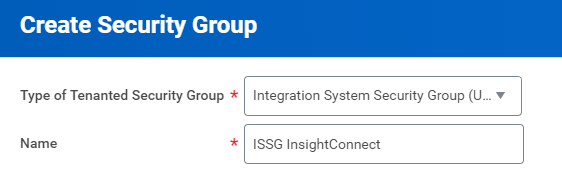
Navigate and execute the Create Security Group task.
-
Select Integration System Security Group (Unconstrained) and give it a meaningful name (e.g. “ISSG Automation (InsightConnect)”).
-
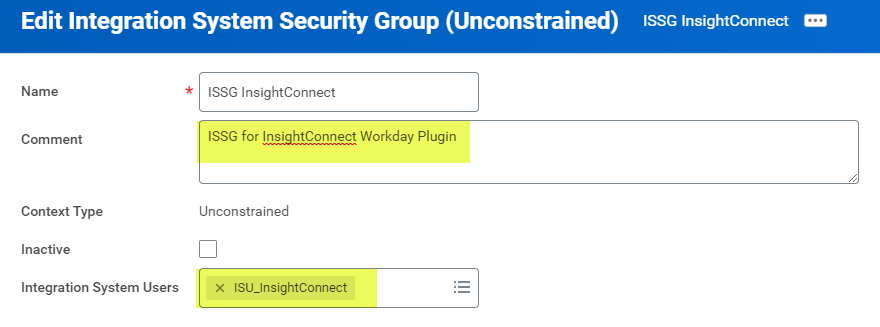
Optionally, add a Comment and select the Integration System User you created in the previous step.
-
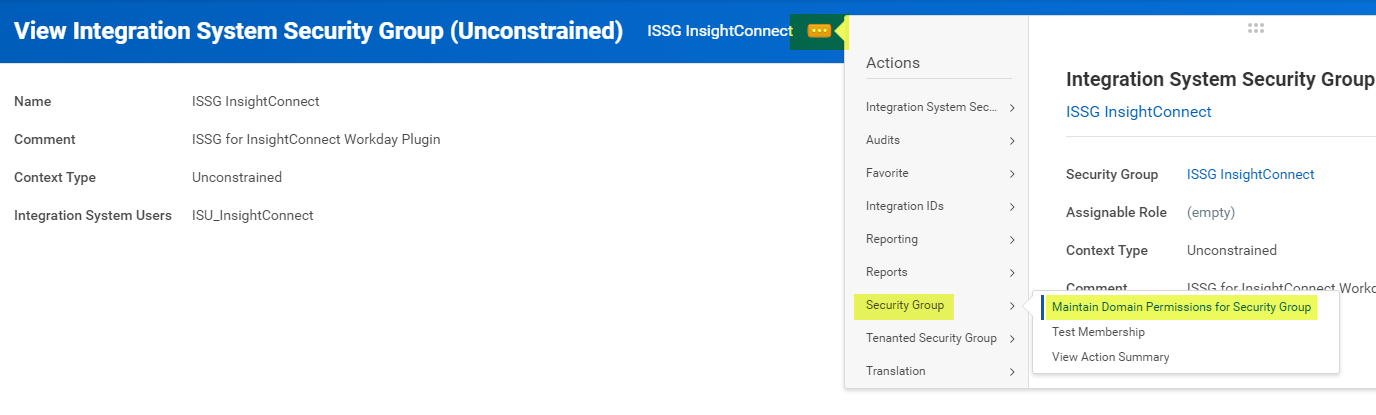
Now, that the user is created, click OK to save the Security Group and click the Related Action icon and select Security Group / Maintain Domain Permissions for Security Group.
-
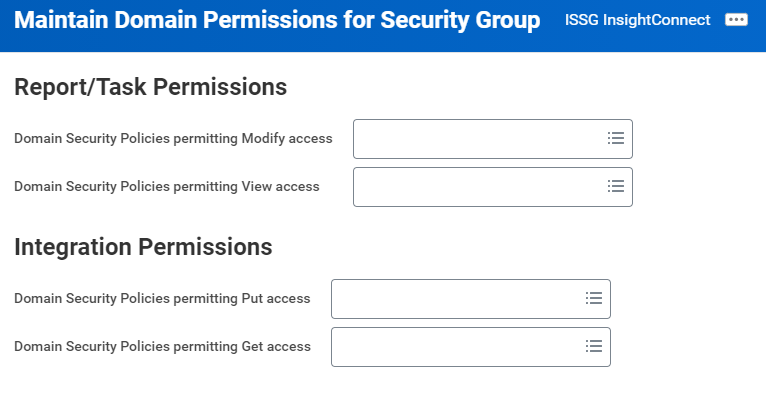
Add the permissions in the table below.
-
Add the following Security Policies to the Security Group.
Operation Domain Security Policy Functional Areas Get and Put Workday Accounts System Get Only Worker Data: Current Staffing Information Staffing Get Only Worker Data: Active and Terminated Workers Staffing Get Only Person Data: Work Phone Contact Information Get Only Person Data: Work Email Contact Information Get Only Business Process Reporting System View and Modify Custom Report Creation System -
Click OK to save.
-
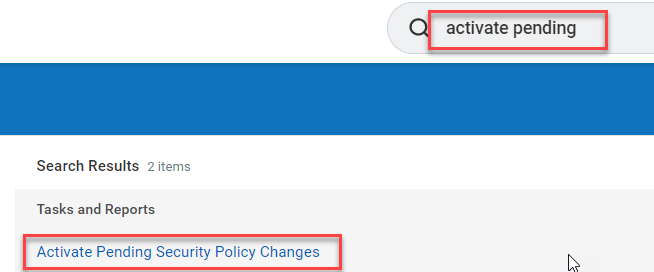
Finally, run the Activate Pending Security Policy Changes so that the security changes take effect.
Transfer Custom Report Ownership
The reports are imported from the Solution Catalog without ownership so we have to Transfer Ownership and configure Sharing.
-
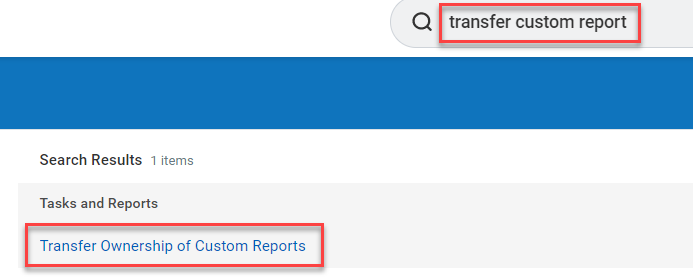
Run the Transfer Ownership of Custom Reports task, as shown below.
-
Search for Report Name(s) Automation (InsightConnect) and select the both the RPT Automation (InsightConnect) Events and RPT Automation (InsightConnect) Workers reports.
-
Assign the New Owner to the ISU account you created.

-
Click on the Related Action icon and select Custom Report / Transfer Ownership.
Recommended: Modify the Custom Report Sharing
-
With the Report Ownership transferred to the ISU, the ISU account can now access the REST API but to ensure it doesn’t lose access we should share the report with security groups.
-
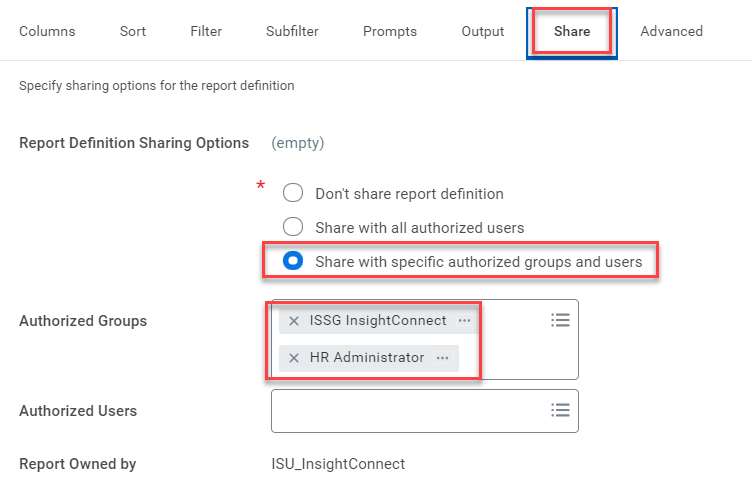
Click on the Share tab and select the Share with specific authorized groups and users radio button. Select the Automation (InsightConnect) security group and optionally add other Administrator groups that should have access to the reports (e.g. HR Administrator).
-
Click on OK to save.
Important: Repeat the process for the RPT Automation (InsightConnect) Workers report.
Get and Save the Custom Report REST URLs
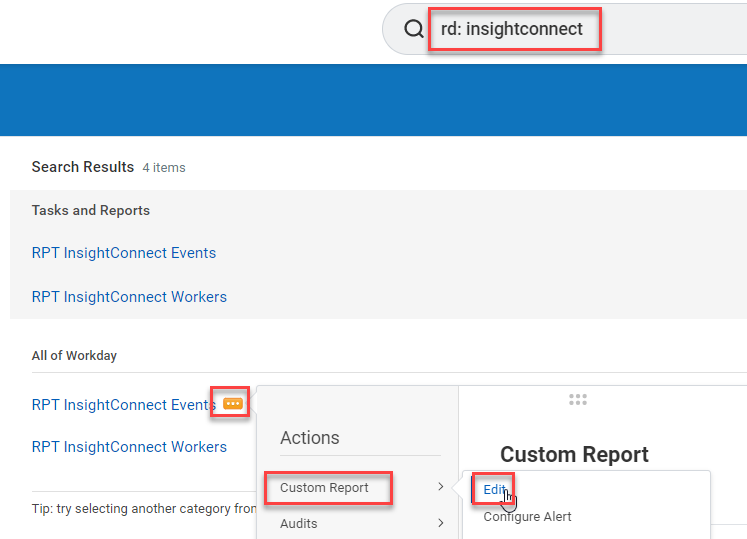
With the report ownership changed and shared appropriately, we can now obtain the URL’s for them so we can configure them in the Automation (InsightConnect) plugin at a later stage.
-
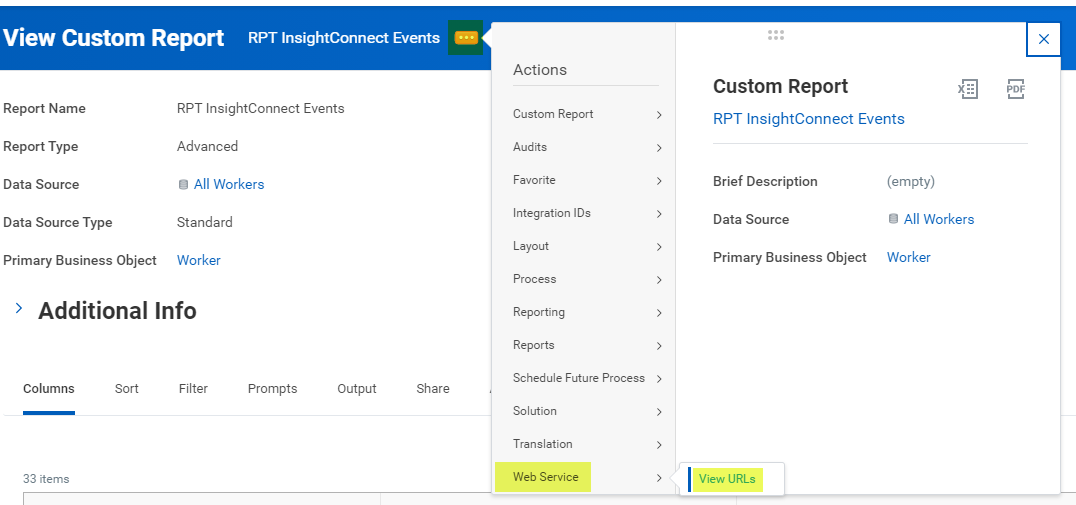
Click on the Related Action icon and select Web Service / View URLs on the report. Then, click OK on the prompt screens.
-
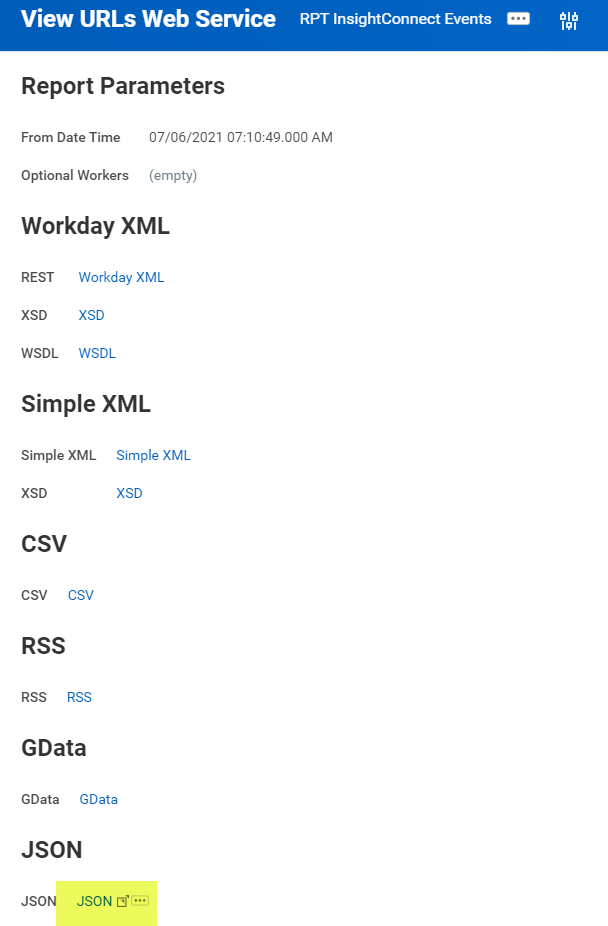
Scroll down and right click on the JSON Hyperlink and Copy and Save the URL. It will have a format similar to the following URLs:
- https://wd-impl-services1.workday.com/ccx/service/customreport2/tenant_name/ISU_InsightConnect/RPT_InsightConnect_Workers?format=json
- https://wd-impl-services1.workday.com/ccx/service/customreport2/tenant_name/ISU_InsightConnect/RPT_InsightConnect_Events?format=json
Important: Repeat this for both the Workers and Events reports and save it for later.
Configure the Workday Events Filter
The RPT Automation (InsightConnect) Events report is used to listen for Business Process events that have completed. Each Automation (InsightConnect) workflow client can have a different list of events that they are interested in and want to use as triggers inside Automation (InsightConnect).
In order for the ISU to have access to the completed event data, we need to first modify events that we are interested in and secondly modify the Business Process permissions.
Note: These steps are where you will likely need assistance from a Workday HR / Integrations administrator
-
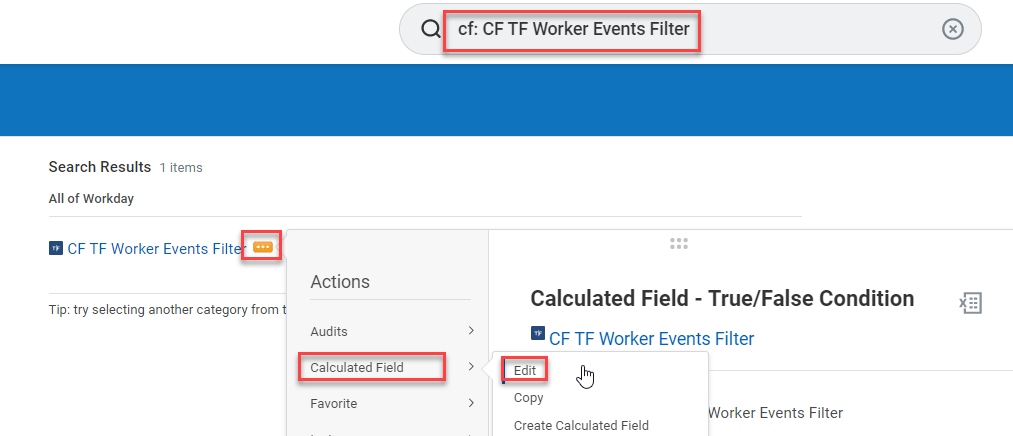
Search for the CF TF Worker Events Filter Calculated Field which controls which Business Process Types are listened for.
-
Review and Modify the Business Process Types, as shown below.
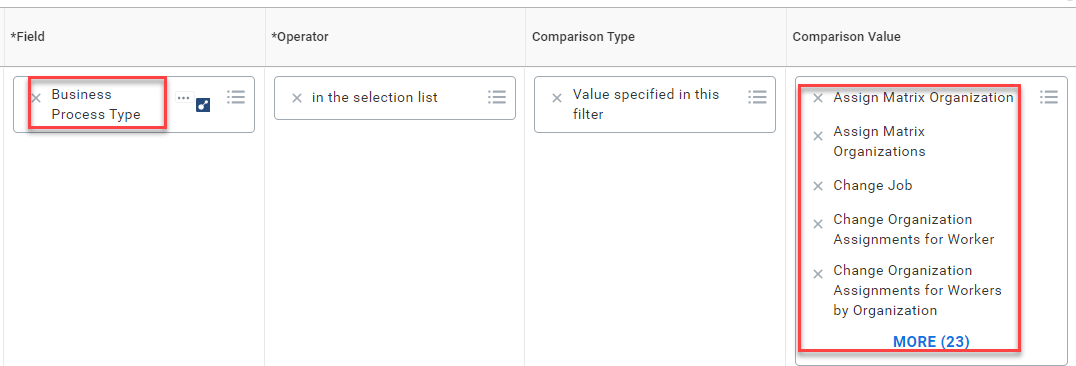
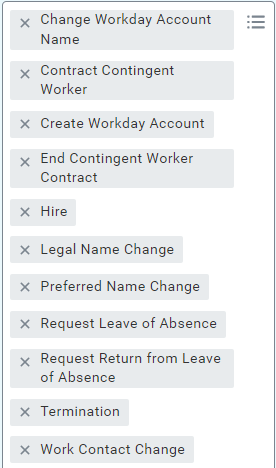
The Calculated Field by default filters for Business Process Types of:
- Hire / Contract Contingent Worker
- Termination / End Contingent Worker Contract
- Create Workday Account
- Name Changes
- Change Job / Organization / Locations
- Request / Return from Leave of Absence
Depending on what you want your Plugin to listen for and how your organization uses Workday Business Processes, this list may need to be modified.
-
Once you have selected and saved the Business Process Types to filter on, you need to assign specific Business Process security to our ISU so it can access completed events.
-
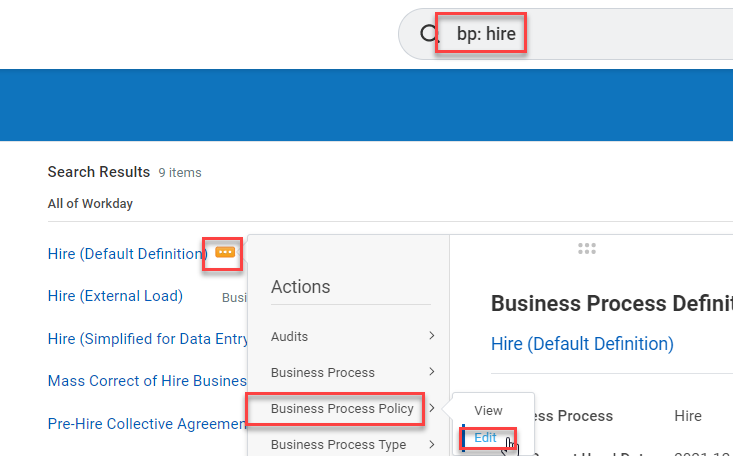
For each Business Process you are listening for in your filter, search for it, use the Related Action icon and select Business Process Policy and click on Edit.
-
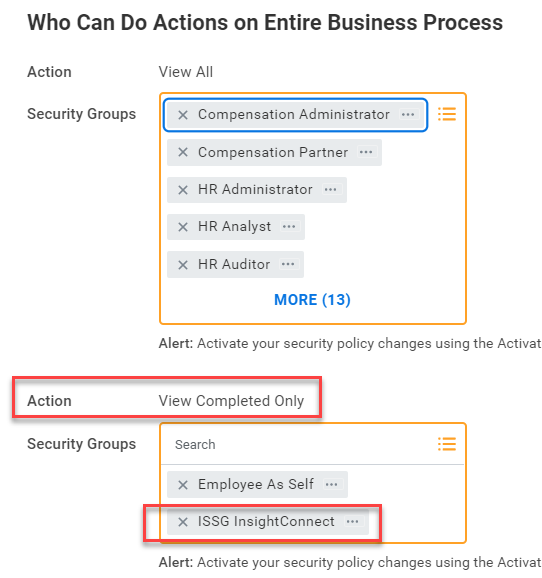
Scroll down to the Who Can Do Actions on Entire Business Process section and add the Security Group to the View Completed Only action.
-
Click OK to save and repeat this for the other Business Process Types.
-
Run the Activate Pending Security Policy Changes so that these security changes take effect.
Automation (InsightConnect) Workday Plugin Connection Configuration
Now that you’ve created the user and reports in Workday, you can configure the Workday connection in Automation (InsightConnect) to use the plugin.
-
In Automation (InsightConnect), open the connection configuration for the Workday plugin.
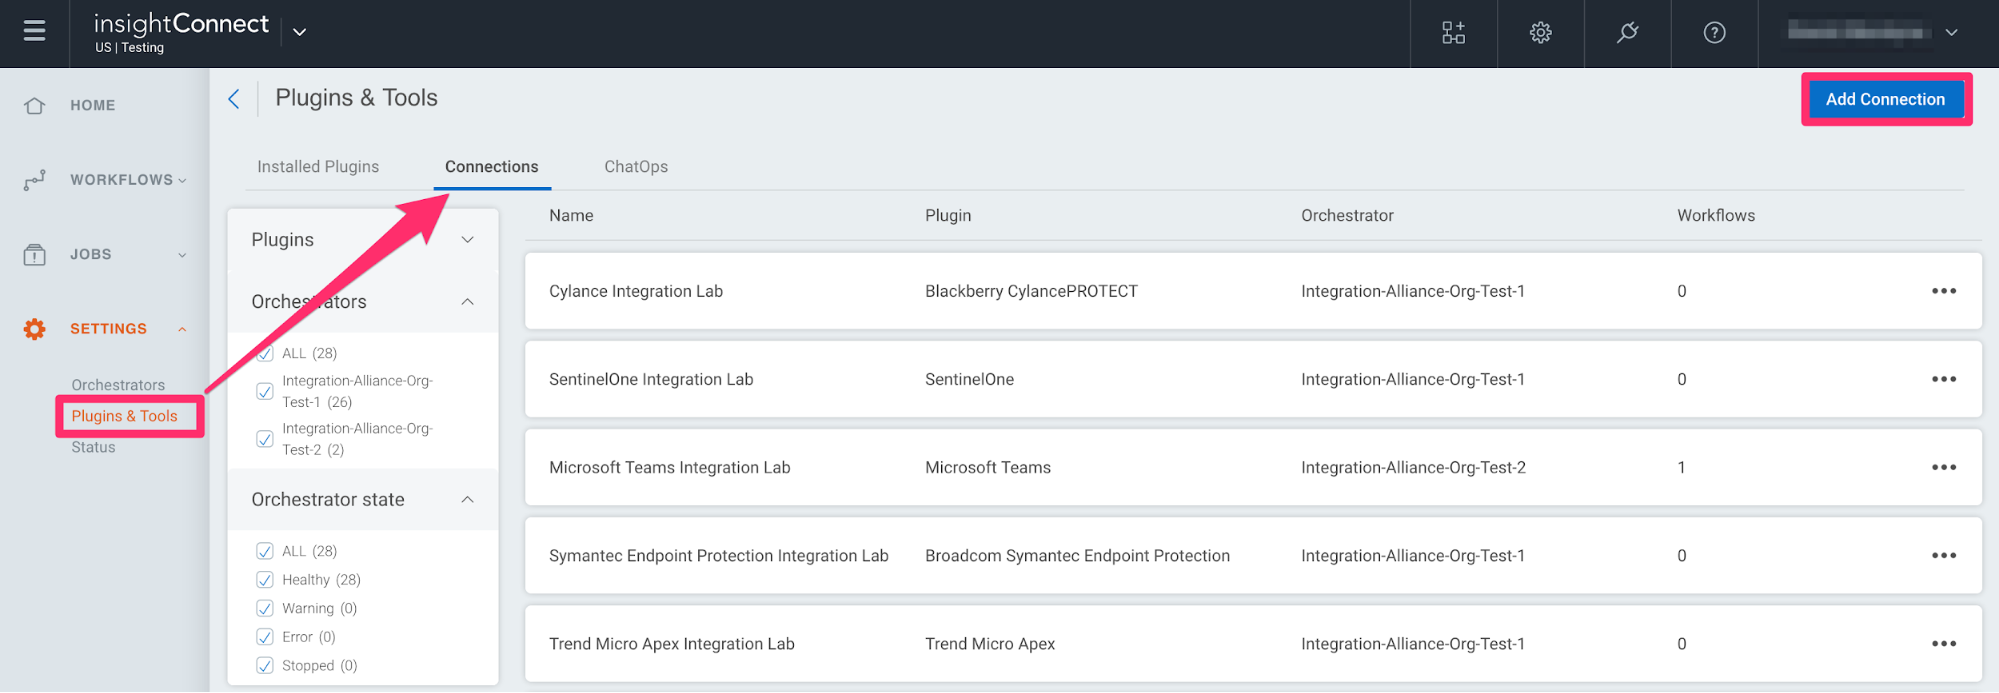
- You can do this when selecting the Workday plugin during a workflow building session in the Workflow Builder, or by creating the connection independently by choosing Plugins & Tools from the Settings tab on the left menu. On the Plugins & Tools page, select the Connections tab and click Add Connection in the upper-right corner.
-
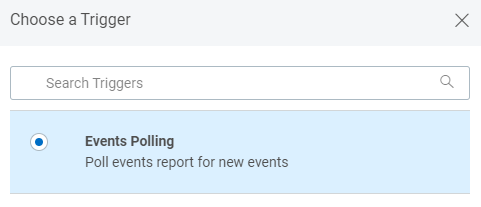
To use the Plugin in a Workflow, create a new Workflow and select the Workday plugin. Select the Events Polling action.
-
Select Add a New Connection.

-
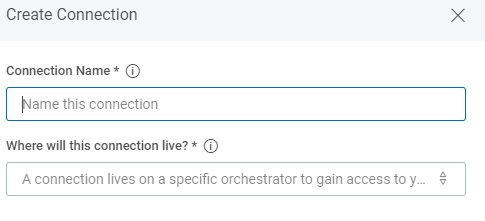
Configure the connection for the Workday plugin.
- Give the connection a unique and identifiable name
- Select where the plugin should run
- Choose the Workday plugin from the list. If it’s not available, import the plugin from the Installed Plugins tab.
-
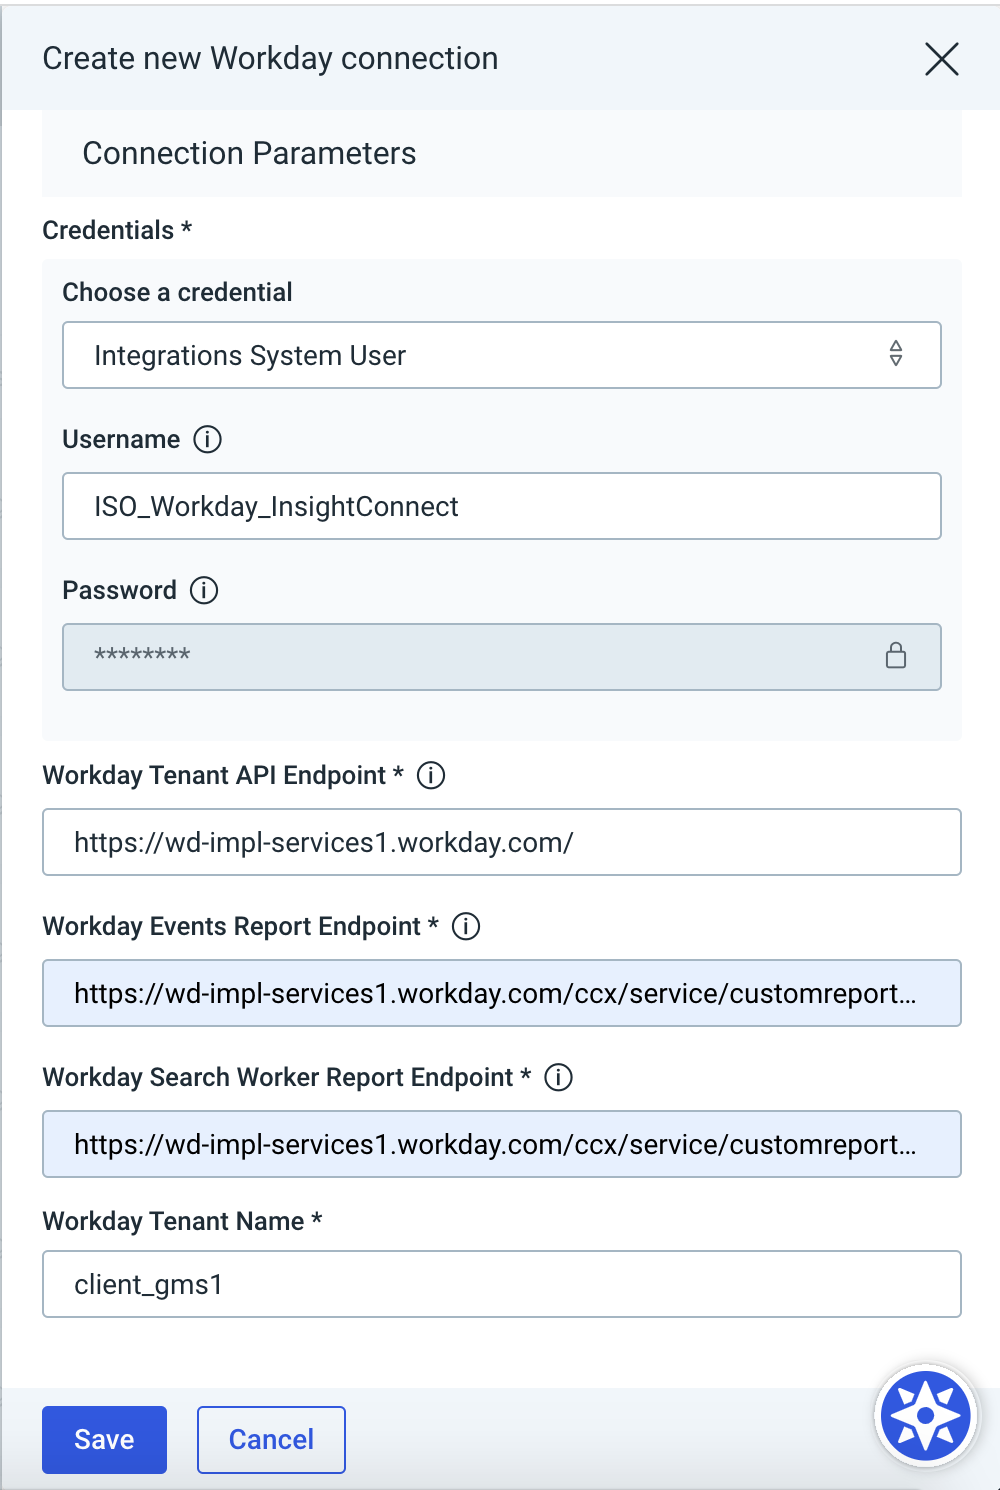
Configure your Workday credentials.
- In the credentials field, enter the ISU username and password created from the previous step.
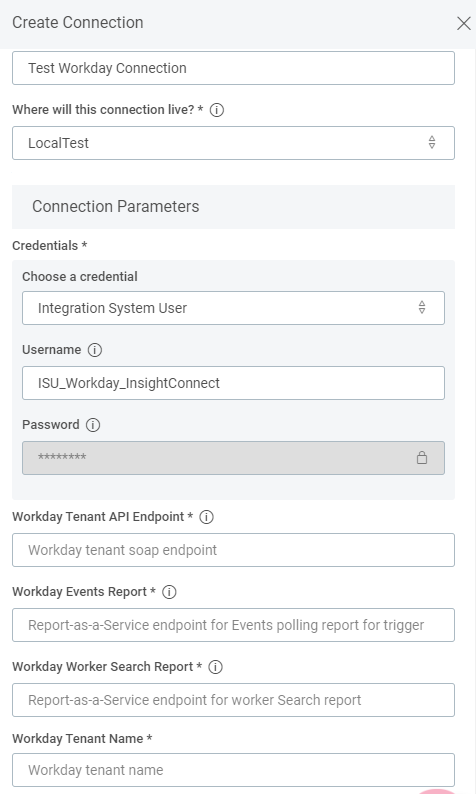
- In the Workday Tenant API Endpoint field, lookup your tenant prefix from the Workday URL column in the table below and enter the Workday Endpoint URL.
Workday URL Workday Endpoint URL www.myworkday.com https://services1.myworkday.com wd3.myworkday.com https://wd3-services1.myworkday.com wd5.myworkday.com https://wd5-services1.myworkday.com wd12.myworkday.com https://e2.wd12.myworkday.com wd10.myworkday.com https://e2.wd10.myworkday.com wd102.myworkday.com https://e2.wd102.myworkday.com impl.workday.com https://wd2-impl-services1.workday.com wd3-impl.workday.com https://wd3-impl-services1.workday.com wd5-impl.workday.com https://wd5-impl-services1.workday.com impl.wd12.workday.com https://impl-e2.wd12.myworkday.com impl.wd10.workday.com https://impl-e2.wd10.myworkday.com impl.wd102.myworkday.com https://e2.wd102.myworkday.com - In the Workday Events Report enter the JSON URL of the Events report you saved in a previous step.
- In the Workday Worker Search Report enter the JSON URL of the Workers report you saved in a previous step.
- In the Workday Tenant Name look at the Workday tenant URL string and enter the unique name of the tenant. For example, if your Workday tenant URL is this https://wd3-impl.workday.com/wday/authgwy/**client_gms1**/login.htmld , then the tenant name is “client_gms1”
Additional Notes
Rescinded Business Process Events in Workday will not trigger Events in the Plugin.