Basic Detection Rule Details
Custom Alerts have been renamed to Basic Detection Rules
Starting in May 2023, we will begin rolling out detection terminology changes to better reflect the functions of the Custom Alerts feature:
- Custom Alerts are now called Basic Detection Rules
- Pattern Detection Alerts are now called Log Pattern Detection Rules
- Inactivity Detection Alerts are now called Log Inactivity Detection Rules
- Change Detection Alerts are now called Log Change Detection Rules
The functions of these features remains the same. These terminology changes will be implemented throughout the documentation and in SIEM (InsightIDR).
When you configure a basic detection rule, you should consider notification settings and notification methods to optimize your rules.
Set Trigger Notification Settings
For Log Pattern Detection Rules, a detection triggers every time the event occurs on a rolling basis by default. If you choose Custom Match Settings, you can specify how many times an event must occur within a given time frame before it can trigger a detection.
For example, if the pattern match threshold is 100 times in the throttle window of 60 minutes, 100 matches must occur within the next hour before you receive the first detection. The detection is triggered when our match counter reaches this limit. However, note that it does not trigger again if the pattern is continually matched above the threshold: the counter must drop again below the limit, and then again over the threshold to be re-triggered.
For Log Change Detection Rules, new queries require that you specify a calculation to use, and a key to apply the calculation. Any changes of the key based off of the calculation will trigger a detection.
Define Notification Methods
For Log Change Detection and Log Inactivity Detection rules, define one or more communication methods. You can choose PagerDuty, Webhook, and email.
Select existing recipients or create new ones and provide the appropriate details for the communication method.
If you are using email, select existing recipients from the dropdown or create new ones. Use commas to separate email addresses if you are sending to multiple recipients.
Define what log information you’d like included in your notifications. By default, the matching log line and context will be included. To change this, open the edit basic detection rule modal, click Notifications and select the communication method tab you’d like to edit:
- Email: Click the Recipients dropdown and select Add & select recipient. Click the Log Context dropdown to view options.
- PagerDuty: Click the Service key for Pagerduty account dropdown and select Add & select key. Click the Log Context dropdown to view options.
- Webhook: Click the Webhook URL and select Add & select Webhook. Click the Log Context dropdown to view options.
- Automation (InsightConnect) Workflow: Click the Automation (InsightConnect) Workflow dropdown and select Add & select Automation (InsightConnect) workflow. If you want log entry information to be included in your notifications, select Send Log Line.
Alternatively, you can also select Detection Rules > Labels & Notifications > Notification Target to define the log information you’d like to be included.
Create Log Labels with a Log Pattern Detection Rule
In addition to triggering notifications such as emails, you can configure custom log pattern detection rules to apply color-coded labels to log entries. This helps you to identify the log entries that were flagged in specific detections or to filter the list of log entries.
If you often use the same queries to identify logs of interest, applying a label can save you time. Labels provide a visual cue in the list of log entries to help you identify important events.
After a log pattern detection rule is saved, the label is displayed on log entries that match the search criteria–both on the Entries tab and the Table tab. The label appears at the top of the tab and also inline with the log entries that it’s applicable to.
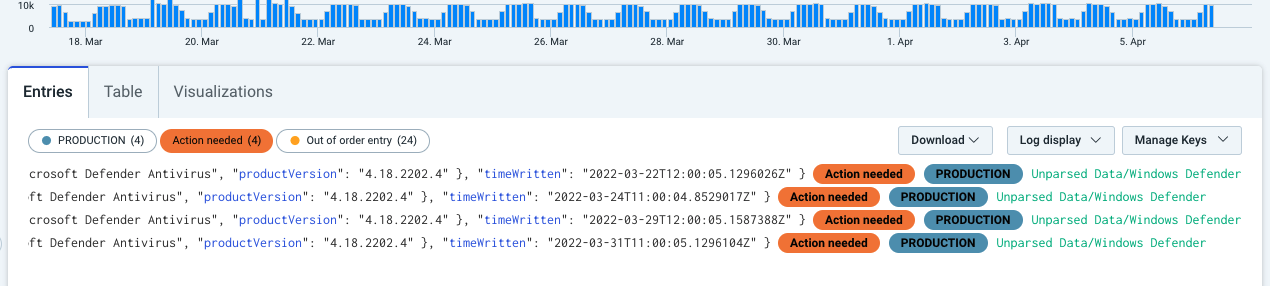
Label counts are applied at ingestion only
The count (the number in parentheses) in a label is calculated at the time of log ingestion. If you change the time frame of the search query to exclude the ingestion time, the count may become ineffective or the label won’t be displayed.
To filter log entries by the rule’s search query, click a label. When a filter is applied, the results appear in the list and the selected label is filled with its designated color.
To remove the filter, click the label again. You can click either instance of the label to switch the filter on and off.
Tip for creating labels
Before you create a basic detection rule that includes a label, we recommend that you fine-tune your search query in Log Search. By trying out the search query and checking the results, you can identify exactly what query syntax to enter in the rule creation panel.
To create a label in a log pattern detection rule:
- Follow the steps to configure a Log Pattern Detection Rule.
- In the Notifications section, select a severity and a label or create your own custom label.
- Optionally, add a notification to the rule by clicking the Notification (emails/integrations) tab and selecting a notification type.
- Click Create.
Default Labels
Default labels are applied to provide visual cues that indicate potential issues with your logs. Within SIEM (InsightIDR), there are currently two default labels:
Exception
These labels are applied to log entries that contain the word “exception”, which indicates a deviation from the product’s normal flow. You may notice Exception labels on log entries when you search for environment or code issues.
Example:
31 Aug 2022 19:48:18.304<14>1 2022-08-31T19:48:18.269729Z ip-1-2-3-4 lerest - - - at java.base/java.lang.NumberFormatException.forCharSequence(NumberFormatException.java:81)OutOfOrder
These labels are applied to logs entries that appear out of time sequence in terms of IDR time.
Example:
idr-timestamp=1 "my first message"
idr-timestamp=3 "my third message"
idr-timestamp=4 "my fourth message"
idr-timestamp=4 "my second message" OutOfOrder
OutOfOrder indicates that time has been mutated to maintain the order of arrival, but the original IDR time was older than 4.
If you want to customize the appearance of log entries by applying different labels, you can create a basic detection rule.
Create an Investigation
Once a detection is triggered from your query, you have the option for SIEM (InsightIDR) to automatically open an Investigation.
When creating a rule, turn on the Create an Investigation button to enable this action. Then define your notification throttle.
Create New Email Recipients
When you are using email to send notifications to your team, you can create a new email recipient.
To add new email recipients:
- From the Recipients dropdown, click Add & select recipient.
- Name the recipient, and then enter one or more email addresses separated by commas.
- Optionally, select the checkbox to include other entries logged when the detection was generated.
- Click the Add & select recipient button.
The new email will populate the Recipients field.
Configure Third-Party Integrations
If you are using one of our partner integrations, you can send notifications to the appropriate teams to remediate issues as they arise. You can configure notifications for the following integrations:
- [PagerDuty]
- [Webhook]
PagerDuty
Any user can complete this PagerDuty Integration.
To configure this integration:
- In your PagerDuty account, create a new service, and select Logentries as the integration. To create a new service, follow the instructions in the PagerDuty documentation at: https://support.pagerduty.com/docs/services-and-integrations#create-a-service
- Once your service is created, copy the Integration key that is generated. You will need this value to set up the integration in SIEM (InsightIDR).
- In SIEM (InsightIDR), create a basic detection rule. From the Notifications section, select PagerDuty.
- In the Service key field, add a new key and paste the Integration key you copied from PagerDuty.
- Configure the remaining fields of your rule.
- Click Create.
Webhook
A Webhook URL allows you to send a POST request to an API as events happen, instead of requiring that you poll for updates. Learn how to use and create a Webhook here: https://developer.github.com/webhooks/
You can use a Webhook URL to notify your team of SIEM (InsightIDR) detections.
To use a Webhook with SIEM (InsightIDR):
- In SIEM (InsightIDR), create a basic detection rule.
- Under “Notifications,” choose Notifications (email/integrations) > Webhook.
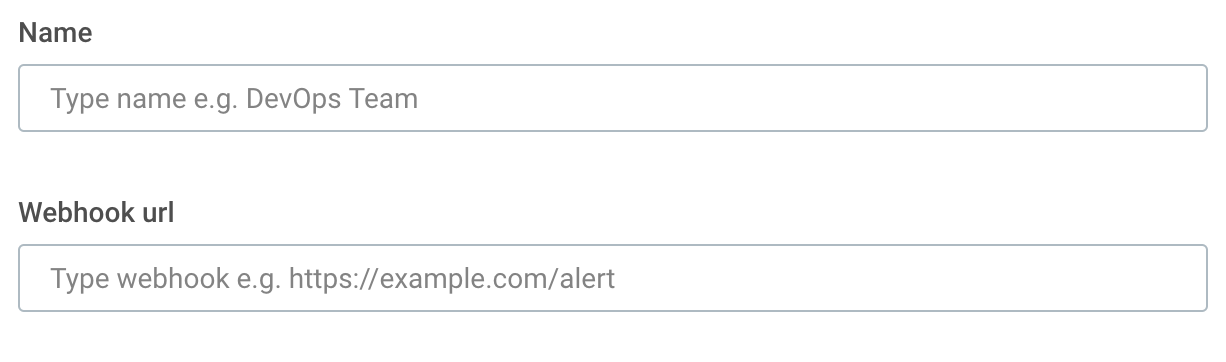
- Name your Webhook.
- Paste your Webhook URL.
- Configure the remaining fields of your rule.
- Press Create.