Suspend or Disable a User
You can automatically suspend or disable a user by using a workflow from Active Directory or Okta. For example, you may want to do this when SIEM (InsightIDR) opens an investigation for suspicious activity, such as when a user accesses a restricted asset.
Before You Begin
After you install the Rapid7 Orchestrator (Insight Orchestrator), make sure that you configure the appropriate connections to your third party tools that your workflow will need.
Suspend a User with Okta
Suspending a user prevents them from logging in to Okta. Instead, they will receive a notification that their account has been suspended.
Application and group memberships are maintained during the suspension.
To learn more about how Okta suspends users, see https://help.okta.com/en/prod/Content/Topics/Directory/Directory_People.htm .
To suspend a user with Okta:
- From your SIEM (InsightIDR) homepage, select Investigations from the left menu.
- Open the desired investigation. You will see a timeline of events involving the user.
- Click the Take Action button. The “Take Action” panel appears.
- From the “Select an Action Category” dropdown, select Containment Workflows.
- From the “Select an Automation Action to Take” dropdown, select Suspend User in Okta.
- Select the Okta connection you want to use and click Continue.
- Choose the user account you want to suspend.
- Click Take Action.
- A Human Decision notification will appear on your timeline. Click Yes to confirm the automated action.
Okta will now prevent the user from logging in and notify them of that their account has been suspended. An item will appear on the timeline for this action.
Unsuspend a User
After you resolve the investigation, you can unsuspend the user with the reverse workflow.
To unsuspend a user:
- From your SIEM (InsightIDR) homepage, select Investigations from the left menu.
- Open the desired investigation. You will see a timeline of events involving the user.
- Click the Take Action button. The “Take Action” panel appears.
- From the “Select an Action Category” dropdown, select Containment Workflows.
- From the “Select an Automation Action to Take” dropdown, select Unsuspend User in Okta.
- Select the Okta connection you want to use and click Continue.
- Choose the user account you want to unsuspend.
- Click Take Action.
- A Human Decision notification will appear on your timeline. Click Yes to confirm the automated action.
The event will appear on the Investigation timeline when the process completes.
Disable a User with Active Directory
Disabling a user in Active Directory prevents them from authenticating to Active Directory based services. The suspension is in effect until you re-enable their account.
To learn more about how Active Directory disables users, see https://docs.microsoft.com/en-us/windows/desktop/AD/managing-users .
To disable a user with Active Directory:
- From your SIEM (InsightIDR) homepage, select Investigations from the left menu.
- Open the desired investigation. You will see a timeline of events involving the user.
- Click the Take Action button. The “Take Action” panel appears.
- From the “Select an Action Category” dropdown, select Containment Workflows.
- From the “Select an Automation Action to Take” dropdown, select Disable User with Active Directory.
- Select the Active Directory connection you want to use.
- Choose the user account you want to suspend.
- Click Take Action.
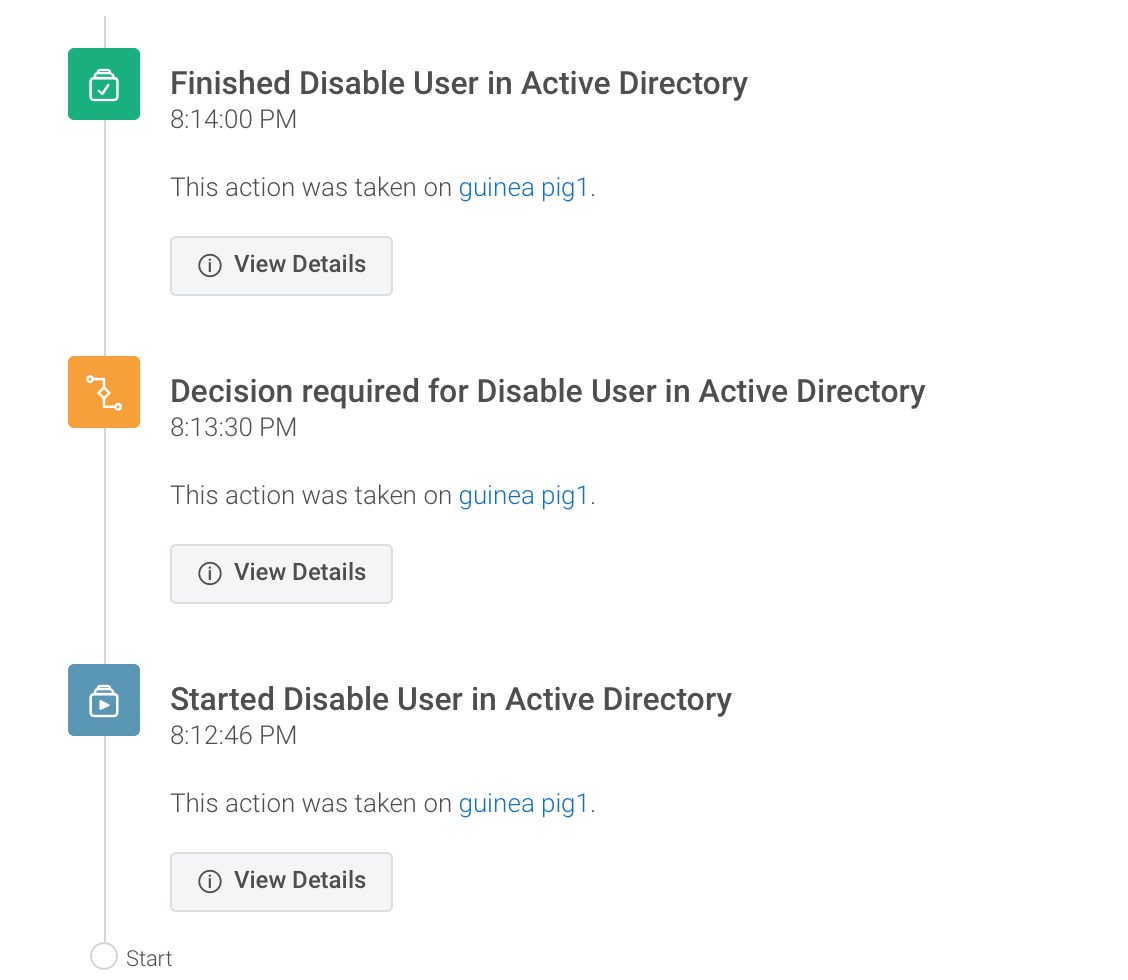
- A Human Decision notification will appear on your timeline. Click Yes to confirm the automated action.
After this action completes, SIEM (InsightIDR) consumes the disabled user account log from Active Directory and marks the user as disabled.
Enable a User
After you resolve an investigation, you can re-enable a user and allow them to authenticate and access your environment once again.
To enable a user with Active Directory:
- From your SIEM (InsightIDR) homepage, select Investigations from the left menu.
- Open the desired investigation. You will see a timeline of events involving the user.
- Click the Take Action button. The “Take Action” panel appears.
- From the “Select an Action Category” dropdown, select Containment Workflows.
- From the “Select an Automation Action to Take” dropdown, select Enable User with Active Directory.
- Select the Active Directory connection you want to use.
- Choose the user account you want to suspend.
- Click Take Action.
- A Human Decision notification will appear on your timeline. Click Yes to confirm the automated action.
The event will appear on the Investigation timeline when the process completes.