Creating a logon for Web site form authentication
Start the configuration for the HTML form authentication:
If you create a logon while configuring a new site, click the Create site button on the Home page. OR Click the Create tab at the top of the page and then select Site from the drop-down list.
If you want to create a logon for an existing site, click that site’s Edit icon ![]() in the Sites table on the Home page.
in the Sites table on the Home page.
- Click the Authentication tab in the Site Configuration.
- Click Add Web Authentication.
- In the Add Web Application Authentication form, select Add HTML form from the Type drop-down list.
- Enter a name for the new HTML form logon settings.
Tip: If you do not know any of the required information for configuring a Web form logon, consult the developer of the target Web site.
- In the Base URL text box, enter the main address from which all paths in the target Web site begin. The credentials you enter for logging on to the site will apply to any page on the site, starting with the base URL. Include the protocol with the address. Example: http://example.com or https://example.com
- In the Logon Page URL text box, enter the page that contains the form for logging onto the Web site. It should also include the protocol. Examples: http://example.com/logon.html

- Click Next. The Security Console contacts the Web server to retrieve any available forms. If it fails to make contact or retrieve any forms, it displays a failure notification. If it retrieves forms, it displays additional configuration steps.
Customize the logon form (if necessary)
- From the Form drop-down list, select the form for logging onto the Web application. Based on your selection, a table of fields appears for that particular form.
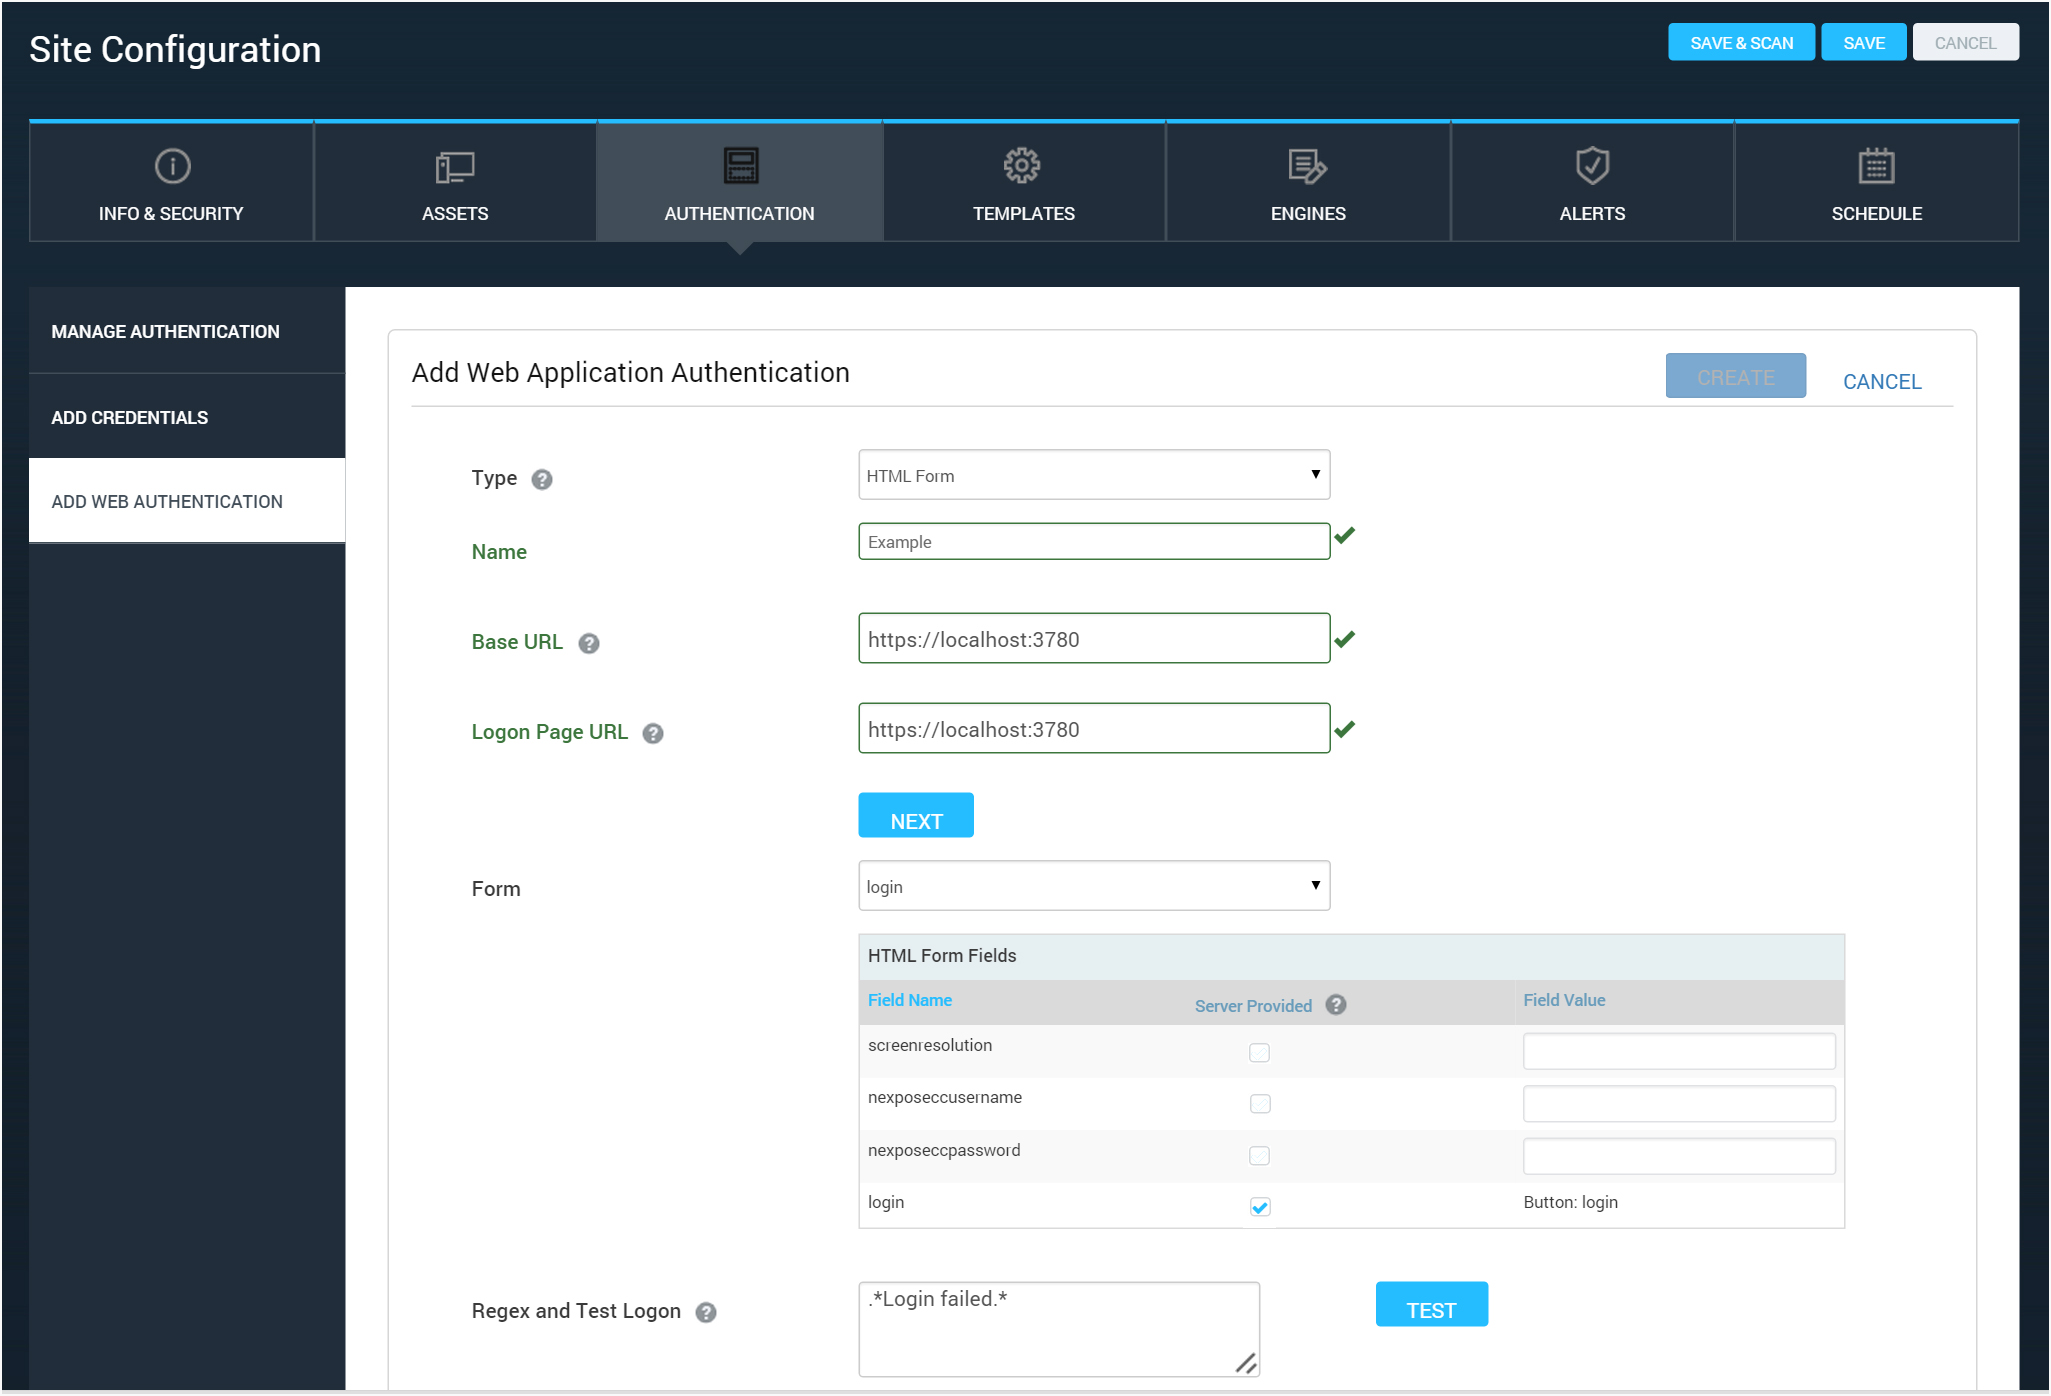
- Change the value for any field if necessary.
If the original value was provided by the Web server, you must first clear the check box before entering a new value. Only change the value to match what the server will accept at logon. If you are not certain of what value to use, contact your Web administrator.
- Click Save. The Security Console displays the field table with any changed values according to your edits. Repeat the editing steps for any other values that you want to change.
When all the fields are configured according to your preferences, continue with creating a regular expression for logon failure and testing the logon:
- Change the regular expression (regex) if you want to use one that is different from the default value. The default value works in most logon cases. If you are unsure of what regular expression to use, consult the Web administrator. For more information, see Using regular expressions.
- Click Test logon to make sure that the Scan Engine can successfully log on to the Web application. If the Security Console displays a success notification, click Save. If logon failure occurs, change any settings as necessary and try again.
To find an appropriate regex, try logging onto the target Web site with incorrect credentials. If the site displays a message such as Logon failed or Invalid credentials, you can use that string for the regex.