Elevating permissions
With SSH authentication you can elevate Scan Engine permissions to administrative or root access, which is required for obtaining certain data. For example, Unix-based CIS benchmark checks often require administrator-level permissions. Incorporating su (super-user), sudo (super-user do), or a combination of these methods, ensures that permission elevation is secure.
Permission elevation is an option available with the configuration of SSH credentials from either Nexpose or CyberArk. Configuring this option involves selecting a permission elevation method. Using sudo protects your administrator password and the integrity of the server by not requiring an administrative password. Using su requires the administrator password.
The option to elevate permissions appears when you create or edit SSH credentials in a site configuration:
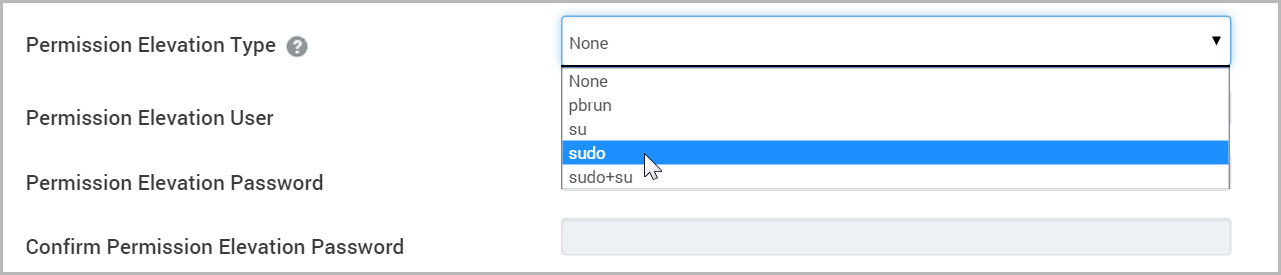
You can choose to elevate permissions using one of the following options:
- su– enables you to authenticate remotely using a non-root account without having to configure your systems for remote root access through a service such as SSH. To authenticate using su, enter the password of the user that you are trying to elevate permissions to. For example, if you are trying to elevate permissions to the root user, enter the password for the root user in the password field in Permission Elevation area of the Shared Scan Credential Configuration panel.
- sudo– enables you to authenticate remotely using a non-root account without having to configure your systems for remote root access through a service such as SSH. In addition, it enables system administrators to explicitly control what programs an authenticated user can run using the sudo command. To authenticate using sudo, enter the password of the user that you are trying to elevate permission from. For example, if you are trying to elevate permission to the root user and you logged in as jon_smith, enter the password for jon_smith in the password field in Permission Elevation area of the Shared Scan Credential Configuration panel.
- sudo+su– uses the combination of sudo and su together to gain information that requires privileged access from your target assets. When you log on, the application will use sudo authentication to run commands using su, without having to enter in the root password anywhere. The sudo+su option will not be able to access the required information if access to the su command is restricted.
- pbrun– uses BeyondTrust PowerBroker to allow Vulnerability Management to run allowlisted commands as root on Unix and Linux scan targets. To use this feature, you need to configure certain settings on your scan targets. See the following section.
- privileged exec mode allows you to authenticate remotely to a Cisco IOS, Cisco IOS XE, or Cisco ASA device using a non privileged account and elevate to the privileged exec level through the
enablecommand. Enter the password for theenablecommand in the Permission Elevation Password field. The privileged username is not used and may be left unchanged or blank. The remote device must be running SSH version 2. The Scan Engine must also be updated to support privileged exec mode.
sudo and sudo+su
If you choose to enable sudo or sudo+su permission elevation when scanning, your scan targets must be granted root access to their respective command line shell. The scan will use whatever shell is defined on the scan user’s asset configuration.
Modify the /etc/sudoers file of your target asset according to the following instructions.
TIP
A dedicated user file may also be created in /etc/sudoers.d/.
sudo
Use the following template /etc/sudoers configuration to grant root shell access. Substitute <nexpose_user> and <user_shell> with the appropriate values:
<nexpose_user> ALL=(root) <user_shell>The following examples show configurations for the bash and ksh shells, respectively:
jsmith   ALL=(root) /bin/bash
jsmith   ALL=(root) /bin/ksh
sudo+su
jsmith ALL=(root) /bin/suUsing system logs to track permission elevation
Administrators of target assets can control and track the activity of su and sudo users in system logs. When attempts at permission elevation fail, error messages appear in these logs so that administrators can address and correct errors and run the scans again.
pbrun
Before you can elevate scan permissions with pbrun, you will need to create a configuration file and deploy it to each target host. The configuration provides the conditions that Vulnerability Management needs to scan successfully using this method:
- Vulnerability Management can execute the user’s shell, as indicated by the $SHELL environment variable, with pbrun.
- pbrun does not require Vulnerability Management to provide a password.
- pbrun runs the shell as root.
The following excerpt of a sample configuration file shows the settings that meet these conditions:
RootUsers = {"user_name" };

RootProgs = {"bash"};

if (pbclientmode == "run" &&

user in RootUsers &&

basename(command) in RootProgs) {


# setup the user attribute of the delegated task

runuser = "root";

rungroup = "!g!";

rungroups = {"!G!"};

runcwd = "!~!";


# setup the runtime environment of the delegated task

setenv("SHELL", "!!!");

setenv("HOME", "!~!");

setenv("USER", runuser);

setenv("USERNAME", runuser);

setenv("LOGNAME", runuser);

setenv("PWD", runcwd);

setenv("PATH", "/bin:/usr/bin:/usr/local/bin:/sbin:/usr/sbin");


# setup the log data

CleanUp();


accept;

}