Virtual Appliance Guide
This feature is no longer available
This feature is no longer supported. If you have any questions, contact Rapid7 Support .
Limited disk space
The Virtual Appliance has limited disk space and is only intended for product evaluation purposes.
It is not intended for enterprise and production deployments.
Supported environments
The current version of the Virtual Appliance is tested and supported in the following environments:
- Virtualbox 6+
- VMware Fusion 11+
- VMware Workstation 16
- VMware vSphere (ESXI 5.1+)
Deploy the Virtual Appliance
Rapid7 provides a Virtual Hard Disk file (VMDK).
- Download the Virtual Appliance:
- Virtual Appliance Security Console
- Virtual Appliance Scan Engine
- In Virtualbox, click New to create a new virtual appliance virtual machine.
- Create the environment for the virtual machine by providing the following information and then click Continue:
- Name - Rapid7 Security Console Trial
- Type - Linux
- Version - Ubuntu (64-bit)
- Select the amount of RAM in megabytes and click Continue. We recommend at least 16384MB.
- Click Choose to import an existing disk. Find and select the VMDK that you downloaded in step 1 and click Open.
- Select Use an existing virtual hard disk file and choose the VMDK that you imported, and then click Create.
- Go to Virtual Machine > Settings > System. Then, increase the Processor count to 4 and click Ok.
- Power on the system and click the Console tab to view a terminal window for the Virtual Appliance.
- To login, enter
nexposefor both the username and password, and then run the commandip ato check the current IP address of the machine.- The IP address is static and should persist through reboots.
Login tip
Password keystrokes do not appear in the terminal as you type them. Take care that you input the password accurately.
- In order to access the Security Console from your browser, you must configure the forwarding port to the virtual machine. In the Virtualbox settings menu, select the Network tab. There, display the advanced options and select Port forwarding.
- Using the Security Console IP address, configure a rule to allow access to the service running on the virtual machine. Enter the following rule configurations and then click Create > Ok > Ok:
- Name - Security Console Browser Access
- Protocol - TCP
- Host IP - 127.0.0.1
- Host Port - 3780
- Guest IP - the IP address retrieved in step 9
- Guest Port - 3780
- In a new browser window, log in to the Security Console by entering
nxadminas your username and password to confirm that the network connectivity is working.
Note
If you are a first-time user and have not yet activated your license, enter your license key when the Security Console displays the activation dialog box. If you do not have a license key, visit https://www.rapid7.com/products/insightvm/ to start your 30-day free trial.
Frequently Asked Questions
How do I set up a dynamic IP?
The virtual machine comes without any networking preconfigured. To have a dynamic IP assigned by the hypervisor, run sudo dhclient.
How do I set up a static IP?
The recommended method of setting a static IP is to use netplan.
Before you begin setting the network configuration, you need to know which interface to set as each hypervisor will label them differently.
To find the name of the networking interface, use the command ip a. The first device is the loopback, device 2 is the interface you need to set.
Note the label of the interface for example, ens32 or enp0s17.
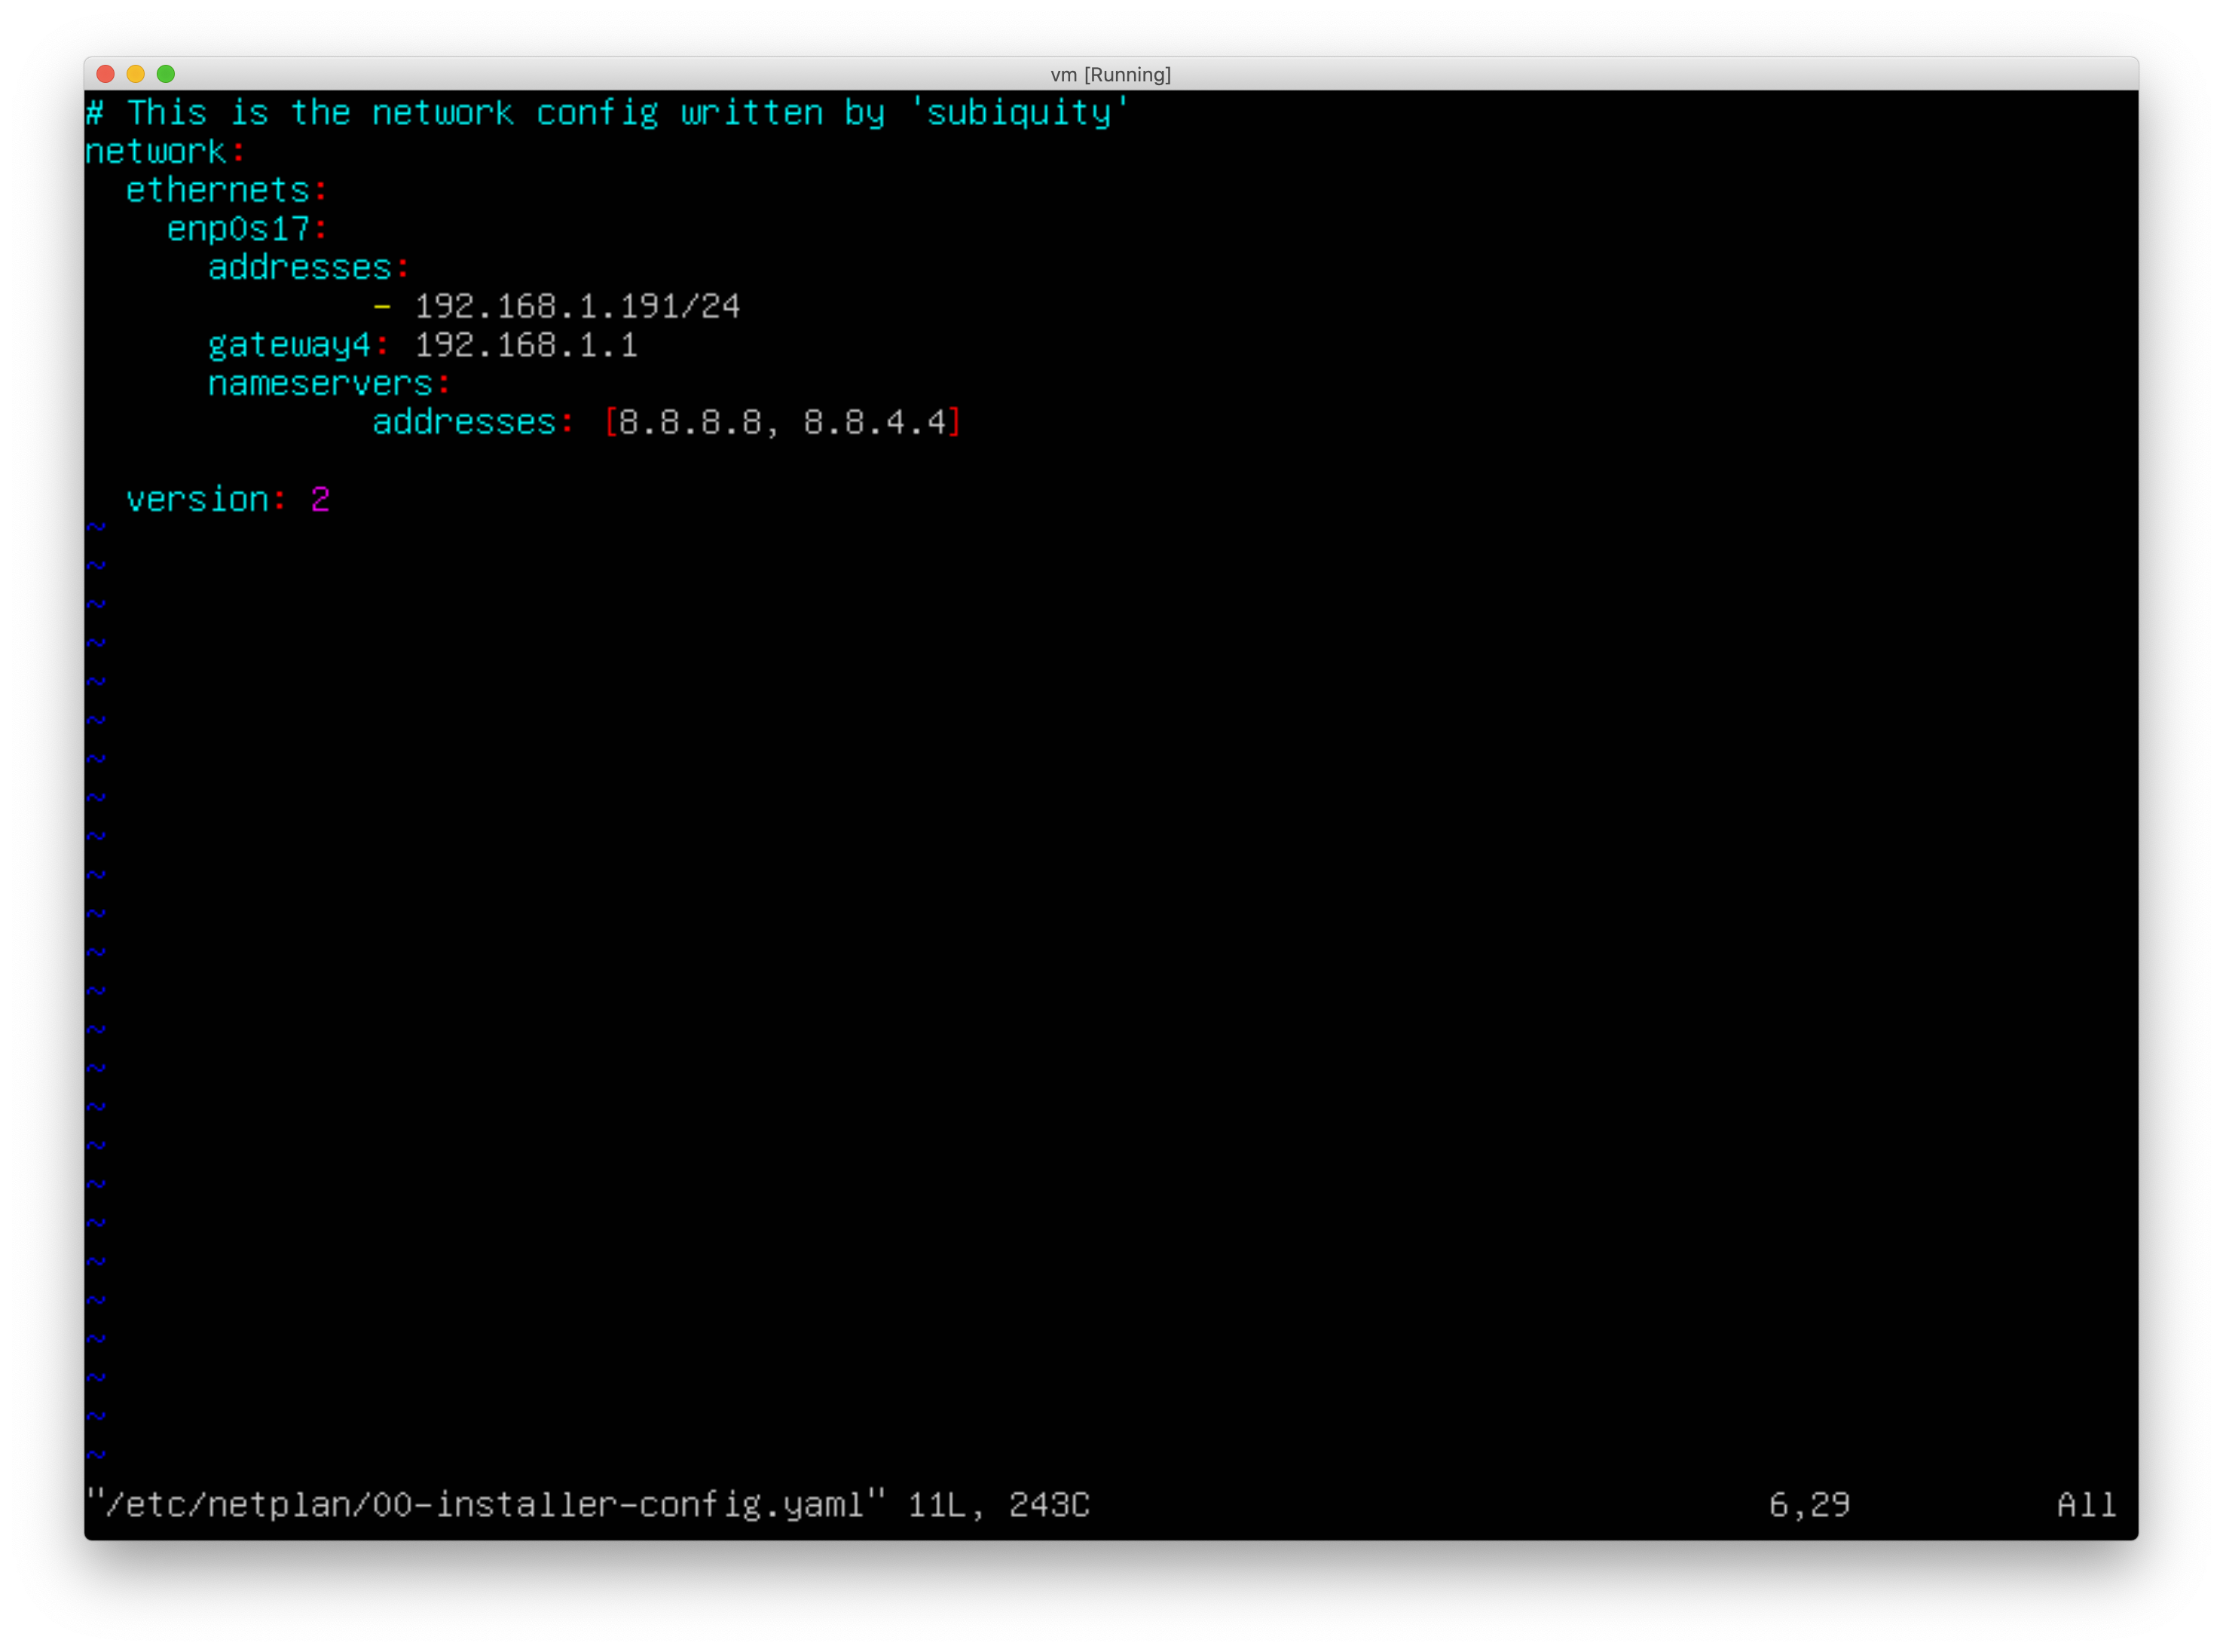
Once you have the name of the interface you need to set, open the /etc/netplan/00-installer-config.yaml file in a text editor with the following command:
sudo nano /etc/netplan/00-installer-config.yamlAs there are a multitude of possible network configurations, see the following sample configuration below as an example:
How do I specify DNS servers?
DNS should be set in the netplan configuration (nameservers array).
How do I restart networking?
To restart the networking service, use the following command:
sudo netplan applyThis command will apply the configuration specified in the netplan configuration file in addition to completely restarting the networking service.
How do I set the system time?
System date and time are controlled using the timedatectl utility.
To set the time, use the following command, where $TIME is the desired time:
sudo timedatectl set-time $TIMETo set the timezone, use the following command, where $TZ is the desired timezone:
sudo timedatectl set-timezone $TZHow do I start, stop, and check the status of the console and engine services?
Console
sudo systemctl status nexposeconsole.service
sudo systemctl start nexposeconsole.service
sudo systemctl stop nexposeconsole.service
Engine
sudo systemctl status nexposeengine.service
sudo systemctl start nexposeengine.service
sudo systemctl stop nexposeengine.service