Asset Management
Assets, the company’s external-facing digital footprint, are the basis of tailored threat intelligence.
Assets include any company resource that could lead to a potential security threat, for example: domain names, brand names, email addresses, IP addresses, DLP indicators, sector, and many other categories.
First, assets are added, and then they can be viewed and classified.
The following figure illustrates the Asset Management page:
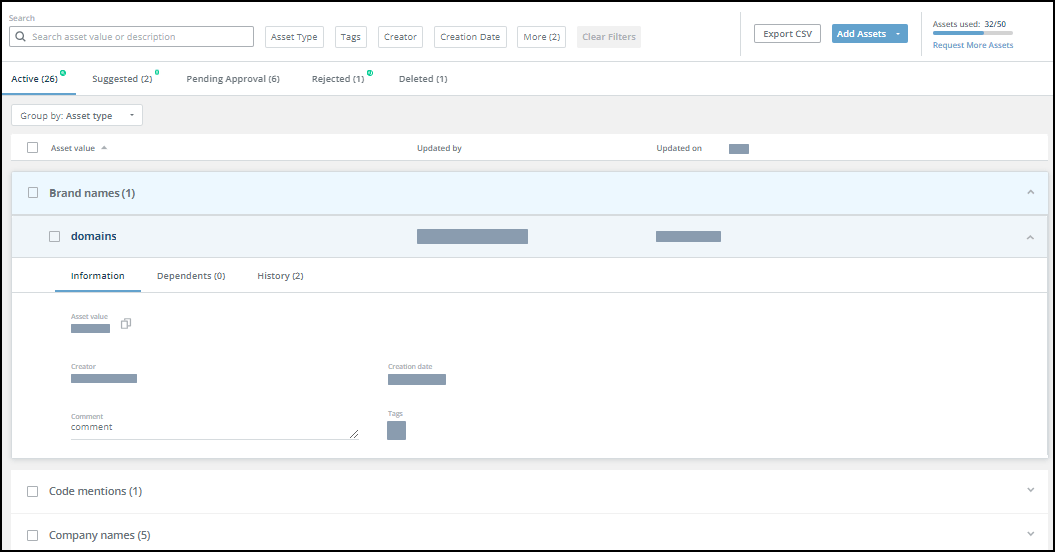
The used assets counter shows how many assets your company has used out of the total available. When your company gets closer to the maximum assets allowed, the usage bar changes colors.
To request more assets, click Request More Assets. A message will be sent to your sales representative.
Here’s what you can do with assets:
- Add assets - Add your company assets so that they start generating threats and alerts.
- View assets - Understand where your assets are in the asset flow.
- Classify assets - Add tags so you can group and apply rules to assets and add description comments for internal use.
- Additional asset activities - Delete or restore assets, approve suggested assets, or resubmit rejected assets.
- Perform operations on multiple assets - Work more efficiently by performing operations on more than one asset at a time.
Add assets
Primarily, assets are added (in bulk) when an account is first set up, and then modified over time.
Added assets are reviewed by Rapid7 intelligence analysts before they become active, thus ensuring your best risk protection. When assets are being reviewed, they are displayed in the Pending Approval tab.
When assets are approved, they are displayed in the Active tab. These assets drive your threats and alerts.
Our analysts also take a proactive role in your security. When assets are identified that can improve your company security coverage, they are presented in the Suggested tab. You can choose to activate them for better coverage, or to dismiss them.
You can add assets of any of these Asset Types, and they can then trigger Alerts from Assets.
Simply put - the more quality assets that you upload, the greater your risk protection will be!
You can add assets in the following ways:
- Import assets from a file using the Add Asset wizard.
This is the most efficient way to add assets in bulk. - Add assets manually using the Add Asset wizard.
Use this method to add assets not from a file. - Approve suggested assets from the Suggested asset tab.
- Restore assets that were previously deleted, from the Deleted tab.
- Resubmit assets that were previously rejected, from the Rejected tab.
Add assets from a file or manually with the Add asset wizard
With this option, you can import bulk assets from a CSV template, or add assets manually:
You can choose to replace current assets, or to add the new assets to the current ones. When you replace, only those assets in the same asset type that you are uploading will be replaced. For example, if you currently have Brand name, Company name, and Domain assets, and your import CSV has only Domain assets, a “replace” operation will replace all the current Domain assets with the new ones, and it will leave the other assets untouched.
To add (import) assets from a file:
-
From the Asset Management page, click Add Assets and choose Import Assets from File.
The Add asset wizard begins. -
Click to download the CSV Template.
The CSV has these columns: Asset type, Asset value, Tags, and Comments. Each column has a row of text that explains what to enter into the column. -
Modify the CSV by adding rows.
Each row must contain at least an asset type and asset value. See here for the asset type description and proper asset formatting. -
(Optional) You can agg tags and comments.
-
Save the CSV file.
-
In the Add asset wizard, select (or drag) the prepared CSV.
-
(Optional) To replace the current assets with those in the upload CSV, select Replace existing assets.
See the description of the “replace” operation at the beginning of this section. -
Click Import Assets from File.
The wizard performs a quick analysis of the assets in the file. -
To import the valid assets, click Upload.
If the upload analysis determined that there were errors in the file, you can review the analysis file, correct those errors, and upload the file again.
Added assets will be displayed in the Pending Approval tab.
To add assets manually:
- From the Asset Management page, click Add Assets and choose Add Assets Manually.
The Add asset wizard begins. - Select an asset type. Asset types and proper asset formatting is described in Asset Types.
- Enter the value of the asset to add.
- (Optional) To add tags and comments, click the icons and enter the information.
You can add a tag and a comment to single assets or to all of the added assets. - (Optional) To add additional values for the same asset type, click

Repeat the two previous steps. - To add the assets, click Add assets.
Added assets are displayed in the Pending Approval tab for review by Rapid7 analysts.
View assets
Assets are displayed in separate tabs of the Asset Management page, determined by the current status of the asset:
- Active - Assets that are currently in use to create threats and alerts.
- Suggested - Assets that intelligence analysts determine can improve your company security coverage. The reason for the suggestion is displayed. You can add these to your active assets. Suggested assets remain in this state until they are approved or dismissed.
- Pending Approval - Assets that you added (and previously-rejected assets that you resubmit) that are under review by security analysts.
- Rejected - Added assets that intelligence analysts deemed would not give you good security coverage (for example, due to non-relevance or false-positive producing). The reason is displayed in the tab. These assets are not counted as active assets in your account.
- Deleted - Assets that were once active, and were then deleted by the user.
A green dot in the tab’s heading  indicates that there is something new.
Filter and group the asset table
For easier management, you can display only assets that match selected filters. Within the asset table, you can further enhance your view by grouping the assets.
To filter the asset table:
- From the Asset Management page, type a term in the Search bar.
- You can also click filter buttons.
The asset table displays only assets that match the search and filter terms. This filter will be applied over all of the asset tabs.
Within each assets tab, the assets are displayed in the table view. You can group the table, as follows:
- None (default for most tabs)
Assets are displayed in alphabetical order, not grouped. - Asset type (default for the Active tab)
Groups assets by asset type, in alphabetical order. - Updated by (not available for Suggested and Deleted tabs) - Groups assets by the user who last updated them.
- Tags (not available for Suggested tab) Groups assets by similar tags.
You can select different groupings for different tabs. To group the asset table:
- From the Asset Management page, click Group by and select a grouping method.
View asset details
To see an asset’s details, click the asset. The asset card is displayed:
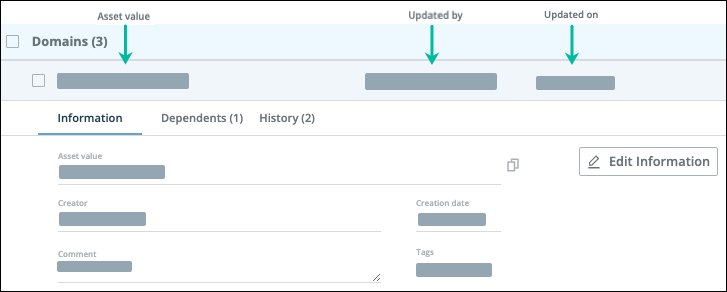
You can view the asset details in these tabs:
- Information - Basic asset information. From this tab, you can also classify assets by modifying tag and comment details.
- Dependents - All places where an asset is used in a policy rule, Alert Profiler rule, or IntelliFind saved query. An asset with dependents cannot be deleted without first removing it from those dependencies.
- History - All activities that have taken place with the asset (for example, add, status change, etc.).
Classify assets
Classifying assets means adding (or removing) tags or comments. By classifying, you can better manage your assets. For example, if you apply a tag to assets that you want to group together, you can simply view and apply bulk actions to all of those assets at once. You can also use asset tags in Alert Profiler rules.
You can classify assets one-at-a-time or many at one time.
To add (or remove) tags or to add a comment to multiple assets, see Perform operations on multiple assets.
To add tags or a comment to an asset:
- From the Asset Management page, select an asset. (If the asset types are showing, first select an asset type, and then select an asset.)
- From the Information tab, click the Comment or Tagsfield.
- Enter comment text. The text is auto-saved.
- Enter tags and press Enter.
To remove tags or a comment from an asset:
- From the Asset Management page, select an asset. (If the asset types are showing, first select an asset type, and then select an asset.)
- From the Information tab, click the Comment or Tagsfield.
- Clear the comment text.
- Click the X in the tag to remove.
Additional asset activities
This section describes how to:
- Approve or dismiss suggested assets - Assets that are suggested by Rapid7 inteliigence analysts are displayed in the Suggested tab.
- Resubmit rejected assets - If an added asset was rejected, you can resubmit the request from the Rejected tab. Resubmit requests will be reviewed by security analysts.
- Delete or restore active assets - When you delete active assets, they will no longer be used to trigger threats and alerts. You can restore these assets from the Deleted tab.
- Export assets to a downloadable CSV - Export asset details and history to a downloadable CSV.
To perform any of these activities on multiple assets, see Perform operations on multiple assets.
To approve or dismiss suggested assets:
-
From the Asset Management page, select the Suggested tab.
-
Hover on an asset and perform one of the following:
- To approve the suggested asset, click
 .
. - To reject the suggested asset, click

- To approve the suggested asset, click
Approved assets are displayed in the Active tab.
To resubmit assets:
- From the Asset Management page, select the Rejected tab.
- Hover on the asset and click .
The asset is displayed in the Pending Approval tab.
To delete assets:
- From the Asset Management page, select assets from the Active, Suggested, or Pending Approval tabs.
- Hover on the asset and click
 .
.
When assets are deleted, here is where they go:
| Removed from | Goes here |
|---|---|
| Active tab | Deleted tab |
| Suggested tab | Removed from system |
| Pending Approval tab | - If the asset was previously rejected, goes back to the Rejected tab. - If the asset was awaiting initial approval, it is removed from the system. |
To restore assets:
- From the Asset Management page, select the Deleted tab.
- Hover on the asset and click .
The asset is displayed in the Active tab.
Export asset information
You can export a CSV with the following asset information:
- Asset details - Asset value, tags, comments, and more (not including history).
- Asset history - Asset changelog (everything listed in an asset’s Changes made column).
You can export asset information for all, or selected, assets, from any asset tab.
Only assets that match the page filters in place before you start the export are included. As part of the export details process, you can select asset statuses and columns to be included.
To export asset details:
- From the Asset Management page, do one of the following:
- To export details of all assets, click Export CSV.
Do not select any assets beforehand. - To export details of selected assets, select those assets, then click Export Selected > Export assets.
The Export dialog is displayed, showing the current filters.
- To export details of all assets, click Export CSV.
- Select the statuses and columns to export.
- Click Download CSV.
A CSV file is downloaded to the default download location.
To export asset history:
- From the Asset Management page, do one of the following:
- To export history of all, or multiple assets, select those assets then click Export Selected > Export history only.
- To export history of a single asset, select that asset, then from its History tab, click Export History.
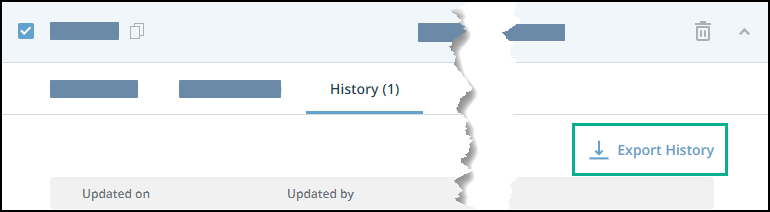
A CSV file is downloaded to the default download location.
Perform operations on multiple assets
You can perform various operations on multiple assets at one time, thus enhancing efficiency. First, select the desired assets, then use the multiple asset toolbar to perform the operations.
The options on the multiple asset toolbar change depending on the tab in which it is displayed.
To select multiple assets:
- From the Asset Management page, select multiple assets:
| To select these | Select like this |
|---|---|
| All assets | 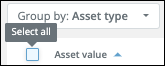 |
| All assets in an asset type | 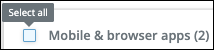 |
| Multiple asset types | 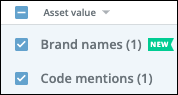 |
| Groups and selected assets | 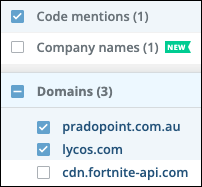 |
Multiple asset commands are displayed at the top of the asset table, specific to the tab where the assets were selected. The following figure shows the multiple asset commands on the Active tab:
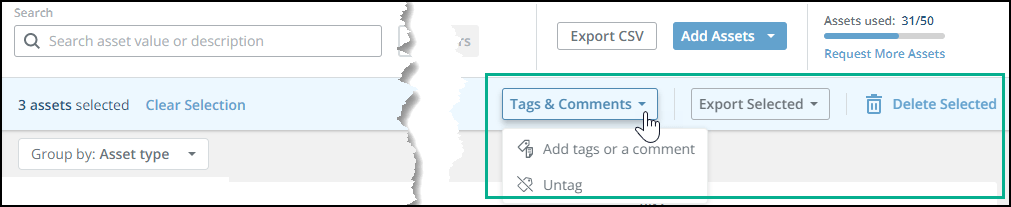
- Click the desired command and perform the activity to all selected assets.
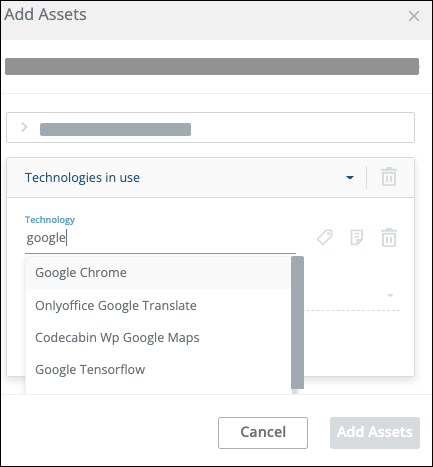
The “Technologies in use” asset
You can add multiple CPEs within a technology family (such as Google). You can add specific versions or select the “wildcard” to add every listed version and all future version in that family.
Every selected CPE is counted as one asset. The “wildcard” is also one asset, even though it can include hundreds of CPEs.
To add multiple CPEs:
- From the Asset Management page, click Add Assets and chooseAdd Assets Manually.
The Add asset wizard begins. - Select the Technologies in use asset.
- In the Technology field, type the first few letters of a product family name.
- Select the matching family name.
- Click Select CPEs.
The CPEs that you can select are displayed. If you select the first, “wildcard” entry (in this example, Google Chrome), that will cover all current and future CPEs in that family. In some cases, no wildcard is available.
 - Select the wildcard or individual CPEs.
(Each CPE selected uses one asset, even if you select the wildcard.) - Click Add Assets.
The selected technologies are added and will be used in the VRA to find relevant CVEs.