Integrate an IBM QRadar On-Premises Device
Configure an IBM QRadar on-premises device. IOCs are pushed from to the device.
To receive IOCs, you must add the device to Digital Risk Protection (Threat Command) and then configure an IOC group whose IOCs will be pushed to the device.
Before you begin, ensure:
- You have administrative credentials to access Digital Risk Protection (Threat Command) with a subscription to the Automation and TIP modules.
- You have the credentials to access the Digital Risk Protection (Threat Command) virtual appliance web interface.
- You have the credentials to access the device management console.
Add an IBM QRadar device
Add an IBM QRadar device to the Digital Risk Protection (Threat Command) virtual appliance. As part of adding the device you will need an API key (authentication token) from the QRadar management console.
To add an IBM QRadar device:
- Get the QRadar authentication token needed to create the device in the Digital Risk Protection (Threat Command) virtual appliance:
- Log in to the IBM QRadar Security Intelligence console.
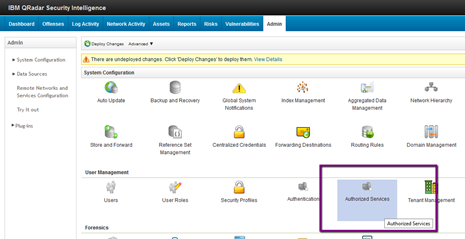
- From the main menu, selectAdmin > Authorized Services (from the User Management section).
- Click Add Authorized Service.
- In the Authorized Service dialog, type a unique Service Name (case-sensitive), select No Expiry, then click Create Service.
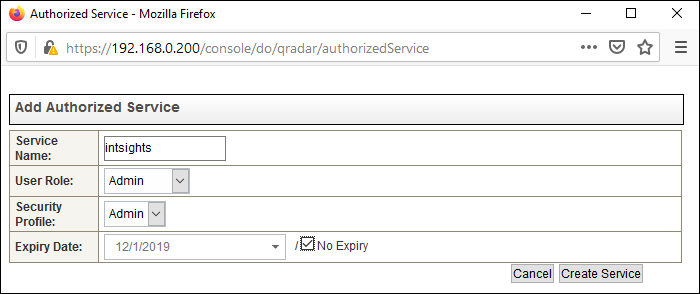
The service name is used to identify the incoming IOCs.
The new service is displayed in the Manage Authorized Services window:
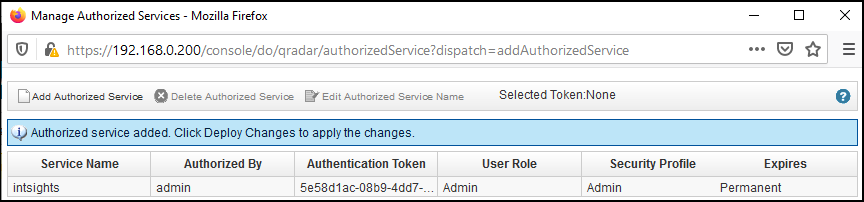
- Copy the authentication token of the new service, then close the window.
- Deploy changes.
This process can take some time. - From an internet browser, navigate to https://<virtual appliance IP address>
- Log in to the virtual appliance using the web access username and password created.
- From the Devices page, click Devices.
- Click Add new device.
- In the Devicesscreen, set up the new device:
- Type a user-defined, unique device name (for example, Cisco_FP).
- Select the QRadar device type.
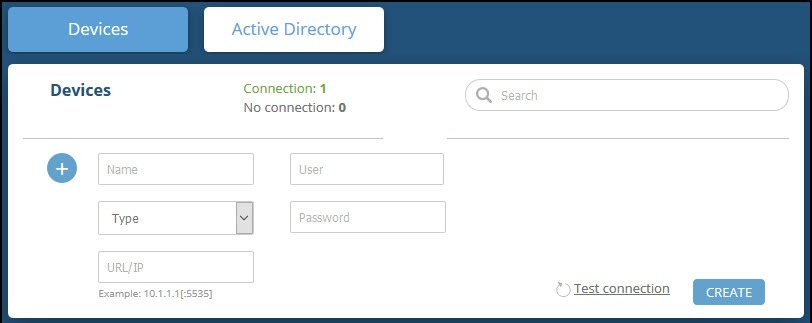
- Paste the token authentication key from QRadar into the API Key field.
Ensure that what is pasted is only the token authentication key, not other copied data. - Type the URL or IP address of the QRadar machine.
- (Optional) You can test the connection by clicking Test connection.
- Click Create.
- Verify that the new device is displayed in Digital Risk Protection (Threat Command):
- Log in to Digital Risk Protection (Threat Command) at https://dashboard.ti.insight.rapid7.com
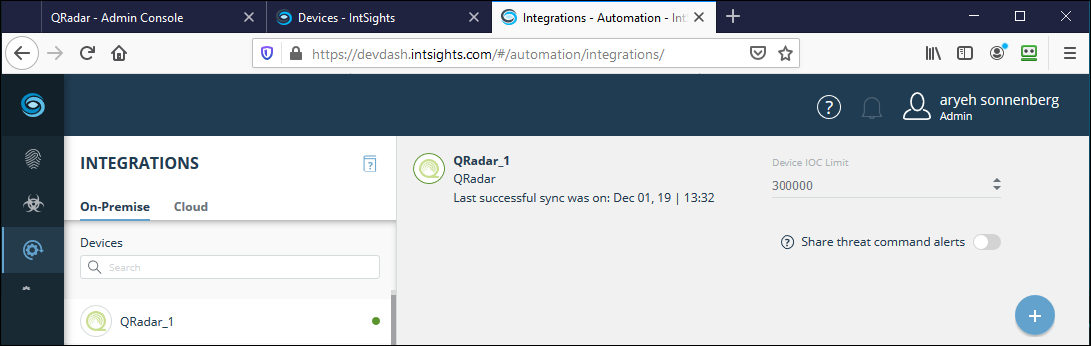
- From the main menu, selectAutomation > Integrations. If this window is already open, refresh it by selecting Automation > Integrations from the menu. The new device is displayed in the On-Premises tab.
The following figure shows a new device in the Automation > Integrations window :
Configure an IOC group to push IOCs to the device
Once the QRadar device has been added and is synching with the Digital Risk Protection (Threat Command) virtual appliance, it is ready to receive IOCs that are pushed from Digital Risk Protection (Threat Command). IOCs are pushed by creating an IOC group for this device in Digital Risk Protection (Threat Command).
Create the IOC group, as described in Create an IOC group.
Due to device limitations, IOC groups can consist of only one type of IOC: domains, URLs, IP addresses, or MD5 file hashes. To support more than one type, create multiple IOC groups.
Verify that IOCs are being pushed to the device
You can verify that IOCs are being pushed to the device.
To verify IOCs:
- From the Digital Risk Protection (Threat Command) main menu, select Automation > Integrations.
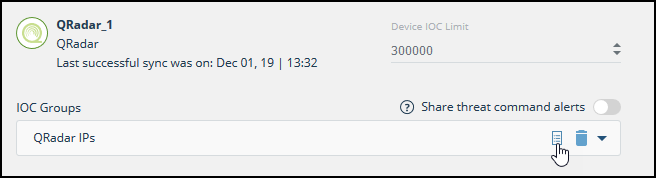
- Select the device.
- On one of the device’s IOC group entries, click the Information icon:
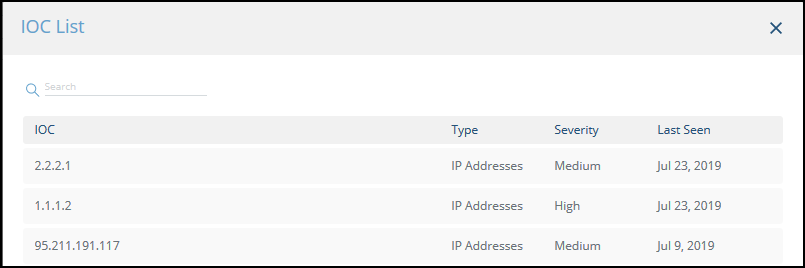
 The IOCs in the group are displayed:
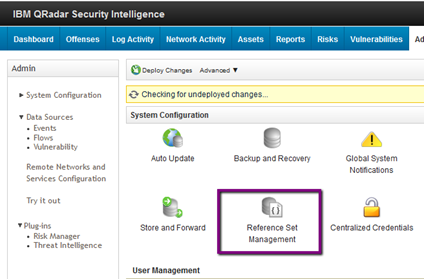
- In the IBM QRadar Security Intelligence console, select Admin > Reference Set Management (from the System Configuration section):
- In the Reference Set Management window, search for the IOC group.
IOC groups are listed as follows: <“integration device name”_“IOC group name”>. For example, if the device name that was added was QRadar_1 and the IOC group is named QRadar_IPs, the QRadar reference set will be named qradar_1_qradar_ips:
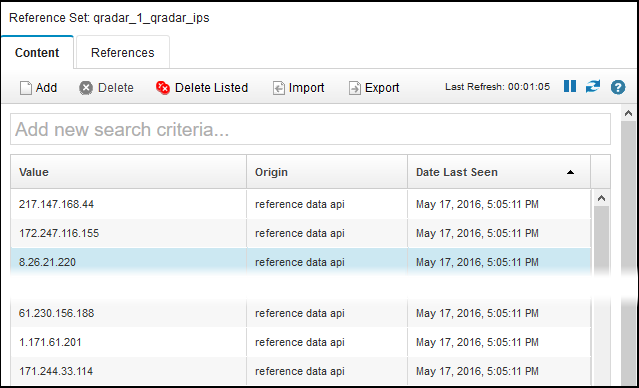
- Select the reference set, then click View Contents.
The contents (the IOCs pushed to the device) are displayed: