Palo Alto Networks Panorama Cloud Device
Configure a Palo Alto Networks Panorama cloud device to receive IOCs from Digital Risk Protection (Threat Command).
The following table shows IOC pull characteristics:
| Characteristic | Description |
|---|---|
| IOC types | Domains, IP addresses, and URLs. |
| IOC group limitation | Each IOC group can contain only one type of IOC. For multiple types, create multiple IOC groups. |
| Device IOC limit | The device is limited to 250,000 IOCs. |
Add a Palo Alto Networks Panorama cloud device to Digital Risk Protection (Threat Command)
Add a cloud device to Digital Risk Protection (Threat Command).
Prerequisites
- You have the credentials to access the device.
- You have administrative credentials to access Digital Risk Protection (Threat Command) with a subscription to the Automation and TIP modules.
To add a cloud device to Digital Risk Protection (Threat Command):
- Log in to Digital Risk Protection (Threat Command) at https://dashboard.ti.insight.rapid7.com
- From the main menu, select Automation -> Integrations.
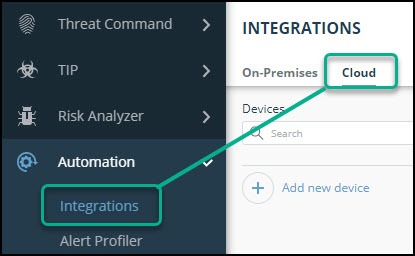
- From the Integrations page, click Cloud.
- Click Add new device.
- In the Add New Cloud Device dialog, type a user-defined name for the device. The name can contain a maximum of 50 letters, spaces, numbers, and underscores.
- Select the Device type.
The default device IOCs limit is displayed. - (Optional) You can change the IOCs limit.
- Click Add.
- To verify that the new device is added, refresh the Automation > Integrations page.
The new device is added to the cloud integrations device list. Next to the device name, there is a red dot, indicating that communication has not yet been established. The dot will change to green when the device is synchronized. If the device cannot synchronize for more than 48 hours, an email warning is sent to the account administrator.
Configure a Palo Alto Networks Panorama cloud device to pull IOCs
After a device has been added, you must enable the pulling of IOCs by the Palo Alto Networks Panorama device from te Digital Risk Protection (Threat Command).
Before you begin, ensure:
-
You have the device login credentials.
-
The device has been added.
-
You have administrative credentials to access Digital Risk Protection (Threat Command) with a subscription to the Automation and TIP modules.
-
An IOC group for this device exists in Digital Risk Protection (Threat Command).
Creating IOC groups is described in Create an IOC group -
You have the Digital Risk Protection (Threat Command) account ID and API key, as described in Subscription Settings, Keys, and API.
Palo Alto Panorama uses External Dynamic Lists (EDL) to pull IOCs from Rapid7. You must create EDLs for each IOC type (domain, IP address, or URL, then, you create a security policy to use the EDL to pull IOCs.
The two-step process is described in the following procedures.
To create Palo Alto External Dynamic Lists:
The create EDL process is identical for each type of IOC.
- Log in to the Palo Alto Networks dashboard via HTTPS.
- Choose Objects > External Dynamic Lists.
- Click Add to create a new EDL:
- Type a name for the EDL.
This name will be used in the following step. - From the Type field, select a type: IP List, Domain List, or URL List.
The type must match the type in the IOC group. - In the Source field, paste the entire value from the Digital Risk Protection (Threat Command) IOC Group URL.

- In the URL that you pasted, replace “https://api.intsights.com ” with “https://[accountID]:[API key]@api.intsights.com”
- Click OK.
- Click Commit.
Continue to the section for your IOC type:
- Type a name for the EDL.
- Add a Palo Alto Networks Panorama cloud device to Digital Risk Protection (Threat Command)
- Configure a Palo Alto Networks Panorama cloud device to pull IOCs
- Import URLs (EDL of type URL List)
- Import IP addresses (EDL of type IP List)
- Import domains (EDL of type Domains List)
Import URLs (EDL of type URL List)
- From the Palo Alto main menu, choose Objects > Security Profiles > URL Filtering.
- Click Add.
- In the URL Filtering Profile dialog, type a name.
- In the External Dynamic URL Lists section, select the EDL created for URLs and click OK.
- From Policies > Security, click Add.
- In the Security Policy Rule dialog, type a name for the new policy.
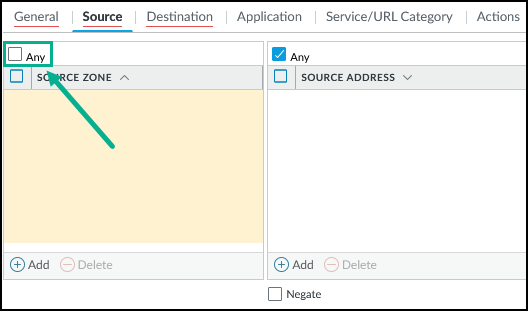
The Rule Type should be universal (default). - In the Source tab, select Any and select Source Zone.
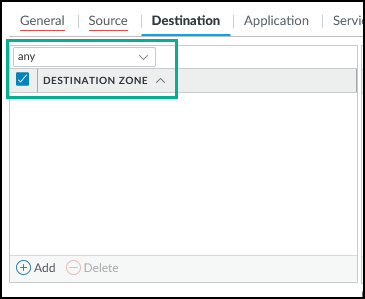
- In the Destination tab, select any from the drop-down list, and mark DESTINATION ZONE.
- In the Application tab, select Any.
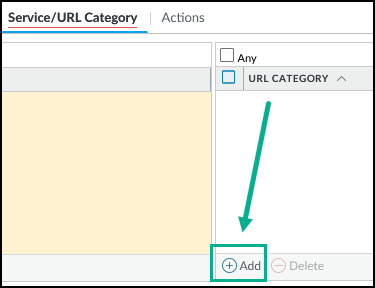
- In the Service/URL Category tab, click Add.
- From the list that opens, in the External Dynamic Lists section, select the EDL that was created for URLs.
- Click OK.
- From Policies > Security, select the new policy, then click Enable on the bottom menu.
- Click Commit.
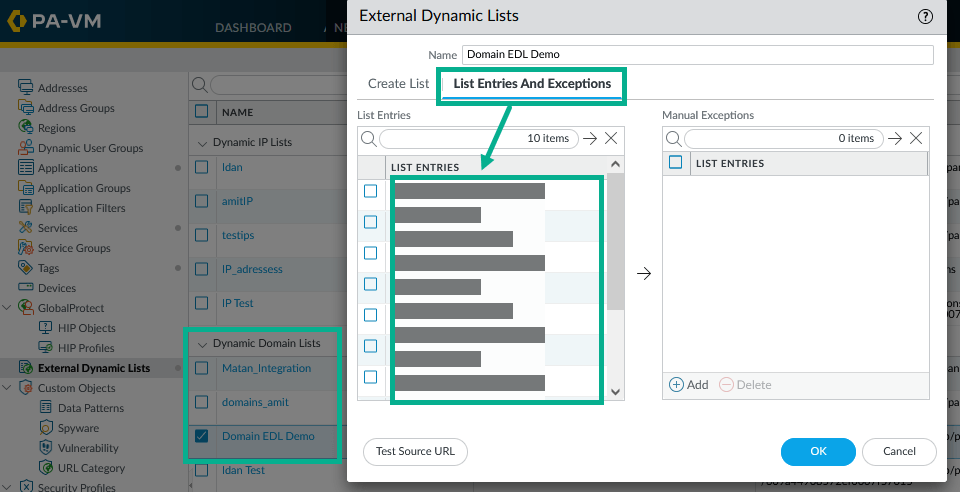
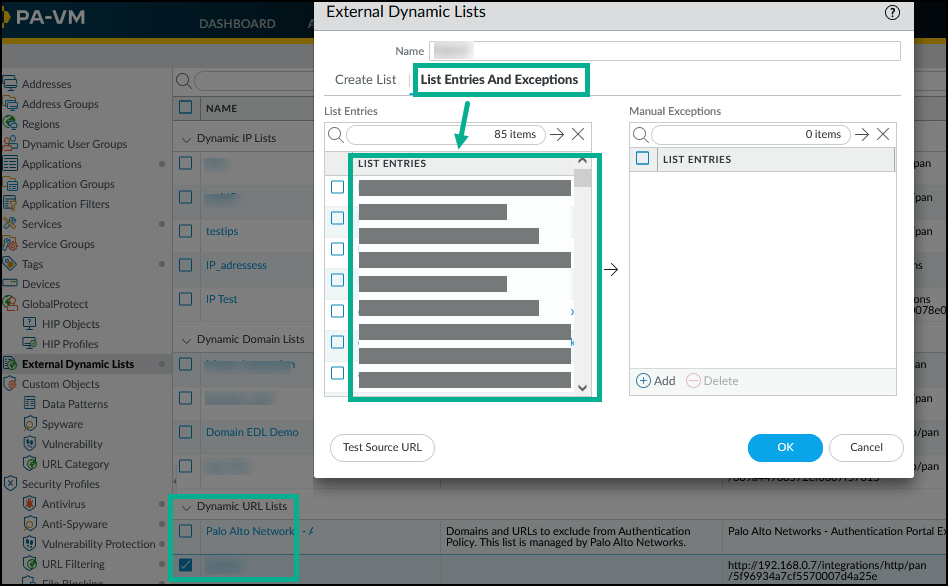
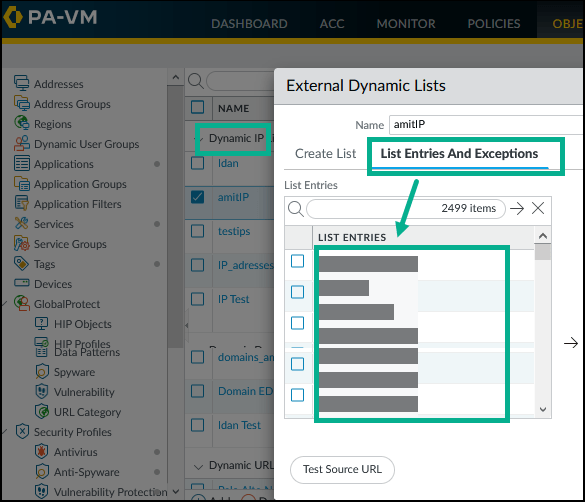
When IOCs are present, you can see them at Objects > External Dynamic Lists. Select the EDL and look in the List Entries And Exceptions tab:
Import IP addresses (EDL of type IP List)
- From the Palo Alto main menu, choose Policies > Security.
- Click Add.
- In the Security Policy Rule dialog, type a name for the new policy.
The Rule Type should be universal (default). - In the Source tab, select SOURCE ZONE and Any above it**.**
- In the Destination tab, click Add.
- From the list that opens, in the External Dynamic Lists section, select the IP List EDL from the drop-down.
- In the Application tab, select Any.
- In the Service/URL Category tab, click Any for URL CATEGORY and for SERVICE.
- Click OK.
- From Policies > Security, select the new policy, then click Enable on the bottom menu.
- Click Commit.
When IOCs are present, you can see them at Objects > External Dynamic Lists. Select the EDL and look in the List Entries And Exceptions tab:
Import domains (EDL of type Domains List)
- From the Palo Alto main menu, choose Objects > Security Profiles > Anti-Spyware.
- Select the strict profile, then click Clone, and OK.
- Click the new profile.
- In the Anti-Spyware Profile dialog, type a name over the cloned name.
- In the DNS Policies tab, select the EDL for domains, then click OK.
- From the main menu, choose Policies > Security.
- Click Add.
- In the Security Policy Rule dialog, type a name for the new policy.
The Rule Type should be universal (default). - In the Source tab, select Any for SOURCE ZONE.
- In the Destination tab, select any from the drop-down list and select ZONE.
Also click Any for ADDRESS and select any in DEVICE.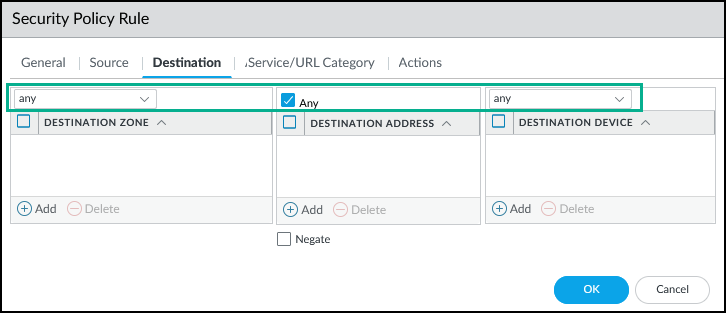
- In the Application tab, select Any.
- In the Service/URL Category tab, select Any from the drop-down list.
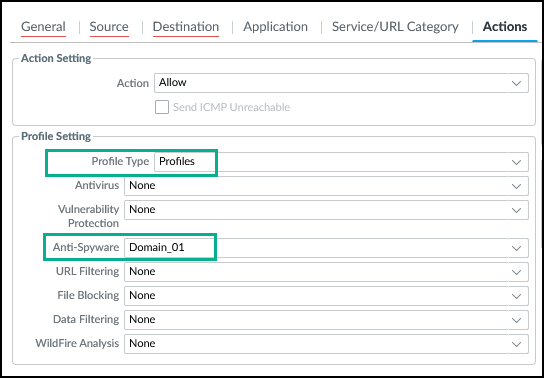
- In the Actions tab, in the Profile Setting section, for Profile Type, select Profiles.
- For Anti-Spyware, select the Anti-Spyware profile that you created (the one that you cloned from another).
- Click OK.
- From Policies > Security, select the new policy, then click Enable on the bottom menu.
- Click Commit.
When IOCs are present, you can see them at Objects > External Dynamic Lists. Select the EDL and look in the List Entries And Exceptions tab: