Integrate a Microsoft Office 365 Cloud Device
Configure a Microsoft Office 365 cloud device.
The following table shows device-specific integration characteristics:
| Characteristic | Description |
|---|---|
| Method of push | All IOCs are pushed to the device. |
| IOC types supported | Domains and email addresses. |
| IOC group limitation | All IOC types can be pushed in the same group. |
| Device IOC limit | The device is limited to 1,000 IOCs. |
Device-specific integration characteristics table
To integrate the device and receive IOCs, perform these steps (described in the following sections):
- Configure an application in Azure Active Directory.
- Create an anti-spam policy in Microsoft 365 Defender.
- Add the device to Digital Risk Protection (Threat Command).
- Configure an IOC group whose IOCs will be pushed to the device.
Configure an application in Azure Active Directory
The application enables pushing IOCs from TIP to a Microsoft Office 365 Defender anti-spam policy.
Prerequisites:
- Access to the company Azure Active Directory. Any user can do this process, but a Privileged Administrator will need to give approval for adding permissions.
- Access to a Windows physical or virtual machine.
To configure an application:
- From the Azure Portal, open Azure Active Directory.
- Register a new application:
- From Azure Active Directory, click App registrations then click New registration.
- Enter a user-defined name for the app.
Leave the rest of the fields at default. - Click Register.
The new application details are displayed. - Copy the Application (client) ID for later use.
- Set permissions for the new application:
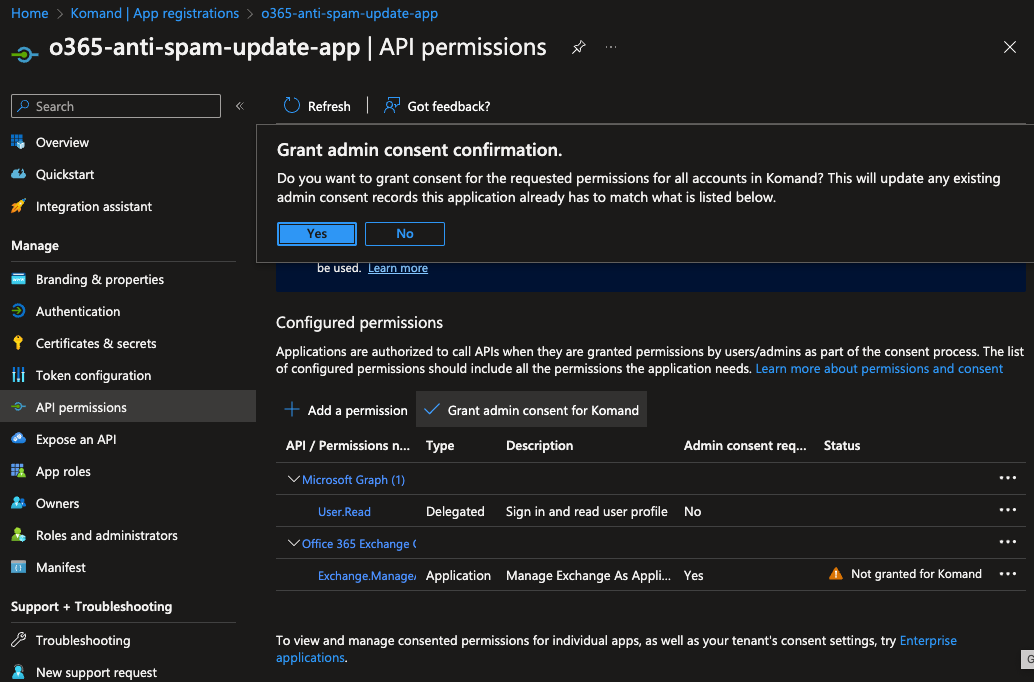
- From the application details screen, click API permissions.
In the Configured permissions section, permissions have been granted for Microsoft Graph only. - Click Add a permission.
The Request API permissions section is displayed in the right-panel. - Select APIs my organization uses.
- In the search field, enter office 365, then select Office 365 Exchange Online.
- Choose Application permissions.
- In the Select permissions section, expand the Exchange option and select Exchange.ManageAsApp
- Click Add permissions.
Office 365 Exchange Online has been added to the Configured permissions section and now permissions can be added. - Approve the user to add the permissions by clicking Grant admin consent for <organization> and then confirm the consent.
 If this option is not displayed, you will need to ask an Admin user to grant consent. For more information, contact the Azure AD administrator.
 - From the application details screen, click API permissions.
- From a Windows machine, create and export CER and PFX certificates:
Sample script to create certificates:
$PfxPassword = ‘yourpassword’
$Organization = ‘your.organization.com’
$AppId = ‘your-app-ip-string’
$mycert = New-SelfSignedCertificate -DnsName $Organization -CertStoreLocation "cert:\CurrentUser\My" -NotAfter (Get-Date).AddYears(3) -KeySpec KeyExchange
$mycert | Export-Certificate -FilePath certificate_file.cer
$mycert | Export-PfxCertificate -Password $(ConvertTo-SecureString -String $PfxPassword -AsPlainText -Force) -FilePath 'ExoCertificateFile.pfx'- Upload the CER certificate:
- From the application details screen, click Certificates & secrets.
- Click Upload certificate.
- Upload the CER certificate.
The certificate is displayed in the Certificates section. (The PFX certificate and password are used later in the process.)
- Assign a role to the new application:
- From Azure Active Directory, click Roles and administrators.
The Assignments screen is displayed. - Search for the Exchange Administrator, then click it.
- Click Add assignments.
Apps that can be assigned are displayed in the right panel. - Search for the user-defined name of the new application.
- Select the new application and click Add.
The application is configured.
- From Azure Active Directory, click Roles and administrators.
Create an anti-spam policy in Microsoft 365 Defender
Prerequisites :
- You have administrative credentials to access Digital Risk Protection (Threat Command) with a subscription to the Automation and TIP modules.
- You have the Microsoft 365 Defender username and password.
Before you can integrate an Office 365 device with Digital Risk Protection (Threat Command), you need to create an anti-spam policy. This policy is where IOCs are displayed after the integration is running.
To create an anti-spam policy in Microsoft 365 Defender:
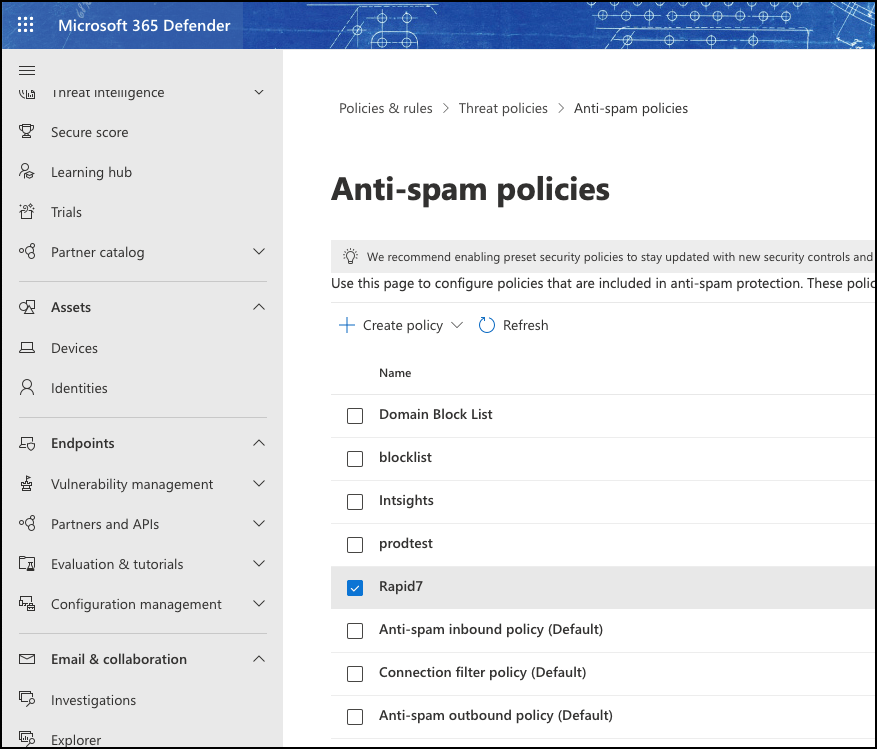
- From Microsoft 365 Defender, choose Policies & rules > Threat Policies > Anti-spam policies.
- Create a new Inbound policy.
The name that you enter will be the name that you use in Digital Risk Protection (Threat Command). In our example, we used the name “Intsights.” - Configure users, groups, and domains, as well as spam policies, actions, etc. according to your company policy.
The new anti-spam policy is displayed:

Add an Office 365 cloud device to Digital Risk Protection (Threat Command)
Create an Office 365 cloud device in Digital Risk Protection (Threat Command).
To add an Office 365 device:
- Log in to Digital Risk Protection (Threat Command) at https://dashboard.ti.insight.rapid7.com
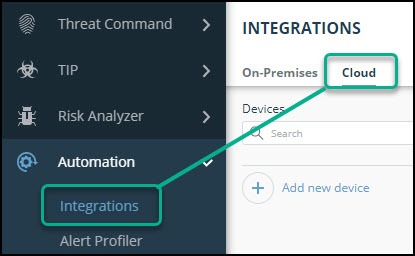
- From the main menu, select Automation > Integrations.

- From the Integrations page, click Cloud.
- Click Add new device.
- In the Add New Cloud Device dialog, type a user-defined name for the device.
The name can contain a maximum of 50 letters, spaces, numbers, and underscores. - For the Device type, select Office 365.
The default device limit is displayed. - (Optional) You can change the IOCs limit.
- Enter details about the Azure Directory app:
- Type the PFX certificate file password.
- Type the Application (client) ID.
- Type the AD organization name.
- In Spam Filter Identity, type the name of the anti-spam policy created in the previous procedure.
- Upload the PFX certificate file.
- It is recommended to click Test Credentials to ensure that the credentials are valid. If the credentials are not valid, a message is displayed.
- Click Add.
- (Optional) To verify that the new device is displayed in Digital Risk Protection (Threat Command), select Automation > Integrations.
If this window is already open, refresh it by selecting Automation > Integrations from the menu.
The new device is added to the cloud integrations device list. Next to the device name, there is a red dot, indicating that communication has not yet been established. The dot will change to green when the device is synchronized. If the device cannot synchronize for more than 48 hours, an email warning is sent to the account administrator.
Configure an IOC group to push IOCs to the device
Once the Office 365 device has been added and is synching with Digital Risk Protection (Threat Command) , it is ready to receive IOCs that are pushed from Digital Risk Protection (Threat Command). IOCs are pushed by creating an IOC group for this device in Digital Risk Protection (Threat Command).
Creating IOC groups is described briefly at Create IOC Groups
Viewing IOCs via Office 365
You can see pushed IOCs in Microsoft 365 Defender.
To view IOCs:
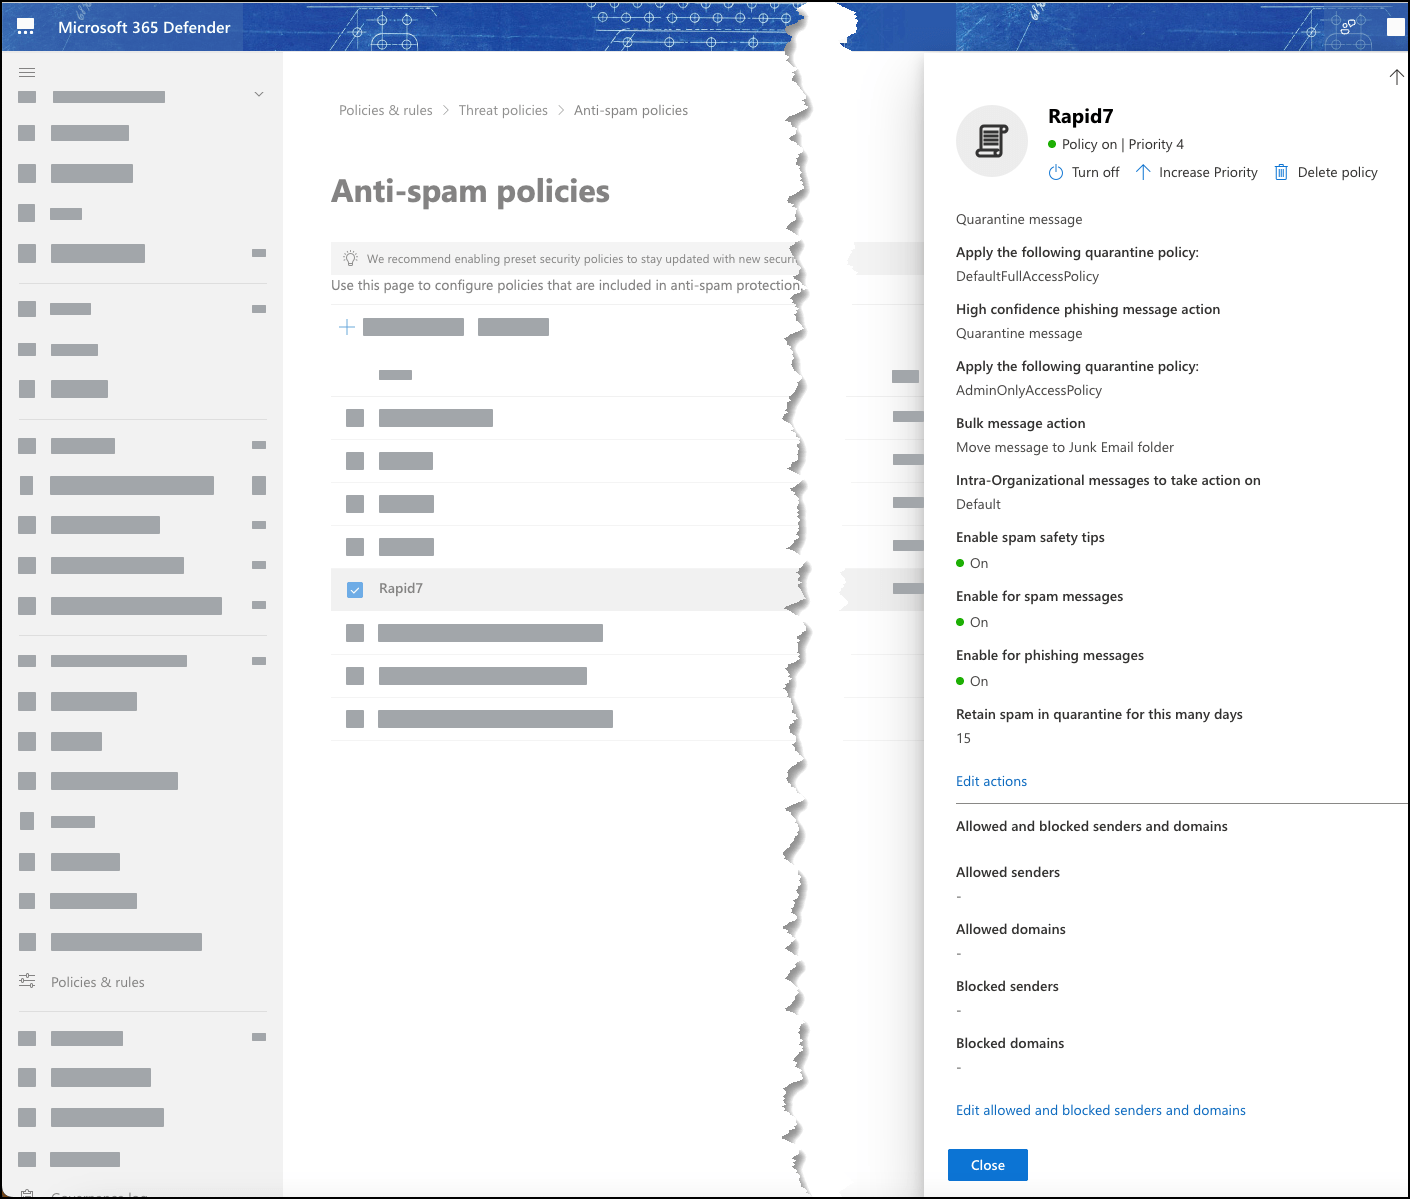
- From Microsoft 365 Defender, choose Policies & rules > Threat Policies > Anti-spam policies.
- Select the anti-spam policy created for Digital Risk Protection (Threat Command) IOCs.
The pushed IOCs are shown in the Blocked senders and Blocked domains sections: