ServiceNow ITSM Use Cases
This section describes these common use cases:
Authentication
This section describes how users should be able to fetch data from the “Rapid7 Digital Risk Protection (Threat Command)” app to ServiceNow. This is used to leverage the default authentication mechanism (Basic Auth) supported by ServiceNow.
Role Required : x_r7_rapid7_intsig.app_admin
- Login to the ServiceNow instance.
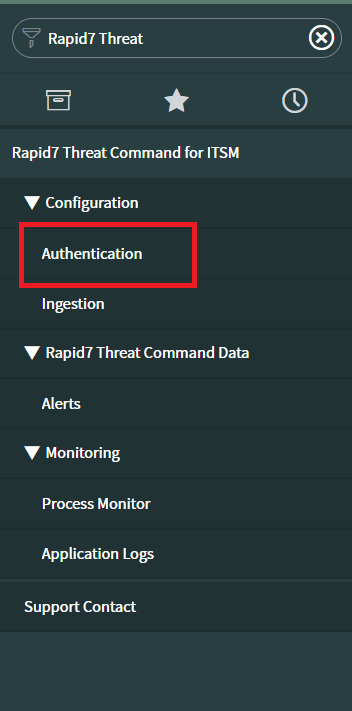
- Navigate to “Rapid7 Digital Risk Protection (Threat Command) for ITSM”.
- Click on “Rapid7 Digital Risk Protection (Threat Command) for ITSM” -> “Configuration” -> “Authentication”.
- On click of the Authentication, the view gets opened with a default record named “Rapid7 Digital Risk Protection (Threat Command)”.
- Update required fields like ‘Name’, ‘Account ID’ and ‘API Key’.
- Users will get a success message if their credentials are correct.
- In case of wrong/empty credentials the user will get error messages.

Ingestion
This section describes how to configure filters that can be used for fetching Alerts from the “Rapid7 Digital Risk Protection (Threat Command)” platform. Incident creation criteria specify for which condition an Incident should be created. Incident mapping criteria specify the custom mapping of Alert fields to Incident.
Role Required : x_r7_rapid7_intsig.app_admin
-
Login to the ServiceNow instance.
-
Navigate to “Rapid7 Digital Risk Protection (Threat Command) for ITSM” “Configuration”.
-
Click on “Ingestion”.

-
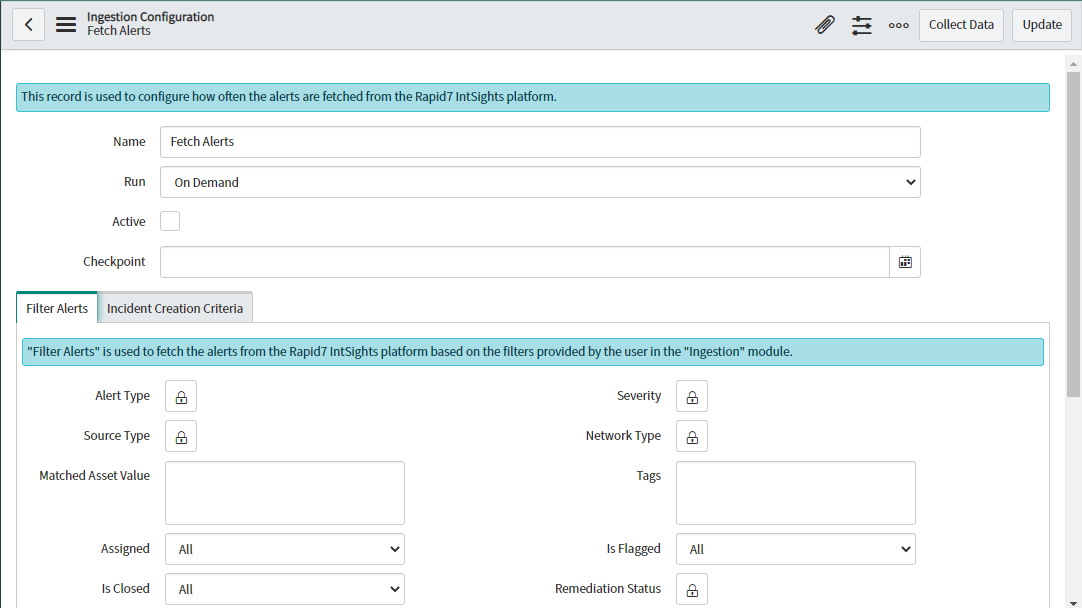
The Ingestion form view gets opened with a default Name as “Fetch Alerts”, “Run” value as “Periodically”, “Active” value as “False” and “Checkpoint” as empty for the initial ingestion. Users need to make sure to check the “Active” checkbox to run the scheduler automatically at the scheduled time.
Note:
- If ‘Checkpoint’ is empty then it will fetch past 3 months data by default otherwise users need to mention specific value.
- Users can not select a future date in the checkpoint , the application will give an error message if the future date is selected.
- On clicking the ‘Active’ checkbox , the user can configure the scheduler’s properties like Repeat Interval of scheduler. It represents the time when the scheduler will be run.
- By default the scheduler will be set to periodically run by 30 minutes once it gets active.
-
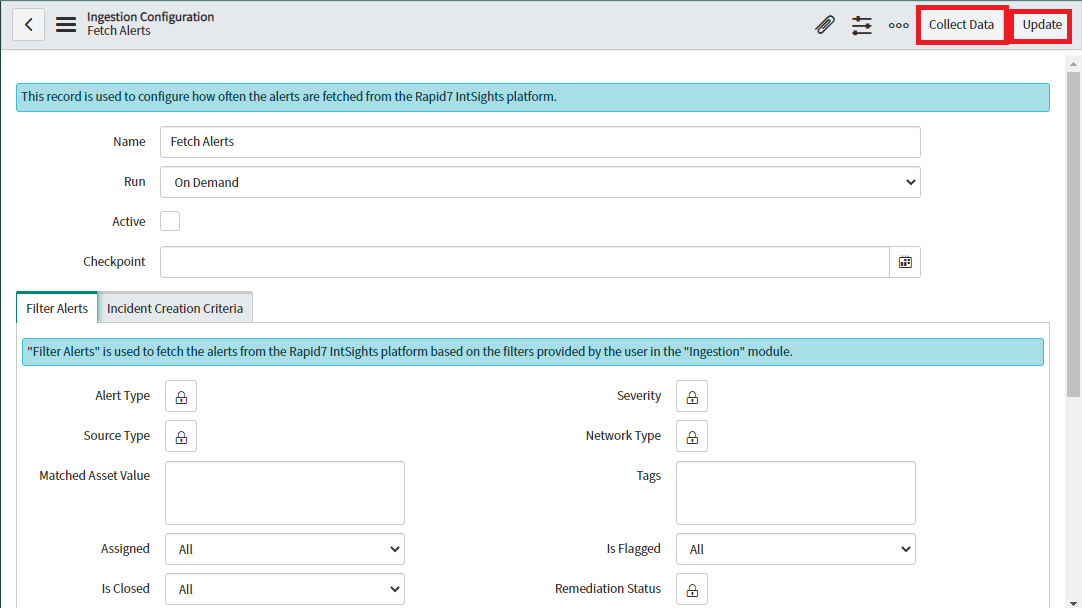
Users can update the existing record. Change the existing details and click on the Update button to only update the configuration or click on the Collect Data button to start the ingestion based on the updated configuration directly.
-
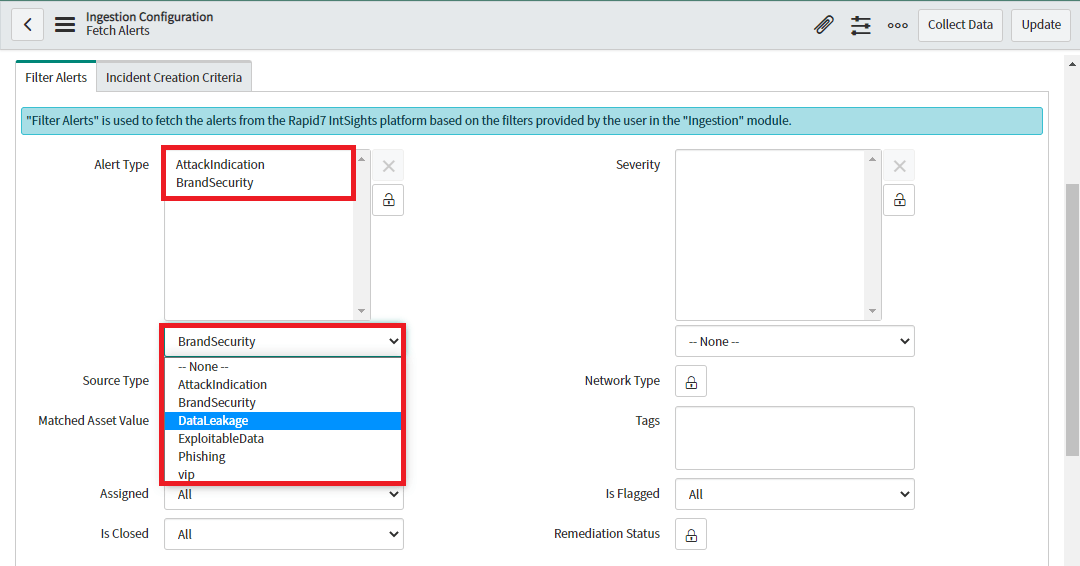
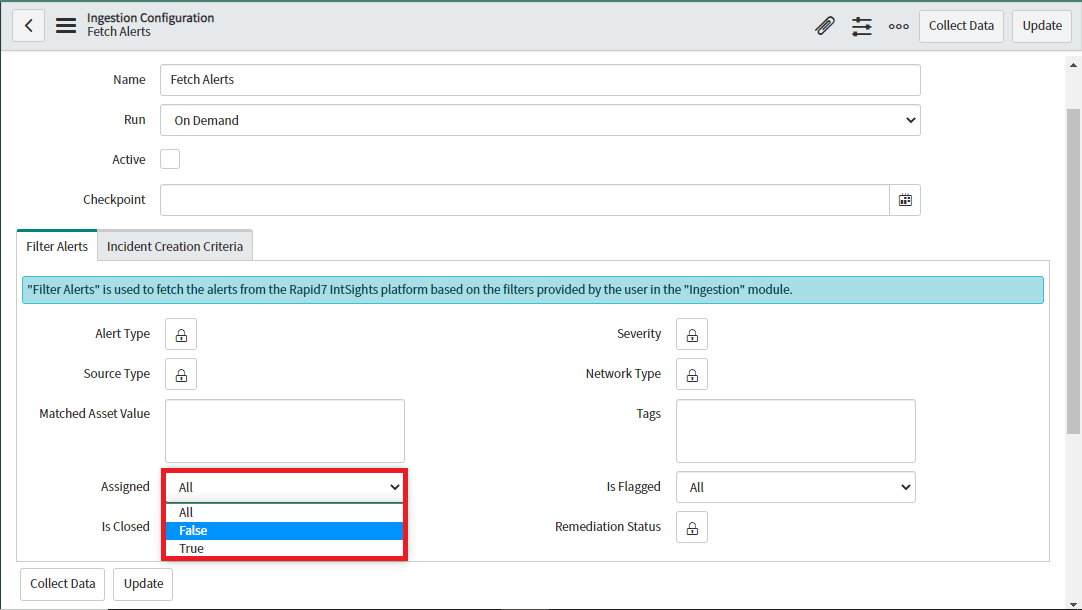
Alert Type, Source Type, Network Type, Severity and Remediation Status Filters can be modified by clicking on the Lock button.

-
Users can select multiple values from the list for the above mentioned Filters by selecting from the Choice List provided.
-
Users can select the Assigned, IsClosed and IsFlagged value from the dropdown of respective Filters by clicking on the dropdown list.
-
Users should provide comma separated values in Matched Asset Value and Tags based on their requirement.
-
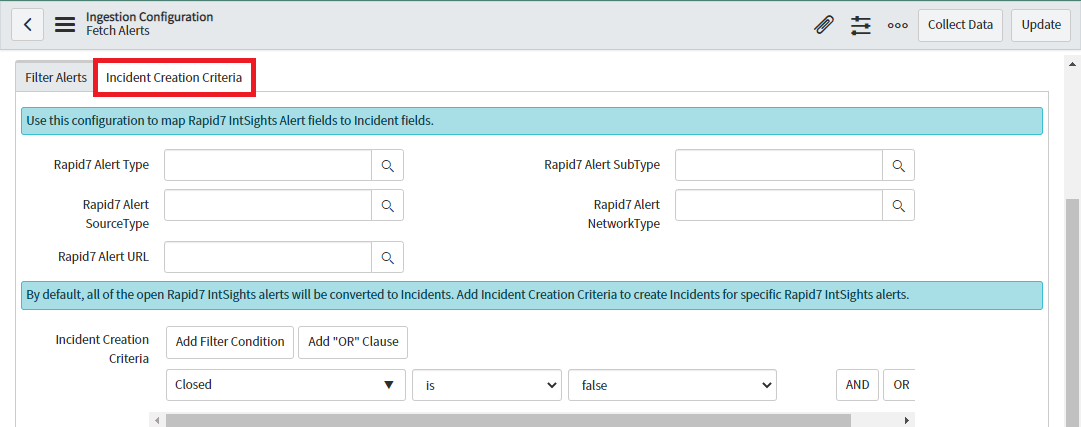
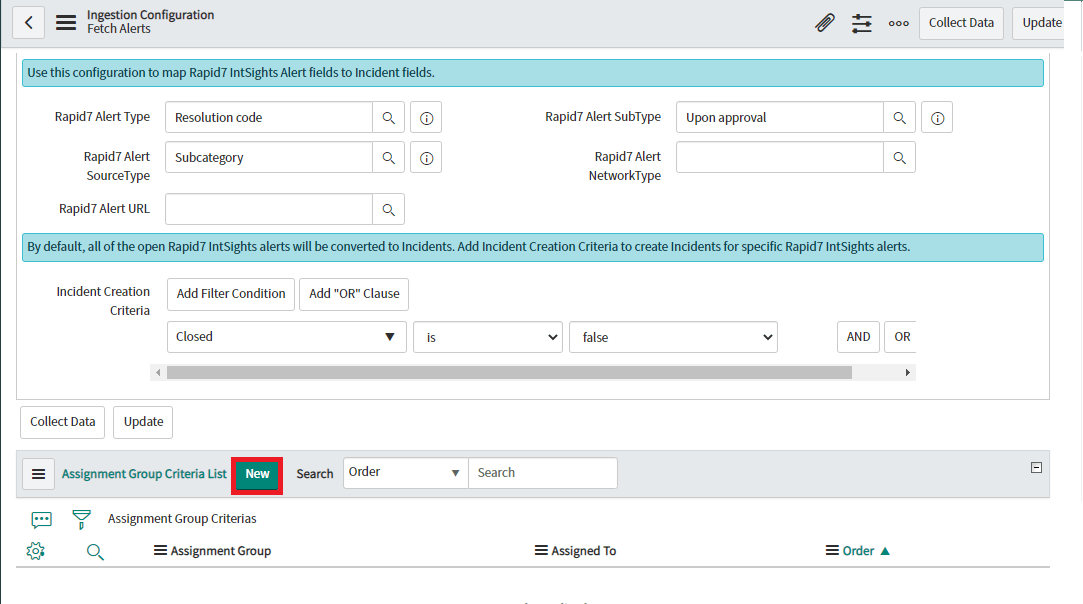
Users can provide Mapping Configuration and Incident Creation Criteria by clicking on the “Incident Creation Criteria” section given next to the “Filter Alerts” section.
-
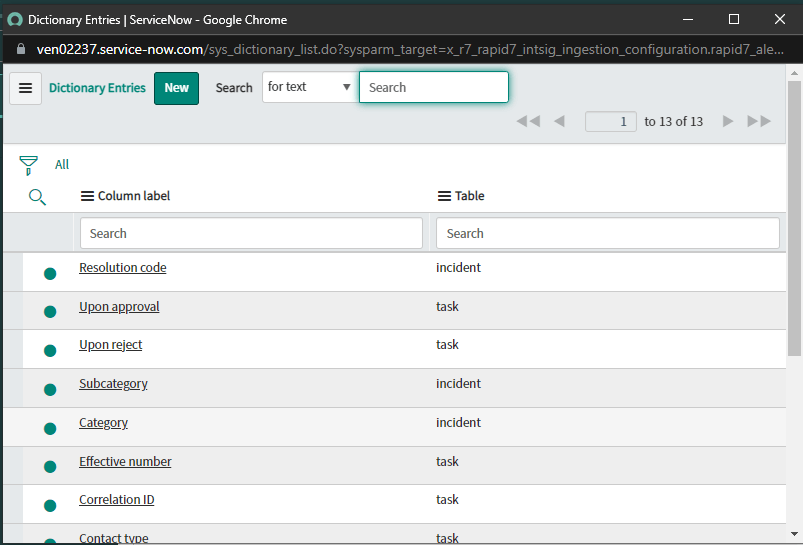
Users can provide custom Mapping by clicking on the Magnifying Glass icon to view the list of available Incident Fields that can be mapped with the Rapid7 Alert Fields.

-
After clicking on the Magnifying Glass icon, the list of available Incident Fields that can be mapped with the Rapid7 Alert Fields will be visible in this way from which the user can select the field of users choice by clicking on it.
-
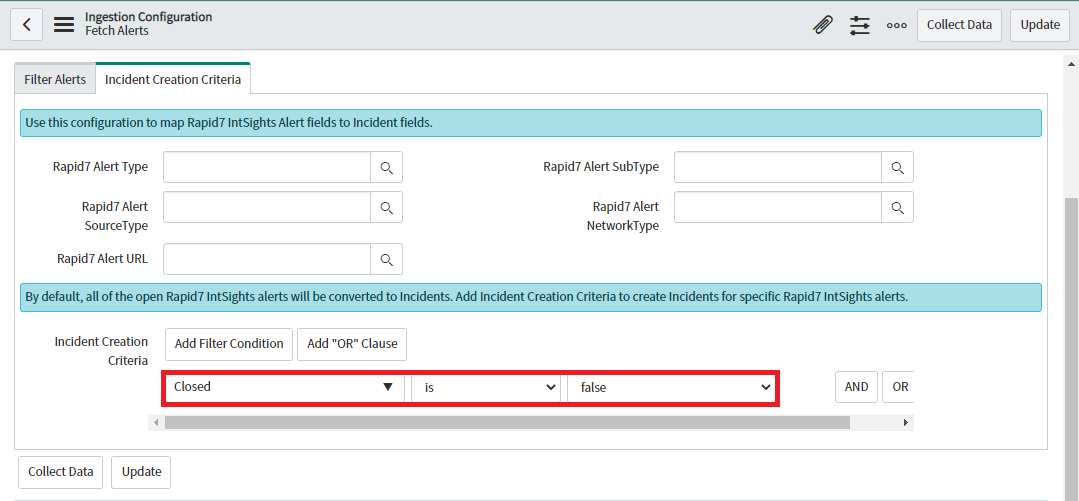
Users will be able to provide Incident Creation Criteria to create Incident for particular conditions only. By Default, Incident Creation Criteria will be provided to create Incidents only for Open Alerts.
-
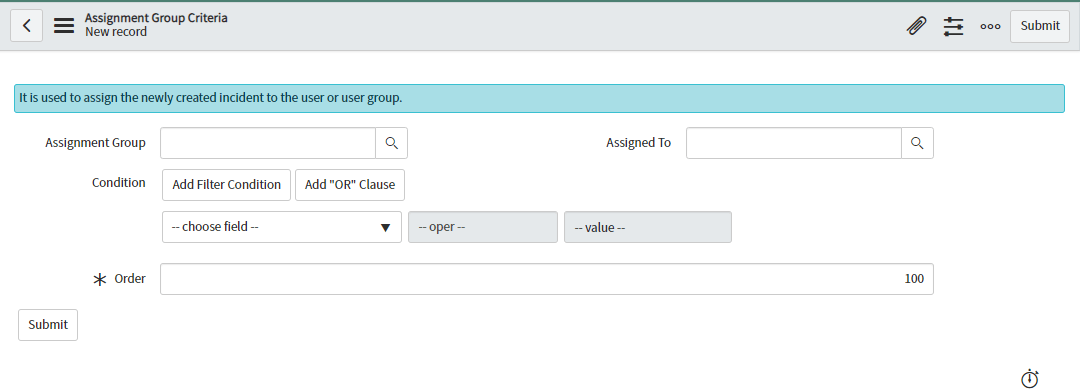
Users will be able to see Assignment Group Criteria to create criterias for assigning an incident to a system group or an user. Users can click on the “New” button to create a new criteria.
-
Users will be able to see the form view of Assignment Group Criteria once users click on the “New” button with default value of “Order” as 100.
-
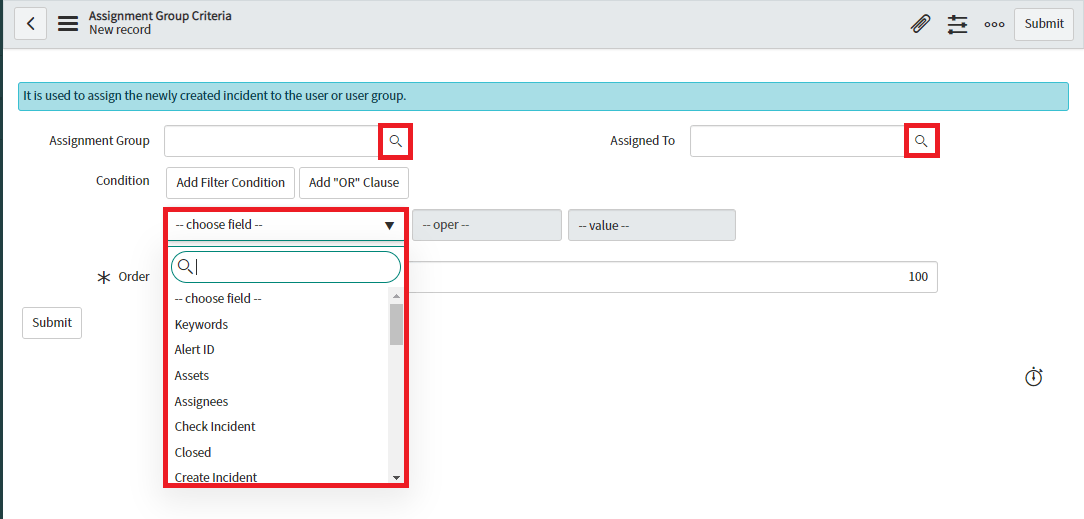
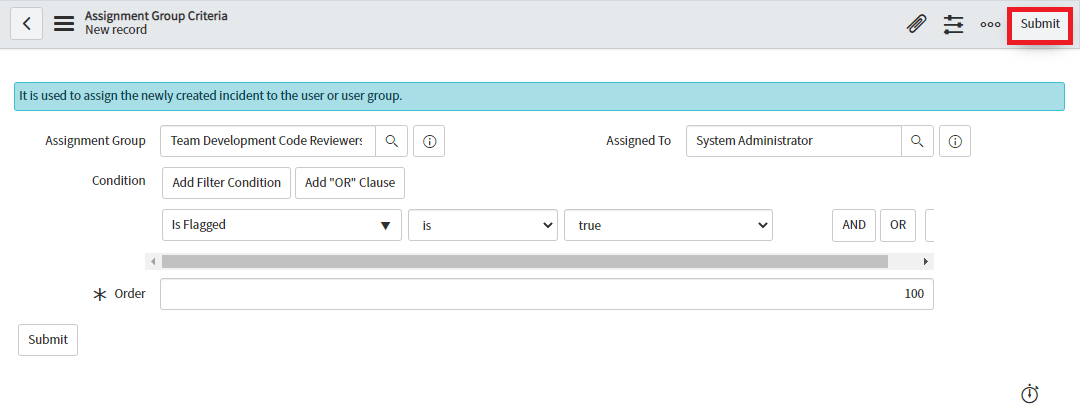
Users will be able to select groups and users by clicking on the magnifying glass shown next to “Assignment Group” and “Assigned To” respectively. Users can provide “Condition” by selecting the choice from the drop down list.
Note:
- Users must have to select either “Assignment Group” or “Assigned To”. One of them is mandatory for saving records.
- Assignment criteria will only work if Alert does not have an ‘Assignee’ field defined.
- If Alert has an ‘Assignee’ field assigned and ‘Assignee’ value will be matched with any ServiceNow user then the matched user will be assigned to that incident directly.
- If Alert has an ‘Assignee’ field assigned but its value is not matching with any of ServiceNow users then it will check for assignment criteria.
-
Once “Assignment Group Criteria” configuration is done successfully, users need to click on the “Submit” button to save the criteria.
Note:
- Users with role ‘x_r7_rapid7_intsig.app_user’ can only view Assignment Group Criteria, New button should not be displayed. .They can collect data by clicking on the ‘Collect Data’ button.
- Where there are more than one Assignment Group Criteria present, the lowest order will execute on highest priority while assigning the Group and/or User to Incident.
Rapid7 Digital Risk Protection (Threat Command) Data
Alerts
“Alerts” section allows users to view Alerts fetched from “Rapid7 Digital Risk Protection (Threat Command)” platform. Users can view a list of alerts and its details. Users can also create an Incident from a specific alert.
Role Required: x_r7_rapid7_intsig.app_admin or x_r7_rapid7_intsig.app_user
- Login to the ServiceNow instance.
- Navigate to “Rapid7 Digital Risk Protection (Threat Command) for ITSM”.
- Click on “Rapid7 Digital Risk Protection (Threat Command) for ITSM” -> “Rapid7 Digital Risk Protection (Threat Command) Data” ->“Alerts”.
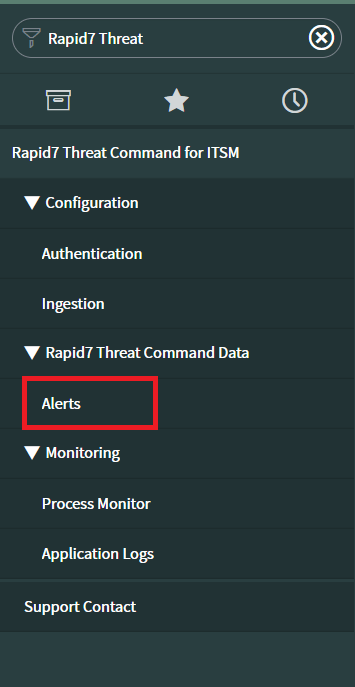
- On click of the Alert, the list view gets opened.
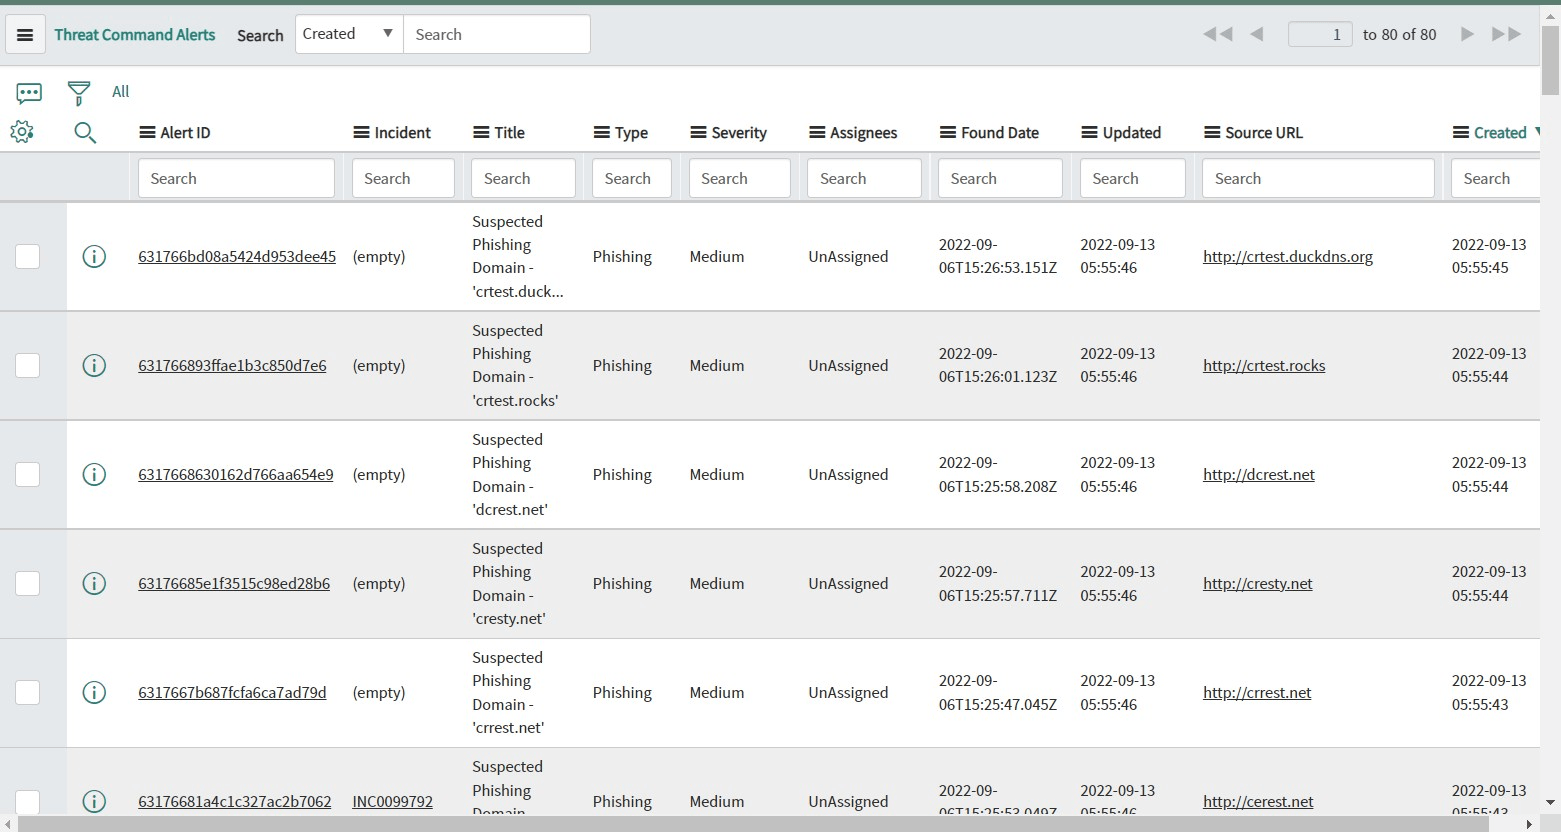
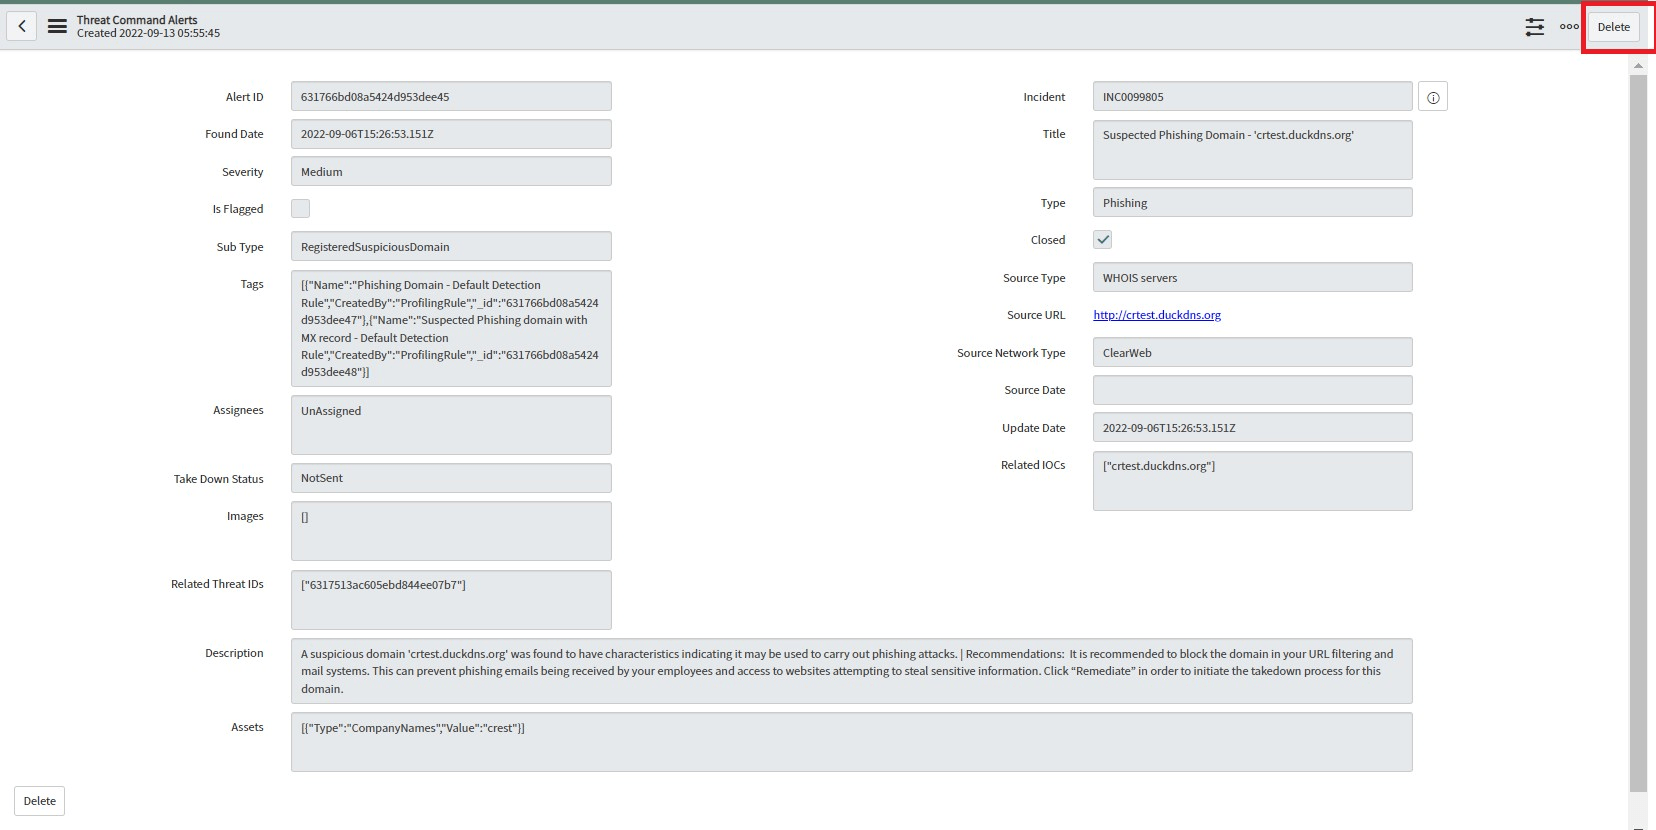
- Open any Alert by clicking on AlertId. Users can view details of Alert. All fields will be read-only.

- Click on the “Create Incident” button to create a new Incident for opened Alert. New Incident will be created and assigned to the Incident field of Alert.

- Users can view the created Incident by clicking the info button near the Incident field. Note : “Create Incident” button will only be visible when either Alert has no Incident assigned or the existing linked incident with Alert is closed.
- Click on the “Delete” button to delete the opened Alert.
- On click of the Delete button , assigned Incident will be closed first and then Alert will be deleted.
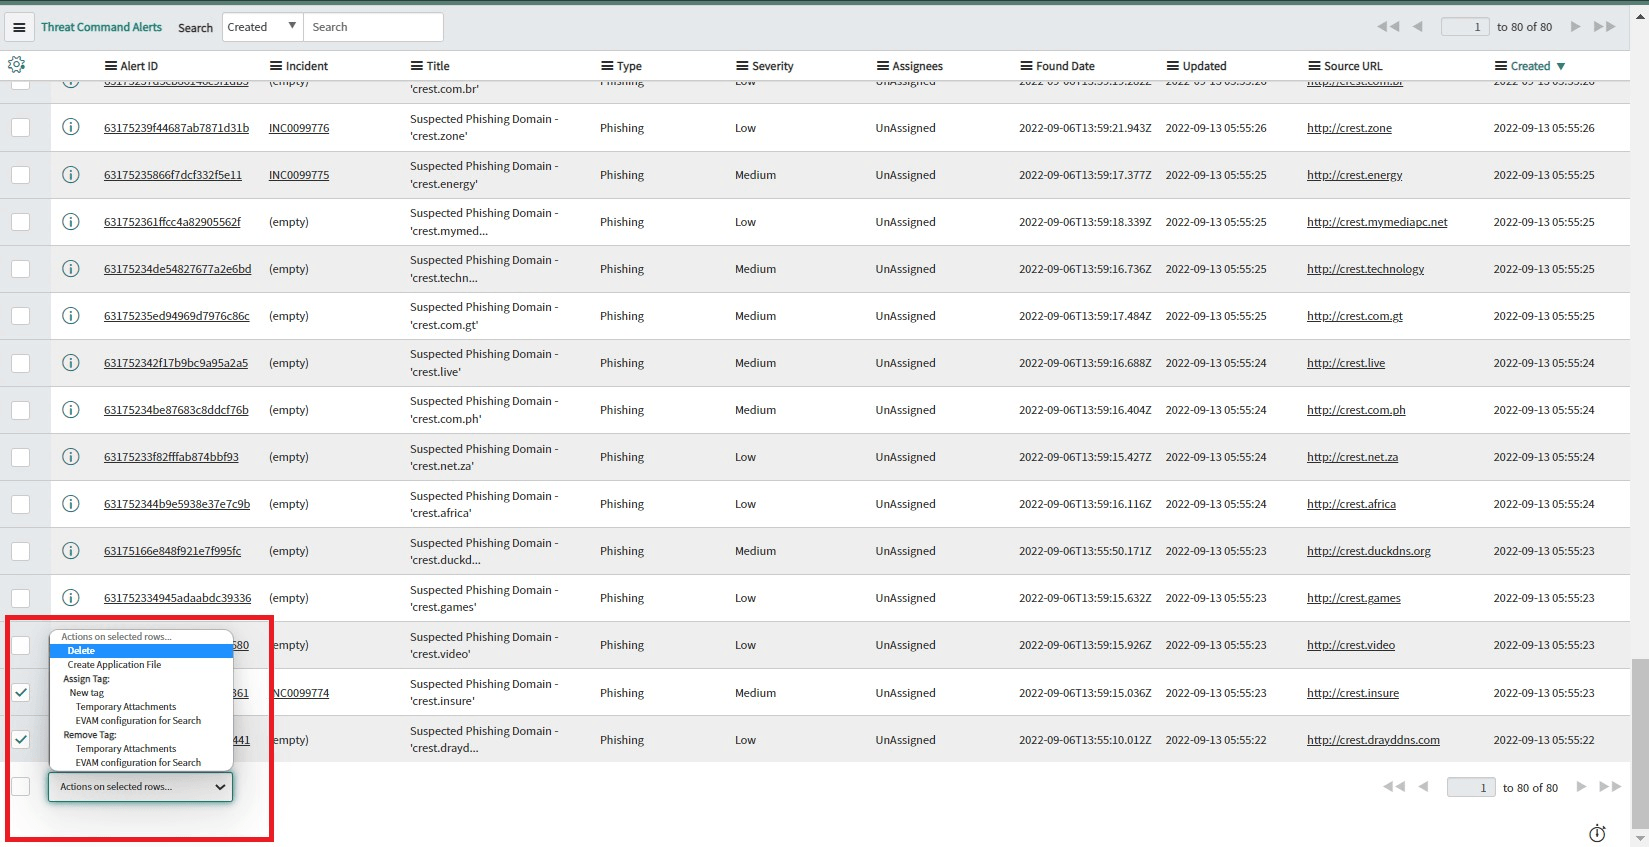
- Users can also delete multiple Alerts by selecting checkboxes in the list view.
- Users with ‘x_r7_rapid7_intsig.app_user’ role can only view Alert details. Users can create an Incident but can not delete any Alert.
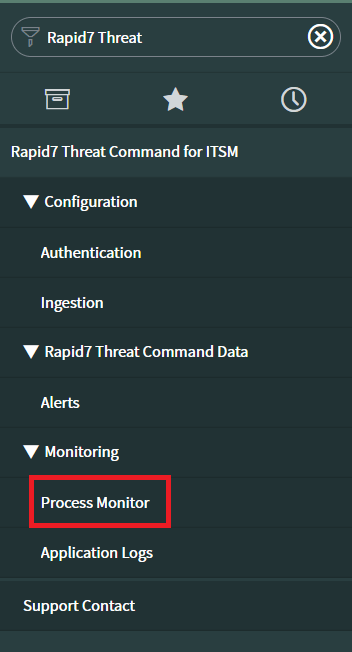
Monitoring
“Rapid7 Digital Risk Protection (Threat Command) for ITSM” application provides the functionality to monitor the jobs which are fetching data. Users can see detailed information of job status and processes.
Role Required : x_r7_rapid7_intsig.app_admin or x_r7_rapid7_intsig.app_user Procedure:
- Login to the ServiceNow instance.
- Navigate to “Rapid7 Digital Risk Protection (Threat Command) for ITSM” “Monitoring”.
- Click on “Process Monitor”.
- Click on the any record to check the status of the process.
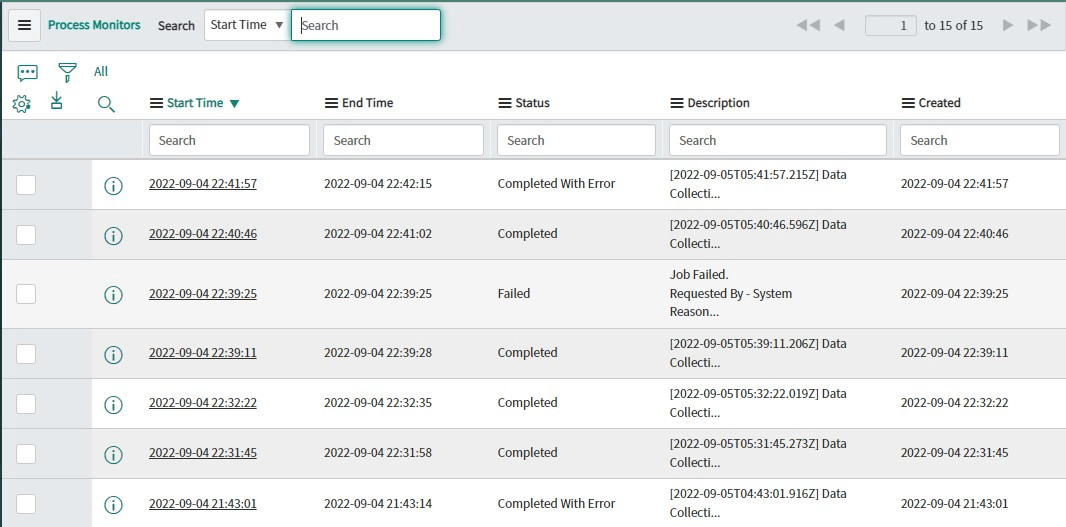
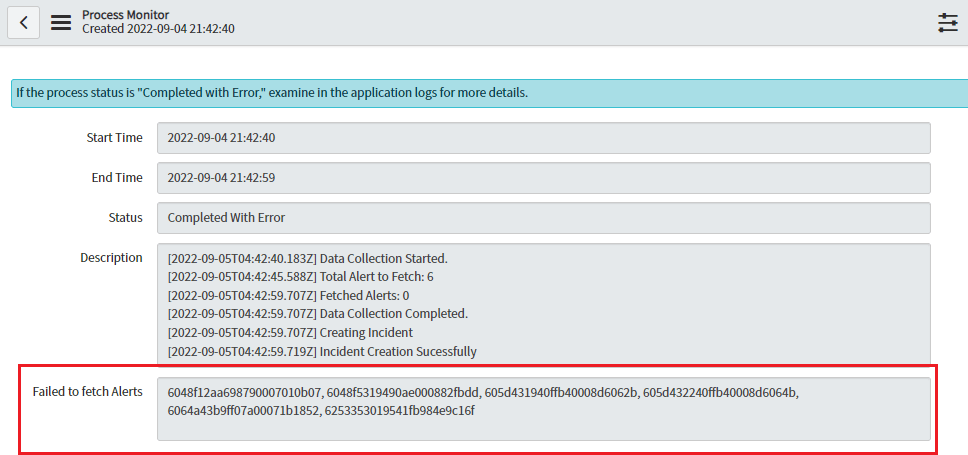
- It will show the job start time, end time, status, and periodically updated logs for the job process.
- If the application fails to retrieve some alerts, “Missed Alert IDs” will display the alert’s IDs. Such IDs will be fetched during next on-demand or scheduled ingestion.
- A newly created job will fail with the message “There is already a job running” if a job is already running.
- Note : All fields in the process monitor will be read-only.