Rapid7 AppSec Plugin for Chrome
The Rapid7 AppSec Plugin for Chrome adds useful capabilities like recording your login activities and replaying attacks from your Application Security (InsightAppSec) console. Use the plugin to understand how traffic is moving between your server, apps, and authentication layer.
To get the most out of the Rapid7 AppSec plugin, we will walk through the following use cases:
- Validate vulnerabilities by replaying the vulnerability attack. Replaying attacks allows you to watch the attack traffic to determine whether a vulnerability is valid.
- Record macro authentication with the plugin and play the authentication sequences back to track user actions during authentication.
- Record traffic authentication to track and send the requests the front end application and the back end server in a Traffic file. You can then import the file so it can be used and referenced within an app.
Install the plugin
- Ensure you are using the latest version of Chrome.
- On the Rapid7 AppSec Plugin for Chrome page , click Add to Chrome.
- In the extension pop-up, click Add extension. A notification appears when the plugin is successfully installed.
Validate Vulnerabilities
In Application Security (InsightAppSec), you can access vulnerabilities and replay attacks from the scan report or vulnerability. Replaying attacks allows you to watch the attack traffic to determine whether a vulnerability is valid. You can also edit the request in the Request Builder to see if a change fixes or further validates a vulnerability.
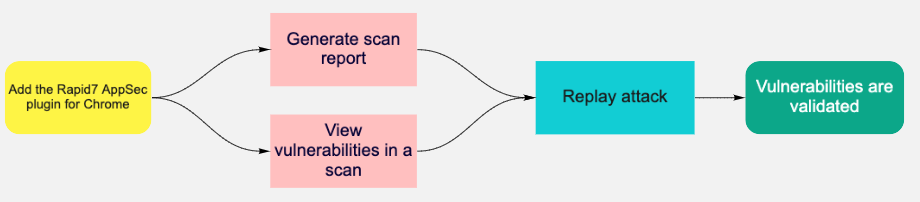
After installing the plugin, you can generate a scan report or view vulnerabilities within a scan and replay the attack.
Validate by scan report
- On the Apps page, select the app you want to validate.
- On the app details page, select the scan you want to generate a report for.
- Click Generate Report
- Give the report a name and choose HTML export.
- When the report is available, replay the attack. a. Select an attack type and then click Replay Attack. b. In the Vulnerability Validator window, use the tabs at the top to switch between the steps in the attack traffic that occurred. c. On each tab, click Send to validate each attack with the Request Builder. The response headers and response body will return with the attack information.
Validate by vulnerability
- On the Apps page, select the app you want to validate.
- On the Vulnerabilities tab, select the vulnerability you want to validate.
- When the Vulnerability Validator window opens, replay the attack.
- Select an attack type and then click Replay Attack.
- In the Vulnerability Validator window, use the tabs at the top to switch between the steps in the attack traffic that occurred.
- On each tab, click Send to validate each attack with the Request Builder. The response headers and response body will return with the attack information.
Record and Test Macro Authentication
Rapid7 AppSec Macros are sequences of actions, such as clicking a series of buttons or text entry on a web page. Once you have the AppSec Chrome plugin installed, you can use macros to record the actions needed to authenticate into an application or to access a specific section of your app that cannot be reached purely by crawling. You can record authentication with the Rapid7 AppSec Plugin in Application Security (InsightAppSec) and in the Macro Recorder tab of the AppSec plugin. The playback option runs the same action sequence taken by the user.

After installing the plugin, you can record and play back the authentication sequence and edit the request before rewatching the authentication playback.
Click here to expand the list of what data the Rapid7 AppSec plugin records.
Data recorded
| Data | Description |
|---|---|
| MacroEventList | The list of macro recorder events. |
| MacroEvent | A single macro event. |
| WindowIndex | During authentication the browser will open a different window, then redirect you back to the original window. 0 - No window was opened. 1 - A new window was opened.2 or more - As the number of browser windows change, the number will keep incrementing. |
| EventType | The actions you take in the browser. For more information, see the Event Types table below. |
| JavaScript | Custom JavaScript can be utilized under <Data><![CDATA[ ____ ]]></Data>. |
| UseEncryptedData | This field determines if the field <EncryptedData> such as a password is used. For most macro event types this field will be a 0 since you may not be passing encrypted data. 0 - The data is not encrypted and the <Data> field is used. 1 - The data is encrypted and the <EncryptedData> is used. When you are passing an encrypted value such as a password, this will be a 1, and there will be an encrypted value in the <EncryptedData> section. When set to 0, <Data> will have a value. |
| Data | The value that is going to be passed or the action which is to be done in tandem with what is defined in <ElementPath>. |
| Wildcards | Wildcards can be used in the <Data> field. For example, if the login button was dynamically generated with a new value such as ‘login-5423’ and upon next login the value is ‘login-7668’, we can address this situation by using ‘login-*’ in the <Data> field. |
| EncryptedData | This field is used with UseEncryptedData. If it is set to 1, this will contain an encrypted value to be passed during the authentication sequence. This can be done using the Encrypter/Decrypter in the AppSecToolkit using the Rapid7 encryption option. |
| ElementPath | This field defines the XPath to the specified location in the browser where the specific event is to take place. It works with the <Data> field. <Data> is the actual value to be inputted in the field and <ElementPath> is the actual path of the <Data> field. If you are using a JavaScript macro event, [CDATA[]] will be empty in <ElementPath> since the value will be defined in <Data>. |
| Duration | The time in milliseconds on how long a specific macro event will take to execute. - Enable: This field defines if a macro event is enabled or not. 0 - Disable the event. 1 - The default value and all macro events are enabled. |
| Optional | This field allows you to toggle a specific macro event as <Optional>. 0 - This is not optional. The macro event has to succeed for the macro to continue onto the next step. 1 - The macro is an optional step. Use 1 when there are actions after login, such as security questions or one time pop ups after authentication. |
Event types
| Event Type | Description |
|---|---|
| Delay | This event is used to add a time delay between two macro events. |
| DriverClick | This event type indicates the action of clicking an element on the page that requires a click action. A new page, new content on the existing page or interaction with a specific element will return a DriverClick. |
| DriverSetControlValue | This event indicates an action of sending parameters or values into fields which you may have clicked on in DriverClick,such as a username and password. DriverSetControlValue will clear the field before sending the value. |
| DriverSendKeys | This event type is similar to the DriverSetControlValue, but it emulates sending key values as they are typed in with a keyboard and not just the whole value set. DriverSendKeys can append and prepend to existing values if needed. |
| Click | This event type indicates an action of clicking on an element of the page which requires a click action similarly to DriverClick. Click interacts with the DOM (Document Object Model). |
| SetControlData | This event indicates an action of sending parameters or values into fields which you may have clicked during Click. Some events are username and password. |
Differences between DriveClick, DriverSetControlValue, Click, SetControlData
DriverClick and DriverSetControlValue - These operations are leveraging specific web drivers at the OS level to execute commands that simulate a mouse click or keyboard press.Click and SetControlData - These are events which interact with the DOM (Document Object Model).
You can use either DriverClick and DriverSetControlValue or Click and SetControlData as macro events to interact with an application’s authentication sequence.
Record and play back login authentication
- In the Rapid7 AppSec plugin, on the Macro Recorder tab, enter the URL or local IP address of the site you want to record.
- Click Record authentication. A message at the top the site recorder window confirms that the plugin is recording.
- On the login page of the site you are recording, enter your credentials and sign in.
- After logging in, click the Cancel button on the top page to close the window.
- In the plugin, choose the Macro Recorder tab to see the XML output of the sequence that was recorded.
- Before playing back the sequence, close all windows that were opened by the plugin.
- Click Playback.
Playback in Application Security (InsightAppSec)
To playback the sequence in Application Security (InsightAppSec), download the .rec file and import into the macro Authentication tab .
Record and Import Traffic Files
You may run into web applications built with technologies that are not supported by the Application Security (InsightAppSec) crawler. You can authenticate into such applications by using a web proxy tool such as the Traffic Recorder in the Rapid7 Application Security (InsightAppSec) plugin. Using the proxy tool, you can record the interactions (like HTTP GET and POST requests) between the front end application and the back end server in a Traffic File. Application Security (InsightAppSec) can replay these interactions to authenticate into your application.

After installing the plugin, you can record traffic from the plugin or a different tool, export the recorded file, and import it into Application Security (InsightAppSec).
Record using the Rapid7 AppSec plugin
- In the Rapid7 AppSec plugin, on the Traffic Recorder tab, enter the URL or local IP address of the site you want to record.
- Click Record authentication. A message at the top the site recorder window confirms that the plugin is recording.
- On the login page of the site you are recording, enter your credentials and sign in.
- After logging in, click the Cancel button on the top page to close the window.
- In the Rapid7 AppSec plugin, click Download(*.har).
Import to Application Security (InsightAppSec)
You can use this file in other applications or import it into Application Security (InsightAppSec).