Set Up an On-Premises Scan Engine
Application Security (InsightAppSec) uses a cloud-based engine to test applications that have been deployed to the public domain and are accessible from the internet. For applications that are not accessible from the internet, you can set up an on-premise scan engine. The on-premise scan engine will scan the applications that the cloud engines cannot reach and will send the data back to Application Security (InsightAppSec). This allows you to easily scan your internal applications without publicly exposing them or making major modifications to your internal environment.
To facilitate communication between Application Security (InsightAppSec) and an on-premise engine, the installation process includes an agent, which regularly checks to see if there are jobs for the scan engine to perform, such as running a scan or updating the engine.
Scan Engine groups
On-premise scan engines are organized in Application Security (InsightAppSec) using scan engine groups. Scan engine groups are collections of scan engines with similar network configurations that can be used to scan a web application. When creating a Scan Config, you can choose an on-premise scan engine group. During the scan, Application Security (InsightAppSec) will find the first available engine from the group and use it to scan your app.
Engines in the same group can be used interchangeably
Scan engines in the same group should all have similar infrastructure and network access so they can be interchangeably used to scan your application.
Create a Scan Engine group
Application Security (InsightAppSec) has a built-in scan engine group called “Default”. You can also create custom scan engine groups using the following steps:
- Log in to http://insight.rapid7.com/ and go to Application Security (InsightAppSec).
- From Application Security (InsightAppSec), go to Settings > Manage Engines.
- Select the “Engine Groups” tab.
- Click the + button in the first row of the “Engine Groups” table.
- Add a name and description that would let you easily identify the purpose of this engine group and press “Enter.”
You should now see your custom engine group in the table with zero engines assigned to it. You can proceed to install an on-premise scan engine and assign it to an engine group.
Set Up an On-Premise Scan Engine
To set up an on-premise engine, check your system requirements and follow the steps below.
System requirements
Before you can set up a scan engine, you must verify the following:
- You are a platform or product administrator.
- The machine you’re installing the engine on meets the hardware, operating system, and browser requirements.
- If the system is behind a firewall that restricts access to the internet, you’ll need to add the domain to the firewall’s allowlist.
Allowlist based on region
Is your Rapid7 product subscription provisioned for the United States? Check your region code first!
As of April 12th, 2021, all new customers subscribing to Rapid7 products that elect to store their data in the United States will be provisioned for one of three data centers. Since these data centers have unique endpoints, any firewall rules you configure must correspond to the data center your organization is assigned to. Follow these steps to determine which United States data center your organization is part of:
- Go to insight.rapid7.com and sign in with your Rapid7 account email address and password.
- Navigate to the Platform Home page.
- If you are not taken to this page by default, expand the product dropdown in the upper left and click My Account.
- Look for the Data Storage Region tag in the upper right corner of the page below your account name. Your United States region tag will show one of the following data centers:
- United States - 1
- United States - 2
- United States - 3
Depending on the region where your platform account is hosted, the machine you’re installing the engine on must allowlist the following:
- US-1: https://us.appsec.insight.rapid7.com and https://us.engines.appsec.insight.rapid7.com
- US-2: https://us2.appsec.insight.rapid7.com and https://us2.engines.appsec.insight.rapid7.com
- US-3: https://us3.appsec.insight.rapid7.com and https://us3.engines.appsec.insight.rapid7.com
- EU: https://eu.appsec.insight.rapid7.com and https://eu.engines.appsec.insight.rapid7.com
- CA: https://ca.appsec.insight.rapid7.com and https://ca.engines.appsec.insight.rapid7.com
- AU: https://au.appsec.insight.rapid7.com and https://au.engines.appsec.insight.rapid7.com
- JA: https://ap.appsec.insight.rapid7.com and https://ap.engines.appsec.insight.rapid7.com
IP addresses may change without notice
We cannot pre-approve a fixed IP. If you can only use an IP address due to internal constraints, please be aware that these can change without notice.
Hardware requirements
- 8GB of RAM
- 100GB of free disk space (after OS installation)
- 4 CPU cores (recommended)
- 1 network interface
Supported operating systems
The scan engine can be installed on 64-bit Windows NT versions 6.2-10.0, which includes:
- Windows 10
- Windows 11
- Windows Server 2016
- Windows Server 2019
- Windows Server 2022
Note
You will not be able to install the on-premise engine on versions of Windows older than 6.2. The installation may work on newer versions of Windows, but you will receive a warning that it will not be officially supported by Rapid7.
Software requirements
- .NET 4.8
- Internet Explorer 11 or higher
- To use selenium macro files, you must install Chrome on the same server as the on-premise engine.
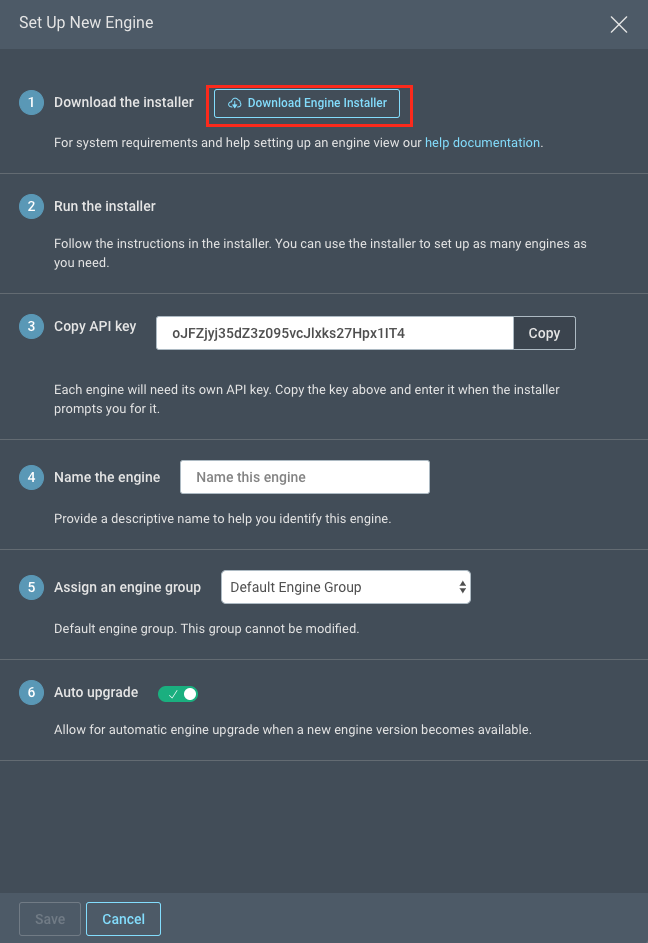
Step 1: Download the Installer
- Log in to http://insight.rapid7.com/ and go to Application Security (InsightAppSec).
- From Application Security (InsightAppSec), go to Settings > Manage Engines.
- Click Set Up New Engine.
- From the “Set Up New Engine” panel, download the installer.
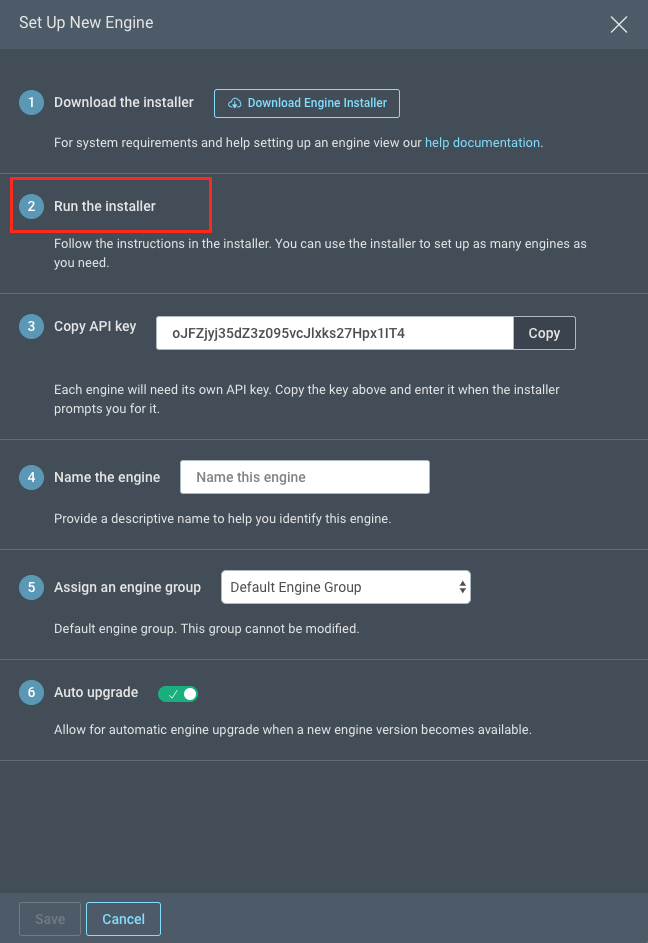
Step 2: Run the installer
The installer provides step-by-step instructions, so you just need to run the installer and follow the prompts.
During installation, the installer verifies that the system meets the minimum requirements and validates that the engine can connect with the Insight platform. If it cannot reach the Command Platform (Insight Platform), you can configure a proxy for the installer to use.
After the installer performs the system checks, it’ll prompt you for an API key (from Step 3), which will be used to validate your organization and verify the presence of a pairable scan engine. You’ll need to provide the API key you copied earlier.
When the installation completes, you’ll need to go back to the “Manage Scan Engines” page in Application Security (InsightAppSec).
Start scanning
To start scanning, you will need to name (step 4) and save the scan engine. The API key will allow you to complete the installation process, but not start scanning.
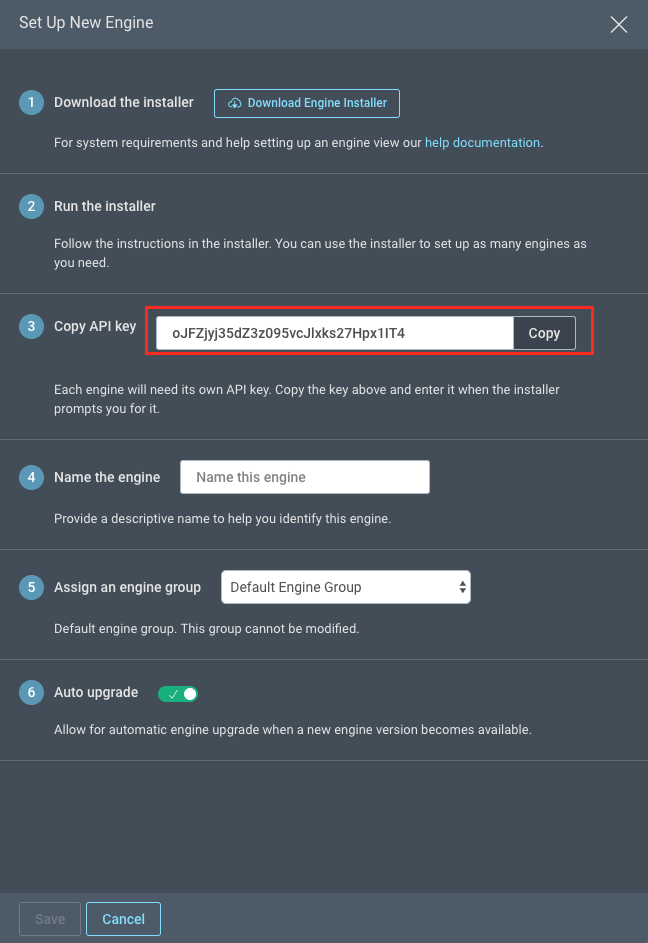
Step 3: Copy the API Key
The API Key is used to validate that your organization has access to Application Security (InsightAppSec) and an available scan engine is ready to be paired.
Copy the API key shown in Step 3 from the “Setup New Engine” panel. You’ll need to have the API key available when you run the installer.
Regenerate an API Key
There is no need to get a new engine API key unless the security of the old engine API key has been compromised. If you run the installer again, you should create a new engine for the same API key. See Regenerate Engine API Key.
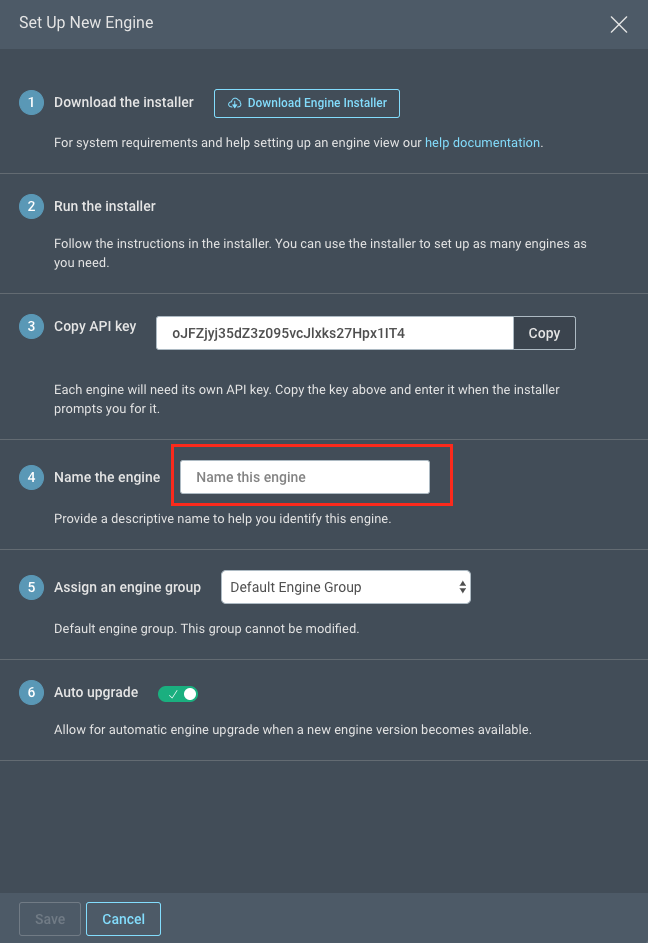
Step 4: Name the Engine
Next, enter a name for the scan engine.
Note
You can reuse names for scan engines. The API key will act as the unique key for the scan engine. However, to help you easily identify a scan engine, you should give it a descriptive, unique name.
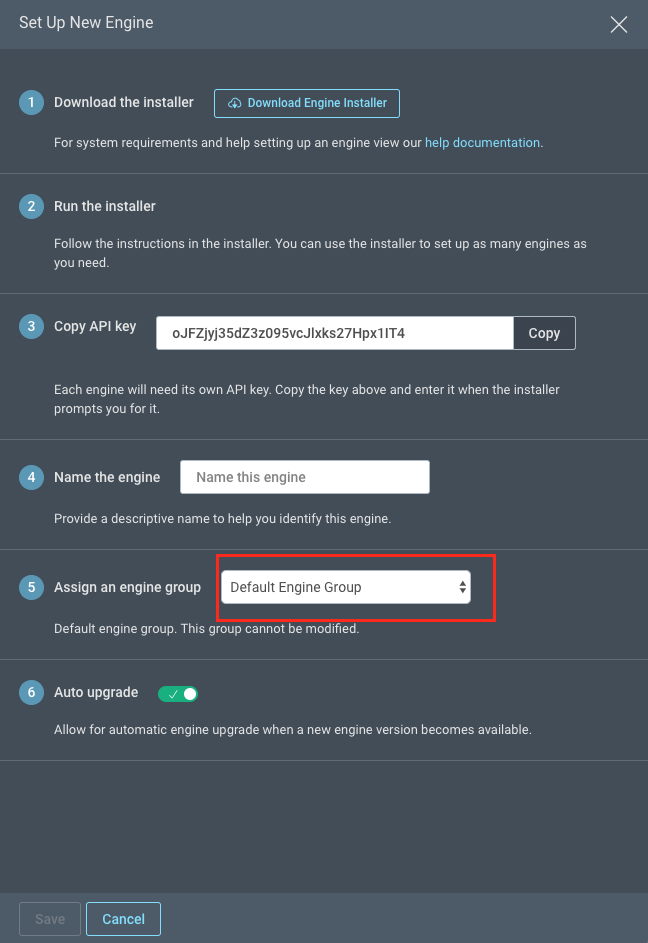
Step 5: Assign an Engine group
The engine group already has a “Default” engine which you can use for now. You can also create a scan engine group.
Step 6: Auto upgrade
To upgrade your engine automatically, toggle the Auto upgrade option to green.
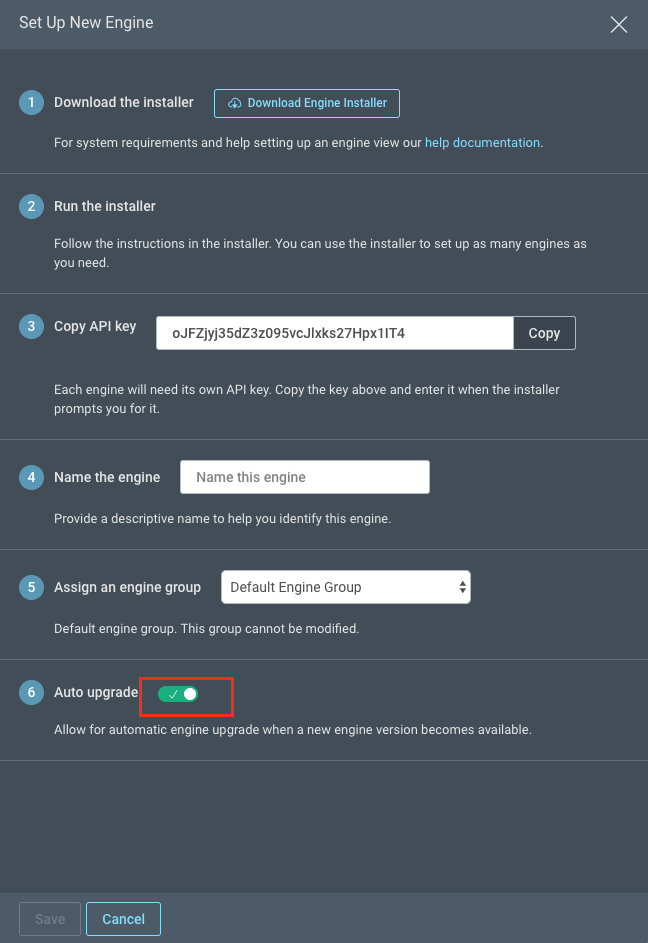
Engine Auto Upgrade
The auto-upgrade feature enables engines to upgrade automatically when a new version is released. We recommend that you leave the Auto Upgrade option turned “ON” when you set up a new engine.
If you need to disable automatic upgrades, you can set the Auto Upgrade option to “OFF.” In this case, you can upgrade out-of-date engines from the Settings > Manage On-Premise Engines screen. Learn more about engine upgrades from the Upgrade an On-Premises Scan Engine page.
Step 7: Refresh Manage Scan Engines Page
After installation, the status of the new on-premise engine changes from “Offline” to “Online,” which indicates that it has successfully paired and is ready for tasks. You’ll need to refresh the page to see the status change.
Step 8: Use the new Scan Engine
The scan engine is now set up. You’re ready to start using the scan engine.
To get started, you can select the scan engine group for new scan configs or you can update existing scan configs to use the new scan engine group.
To update your existing scan configs, go to Apps > Scan Config > Engine Groups. You can choose the engine group for this new engine from the list of on-premise scan engine groups.
Once you have selected an on-premise scan engine group for a scan config, the agent will regularly contact Application Security (InsightAppSec) to see if there are tasks, such as scans or engine updates, that need to be performed.
Step 9: Scan your apps
You’re all done! You’re now ready to scan your apps.