Create Custom Plugins
You can extend Automation (InsightConnect)’s capabilities by building your own plugins or contributing to existing plugins. This lets you:
- Create new plugins with new triggers and actions
- Add triggers and actions to existing plugins
- Connect your Automation (InsightConnect) workflows to your internal services
- Connect to other third-party services
- Change the behavior of existing plugins
Automation (InsightConnect) plugins are built on REST API design and run within Docker containers (you can learn more about REST APIs here ).
We use RESTful design in order to ingest and send data in different types like plain text, JSON, CSV, and RSS. RESTful design best supports how Automation (InsightConnect) triggers and steps pass variables through a workflow.
Before You Begin
Before you start building your own plugins, we recommend you review the Get Started Guide in the plugins repository.
Please note that plugin development is currently supported for Debian-based and Enterprise Linux distributions as well as macOS. For Microsoft Windows an installer can be built using the following command:
$ python setup.py build --plat-name=win-amd64
You also need to install the following tools in order to build or contribute to Automation (InsightConnect) plugins. Use the installation instructions provided below or use the package manager (if available) for your operating system or distribution.
| Tool | Installation Instructions |
|---|---|
| Python 3 | Follow the instructions at https://www.python.org/download/releases/3.0/ . |
| Docker | Follow the instructions at https://docs.docker.com/get-started/ . |
| GNU Make | Follow the instructions at https://www.gnu.org/software/make/manual/make.html#Overview . |
| Rapid7 Automation (InsightConnect) plugin tooling dependencies | Run update-tools.sh from the tools/ directory in the Automation (InsightConnect) plugins repository. Or use the following below:
|
Creating the Plugin
For developing plugins, make sure to review the Get Started Guide from the open-source plugin repository on GitHub . If you are planning to modify an existing plugin, you can pull the code for the plugin from that repository.
For existing plugin-specific resources, locate the help.md file in a plugin’s directory. This file contains information on that plugin’s version history, parameters, input and output schemas, connection configuration information, and troubleshooting suggestions.
Plugin Development High Level Steps:
- Create Plugin Spec File.
- Custom plugins cannot have
vendorvalue ofrapid7orkomand. If you are creating a new plugin, make sure to change this value. - Each time you upload a plugin to Automation (InsightConnect), you must increment the version of that plugin.
- Versioning in Automation (InsightConnect) follows Semantic Versioning down to pre-release versioning. Example:
1.0.1for a bug fix on1.0.0
- Custom plugins cannot have
- Create the Plugin File Structure Locally.
- Be sure to run
make
- Be sure to run
- Write the custom code for the plugin’s connection, action(s), and trigger(s).
- Write your functionality within the
action.py,trigger.py&connection.pyfiles.
- Write your functionality within the
- Test the Plugin Locally.
- To test your plugin, you need to first build the docker image
- run
makeormake image
- run
- Generate sample files to run against the docker image
insight-plugin samples
- Fill in the details for the files created within the new
tests/directory. - Run the samples using the tooling
insight-plugin run tests/{action}.json
- If you make additional changes to the code, you will need to rebuild using
make imageorinsight-plugin run tests/{action}.json --rebuild
- To test your plugin, you need to first build the docker image
- Run
insight-plugin exportfrom the same directory containing the Makefile to export the plugin Docker image. - Upload the generated
plgto Automation (InsightConnect) from within the product UI.- Once uploaded the plugin can be used in a similar fashion to a marketplace plugin.
- This is located under Settings -> Plugins, select Import to go to the Import page.
- Next, from Local Drive.
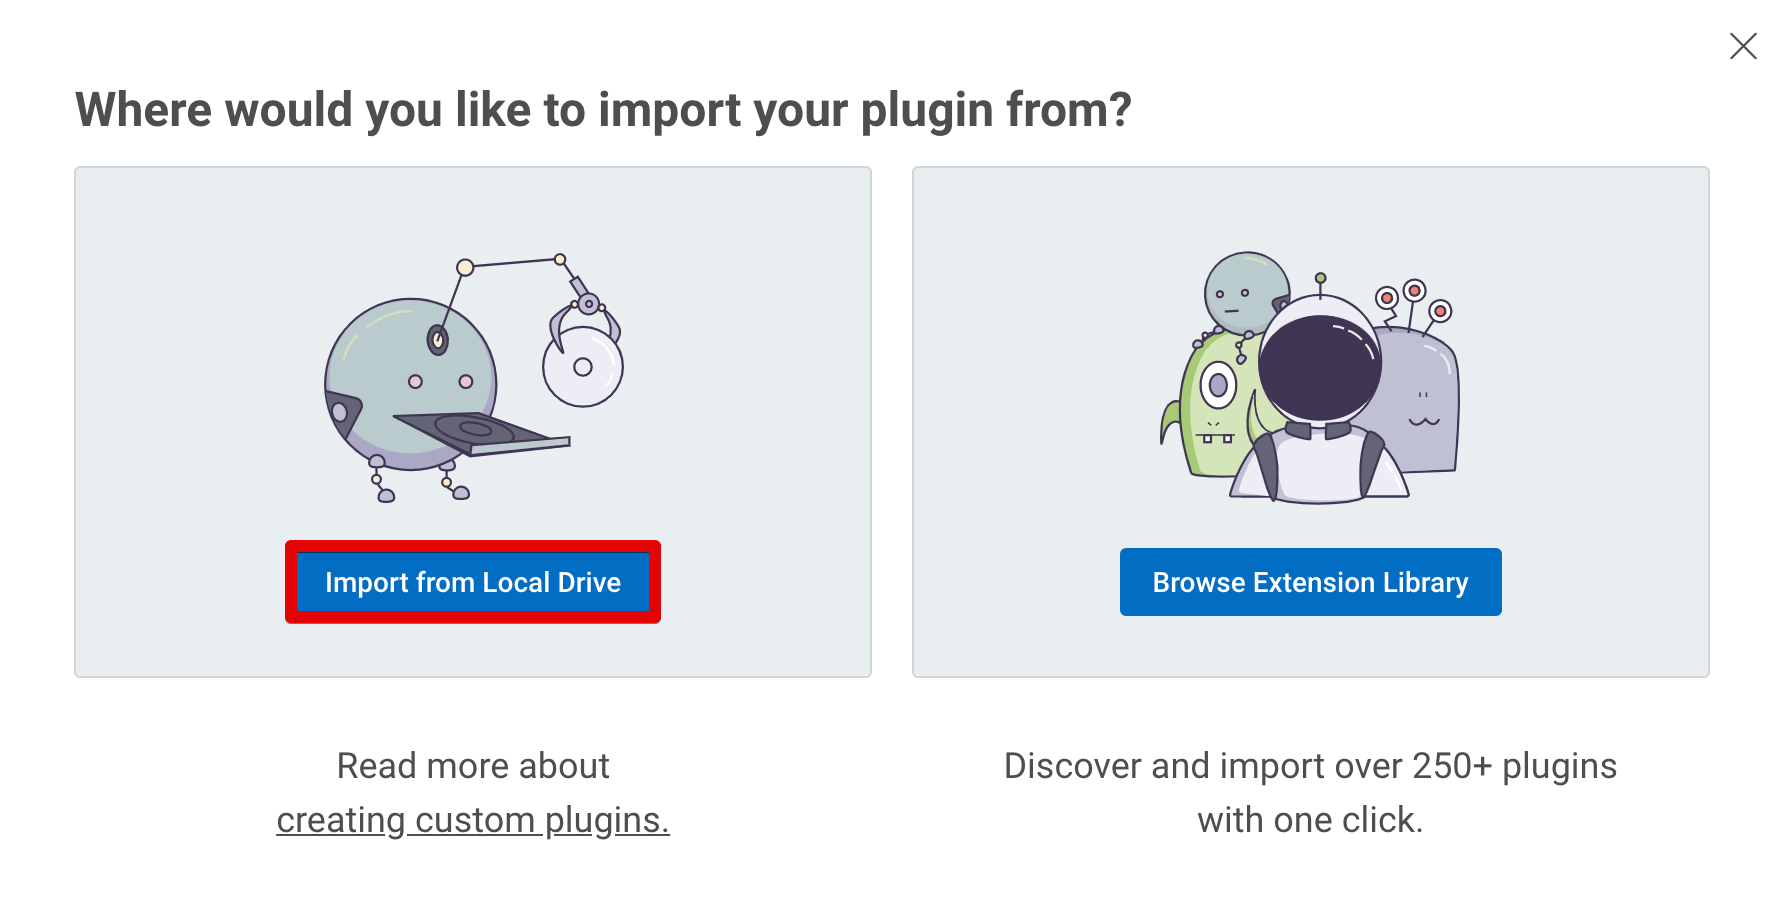
- Drag and Drop or select the
plgfile, from your window manager, which you exported viainsight-pluginexport in step 5.
Contribute to the Custom Plugins Repository
After installing the required tools and developing your plugin you can choose to contribute your changes back to the community !
You can also follow these links to additional resources:
- Automation (InsightConnect) SDK in developer documentation
- Custom Plugin Style Guide in developer documentation
- Contributing Guide in the GitHub repo
Developer Support
For general questions and requests, reach out to the Rapid7 Integrations team at IntegrationAlliance@rapid7.com.