Palo Alto Firewall
Next-generation firewalls safely enable applications and prevent modern threats by inspecting all traffic—applications, threats, and content—and tying it to the user, regardless of location or device type.
Automate the management of your firewall by isolating hosts from your network, managing access rules, and modifying address objects and groups using the Palo Alto Firewall plugin for Automation (InsightConnect) . Additionally, use this plugin to view rulebases, install policies, and set threat protection on your Palo Alto Firewall .
To use the Palo Alto Firewall plugin, you can use an existing Palo Alto Firewall account or create a dedicated account to configure the connection in Automation (InsightConnect). For more information on the functionality of the Palo Alto Firewall plugin, see the Extension Library listing .
Action connection type
| Action Name | Connection type |
|---|---|
| Add Address Object to Group | Direct firewall |
| Add External Dynamic List | Direct firewall |
| Add to Policy | Direct firewall |
| Check if Address in Group | Direct firewall |
| Commit | Direct firewall |
| Create Address Object | Direct firewall |
| Delete | Panorama |
| Edit | Panorama |
| Get | Panorama |
| Get Addresses from Group | Direct firewall |
| Get Policy | Direct firewall |
| Op | Direct firewall |
| Remove Address Object from Group | Direct firewall |
| Remove from Policy | Direct firewall |
| Retrieve Logs | Direct firewall |
| Set | Panorama |
| Set Security Policy Rule | Direct firewall |
| Show | Panorama |
Firewall Blocking Use Case
A common use case for the Palo Alto Firewall plugin is to quickly respond to threats by blocking them at the firewall. This is accomplished through the management of address objects in address groups. To begin, you must have an existing Palo Alto Firewall deny-all firewall policy in place with a predefined address group assigned to the policy. As threats are detected, you can leverage the Palo Alto Firewall plugin to block malicious hosts from your network by adding malicious addresses to the predefined address group, and unblock hosts by removing addresses from the predefined address group. Using the Palo Alto Firewall plugin and firewall functionality in the way described allows for a safe and flexible policy management of large groups of dynamic addresses.
You can build your own workflow to accomplish this use-case and many more, or you can choose from a number of out-of-the-box prebuilt workflows for firewall blocking to get up and running quickly. These are available on the Rapid7 Extension Library .
Create a new role for API user account
If you wish to create a new role for an API user account to use with Automation (InsightConnect), follow the steps below.
-
Open your Palo Alto Firewall. Log in with a user account that has permissions to manage other users.
-
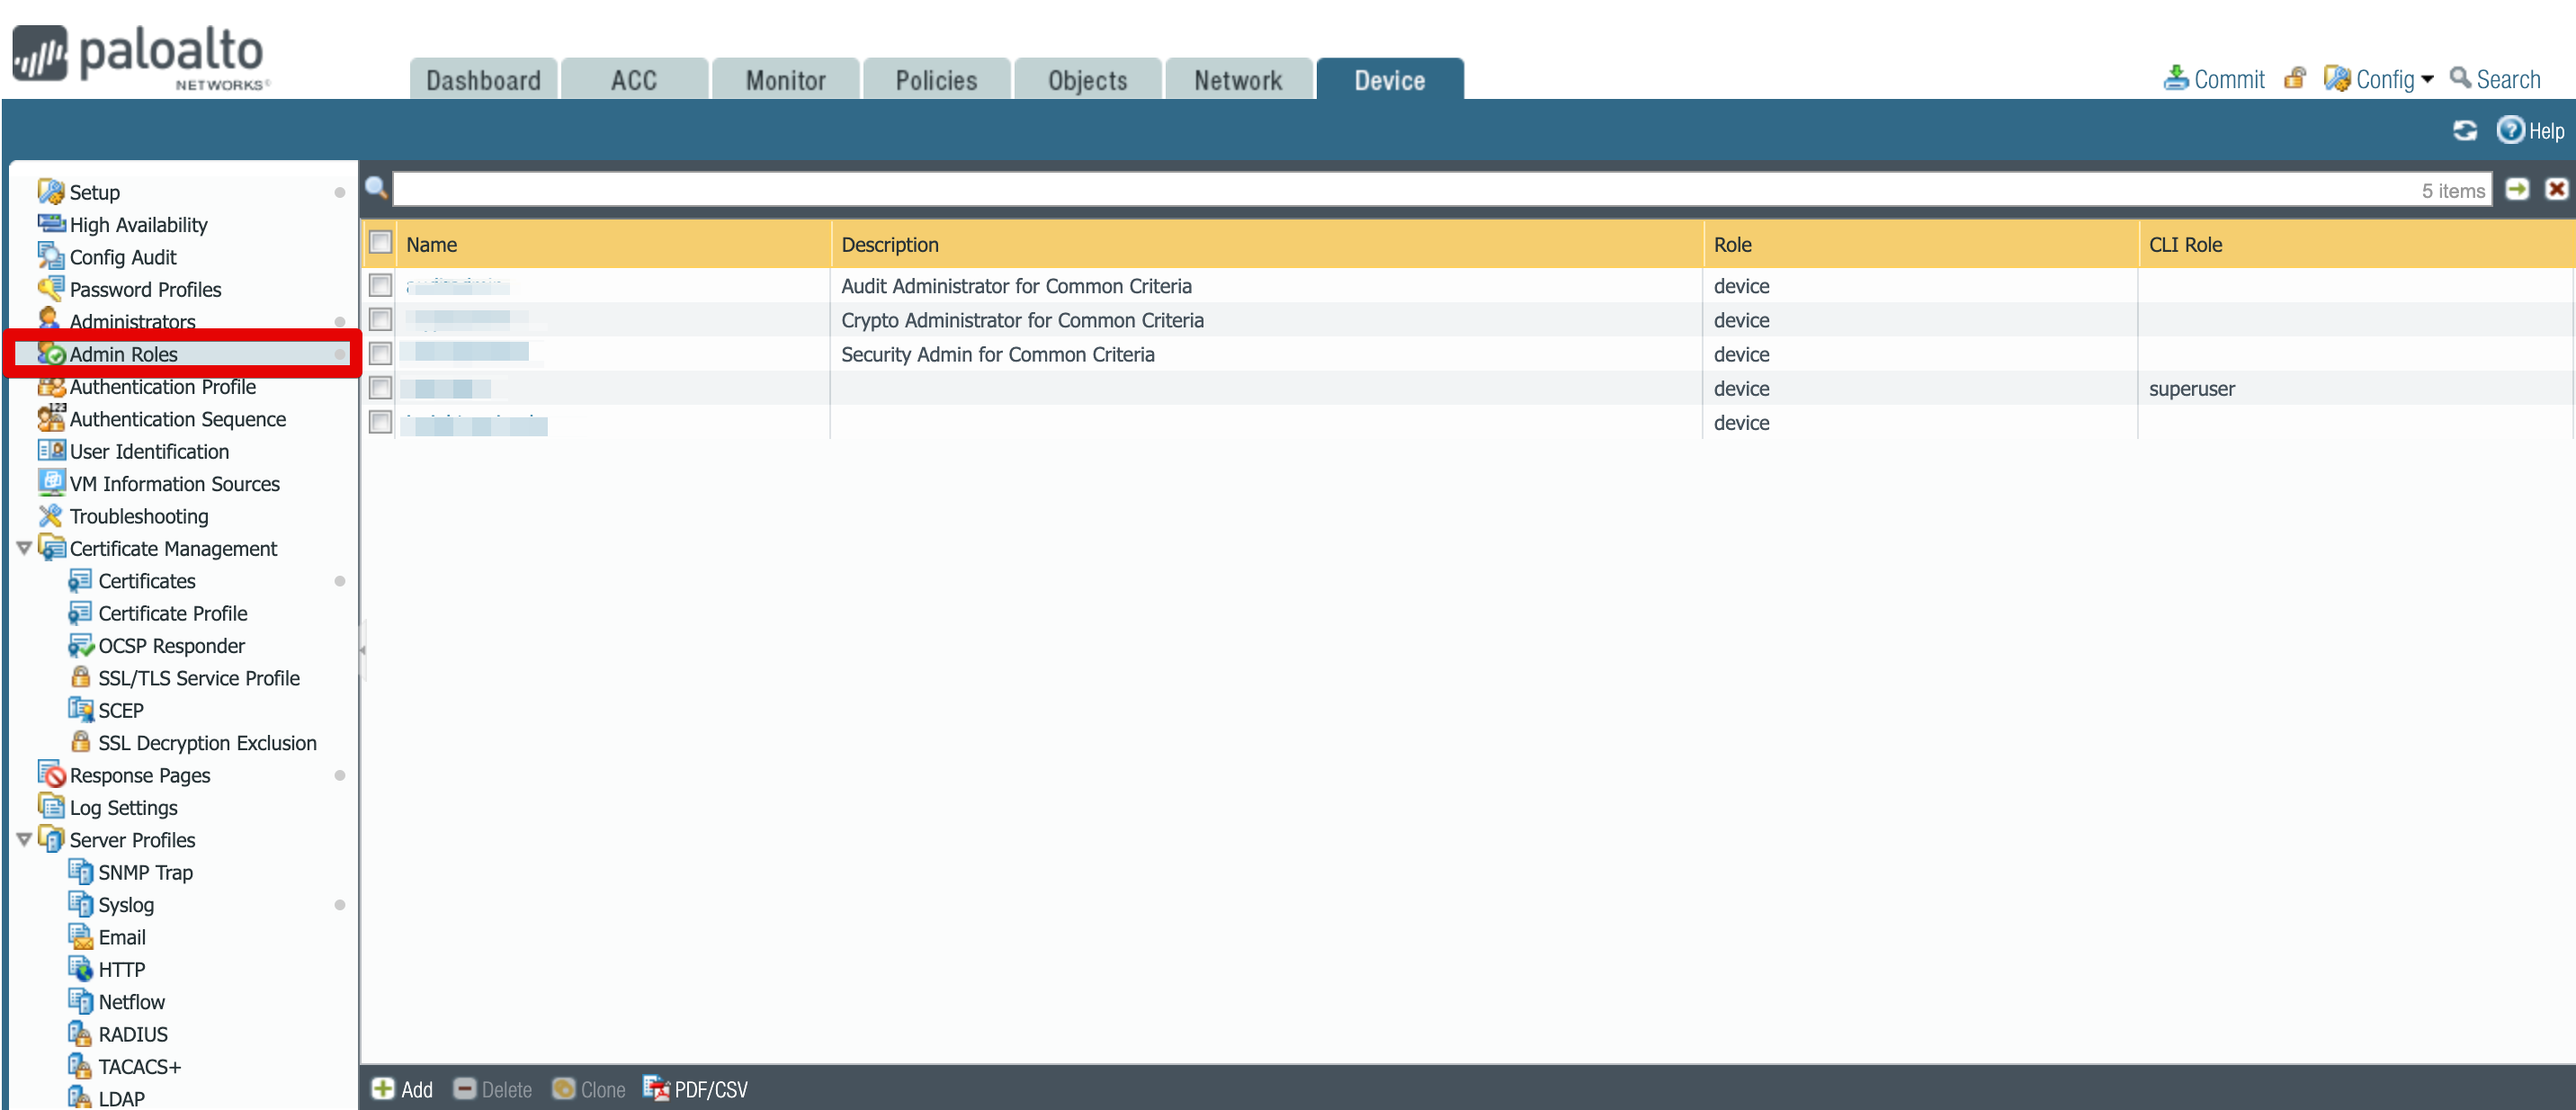
Select Devices tab and from the left hand menu, select Admin Roles.
-
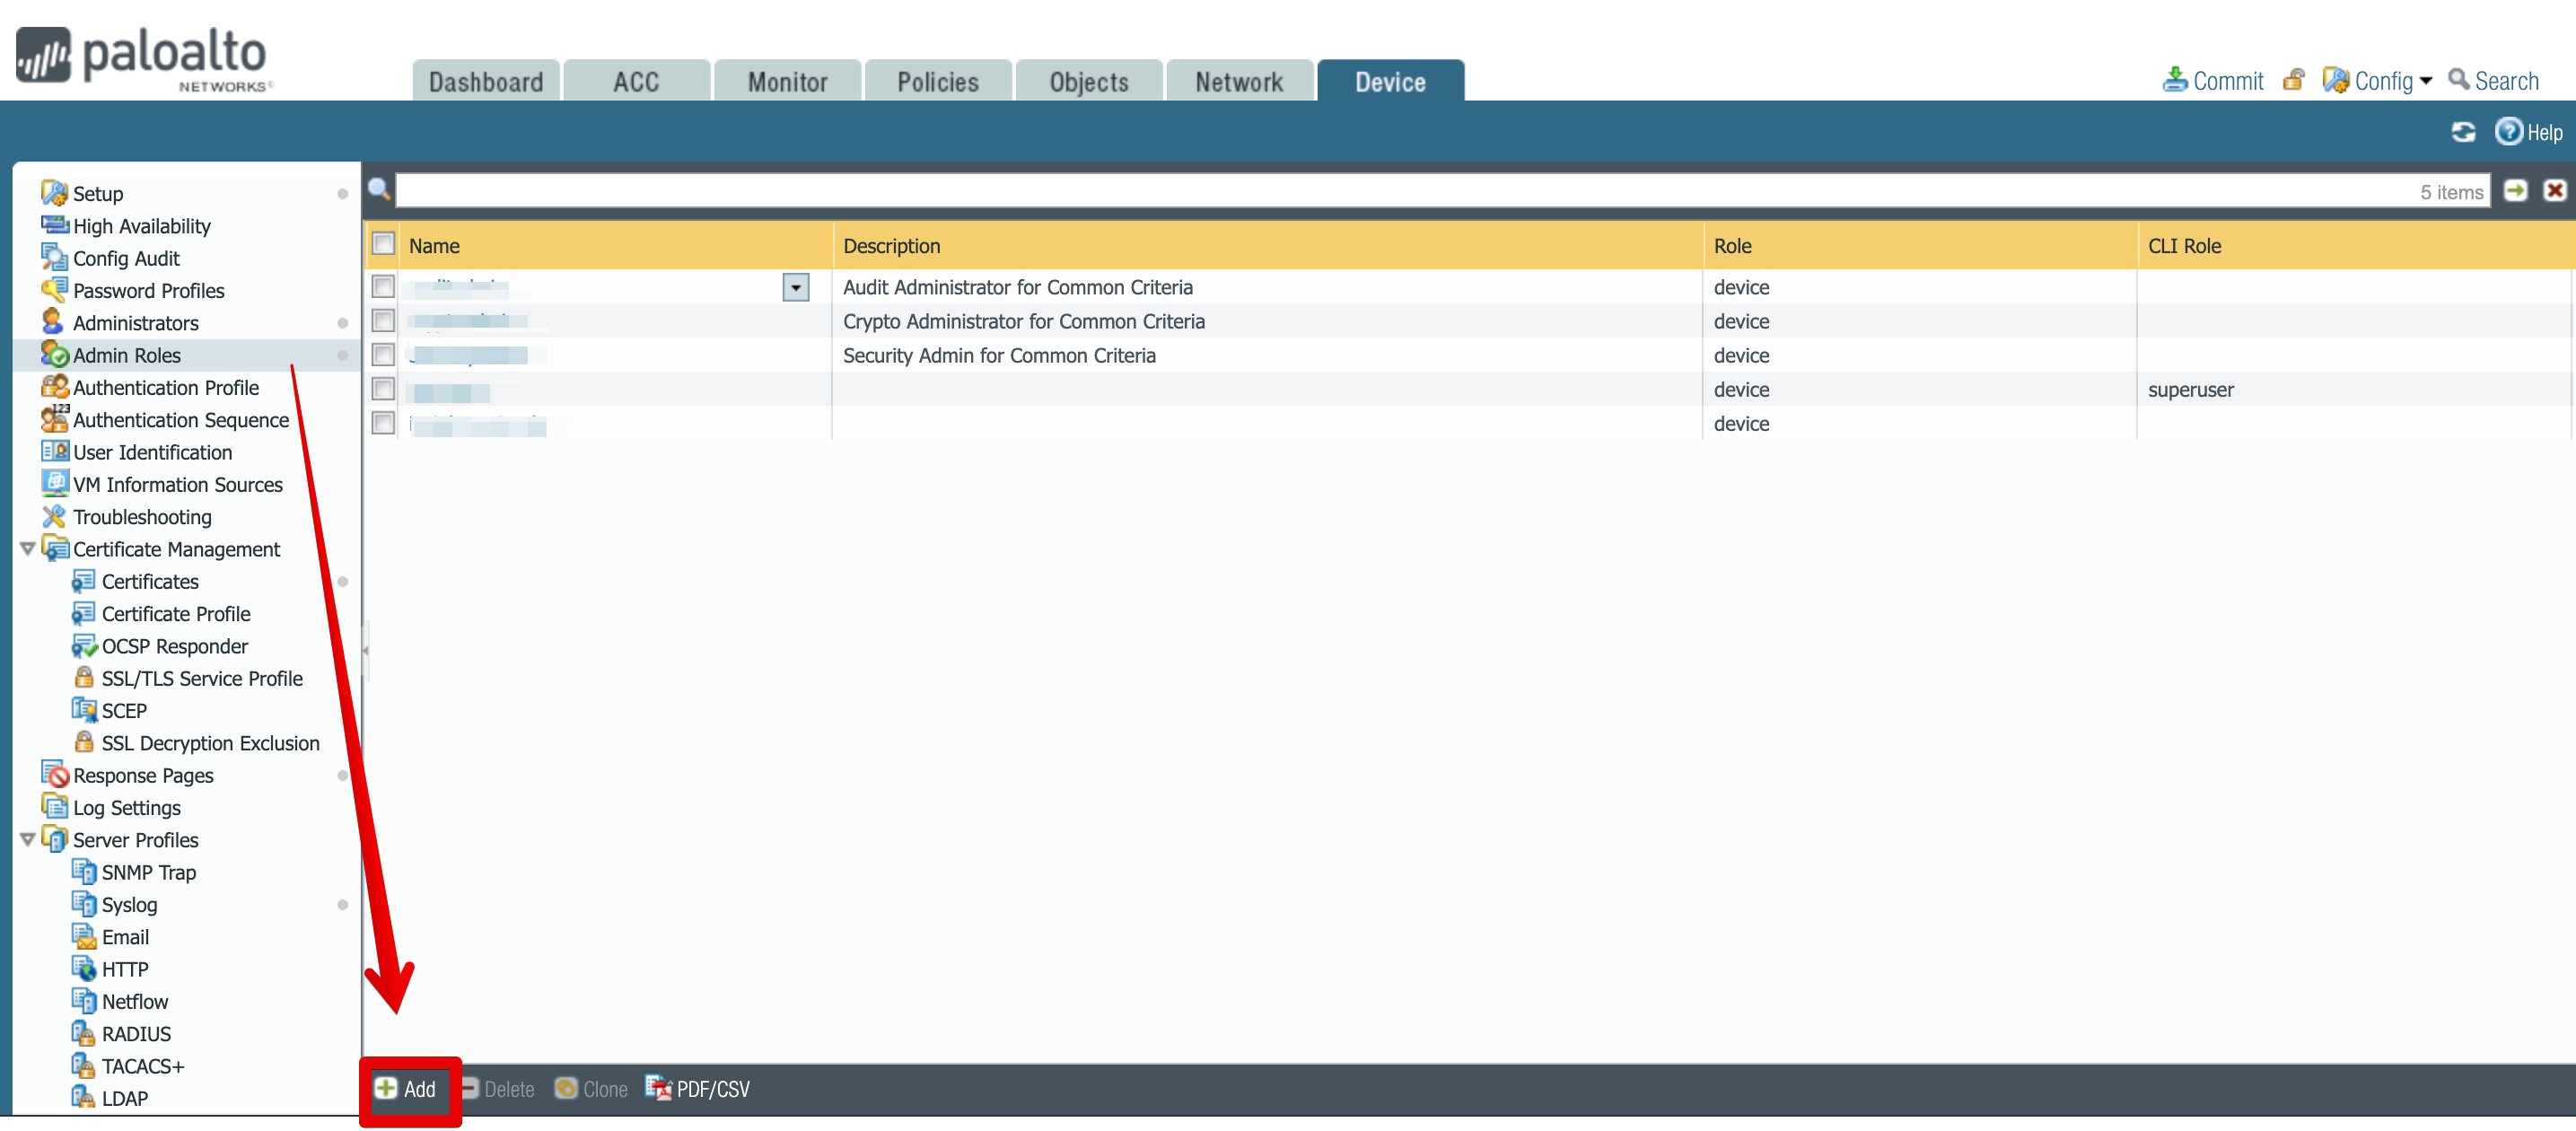
Select Add, located towards the bottom of the screen.
-
Give the role an appropriate name and description so it’s easily identifiable, then from the XML/REST API tab select appropriate permissions, see below for what permissions are required for different Palo Alto Firewall Plugin actions:
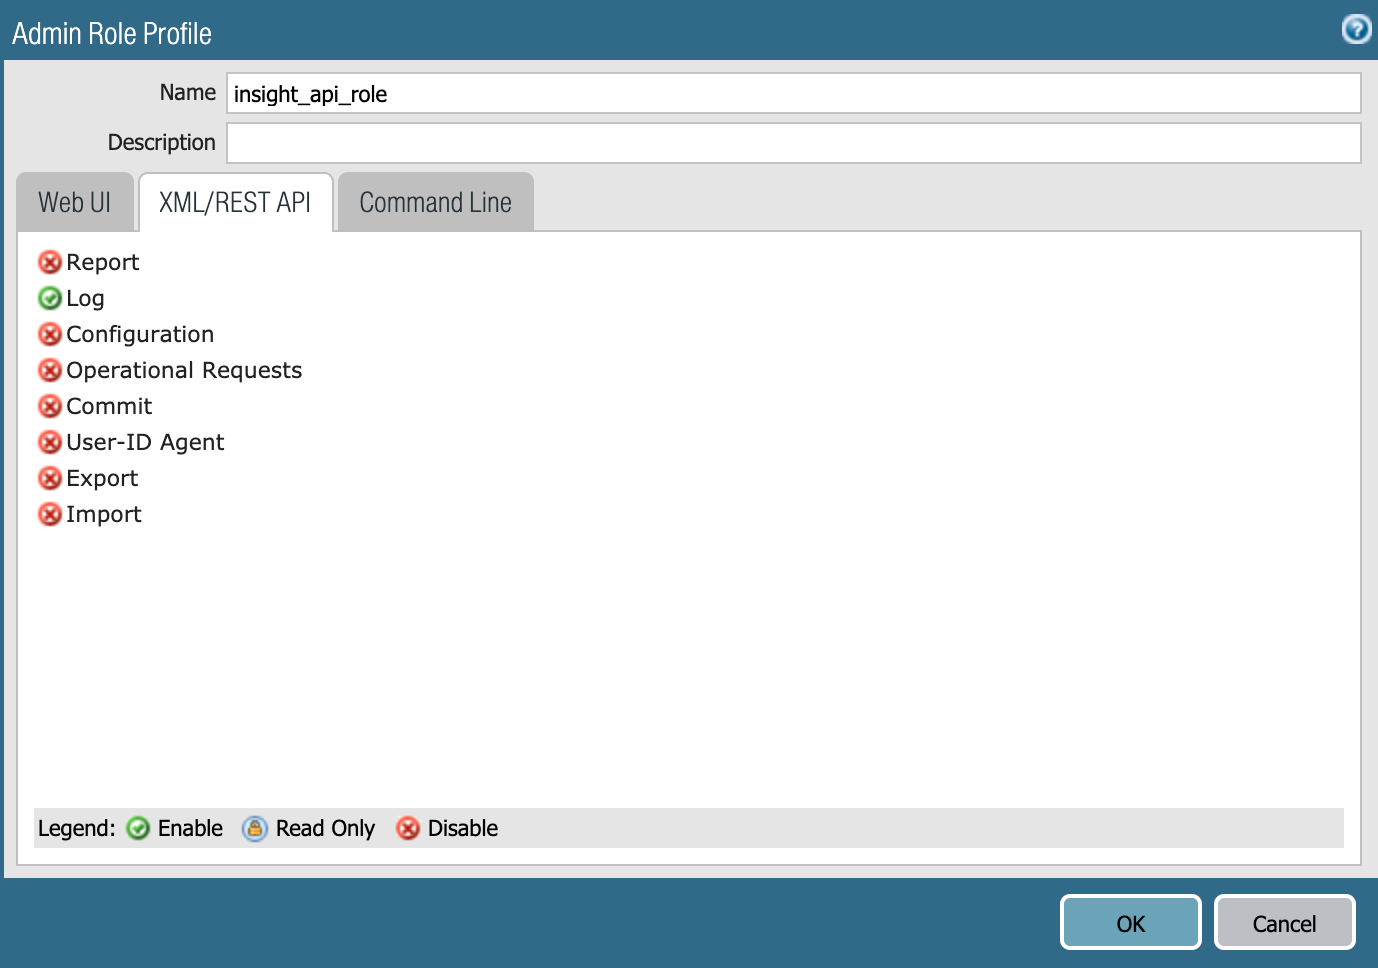
Action Name Permissions Required Add Address Object to Group Configuration Add External Dynamic List Configuration Add to Policy Configuration Check if Address in Group Configuration Commit Commit Create Address Object Configuration Delete Configuration Edit Configuration Get Configuration Get Addresses from Group Configuration Get Policy Configuration Op Operational Request Remove Address Object from Group Configuration Remove from Policy Configuration Retrieve Logs Log Set Configuration Set Security Policy Rule Configuration Show Configuration -
Now that the new role is created, you should see it in the role list. The next step is to create a user account that will use this role.
Create a new user for API
To create a new user for API to use with Automation (InsightConnect), follow the steps below.
-
While in Devices tab, from the left hand side menu, select Administrators.
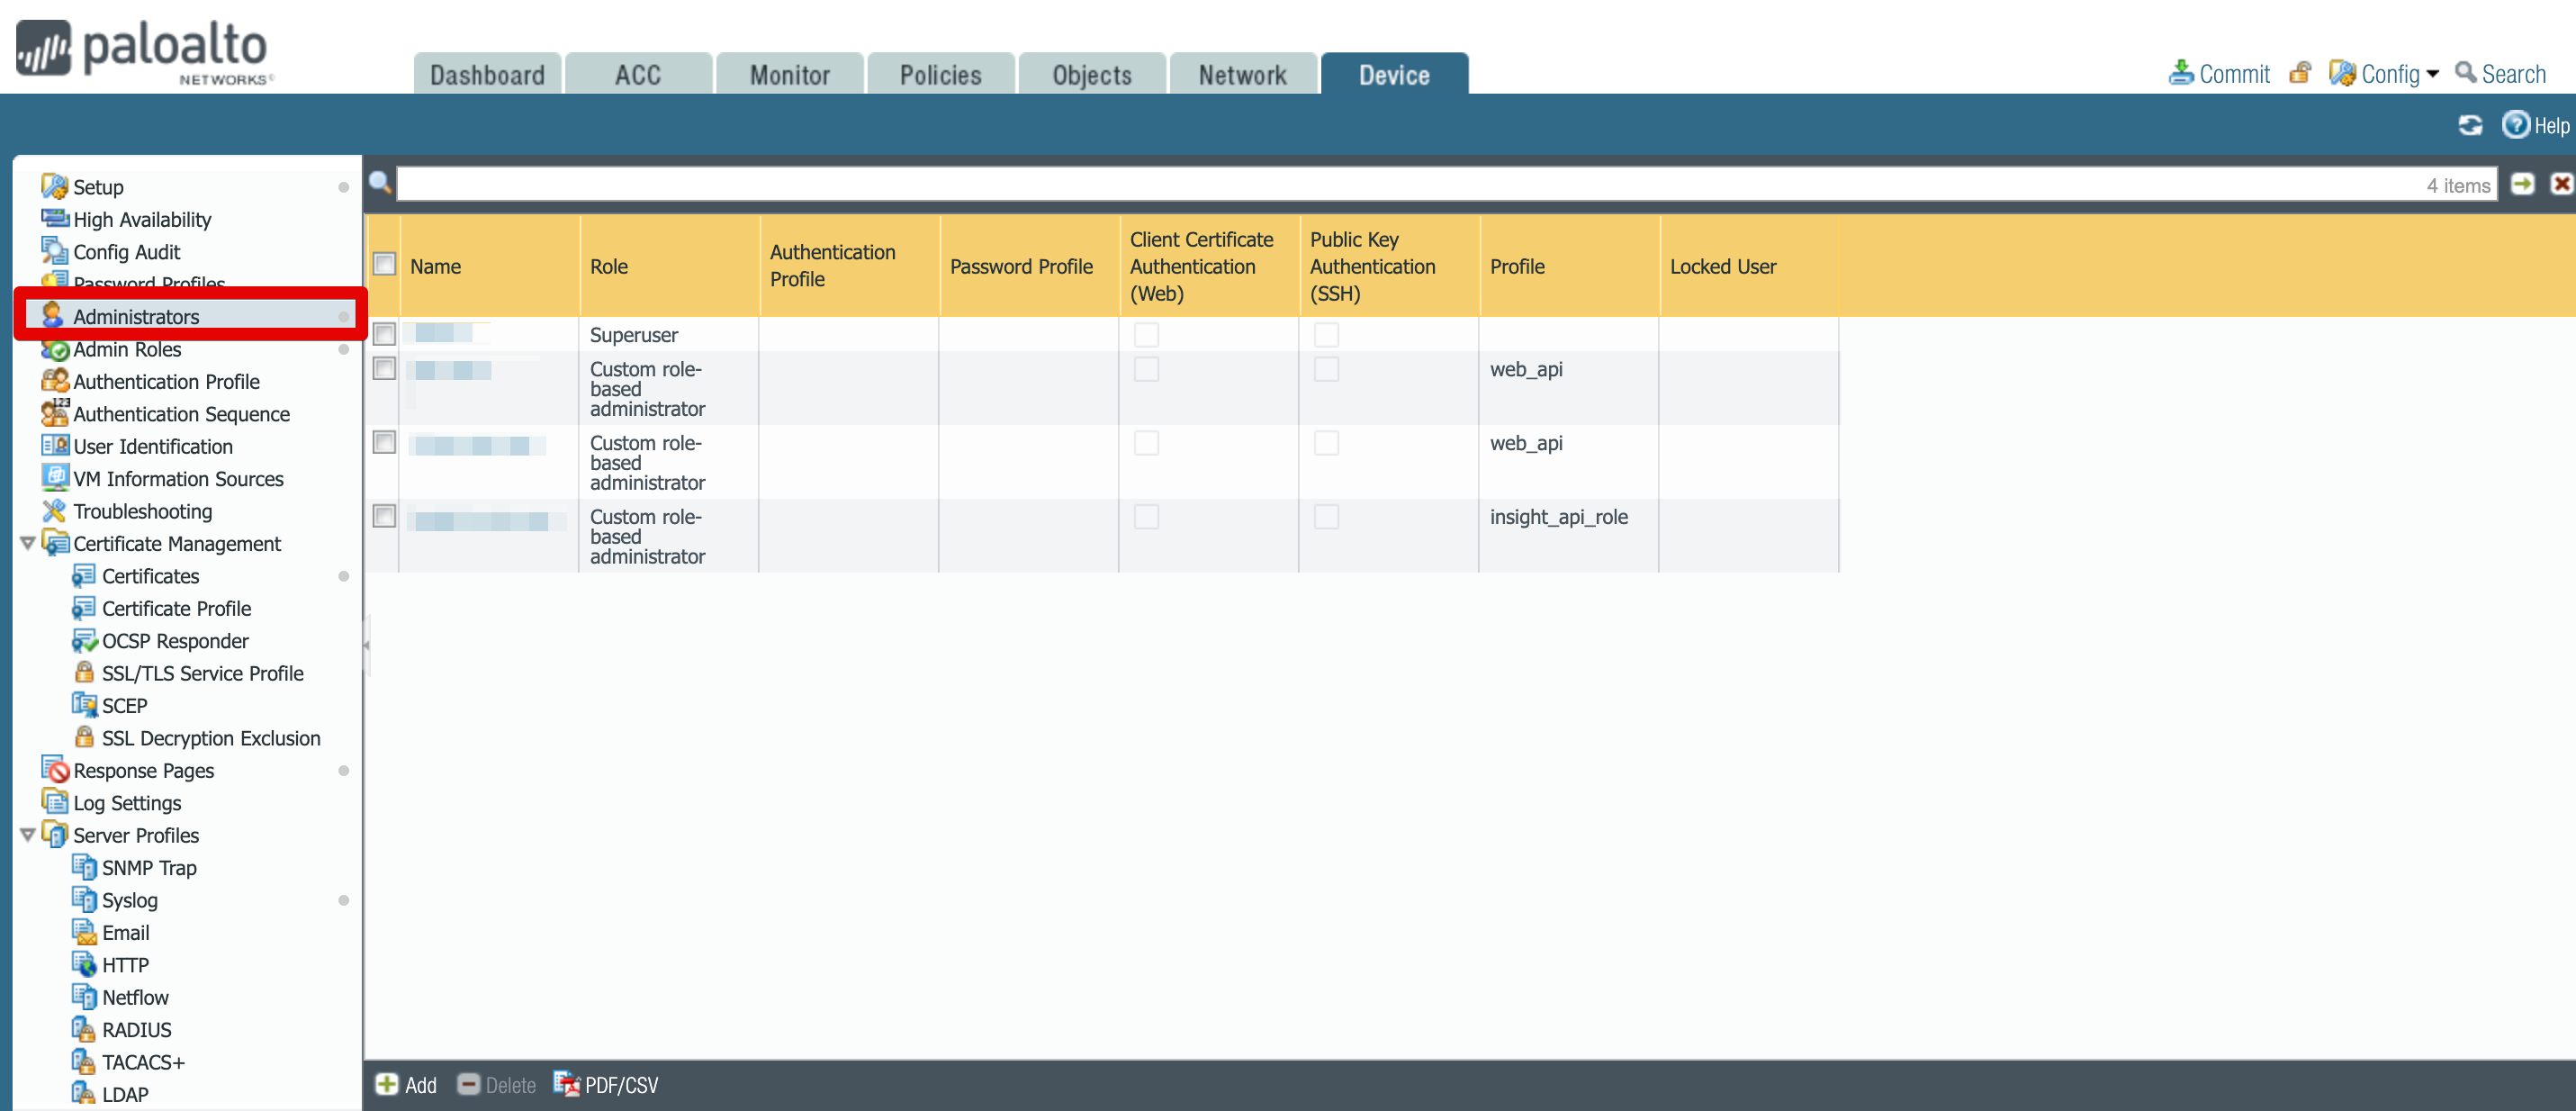
-
Select Add, located towards the bottom of the screen.

-
Set a name and password. In the administrator type radio button select role based and then from the dropdown select the previously created profile.
-
Click on OK to save your changes.
Commit the changes
Now that we have the new API role and user created, you have to commit the changes to your firewall device.
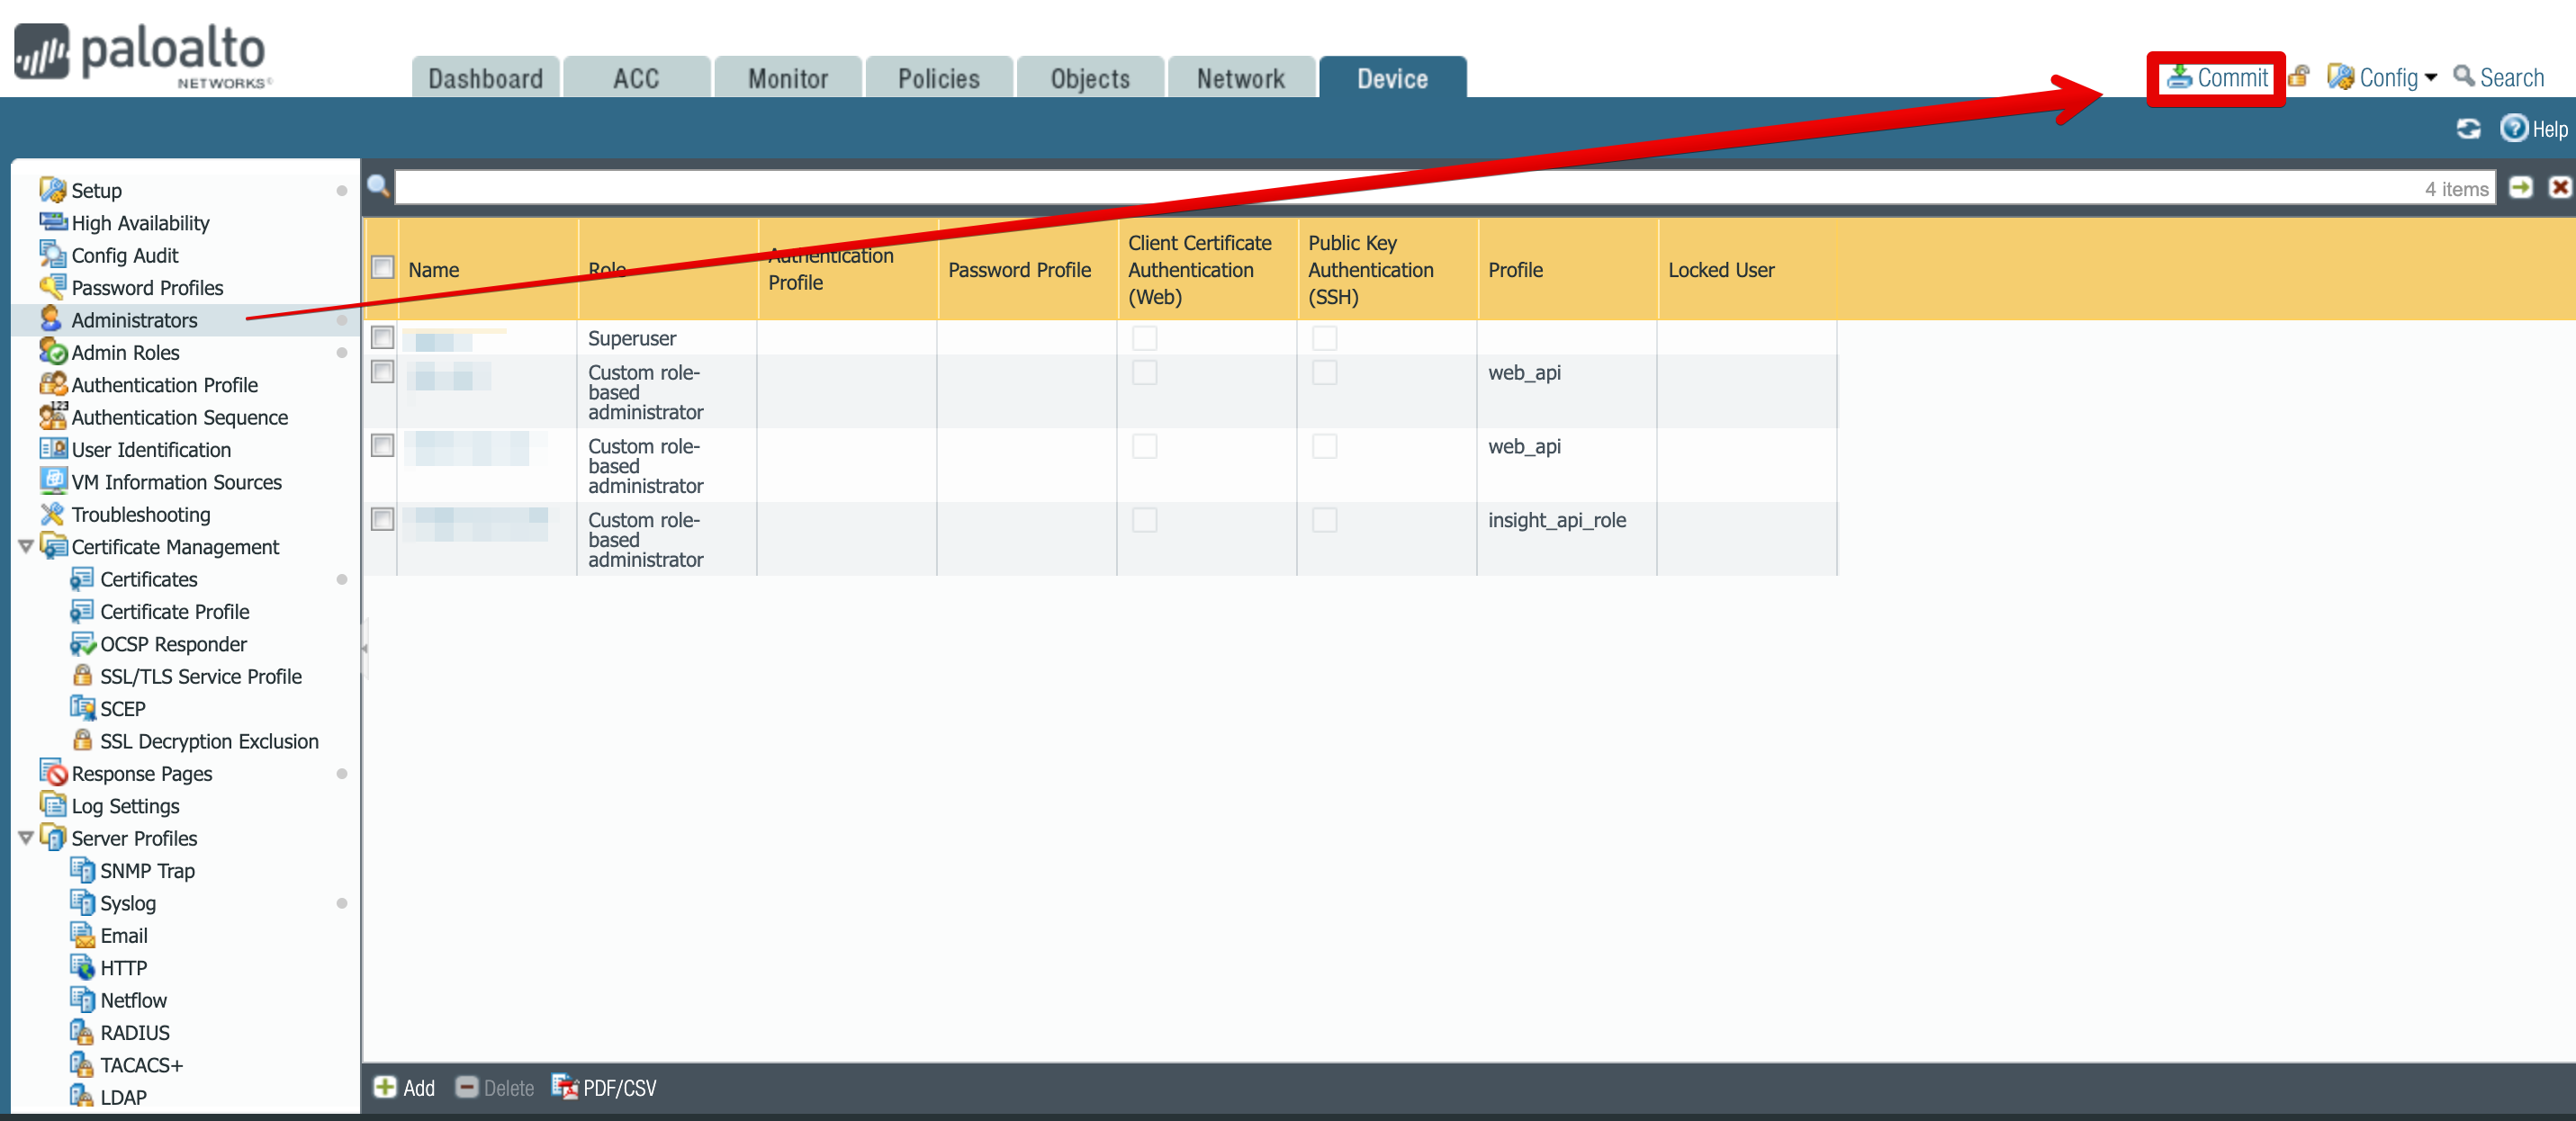
-
Use the Commit botton in the top right corner.
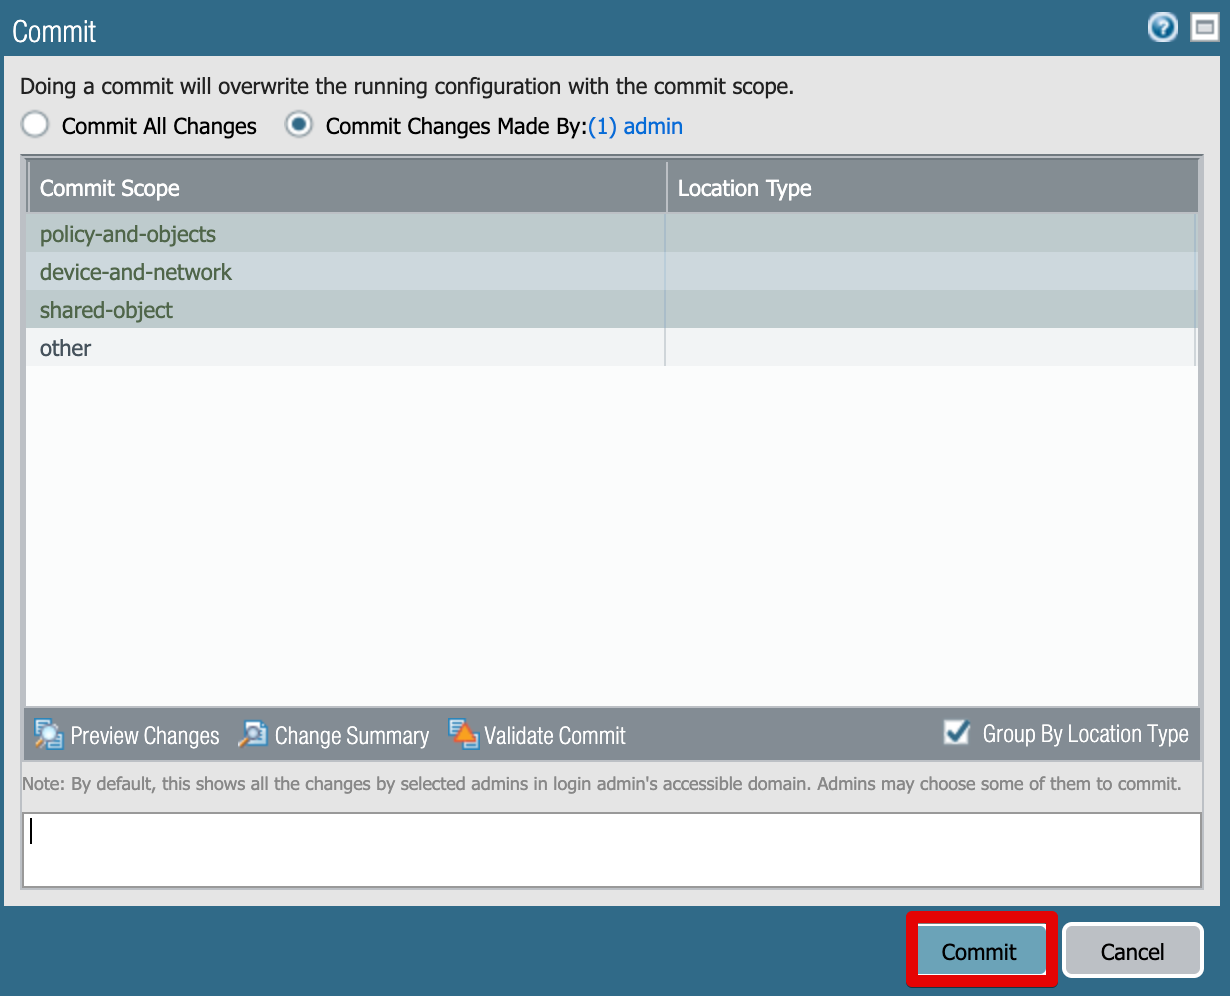
-
Optionally you can add change description in the Description text box, and then click Commit.
Configure the Palo Alto Firewall connection in Automation (InsightConnect)
Now that you’ve created your user in Palo Alto Firewall, you can configure the Palo Alto Firewall connection in Automation (InsightConnect) to use the plugin.
-
In Automation (InsightConnect), open the connection configuration for the Palo Alto Firewall.
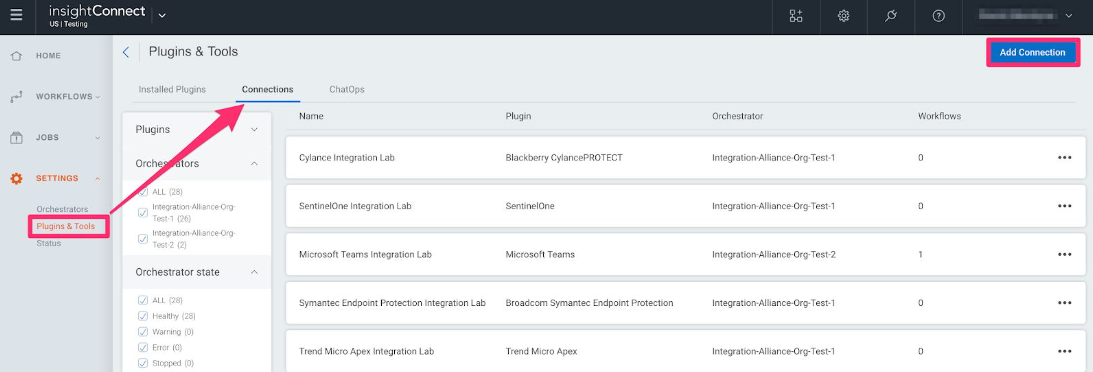
- You can do this when selecting the Palo Alto Firewall plugin during a workflow building session, or by creating the connection independently by choosing Plugins & Tools from the Settings tab on the left menu. On the Plugins & Tools page, select the Connections tab and click Add Connection in the upper-right corner.
-
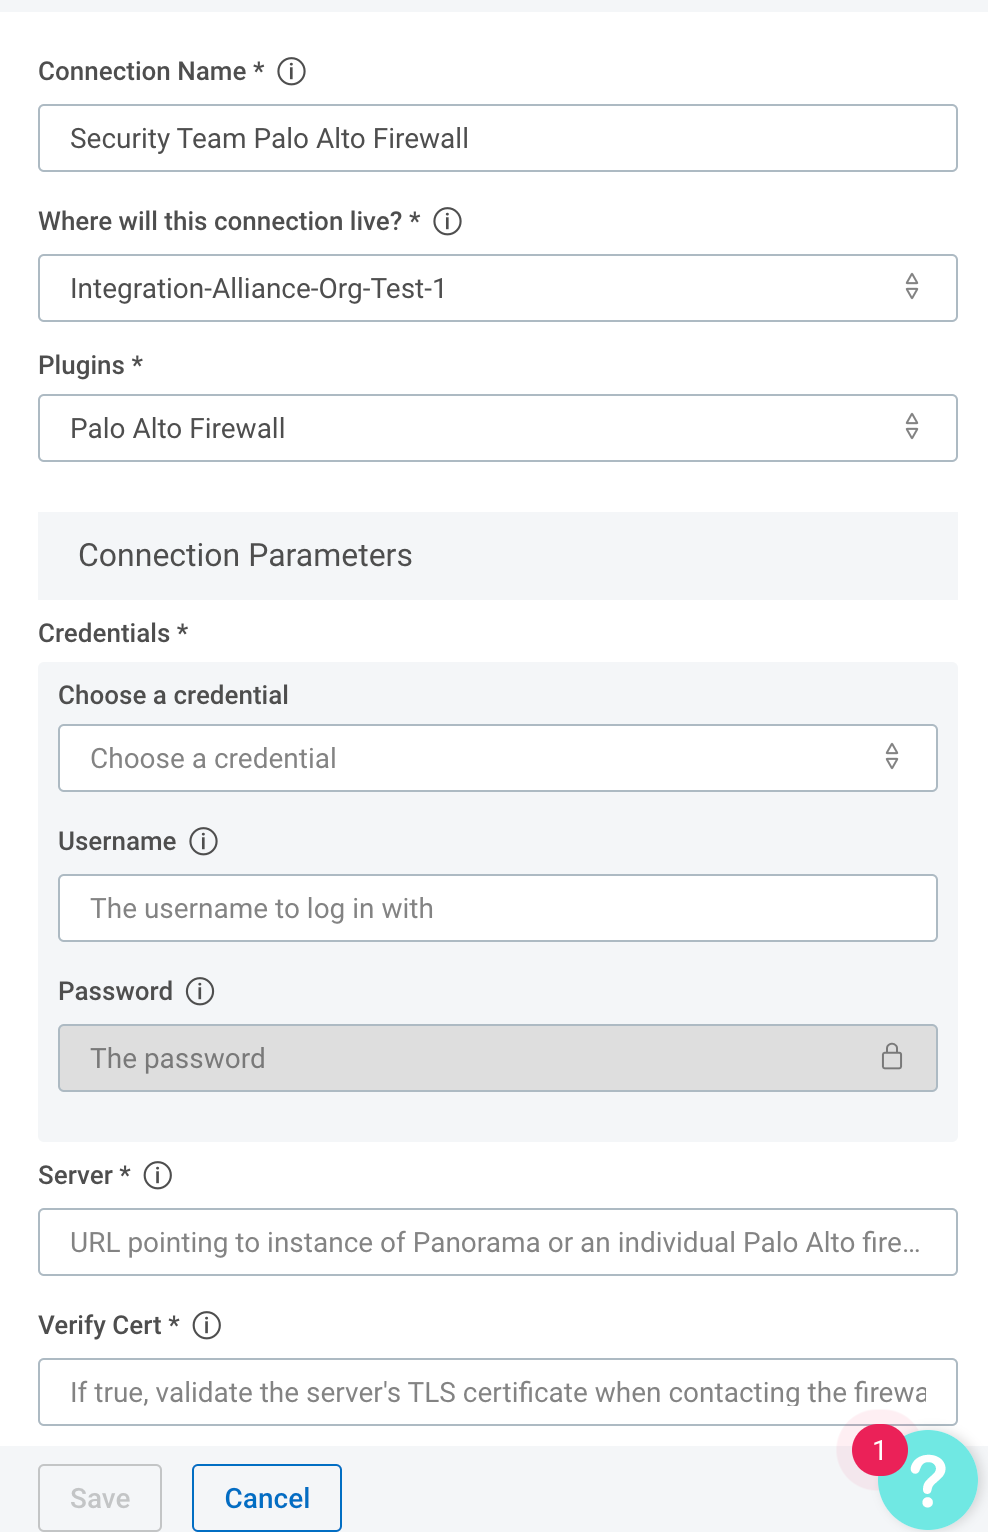
Configure the connection for the Palo Alto Firewall plugin.
- Give the connection a unique and identifiable name, select where the plugin should run, and choose the Palo Alto Firewall plugin from the list. If it’s not available, import the plugin from the Installed Plugins tab.
-
Configure your Palo Alto Firewall credentials.
- In the Credentials field, select credentials to an existing Palo Alto Firewall account or enter the username and password for a newly created Palo Alto Firewall user.
- In the Server field, enter the full URL (e.g.
https://palo-alto-pan01.example.com) to a Palo Alto firewall or Panorama system.
Test your connection
When you save the connection, the connection test will attempt to authenticate to the specified Palo Alto Firewall instance. A blue circle on the Connection tile indicates that the Connection test is in progress.

Successful connection test
If there is no circle, the connection succeeded and you’re ready to begin orchestrating your processes with CPalo Alto Firewall.

Failed connection test
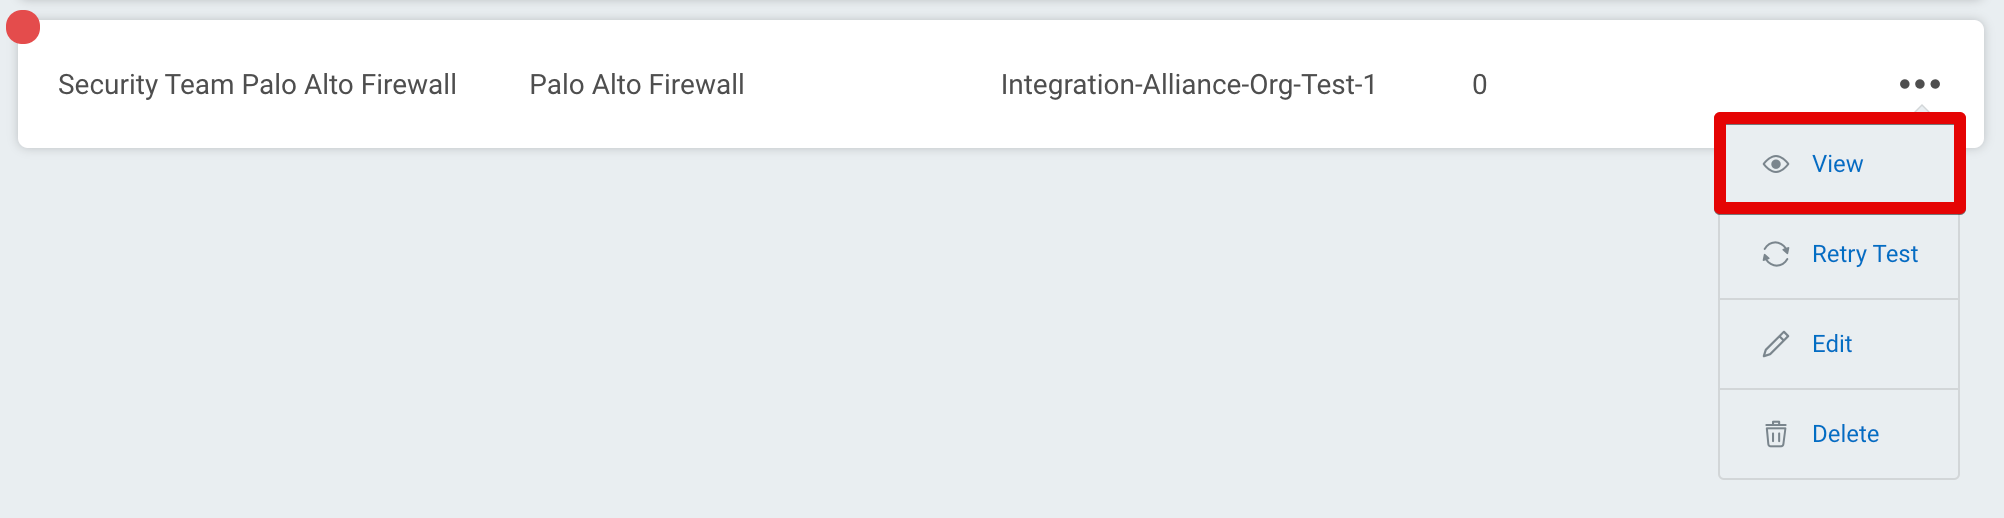
A red circle indicates that the connection test failed. If this occurs, check your connection details (including the Palo Alto Firewall URL, username, and password) before trying again.

The log may contain useful troubleshooting information. First, click View to see a list of your recent connection tests.
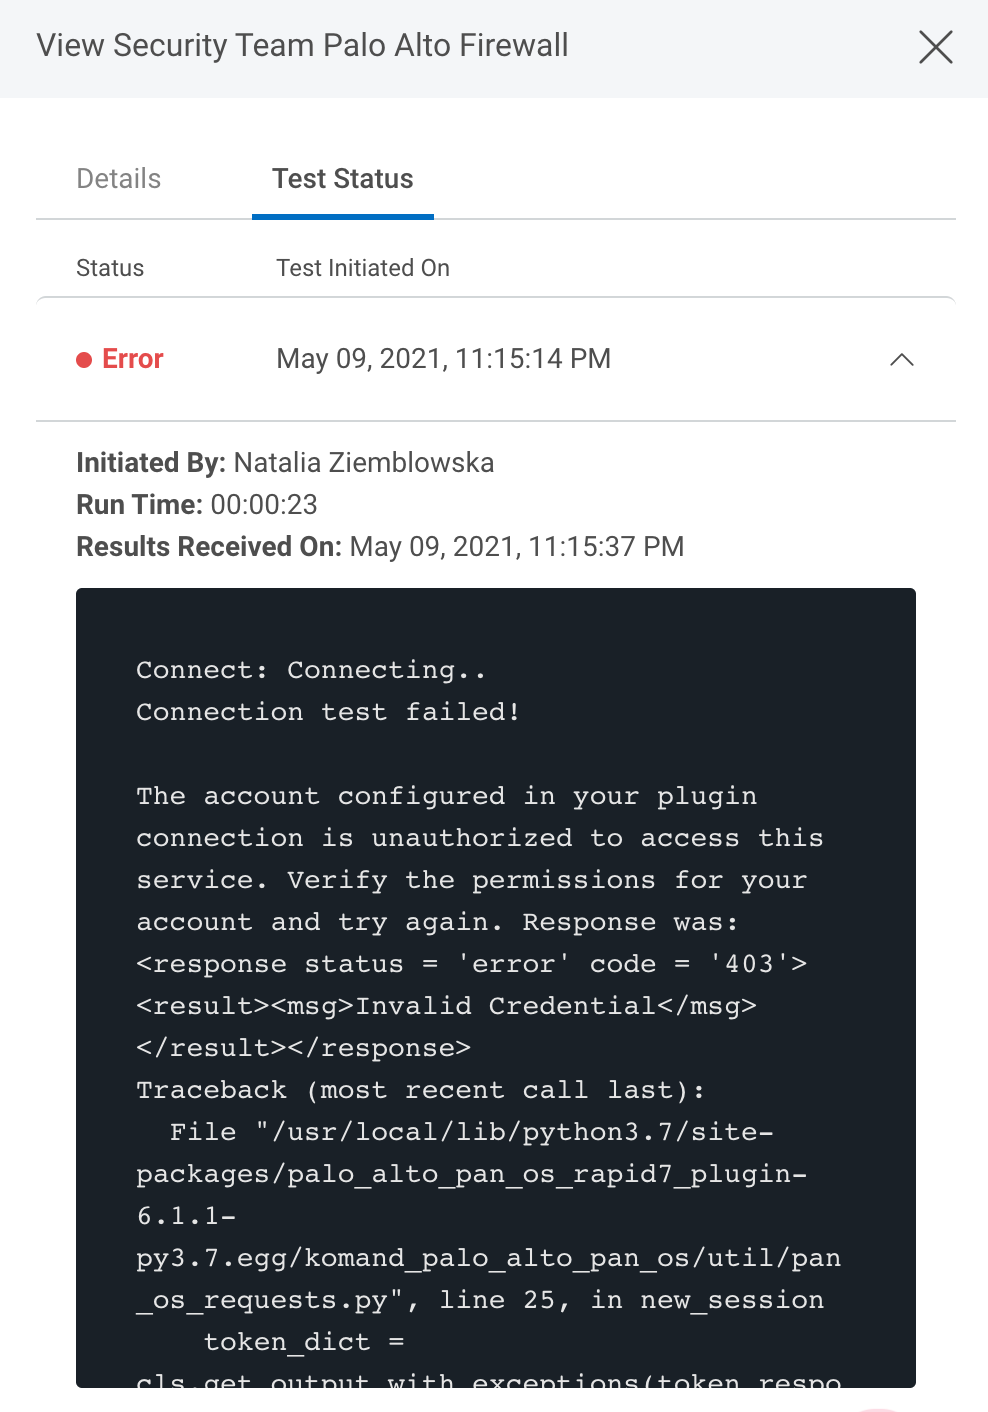
Under the Test Status tab, expand the dropdown for the test that encountered an error to view its log.
Troubleshooting
Invalid Credential
In the example error message above, an authorization error occurred and the Palo Alto firewall returned a XML response that says “Invalid Credential”. In this particular case, the credential (username or password) provided in the connection was incorrect. The user will need to delete that credential, add a new one, and assign it to the connection.
TLS/SSL Verification
If an TLS/SSL Certificate verification error occurs during the connection test, it could be the result of a self-signed certificate, which can be mitigated by selecting False in the Verify Cert / SSL Verify option in the connection. It could also be the result of a certificate that is not in the supported list of CA’s on the orchestrator, which the orchestrator will need to be updated for , or a proxy that needs to be configured correctly . It could also be a malicious or expired ticket and the validation failing is intended as the server owner will need to remediate host or update to a valid certificate.
Common xpath examples for Edit, Get, Set, Show actions
Palo Alto Pan OS Firewall XML API uses XML for both requests and responses. Xpath allows you to access resources within your firewall by providing an XML structure of where the resource is located. This enables you to make almost any configuration change in your Firewall using Automation (InsightConnect) Palo Alto Firewall Edit, Get, Set and Show actions.
Palo Alto has a number of documents describing how the XML API works and with some examples of xpath:
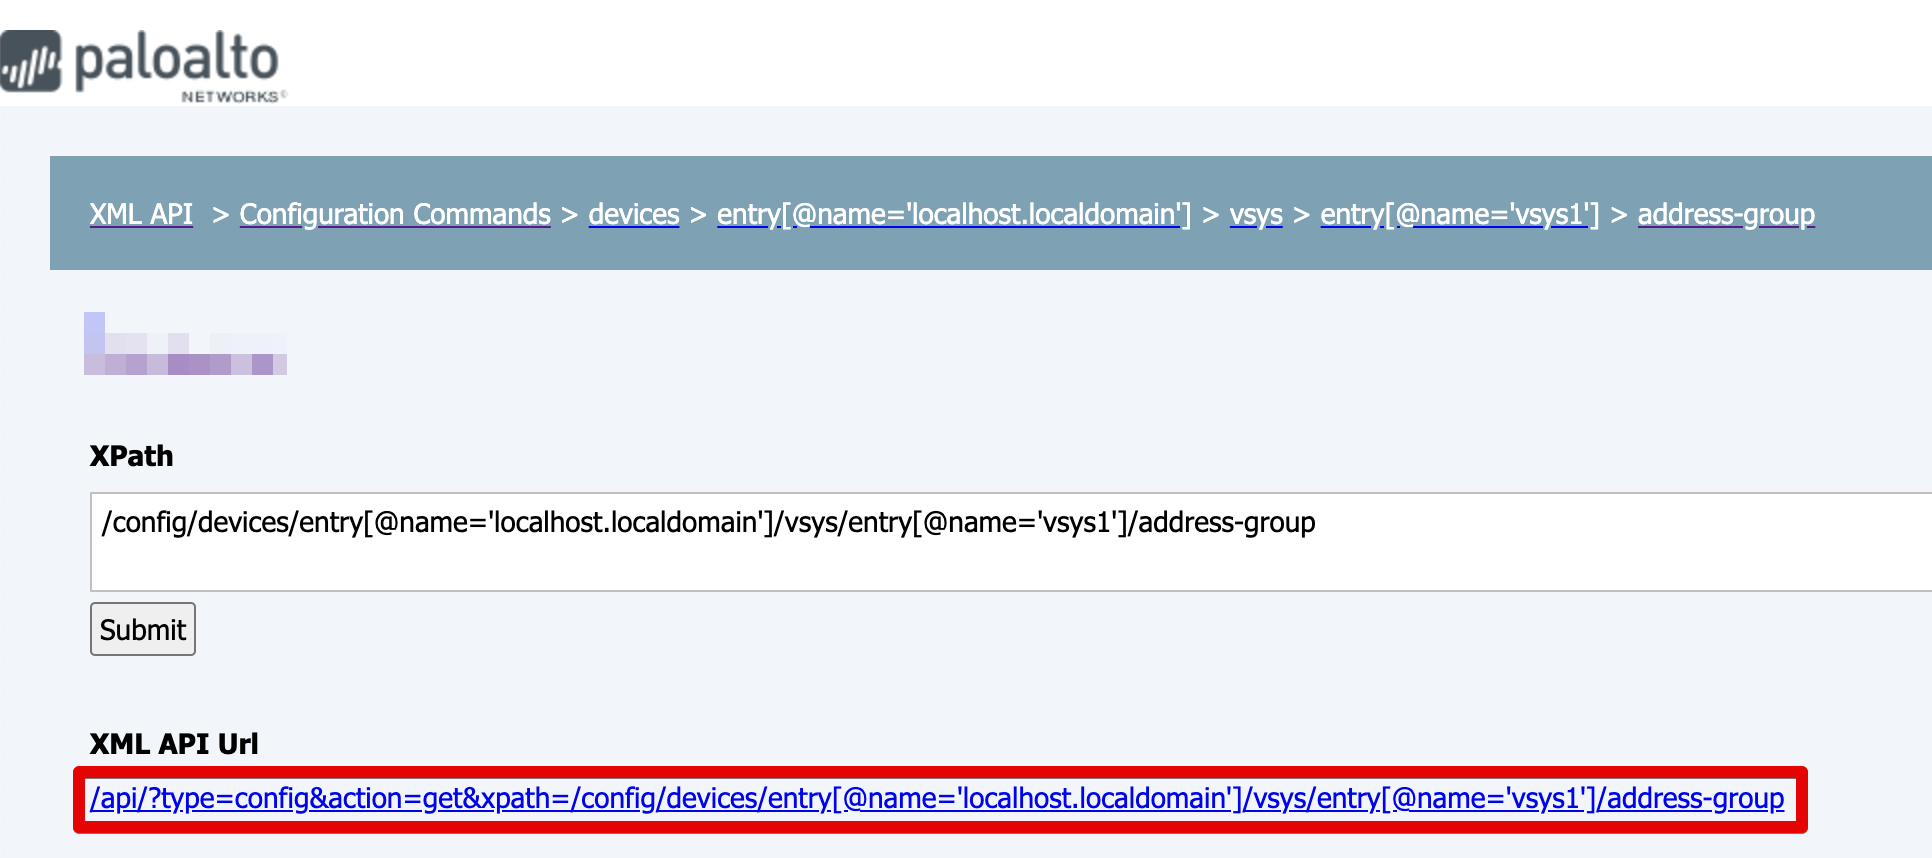
Additionally, there is a built in tool in Palo Alto Firewall, that enables you to browse through the XML API, allowing you to get a correct XPATH for the elemenet you wish to create/edit/update. You can access it by adding /api to the end of a URL poiting to an instance of Palo Alto Firewall, and it should take you to a page that looks like below:
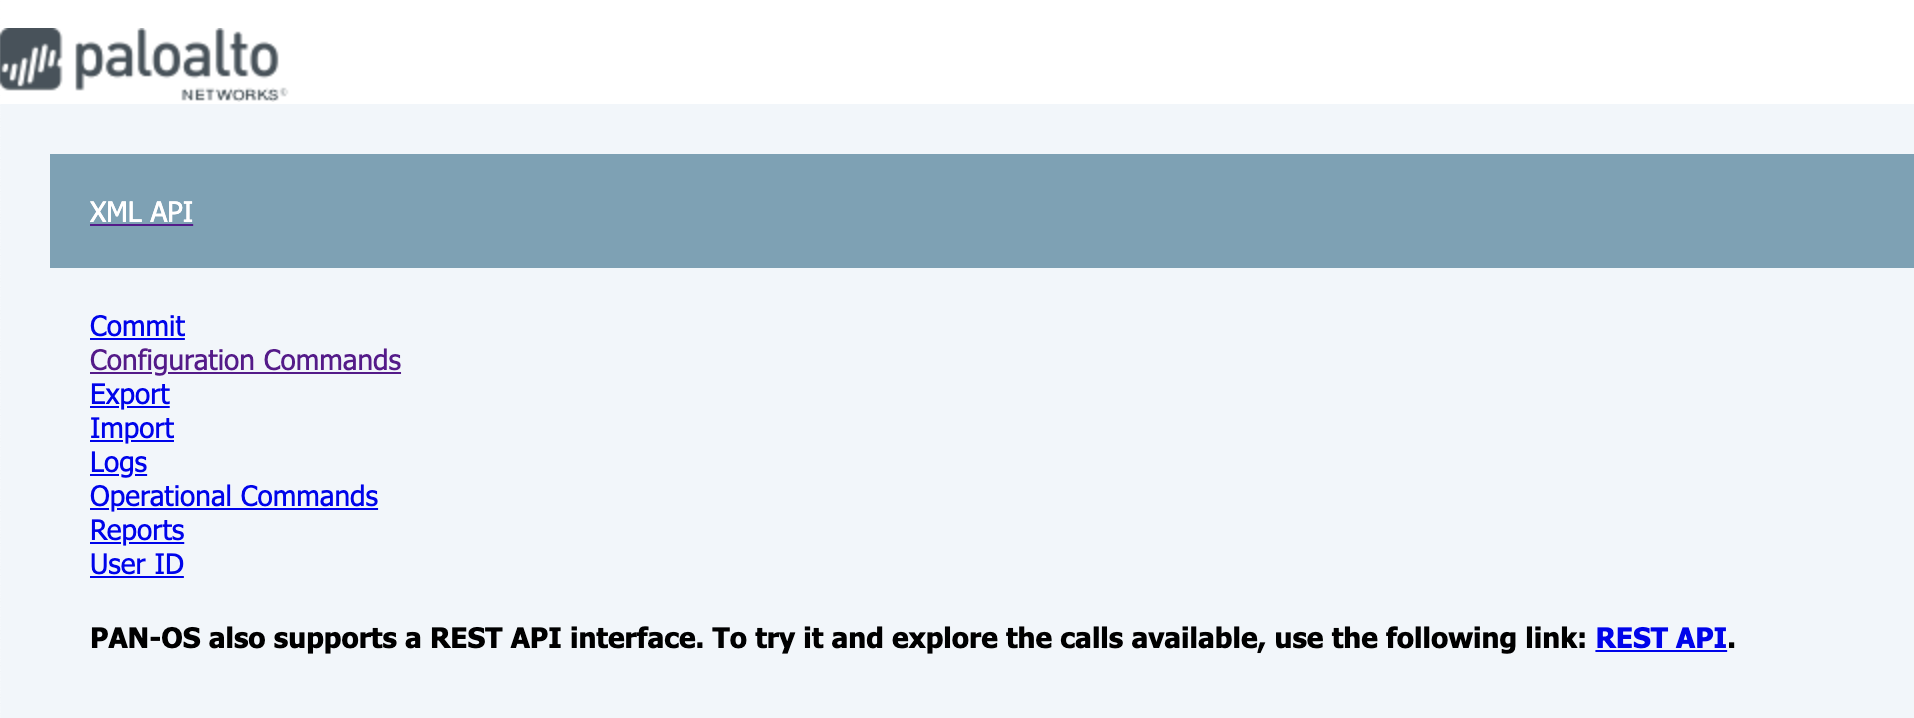
Once you found the resource you wish to update you can use the XML API URL to find which element needs editing:
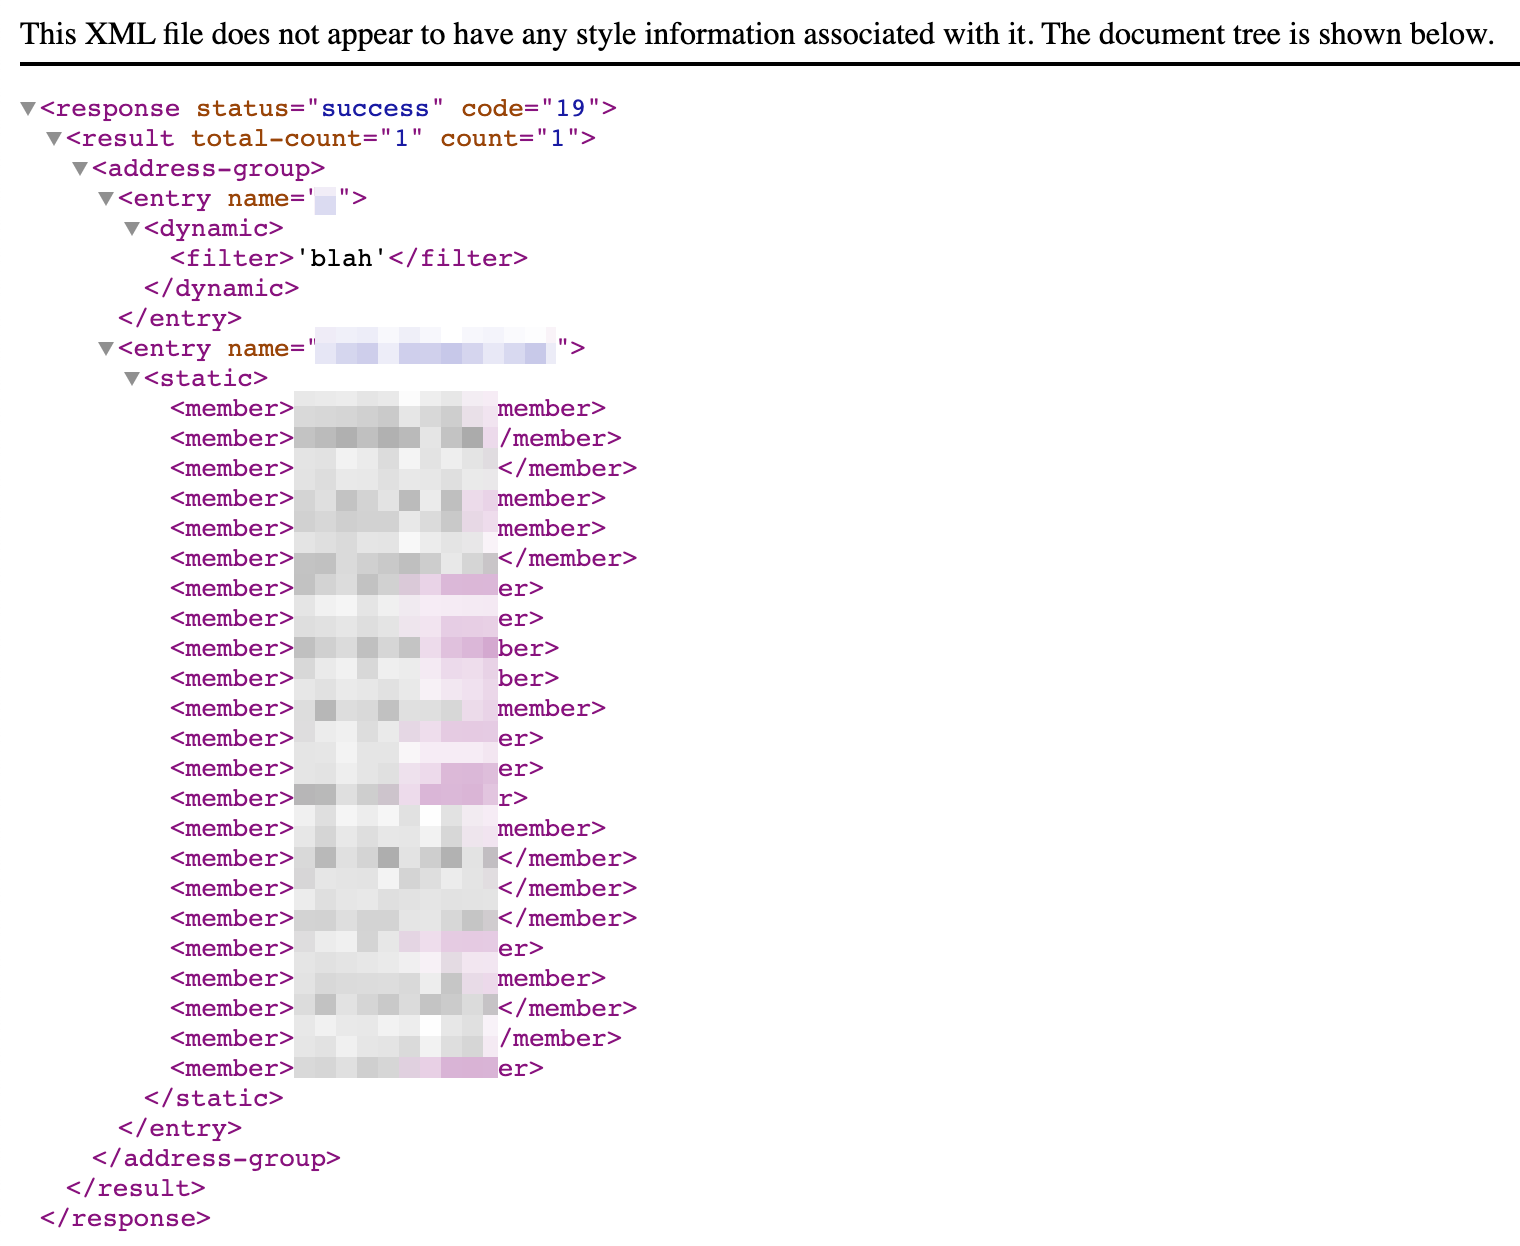
When you open the Url or click the Submit button, you will be preseneted with an XML document that looks similar to below:
Popular xpaths:
-
Address Object Groups:
/config/devices/entry[@name='localhost.localdomain']/vsys/entry[@name='vsys1']/address-group -
A specific Address Object Group
/config/devices/entry[@name='localhost.localdomain']/vsys/entry[@name='vsys1']/address-group/entry[@name='ADDRESS GROUP NAME'] -
Address Objects
/config/devices/entry[@name='localhost.localdomain']/vsys/entry[@name='vsys1']/address -
Custom URL Category
/config/devices/entry[@name='localhost.localdomain']/vsys/entry[@name='vsys1']/profiles/custom-url-category -
URL Filtering
/config/devices/entry[@name='localhost.localdomain']/vsys/entry[@name='vsys1']/profiles/url-filtering
Example use cases:
-
Enable/disable a firewall rule:
xpath:
/config/devices/entry[@name=‘localhost.localdomain’]/vsys/entry[@name=‘vsys1’]/rulebase/security/rules/entry[@name=‘RULE NAME’]element:
<disabled>yes</disabled> -
Add IPs or URLs to an address object group:
xpath:
/config/devices/entry[@name=‘localhost.localdomain’]/vsys/entry[@name=‘vsys1’]/address-group/entry[@name=ADDRESS GROUP NAME’]element:
<static><member>example.com</member><member>example2.com</member><member>example3.com</member></static>