Working with Project Sonar
Project Sonar is an initiative by the Rapid7 Labs team to improve security through the active analysis of public networks. It performs non-invasive scans of public IPv4 addresses for common services, extracts information from the services, and makes the data available to everyone.
By analyzing Project Sonar data, you can:
- View your environment from an outsider’s perspective.
- Find assets that belong to your organization that you may not have been tracking.
- Get a snapshot of your public facing assets.
- Obtain a better understanding of your exposure surface area.
Project Sonar data can be added to a site and treated like any other asset data. Please just remember that Project Sonar data is not a definitive or comprehensive view; it’s just a starting point you can use to learn more about your public Internet presence.
Setting up Sonar queries
A Sonar query pulls the information for a domain from Sonar’s archives and adds it to the Discovered by Connection table on the Assets page. The Sonar query is set up by your Nexpose Administrator and defines the domains that you have permissions to scan. As a site administrator, you can add them to a site via Dynamic Discovery connection.
Before you can access Project Sonar data, your Nexpose Administrator must have already created a Sonar query for your Nexpose console. If you have a Nexpose Enterprise license, and you do not see the results from the Sonar connection, contact your Nexpose Administrator and ask them to set up a Sonar query.
Understanding the Sonar workflow
The way you work with Sonar assets will be similar to how you work with dynamic assets. To add Sonar assets to a site, you can use the following workflow:
- Create a site.
- Select the Sonar connection to dynamically discover assets.
- Filter the asset based on domain name, host range, or scan date.
- Save the site.
- Scan the assets.
- Schedule a scan.
Creating a site for Sonar assets
In order to work with Sonar assets, the first thing you’ll need to do is create a dynamic site that uses the Sonar connection. After you create the site, you’ll be able to work with them just as you would any other assets in your database.
To create a site for Sonar assets:
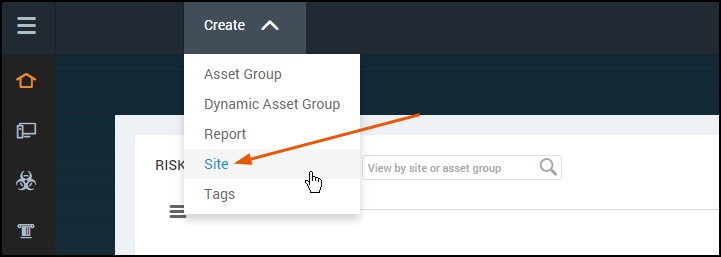
- Click the Create tab at the top of the page and select Site from the drop-down list.
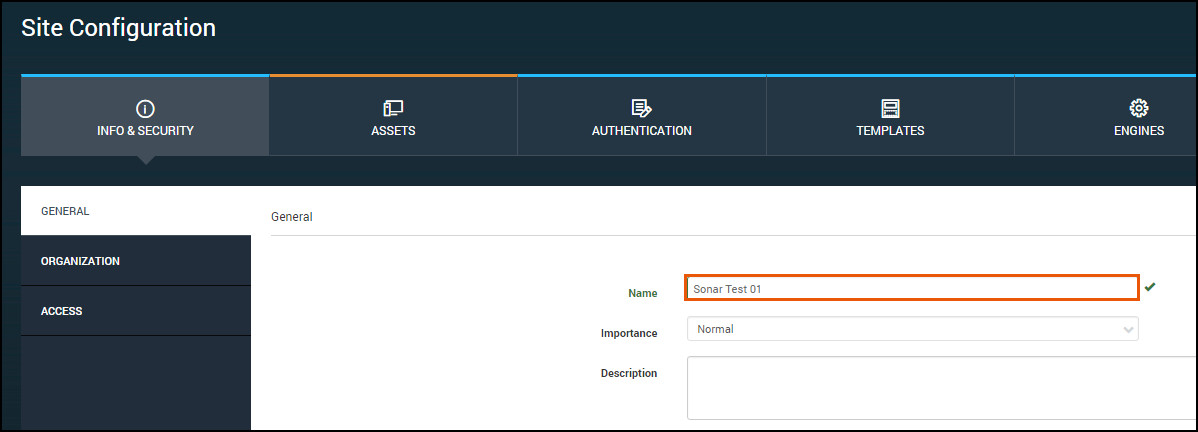
- In the Info & Security tab of the Site Configuration page, enter a name for the site that will contain assets from Sonar Labs.
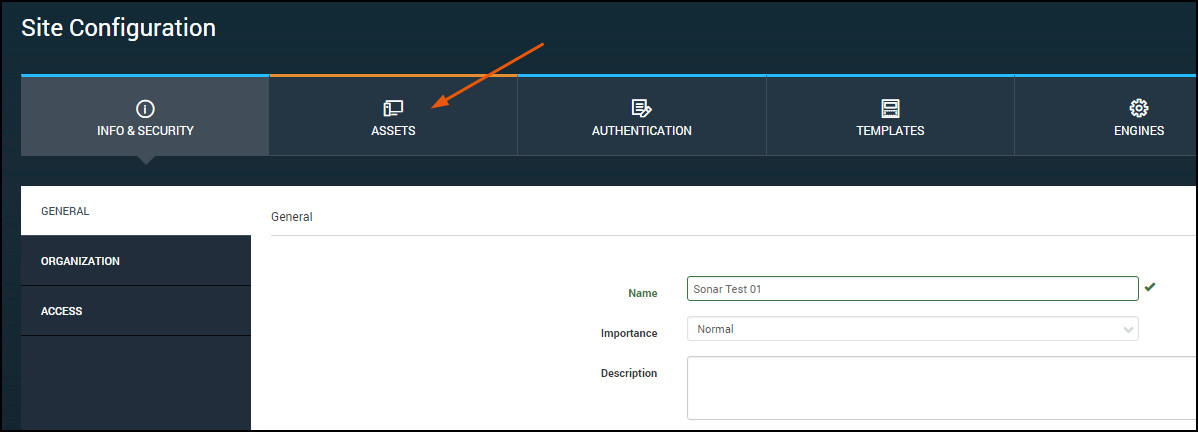
- Click the Assets tab.
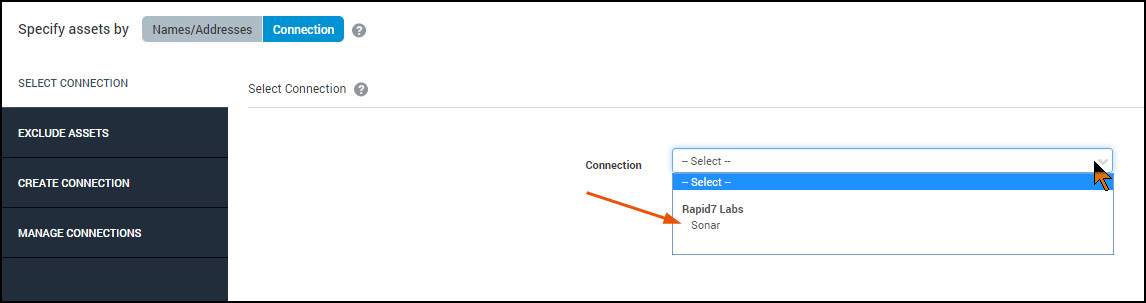
- Select Connection as the option for specifying assets.
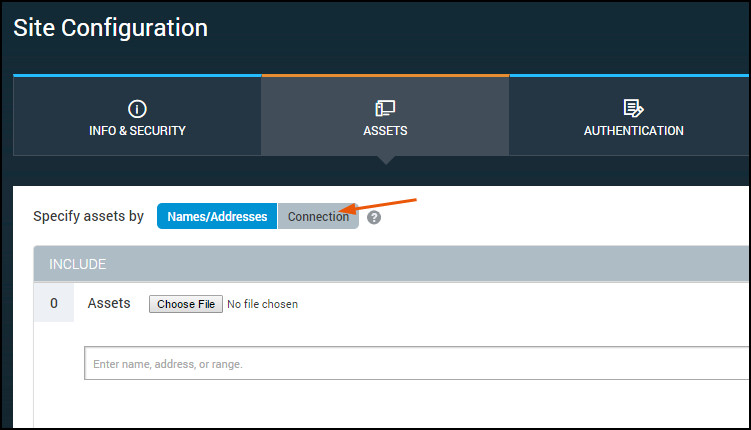
- On the Select Connection page, select Sonar from the Connection drop-down list.
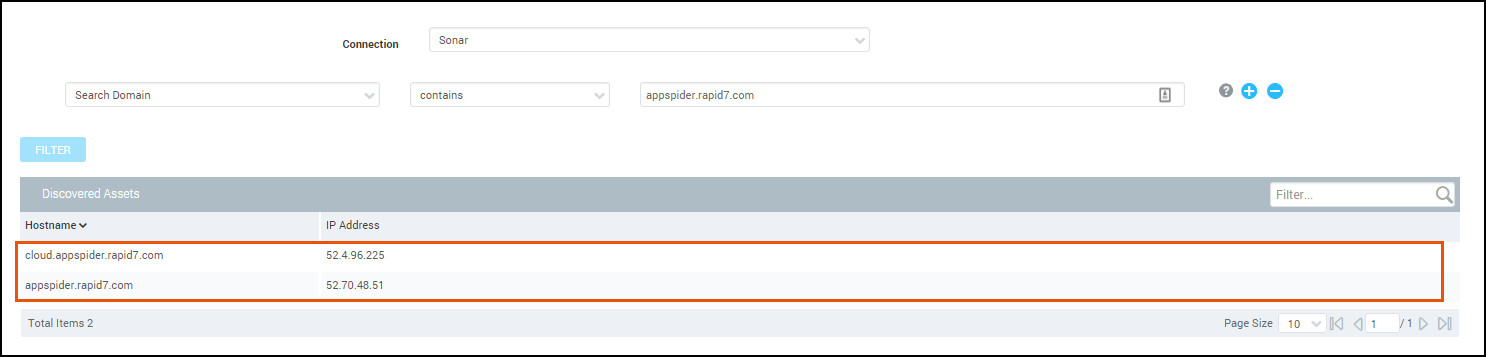
After you select the Sonar connection, the Discovered Assets table populates with the results from the Sonar query. You can apply filters to refine the list of assets that you add to the site. However, if you want to add all Sonar assets, do not apply any filters.
The Security Console connection discovers a maximum of 10,000 assets per query that is set up by the Nexpose Administrator. These are the first 10,000 assets returned by the lab servers, and the list can change at any time.
- Save the site.
Filtering data from Project Sonar
A filter is a rule that you can use to refine the results from a Sonar query. You create them when you want to specify requirements for the assets you add to your site. For example, you can create a filter if you want to only add assets that fall within a certain IP range to your site.
A filter comprises of a filter type, search operator, and filter value.
Filter types
You can create filters based on:
- A domain name, such as ‘rapid7.com’ or ‘community.rapid7.com’
- A host IP range, such as ‘192.168.1.0-192.169.1.255’
- A scan date, such as ‘within the last 30 days’
Search operators
A filter uses an operator to match assets to the value you have provided. You can use the following operators to build a filter:
- Contains — Filters based on a partial match. For example, the filter ‘domain name contains rapid7.com’ returns all assets that contain ‘rapid7.com’ in the domain.
- Is — Filters based on an exact match. For example, the filter ‘domain name is rapid7.com’ only returns assets whose domain name is ‘rapid7.com’.
- Within the last — Filters base on a time frame. This operator is only used with scan date filters and only accepts an integer. For example, the filter ‘Sonar scan date within the last 7 days’ returns assets that Sonar has scanned in the past week.
Creating a filter
The first thing you need to do is create is a filter for the domain name. After you create a filter for the domain name, you’ll be able to create filters based on the host IP range and the scan date.
To create a filter:
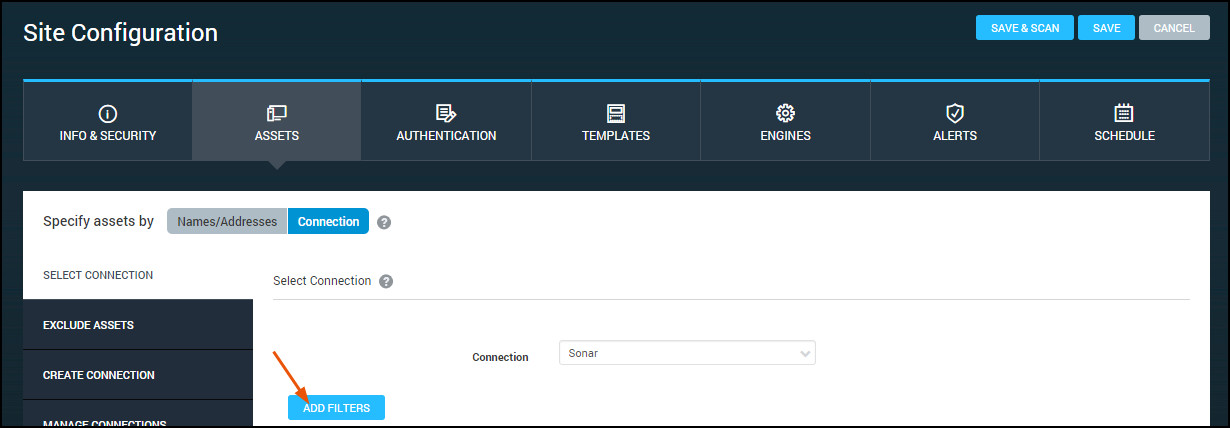
- From the Assets tab of the Site Configuration page, choose Connection as the option for specifying assets.
- Click Add Filters to display the filters that are available.
- Build rules for the Sonar assets using the available filters. You can filter by IP address range, domain name, and scan date.

- Add as many filters as you need, and click Filter to apply them. The results in the Discovered Assets table update according to your filters.

- Save the site.
Setting the scan date for Sonar queries
You can create a scan date filter to control the staleness of your asset data. Stale data occurs when the asset has been scanned by Sonar, but the asset has changed IP addresses since the scan was performed. Typically, the longer it has been since Project Sonar has scanned an asset, the more likely it is that the data is stale.
To reduce the possibility of adding stale data to your site, you should create a scan date filter. A more recent scan date range, like 7 days, ensures that you don’t accidentally add assets to your site that do not belong to you. If you apply a scan date filter and do not see any results from Sonar, you may need to extend the range the filter is using.
Scanning Sonar assets
Before you scan your Sonar assets, it is critical that you review them first. Project Sonar discovers production assets, so you’ll want to verify that the assets actually belong to your company and you have permissions to scan them. You should also check your blackout schedule before you perform any scans.
To manually scan a site:
- In the Sites table of the Home page, click the Scan button for the site that contains your Sonar assets.

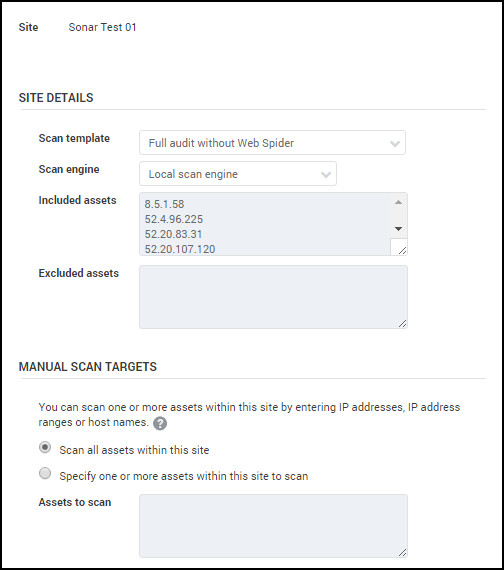
- When the Start New Scan window appears, configure a scan as you normally would, such as choosing a scan template and site engine.
- Click Start Now to run the scan.
An asset will be added to the Scanned table of the Assets page if a host name has been identified for it.
Scheduling a scan
Now that you’ve successfully created a site for your Sonar assets, you may want to consider creating a schedule for your scan. A schedule can help you perform checks on a regular cadence. For more information on scheduling a scan, see Scheduling scans .