Configuring custom report templates
The application includes a variety of built-in templates for creating reports. These templates organize and emphasize asset and vulnerability data in different ways to provide multiple looks at the state of your environment’s security. Each template includes a specific set of information sections.
If you are new to the application, you will find built-in templates especially convenient for creating reports. To learn about built-in report templates and the information they include, see Report templates and sections.
As you become more experienced with the application and want to tailor reports to your unique informational needs, you may find it useful to create or upload custom report templates.
Fine-tuning information with custom report templates
Creating custom report templates enables you to include as much, or as little, scan information in your reports as your needs dictate. For example, if you want a report that lists assets organized by risk level, a custom report might be the best solution. This template would include only the Discovered System Information section. If you want a report that only lists vulnerabilities, you may create a document template with the Discovered Vulnerabilities section or create a data export template with vulnerability-related attributes.
You can also upload a custom report template that has been created by Rapid7 at your request to suit your specific needs. For example, custom report templates can be designed to provide high-level information presented in a dashboard format with charts for quick reference that include asset or vulnerability information that can be tailored to your requirements. Contact your account representative for information about having custom report templates designed for your needs. Templates that have been created for you will be provided to you.
After you create or upload a custom report template, it appears in the list of available templates on the Template section of the Create a report panel.
You must have permission to create a custom report template. To find out if you do, consult your Global Administrator. To create a custom report template, take the following steps:
- Click the Reports icon in the Web interface. OR Click the Create tab at the top of the page and then select Report from the drop-down list.
- Click Manage report templates.
- In the Manage report templates panel, click New. The Security Console displays the Create a New Report Template panel.

Editing report template settings
- Enter a name and description for the new template on the General section of the Create a New Report Template panel.
If you are a Global Administrator, you can find out if your license enables a specific feature. Click the Administration tab and then click View current license.
- Select the template type from the Template type drop-down list:
- With a Document template you will generate section-based, human-readable reports that contain asset and vulnerability information. Some of the formats available for this template type—Text, PDF, RTF, and HTML—are convenient for sharing information to be read by stakeholders in your organization, such as executives or security team members tasked with performing remediation.
- With an export template, the format is identified in the template name, either comma-separated-value (CSV) or XML files. CSV format is useful for integrating check results into spreadsheets, that you can share with stakeholders in your organization. Because the output is CSV, you can further manipulate the data using pivot tables or other spreadsheet features. See Using Excel pivot tables to create custom reports from a CSV file. To use this template type, you must have the Customizable CSV export featured enabled. If it is not, contact your account representative for license options. Note: Discovery scan results are not exportable in CSV format.
- With the Upload a template file option you can select a template file from a library. You will select the file to upload in the Content section of the Create a New Report Template panel.
The Vulnerability details setting only affects document report templates. It does not affect data export templates.
- Select a level of vulnerability details from the drop-down list in the Content section of the Create a New Report Template panel.
Vulnerability details filter the amount of information included in document report templates:
- None excludes all vulnerability-related data.
- Minimal (title and risk metrics) excludes vulnerability solutions.
- Complete except for solutions includes basic information about vulnerabilities, such as title, severity level, CVSS score, and date published.
- Complete includes all vulnerability-related data.
- Select your display preference:
- Display asset names only
- Display asset names and IP addresses
- Select the sections to include in your template and click Add. See Report templates and sections. Set the order for the sections to appear by clicking the up or down arrows.
- (Optional) Click Remove to take sections out of the report.
- (Optional) Add the Cover Page section to include a cover page, logo, scan date, report date, and headers and footers. See Adding a custom logo to your report for information on file formats and directory location for adding a custom logo.
- (Optional) Clear the check boxes to Include scan data and Include report date if you do not want the information in your report.
- (Optional) Add the Baseline Comparison section to select the scan date to use as a baseline. See Selecting a scan as a baseline for information about designating a scan as a baseline.
- (Optional) Add the Executive Summary section to enter an introduction to begin the report.
- Click Save.
Creating a custom report template based on an existing template
NOTE
Only certain legacy reports templates can be copied for customization purposes. Newer report templates do not support this feature.
You can create a new custom report template based on a legacy template or existing custom report template. This allows you to take advantage of some of a template’s useful features without having to recreate them as you tailor a template to your needs.
To create a custom template based on an existing template, take the following steps:
- Click the Reports icon in the Web interface.
- Click Manage report templates.
- In the Manage Report templates panel, from the table, select a template that you want to base a new template on. OR If you have a large number of templates and don’t want to scroll through all of them, start typing the name of a template in the Find a report template text box. The Security Console displays any matches. The search is not case-sensitive.
- Hover over the tool icon of the desired template. If it is a legacy built-in template, you will have the option to copy and then edit it. If it is a custom template, you can edit it directly unless you prefer to edit a copy. Select an option.
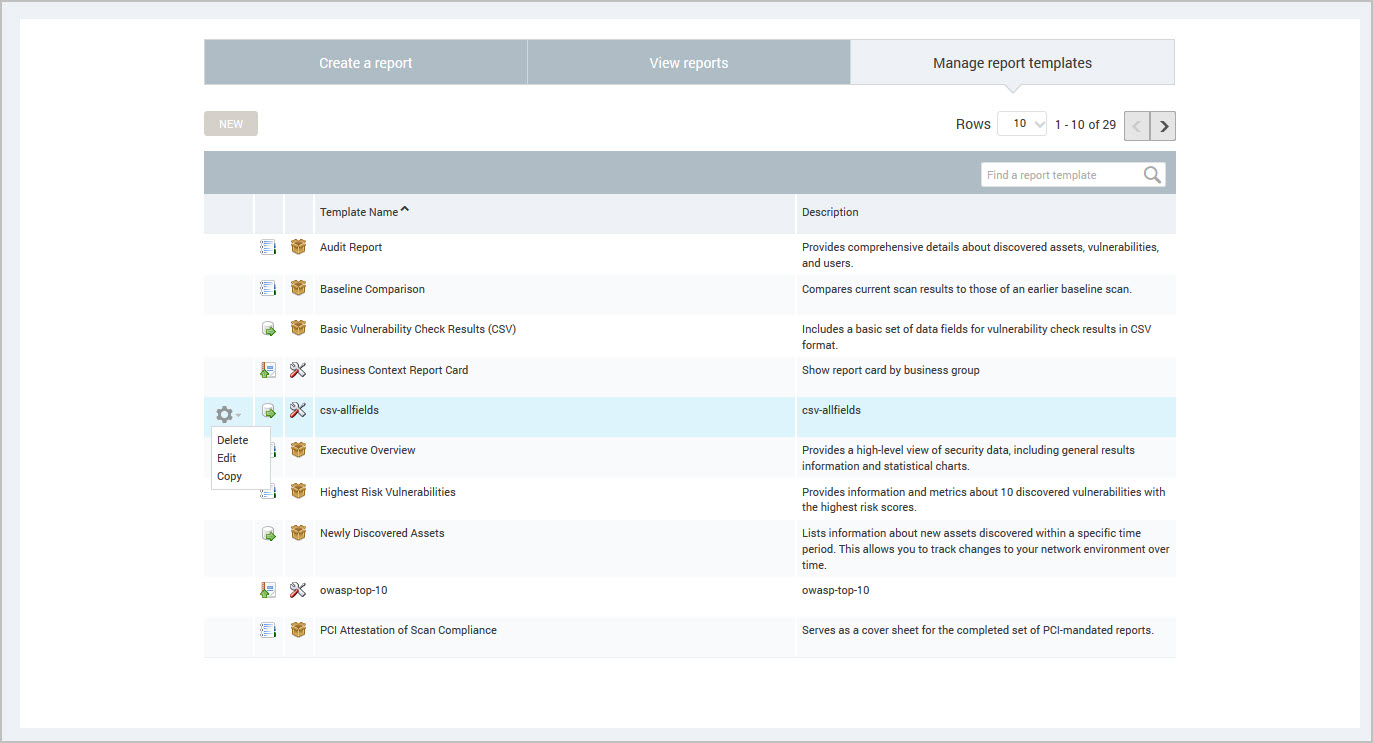
The Security Console displays the Create a New Report Template panel.
- Edit settings as described in Editing report template settings. If you are editing a copy of a template, give the template a new name.
- Click Save.
The new template appears in the template table.
Adding a custom logo to your report
By default, a document report cover page includes a generic title, the name of the report, the date of the scan that provided the data for the report, and the date that the report was generated. It also may include the Rapid7 logo or no logo at all, depending on the report template. See Cover Page. You can easily customize a cover page to include your own title and logo.
Logos can be JPEG and PNG logo formats.
To display your own logo on the cover page:
- Copy the logo file to the designated directory of your installation:
- Windows -
C:\Program Files\Rapid7\nexpose\shared\reportImages\custom\silo\default - Linux -
/opt/rapid7/nexpose/shared/reportImages/custom/silo/default
- Go to the Cover Page Settings section of the Create a New Report Template panel.
- Enter the name of the file for your own logo, preceded by the word “image:” in the Add logo field. Example: image:file_name.png. Do not insert a space between the word “image:” and the file name.
- Enter a title in the Add title field.
- Click Save.
- Restart the Security Console. Make sure to restart before you attempt to create a report with the custom logo.