Quick Start - Free Trial Edition
Application Security (InsightAppSec) is an application security tool that you can configure to attack different aspects of your application to identify response behaviors that make your apps vulnerable to attackers. The attacks are run during scans, which you can customize and schedule based on your needs. After the scan completes, you can view vulnerabilities by app or scan and details about each vulnerability. You can export the results or have them display as a dashboard widget for easier visibility into the health of your application security.
Welcome to the Application Security (InsightAppSec) Free Trial!
After you receive your free trial confirmation email, you can sign in to Application Security (InsightAppSec) at https://insight.rapid7.com . During the free trial, you can scan one personal domain or Rapid7’s demo domains (http://www.webscantest.com/ and http://hackazon.webscantest.com/ ).
To help you maximize your time, we’ve created a checklist of important capabilities to explore during your free trial of Application Security (InsightAppSec). The free trial comes with built-in demo domains scan options, as well as the ability to scan your own domain.
Here are some of the things you will learn how to do:
- Scan a domain - Scan your own domain or one of the pre-configured Rapid7 domains.
- Gain visibility and identify risks - Customize and run your scan using scan configuration settings.
- Review and prioritize vulnerabilities - View and filter vulnerabilities in your environment based on the needs of your business.
- Share vulnerability data - Show value to rest of your organization using reports.
- Remediate and test vulnerabilities - Test your fixes by re-scanning or using attack replay.
Set up a domain
Scanning Rapid7’s pre-configured demo applications can help you explore the capabilities of Application Security (InsightAppSec), while scanning your own domain helps you ensure that Application Security (InsightAppSec) is the right security tool for your technology stack.
Scan Your Own Domain
You can scan one personal domain with a free trial account. Before you begin the scan, you’ll need to validate your domain.
Before You Begin
Before you can scan your own domain, you’ll need to validate your ownership of the domain. This requires you to add a custom-generated meta tag to your application’s root path. Ensure that you have access to modify the source code of web pages in the application you are going to scan.
During an Application Security (InsightAppSec) scan, your web application may experience a high amount of incoming network traffic. Some firewalls may block attack traffic and prevent Application Security (InsightAppSec) from testing your application for vulnerabilities. In such cases, you must allowlist the IP addresses of the Application Security (InsightAppSec) cloud engines to scan your web applications.
Scan Your Web Application
During the free trial, Application Security (InsightAppSec) will scan your web application for passive attack modules by default. After you become familiar with Application Security (InsightAppSec), you can customize your scans to test for all attacks. We will learn how to customize scans with scan configs in a subsequent lesson of this quick start guide.
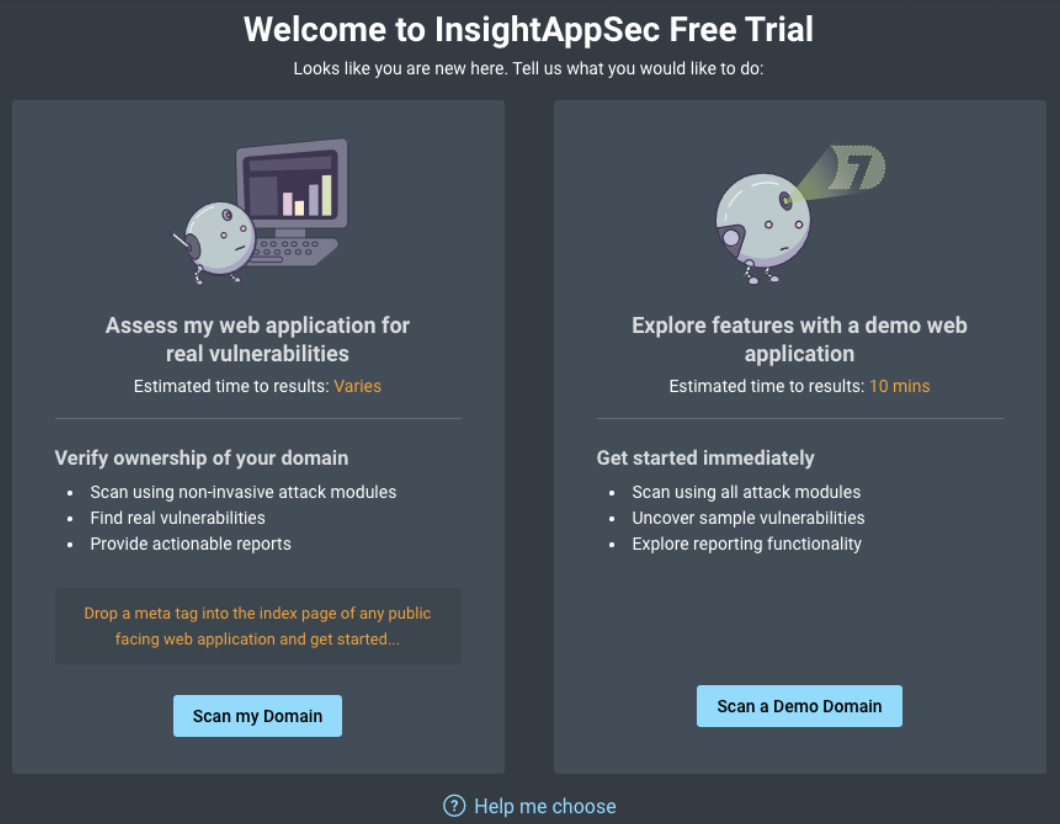
- On the welcome page, click the Scan my Domain button.
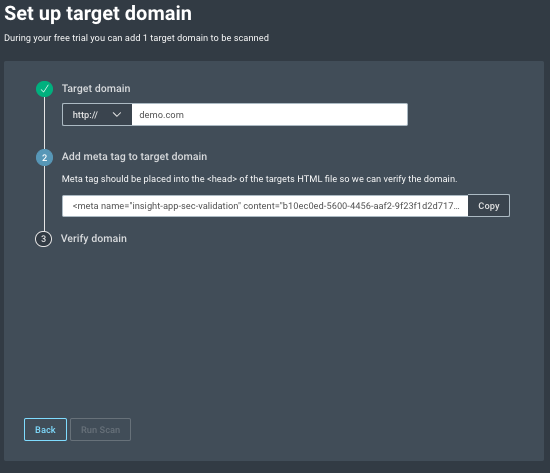
- When the “Set up target domain” wizard appears, enter the URL of the domain you would like to scan and press the Enter key. Be sure to select the right protocol for the URL, such as
httporhttps. - You’ll now see a custom generated meta tag that you must place the
<head>tag in the HTML code of your application’s index page. The index page is the page that appears by default (for example: index.html or default.aspx) at the URL you are testing. Click the Copy button to copy the meta tag to your clipboard. Insert the meta tag in the index page and redeploy your web application. - Click the Verify button. The Application Security (InsightAppSec) engine will access your web page and check for the presence of the meta tag. If the tag is found, the Verify button will say “Verified” in green and the Run Scan button will become clickable.
- Click the Run Scan button to start the scan. Application Security (InsightAppSec) will now provision a scan engine and initialize your scan. This process may take a few minutes.
After your scan starts, Application Security (InsightAppSec) will take you to the Scan Overview page where you can monitor the scan’s progress.
Success! You ran your first scan
When the scan completes, view the discovered vulnerability results on the Scan Overview page. You can now evaluate the vulnerabilities and prioritize code fixes, or create a scan config to target specific parts of your app.
Scan a demo domain
Want to try out scans on a demo domain before scanning your own domain? Application Security (InsightAppSec) offers two test domains where you can configure scans, review results, and replay attacks.
To scan a Rapid7 pre-configured vulnerable web application:
- On the welcome page, click the Scan a Demo Domain button.
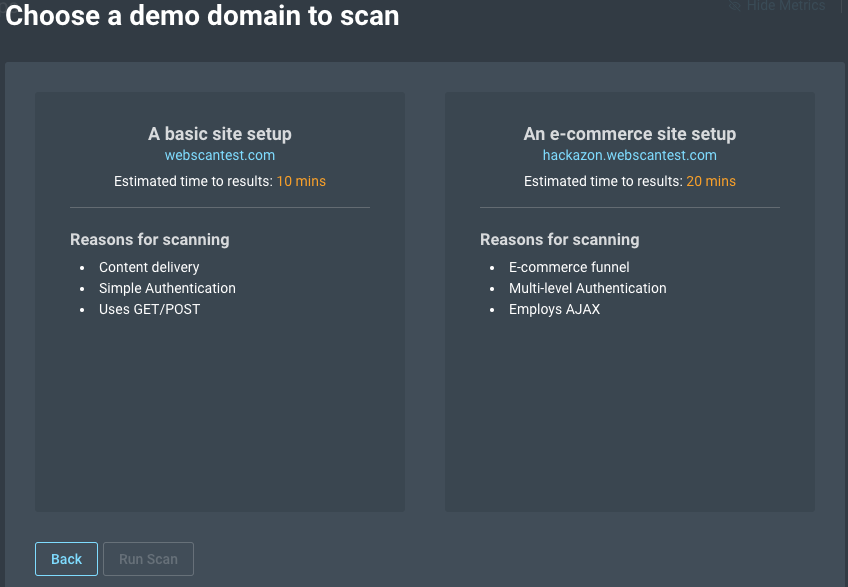
- You will receive the option to scan either a basic site (http://www.webscantest.com/ ) or an e-commerce site (http://hackazon.webscantest.com/ ). Both of these websites are owned by Rapid7 and have been deliberately made vulnerable to test the features of your Dynamic Analysis Security Testing (DAST) tool.
- Select one of the sites and click the Run Scan button. Application Security (InsightAppSec) will now provision a scan engine and initialize your scan. This process may take a few minutes.
After your scan starts, Application Security (InsightAppSec) will take you to the Scan Overview page where you can monitor the scan’s progress.
Success! You ran your first scan
When the scan completes, view the discovered vulnerability results on the Scan Overview page. You can now evaluate vulnerabilities and prioritize fixes, or create a scan config to test targeting specific parts of the app.
Manage active scans
- While the scan is running, view the Scan Status.
- To pause the scan, click Pause Scan. You can review all paused scans in the Scanning Activity screen or the Interrupted Scans dashboard widget.
- To resume a paused scan, click Resume Scan.
- To stop the scan, click Stop Scan and select whether to save or discard scan results.
Gain visibility
Gain visibility into your application security through scanning your app based on your own scan configuration. A scan configuration, or scan config, is a group of settings you can use to scan a particular app. Based on your needs, you can create scan configs to specify scan settings and target various sections of your application for weaknesses. You can save particular settings configurations and reuse them to scan the app again and again.
Customize and run your scan
- In the navigation menu, click Apps.
- In the Apps page, click on the name of your app.
- Select the Scan Configs tab.
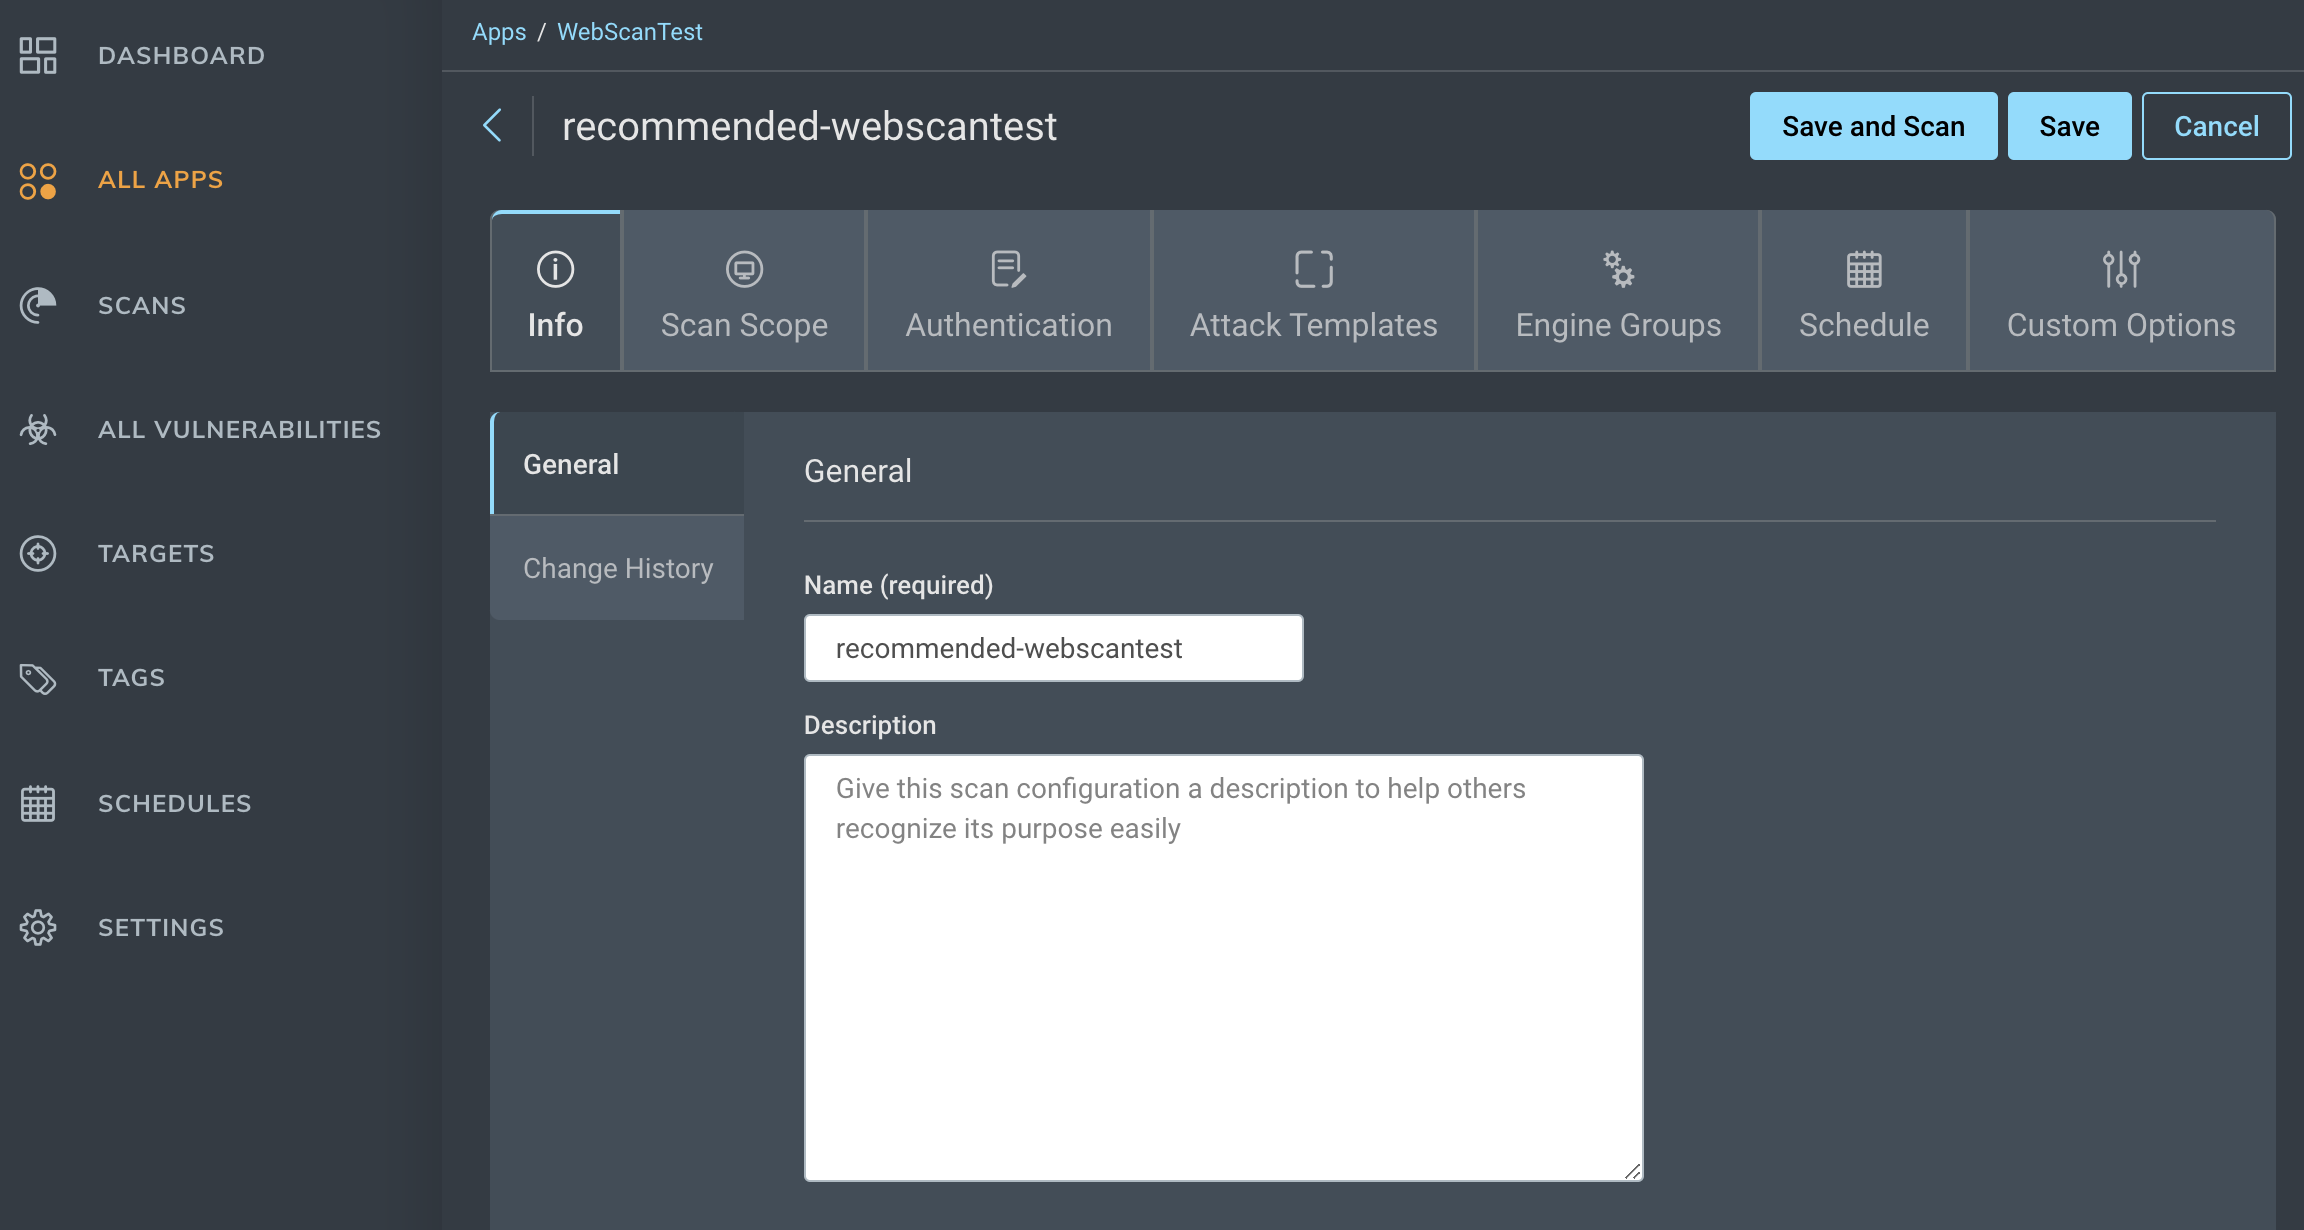
- Click the Create New Scan Config button. For more information, see Scan Configuration.
- Provide a name and description for the scan configuration.
- Set the Scan Scope which includes settings like the maximum number of pages to crawl, URLs to include or exclude from the scan, as well as parameters to include or exclude from the scan. If you are using the tool to test a customer facing application, it would be useful to either use a low number of links to crawl or restrict your testing to a small subsection of the site using wildcards.
- Add your authentication credentials if certain parts of the app are visible only after logging in. The webscantest and hackazon apps accept Basic and Form authentication, but you can also try authentication on your own apps and experience improved scan results.
- Select an attack template. For the first scan, we recommend using the “Crawl Only” template to make an inventory of the publicly visible resources on your web application. You can then focus on a smaller subsection of the app to run more comprehensive tests such as the All modules template.
- Click the Save button to save the template.
- Click the Scan Now button on the top right corner of the screen and choose your newly created scan configuration.
Success! You ran a scan based on your scan config
Now that you’ve run a scan based on your specific configuration, you can explore the findings.
Evaluate vulnerabilities to prioritize fixes
Having run your first scan, you can now review the vulnerabilities discovered by your scan. The vulnerabilities found are aspects of your app that can make it susceptible to attackers. Within each organization, app, and scan-level vulnerability you can view details about the vulnerability to help you prioritize what to fix first.
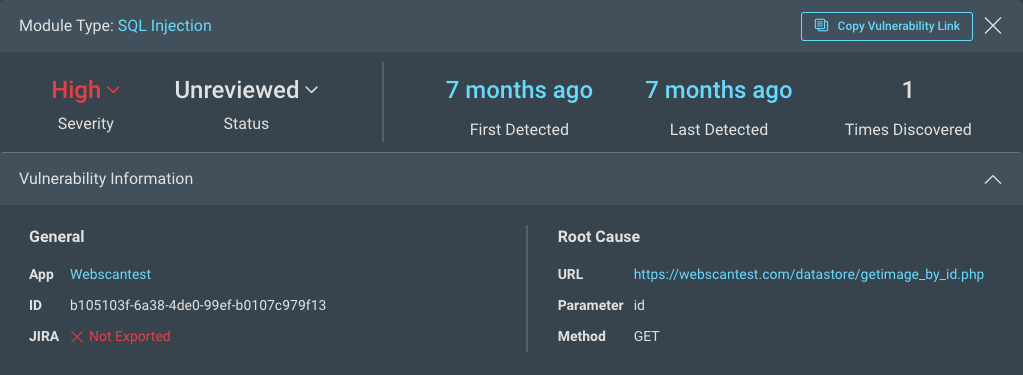
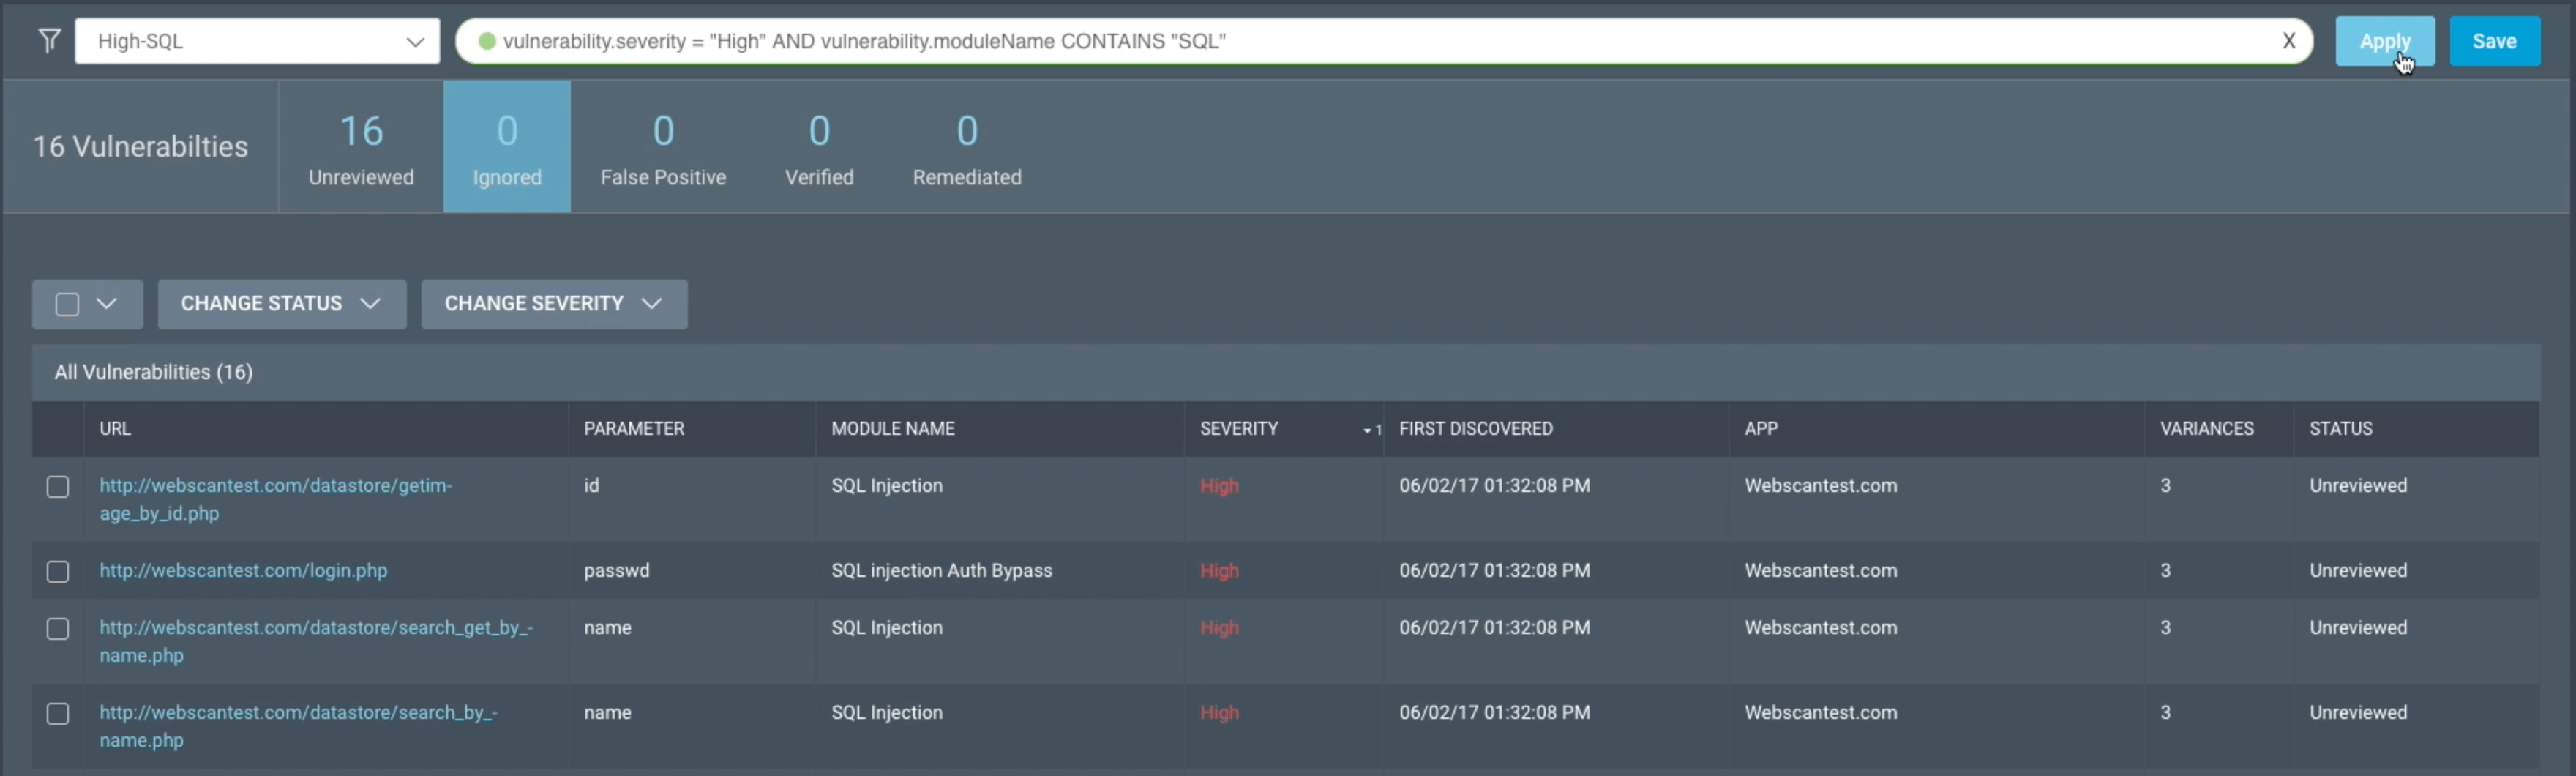
View vulnerabilities
There are three ways to check your vulnerabilities - at the Organization level, the App level, or the Scan level. View your vulnerabilities on the Apps page, Scans page, and Vulnerabilities page. Additionally, you can view live scan results in the Live Vulnerability View on the Scan Results page.
Monitor your data
You can build custom views of the Application Security (InsightAppSec) data you want to monitor using dashboards. Create a new dashboard or use an existing dashboard as a starting point. Then, add, edit, resize, and rearrange data visualization widgets to tailor the data view to you and your organization’s needs.
Success! You evaluated and prioritized your results
When the scan completes, view the discovered vulnerability results on the Scan Overview page. You can now share your results with stakeholders.
Share your results
One of the biggest challenges SecOps professionals face is communicating the importance of improving their business’s security posture, while demonstrating the value of its investments to various groups within the organization. Application Security (InsightAppSec) makes it easy with reports that target the priorities of different groups within an organization. For example, you can present the Vulnerability Summary report to the leadership group for tracking improvements while app developers can use a CSV export which they can import into their issue tracking tool.
As part of this objective, you must select the vulnerabilities found in your last scan, click the Generate Report button and examine the reports generated by Application Security (InsightAppSec). The Generate Reports guide has more details on the reporting feature.
Success! You shared finding results
Now that you’ve shared your results, it’s time to remediate and test the fix.
Test the remediation
You can re-run the scan to see whether the vulnerability is found again. If it’s found again, you can view the vulnerability details and attempt another fix. If you have the Rapid7 AppSec Chrome Plug-in, you can replay an attack to test the fix.