Forcepoint Firewall
Forcepoint Firewall is part of the Stonesoft Security Management Center (SMC). The Stonesoft SMC provides security coverage for firewall, IDS, VPN, and other protective measures in your security environment.
You can export your firewall events from Stonesoft Forcepoint to SIEM (InsightIDR) in a CEF format from the SMC Log Server. You can read about this process here: https://support.forcepoint.com/KBArticle?id=000015002
To start forwarding Stonesoft logs from the Stonesoft SMC Log Server:
- Create Log Forwarding Rules
- Enable Logging from the SMC
- Create Traffic Access Rules
- Add a Firewall Event Source to SIEM (InsightIDR)
Create Log Forwarding Rules
Complete these steps in the Forcepoint SMC.
To create log forwarding rules:
- Sign into your SMC console.
- From your Home dashboard, select the Others tab from the left menu.
- Select the Monitoring tab and click the Add button to add a new Server element.
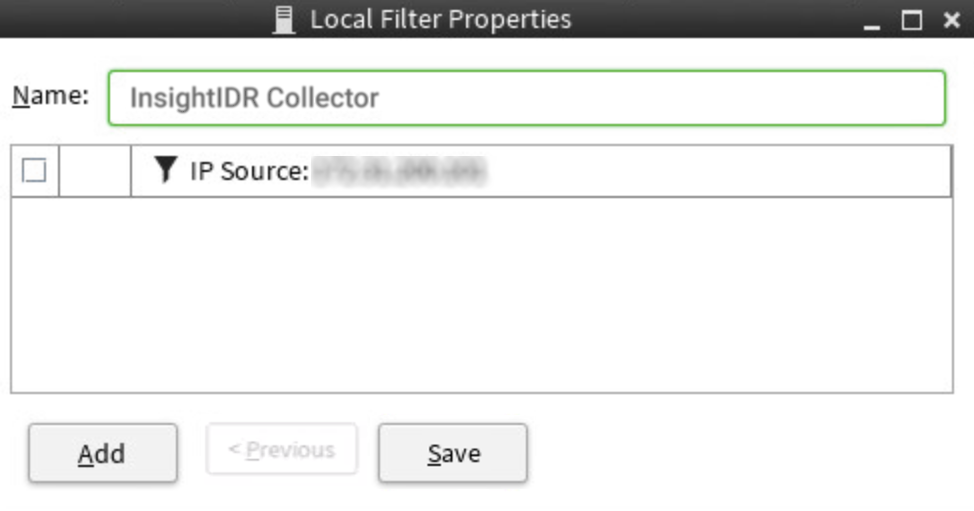
- Click the Add button to add a new local filter.
- In the “Name” field, provide a name for the SIEM (InsightIDR) collector.
- In the “IP Source” field, enter the IP address of your SIEM (InsightIDR) collector. Click the Save button.
- Click the Log Forwarding tab.
- Click the Add button.
- From the “Target Host” dropdown, select the previously added SIEM (InsightIDR) Collector.
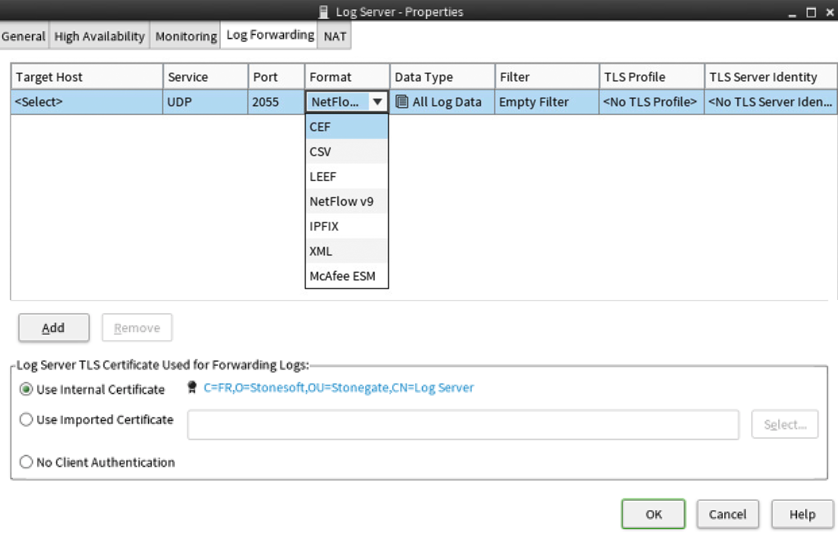
- In the “Service” dropdown, select your protocol.
- In the “Port” field, enter the unique port you want to use.
- In the “Format” dropdown, select the CEF format.
- In the “Data Type” dropdown, select the All Data Types option.
- In the “Filter” dropdown, select the Empty Filter option.
- Leave “TLS Profile” and “TLS Server Identity” blank.
- Click the OK button to save the configuration.
Read more about this process here: https://help.stonesoft.com/onlinehelp/StoneGate/SMC/6.2.0/GUID-4C98583A-7BA4-4028-AD85-6D20B58EC420.html#GUID-4C98583A-7BA4-4028-AD85-6D20B58EC420
Enable Logging from the SMC
After you’ve properly created a log forwarding rule for the SIEM (InsightIDR) Collector, you must enable logging from the SMC to external servers.
To enable logging from the SMC:
- Navigate to **Configuration NGFW > Policies > Firewall Policy. **

- Right click the Logging policy you want to change and select the Edit option.
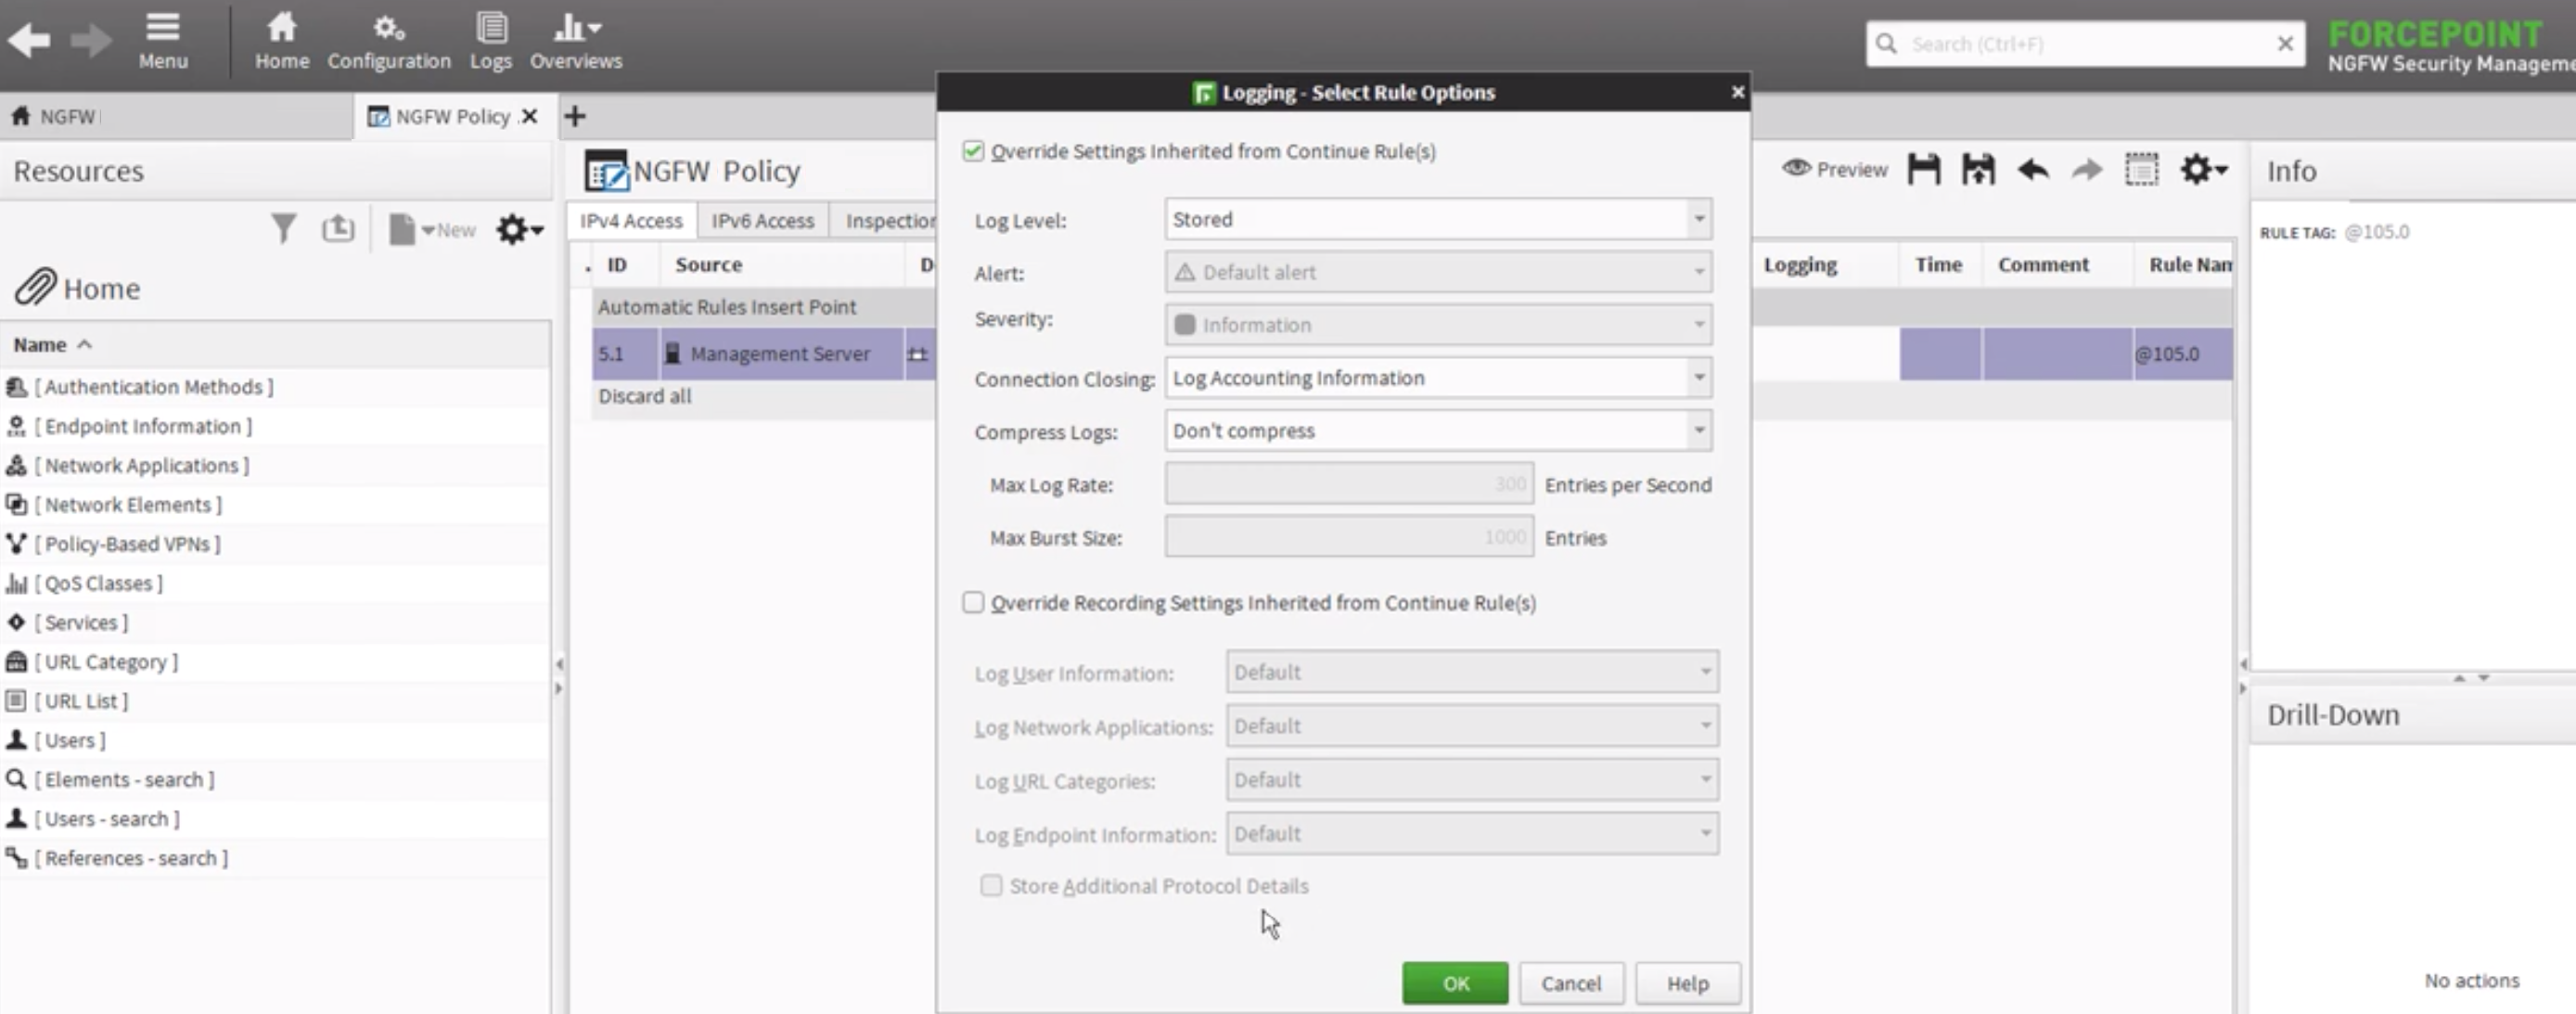
- Select the appropriate version for the IP Access tab. Scroll to the right in the cell table and double click on the “Logging” cell. Then choose the Edit option.
- Check the Override Collected Values Set With Continue Rules box.
- From the “Log Level” dropdown, select the Stored or Essential option.
- Click the OK button, and then click the Save button.
Create Access Rules
Lastly, you must allow access from the Firewall to external servers.
To do create access rules for the firewall
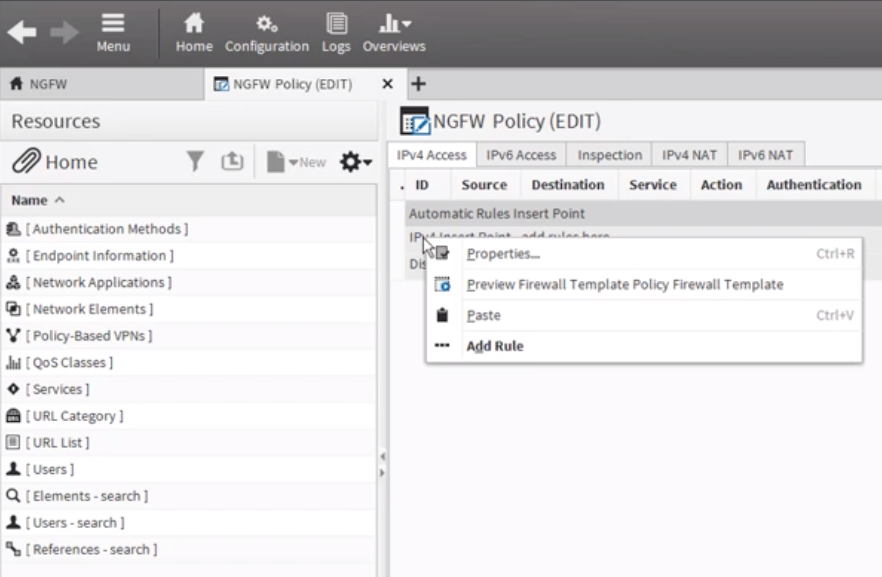
- In your SMC, navigate to Configuration NGFW > Policies > Firewall Policy.
- Select the appropriate version for the IP Access tab. Right click on the policy and select the Add Rule option.
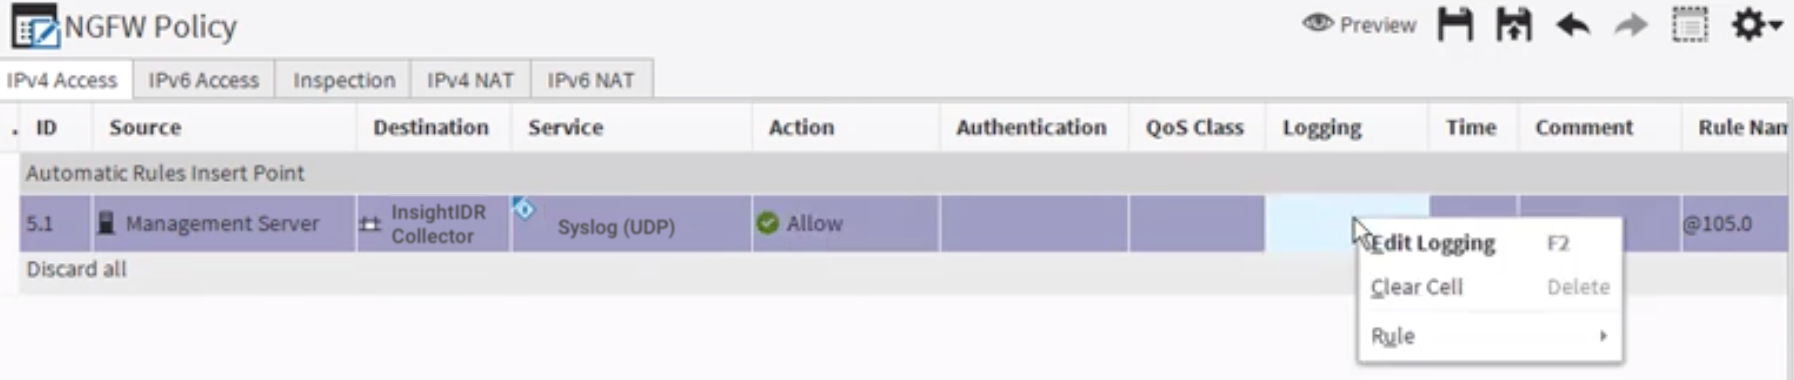
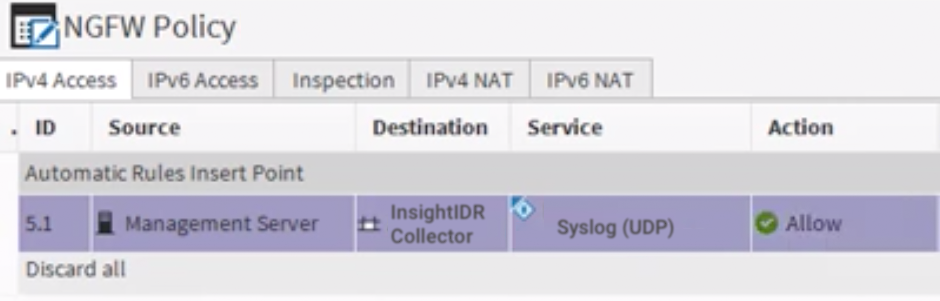
- In the “Source” field, select the Management Server option.
- In the “Destination” field, select the host element that represents the SIEM (InsightIDR) Collector.
- In the “Service” field, select the Syslog (UDP) option.
- In the “Action” cell, select the Allow option.
- In the “Logging” cell, select None to avoid a logging loop.
- Click the Save button.
Configure SIEM (InsightIDR) to collect data from the event source
After you complete the prerequisite steps and configure the event source to send data, you must add the event source in SIEM (InsightIDR).
To configure the new event source in SIEM (InsightIDR):
- From the left menu, go to Data Collection and click Setup Event Source > Add Event Source.
- Do one of the following:
- Search for Forcepoint Firewall in the event sources search bar.
- In the Product Type filter, select Firewall.
- Select the Forcepoint Firewall event source tile.
- Choose your collector and select Forcepoint Firewall as your event source. You can also name your event source if you want.
- Choose the timezone that matches the location of your event source logs.
- Optionally choose to send unparsed logs.
- Configure your default domain and any advanced settings.
- Select Syslog as your data collection method and select UDP as your protocol.
- Enter the unique port you specified during configuration in the SMC.
- Click the Save button.