Integrate a Fortinet FortiGate On-Premises Device
Configure a Fortinet FortiGate on-premises device to pull IOCs from Threat Intelligence.
FortiGate v6.2 or later is supported when using the Threat Intelligence Virtual Appliance 4.0 or later.
The following table shows device-specific integration characteristics:
| Characteristic | Description |
|---|---|
| Method of pull | All new IOCs that were discovered since the previous update are pulled. |
| IOC types | Domains, file hashes (MD5, SHA-1, and SHA-256), and IP addresses. |
| IOC group limitation | Each IOC group can contain only one type of IOC. For multiple types, create multiple IOC groups. |
| Device IOC limit | The device is limited to 100,000 IOCs. |
Imported IOCs are accepted/monitored. You can create a policy to block those IOCs.
To integrate the device, perform these steps (described in the following sections):
- Add the device to the Threat Intelligence Virtual Appliance.
- Configure the device to pull IOCs from Threat Intelligence.
Add a Fortinet FortiGate on-premises device
Add a device to Threat Intelligence.
Prerequisites
- You have the credentials to access the Threat Intelligence Virtual Appliance web interface.
- You have the credentials to access the device.
To add the device to Threat Intelligence:
- From the Command Platform, go to Data Connectors > Threat Intelligence > Integrations.
- From the Integrations page, click On-Premises.
- Click Add new device.
- In the Add New On-Premises Device dialog, type a user-defined name for the device. The name can contain a maximum of 50 letters, spaces, numbers, and underscores.
- Select the Device type.
The default device IOCs limit is displayed. - (Optional) You can change the IOCs limit.
- Click Add.
- To verify that the new device is added, refresh the Data Connectors > Threat Intelligence > Integrations page.
Next to the device name, there is a red dot, indicating that communication has not yet been established. The dot will change to green when the device is synchronized. If the device cannot synchronize for more than 48 hours, an email warning is sent to the account administrator.
Configure a Fortinet FortiGate device to pull IOCs
After a device has been added, you must enable it to pull IOCs from Threat Intelligence.
In FortiGate, you must create a separate fabric connector for each IOC group.
By default, IOCs are accepted/monitored. To block IOCs, you will need to edit the policy,
Prerequisites
-
You have the device login credentials.
-
The device has been added.
-
An IOC group for this device exists in Threat Intelligence. Creating IOC groups is described in Create an IOC group.
-
You have the Threat Intelligence account ID and appliance key, as described in API key, account ID, and appliance key.
To configure a FortiGate on-premises device:
- From Threat Intelligence, copy the Fortinet FortiGate IOC group URL into the Fortinet FortiGate:
- Log in to the Rapid7 Command Platform.
- From the main menu, select Data Connectors > Threat Intelligence > Integrations.
- From the On-Premises device list, select the Fortinet FortiGate device.
- Click the link icon to the far right of the device IOC group.
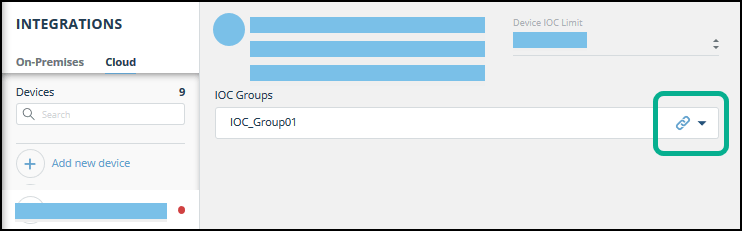 The IOC Group URL dialog is displayed.
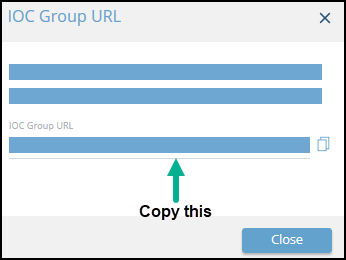
5. From the IOC Group URL dialog, copy the URL.
The IOC Group URL dialog is displayed.
5. From the IOC Group URL dialog, copy the URL.
- Log in to the Fortinet FortiGate.
- Navigate to Security Fabric > Fabric Connectors.
- Click Create New.
The New Fabric Connector page is displayed. - In the Threat Feeds section, select a feed option that matches the IOC type in Threat Intelligence IOC group (IP Address, Domain Name, or Malware Hash):
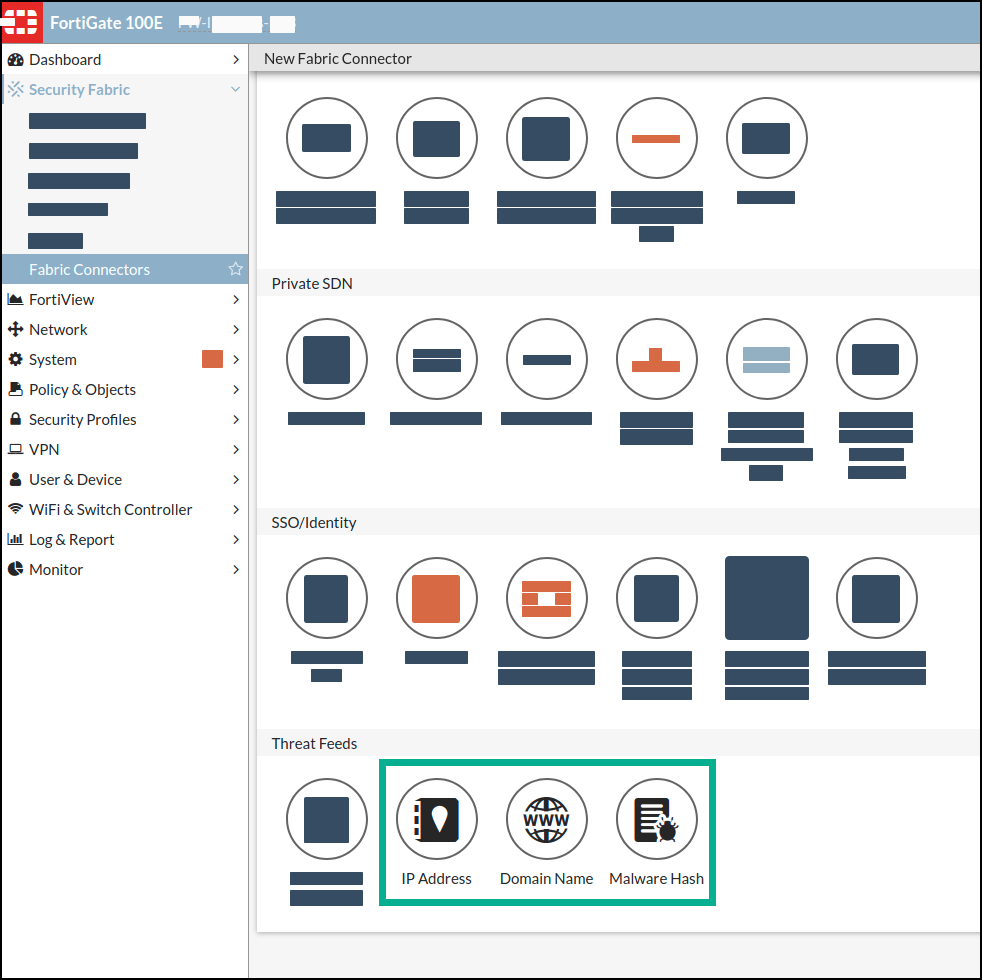 The New Fabric Connector dialog is displayed:
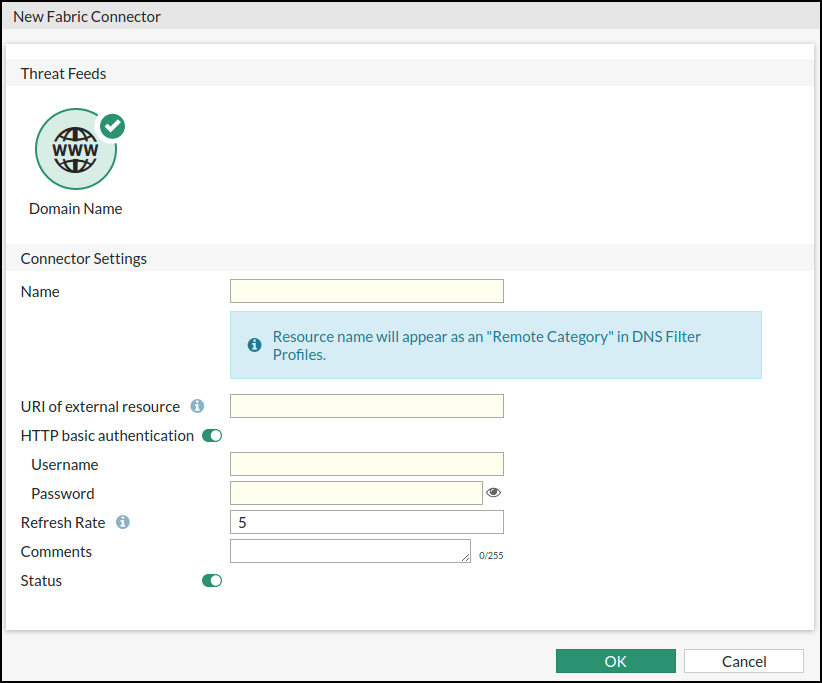
- In the New Fabric Connector dialog, fill the fields, as follows:
| Field | Description |
|---|---|
| Name | Type a user-defined name. This name is used to identify IOCs imported from this group. |
| URI of external resource | Paste in the URL from the Threat Intelligence IOC Group URL dialog. |
| HTTP basic authentication | In the Username field, paste the Account ID. In the Password field, paste the Appliance Key. You can retrieve this information, as described in API key, account ID, and appliance key. |
| Refresh Rate | (Optional) You can change the refresh rate (default: 5 minutes). |
| Comments | Optional |
- Click OK.
The new threat feed is displayed in the Threat Feeds page: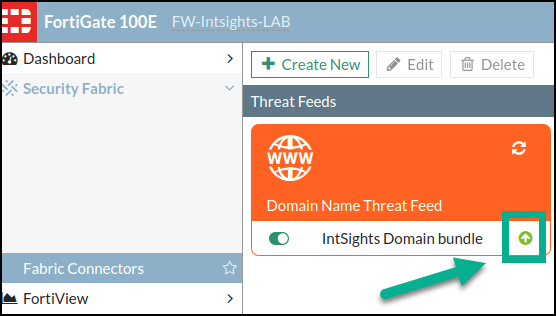 Initially, the arrow is red and pointing downwards. When it is synchronized it is green, pointing up.
This process is the same for all forms of threat feeds. - Repeat this process for every IOC group to be imported.
See imported IOCs
You can see the IOCs that are imported into FortiGate. The following procedure works the same for all forms of threat feeds.
To see imported IOCs in FortiGate:
- From FortiGate, navigate to Security Fabric> Fabric Connectors.
- Click a threat feed.
Its details are displayed.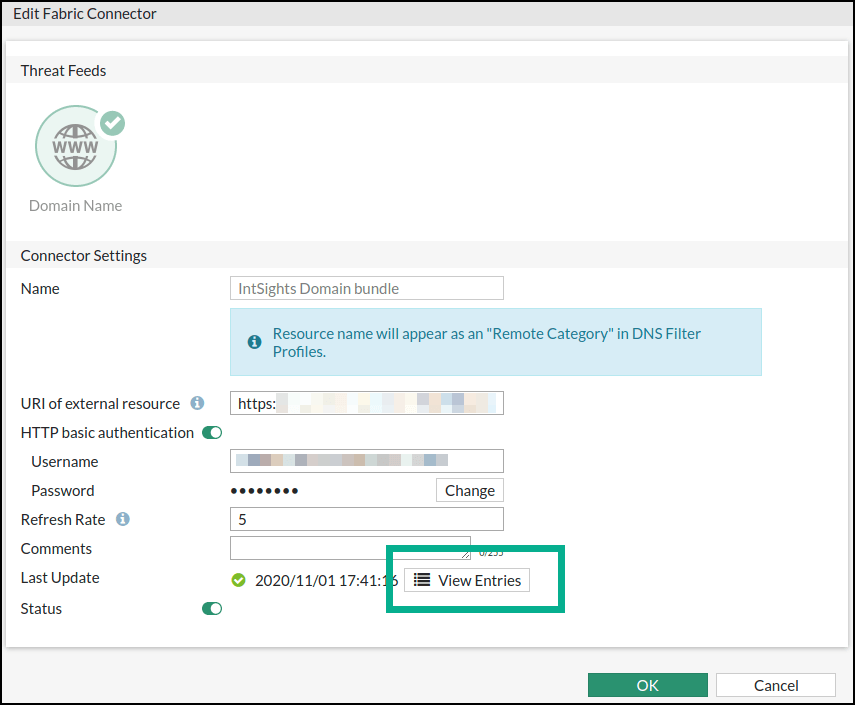
- Click View Entries.
The imported IOCs are displayed: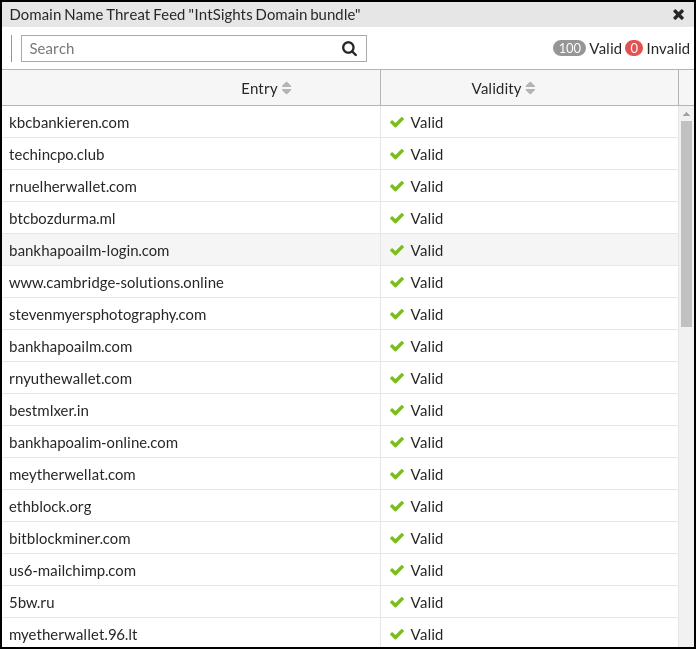
Block imported IOCs
By default, imported IOCs are accepted/monitored. You can create a policy to block both incoming and outgoing communication with the IP address IOCs.
To create a policy to block IOCs:
- From FortiGate, navigate to Policy & Objects > IPv4 Policy.
- Click Create New.
The Edit Policy dialog is displayed.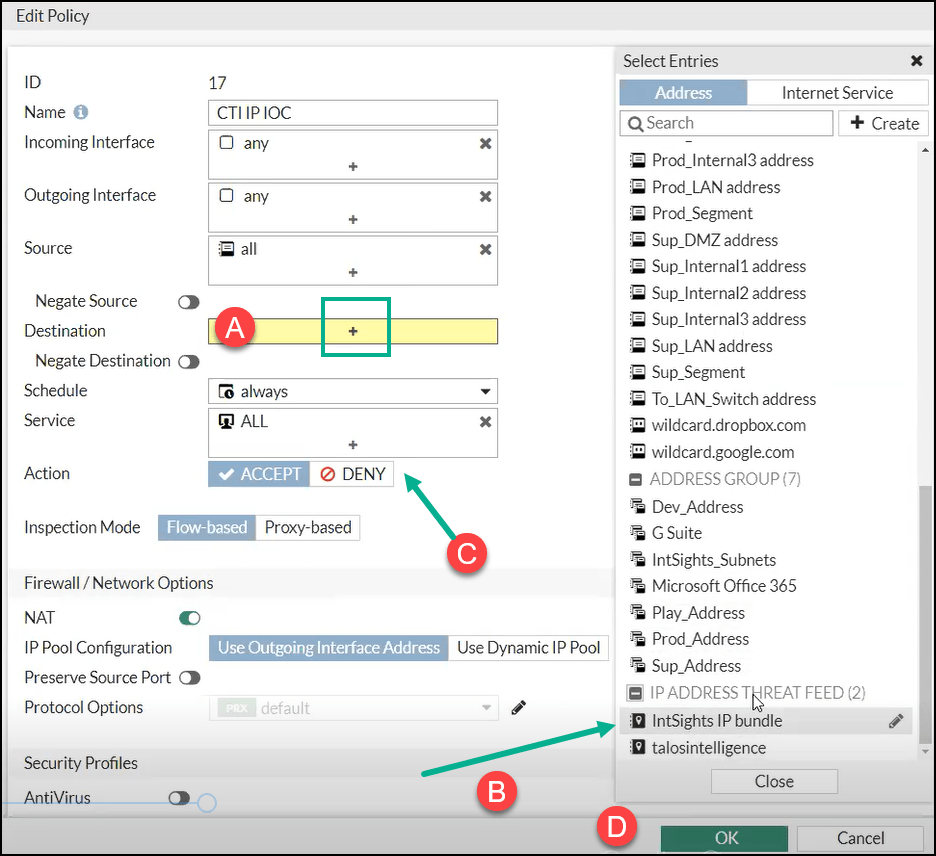
- To select the threat feed to block, click Destination (step A).
- Select the IP address threat feed defined previously (step B).
- Select Deny (step C).
- Click OK (step D).