Configure Virtual Switches for Hyper-V
To set up a virtual machine suitable for the Rapid7 Network Sensor (Insight Network Sensor), two virtual switches are required: one for management and one for monitoring.
There are two options for configuring virtual switches, depending on whether you are enabling Hyper-V for the first time.
Option 1: Create Virtual Switches During Hyper-V Setup
If it is your first time enabling Hyper-V, the setup process asks whether you want to set up virtual switches. From there, you can select the interfaces you want to use as virtual switches.
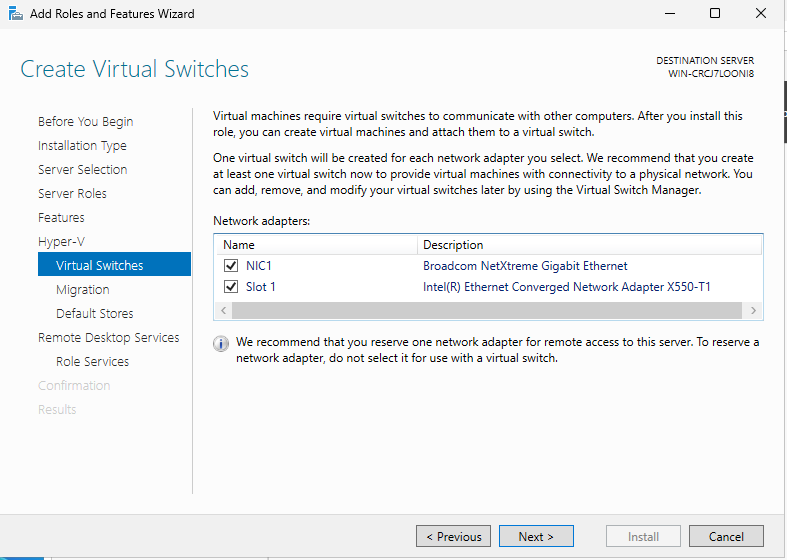
Option 2: Create Virtual Switches in Virtual Switch Manager
Otherwise, you must set up the virtual switches through the Virtual Switch Manager menu in Hyper-V Manager. Depending on how setup was done, there may be one, multiple, or no existing virtual switches. This article assumes that both switches need to be created and configured from scratch.
Create the Management Switch
- In Virtual Switch Manager, click New virtual network switch.
- Click the new switch that appears. This will be the management switch.
- In the properties menu, rename the switch to indicate its purpose.
- In the Connection type section, use the dropdown menu to select the Network Interface you want to use as the management interface.
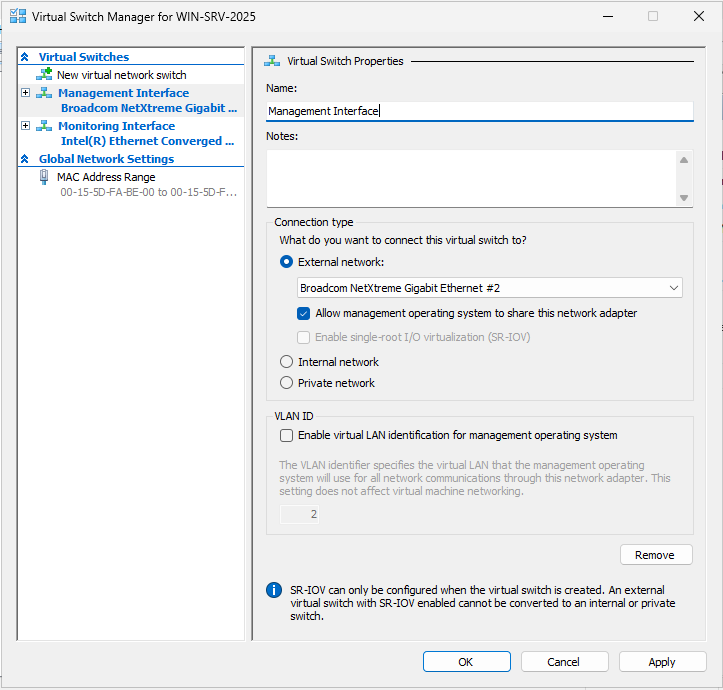
Management interface connectivity
The management interface must be an interface through which the virtual machine can access the Command Platform (Insight Platform).
Create the Monitoring Switch
- Create another new switch, following the same steps as before.
- Rename the switch to indicate its purpose.
- From the Connection type dropdown menu, select the interface you want to use for traffic monitoring.
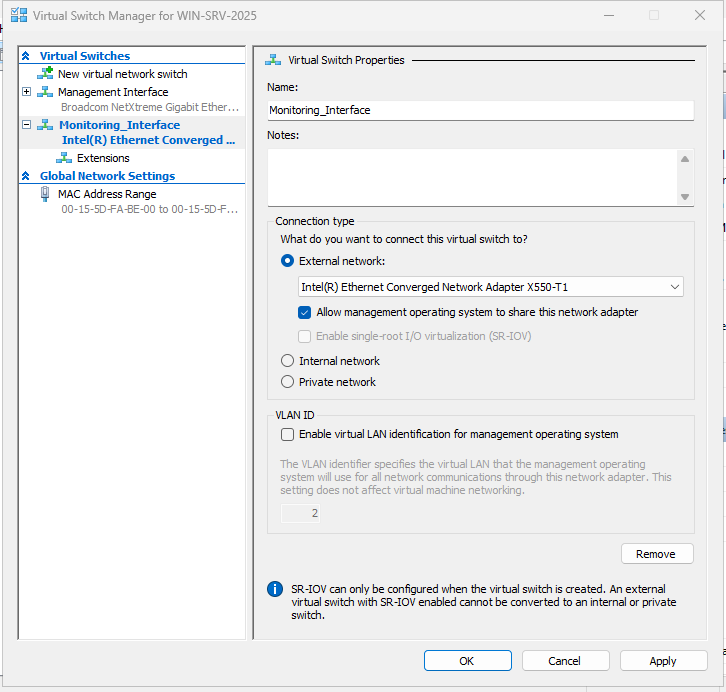
Avoid spaces in the monitoring switch name
Do not use a name with spaces for the monitoring switch, as this can cause issues with the following steps.
Verify the Microsoft NDIS Capture Extension
Click Extensions under the monitoring interface and verify that the Microsoft NDIS Capture extension is enabled.
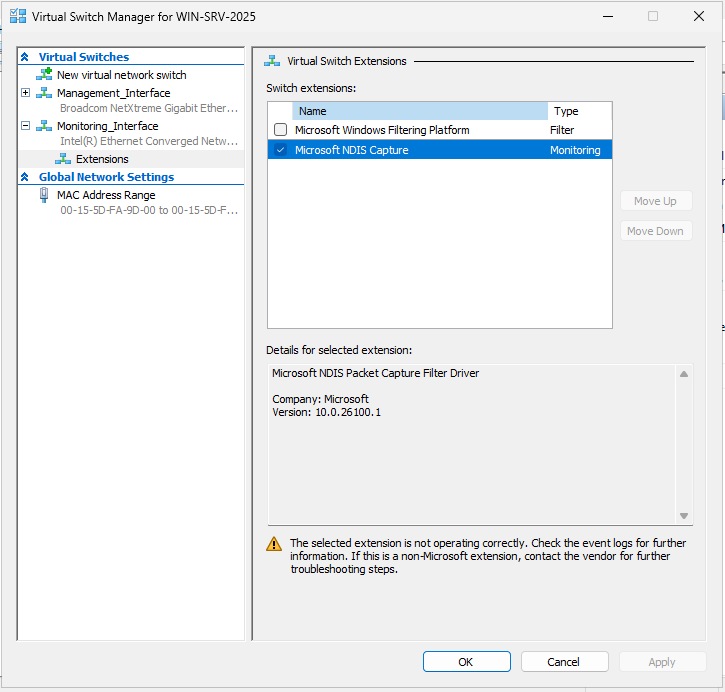
Configure the Monitoring Mode
The final step in configuring the virtual switches is to configure the monitoring mode for the virtual switch being used for monitoring. Run the following PowerShell commands:
$ExtPortFeature=Get-VMSystemSwitchExtensionPortFeature -FeatureName "Ethernet Switch Port Security Settings"
$ExtPortFeature.SettingData.MonitorMode=2
Add-VMSwitchExtensionPortFeature -ExternalPort -SwitchName $virtual_switch -VMSwitchExtensionFeature $ExtPortFeature
When running the final command, ensure that you replace $virtual_switch with the actual name of your switch. For example:
Add-VMSwitchExtensionPortFeature -ExternalPort -SwitchName Monitoring_Interface -VMSwitchExtensionFeature $ExtPortFeatureNext steps
Now that your virtual switches are configured, you can configure the Network Sensor virtual machine.