Mass Deploy
This article covers deployment instructions for the certificate package edition of the agent installer.
For instructions that also accommodate mass deployment with the token-based installer, see the following articles:
Deployment Software
While you can use any deployment and packaging software that you wish to install the Rapid7 Agent (Insight Agent), we recommend using either of the following options:
You can also deploy the Rapid7 Agent (Insight Agent) using our Azure Security Center.
Microsoft Group Policy
You can distribute the Rapid7 Agent (Insight Agent) among Windows assets via a Group Policy (GPO) package created through Microsoft Group Policy.
To deploy the Rapid7 Agent (Insight Agent) as an assigned app, the MSI file, needs to be edited to pass the required parameters for the agent to fetch the configuration files that pair the agent to your organization. We recommend using Orca (https://docs.microsoft.com/en-us/windows/win32/msi/orca-exe ) to edit the MSI file.
Edit the MSI file
- Download Orca and follow the installation instructions. https://docs.microsoft.com/en-us/windows/win32/msi/orca-exe
- Download the installer from the Command Platform (Insight Platform).
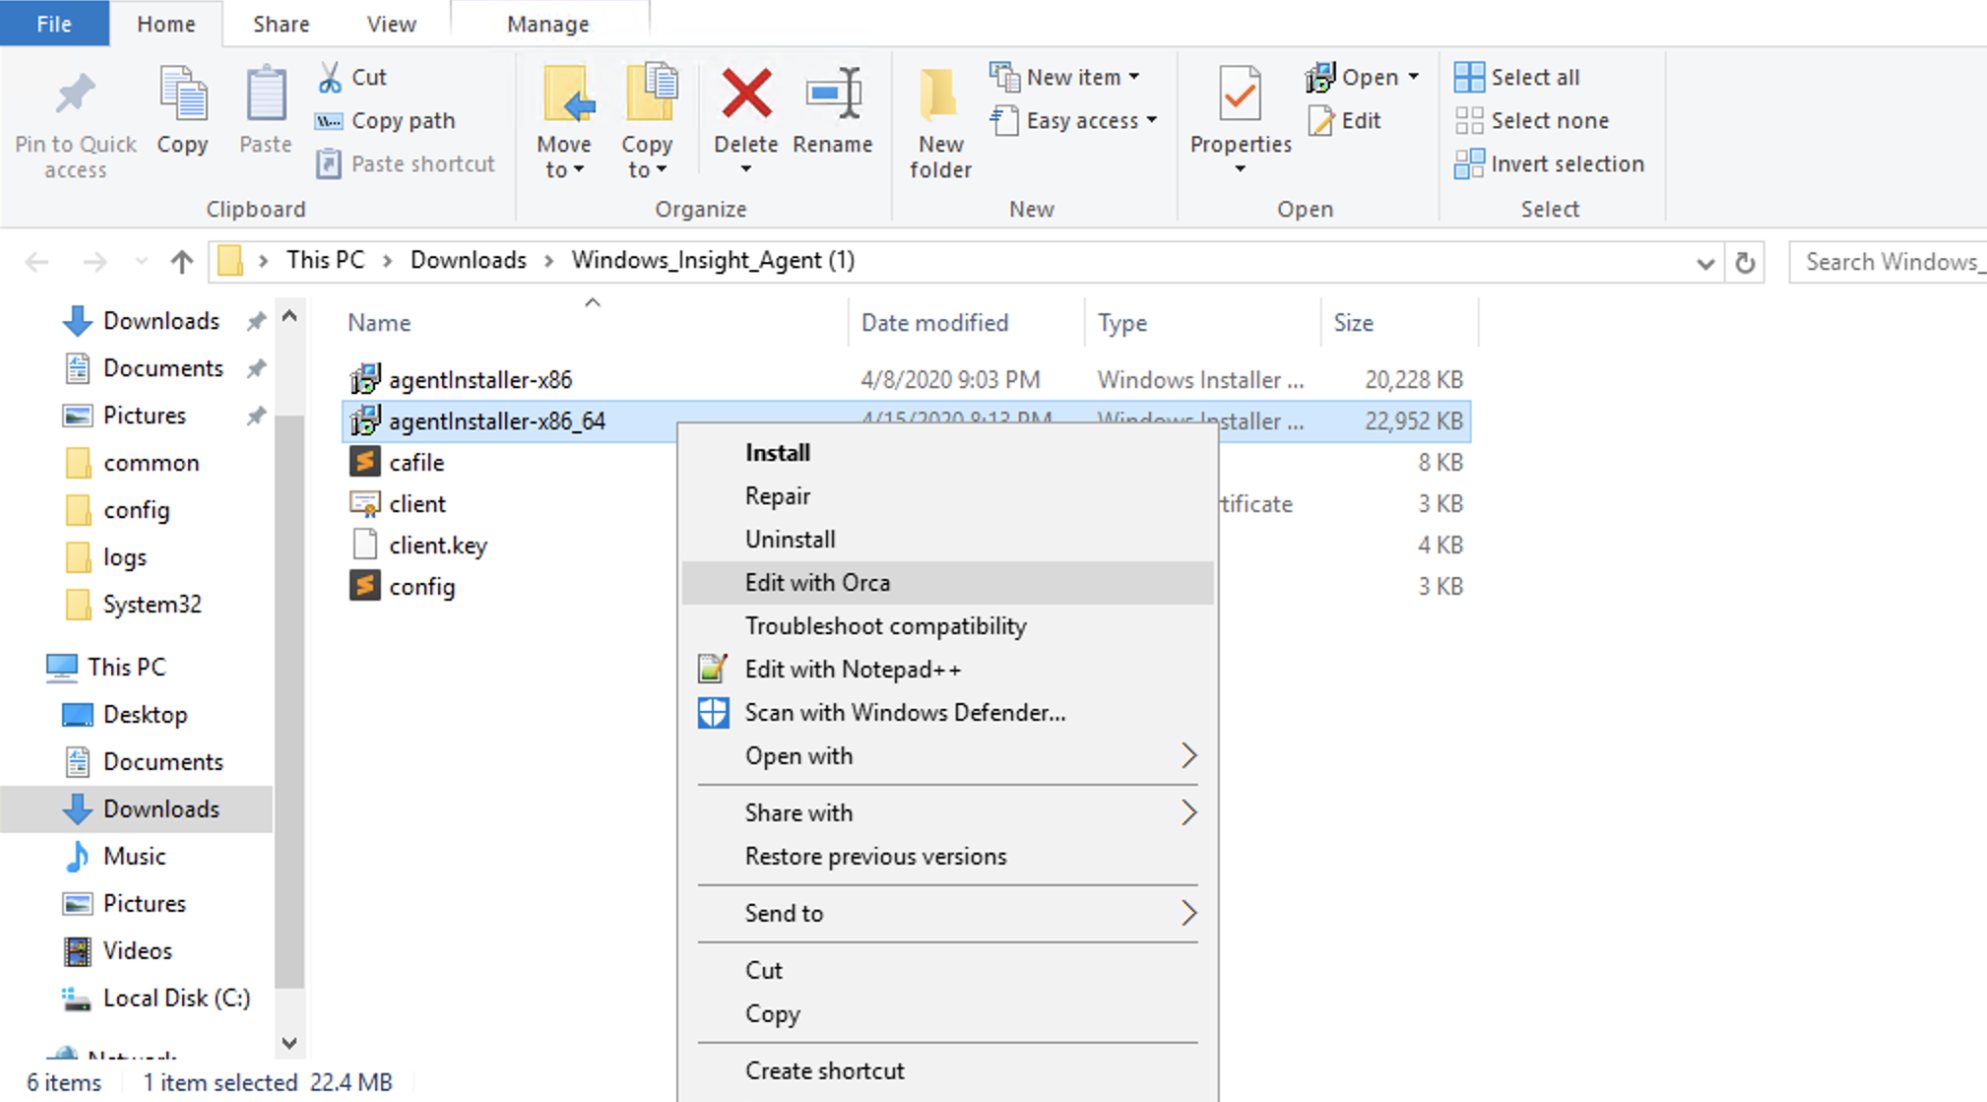
- Open the MSI file that you downloaded in step 2 in Orca. With your mouse, secondary click on the MSI file > select Edit with Orca.

You will need to generate a token. Before generating a token, review how to install the Rapid7 Agent (Insight Agent) using a token.
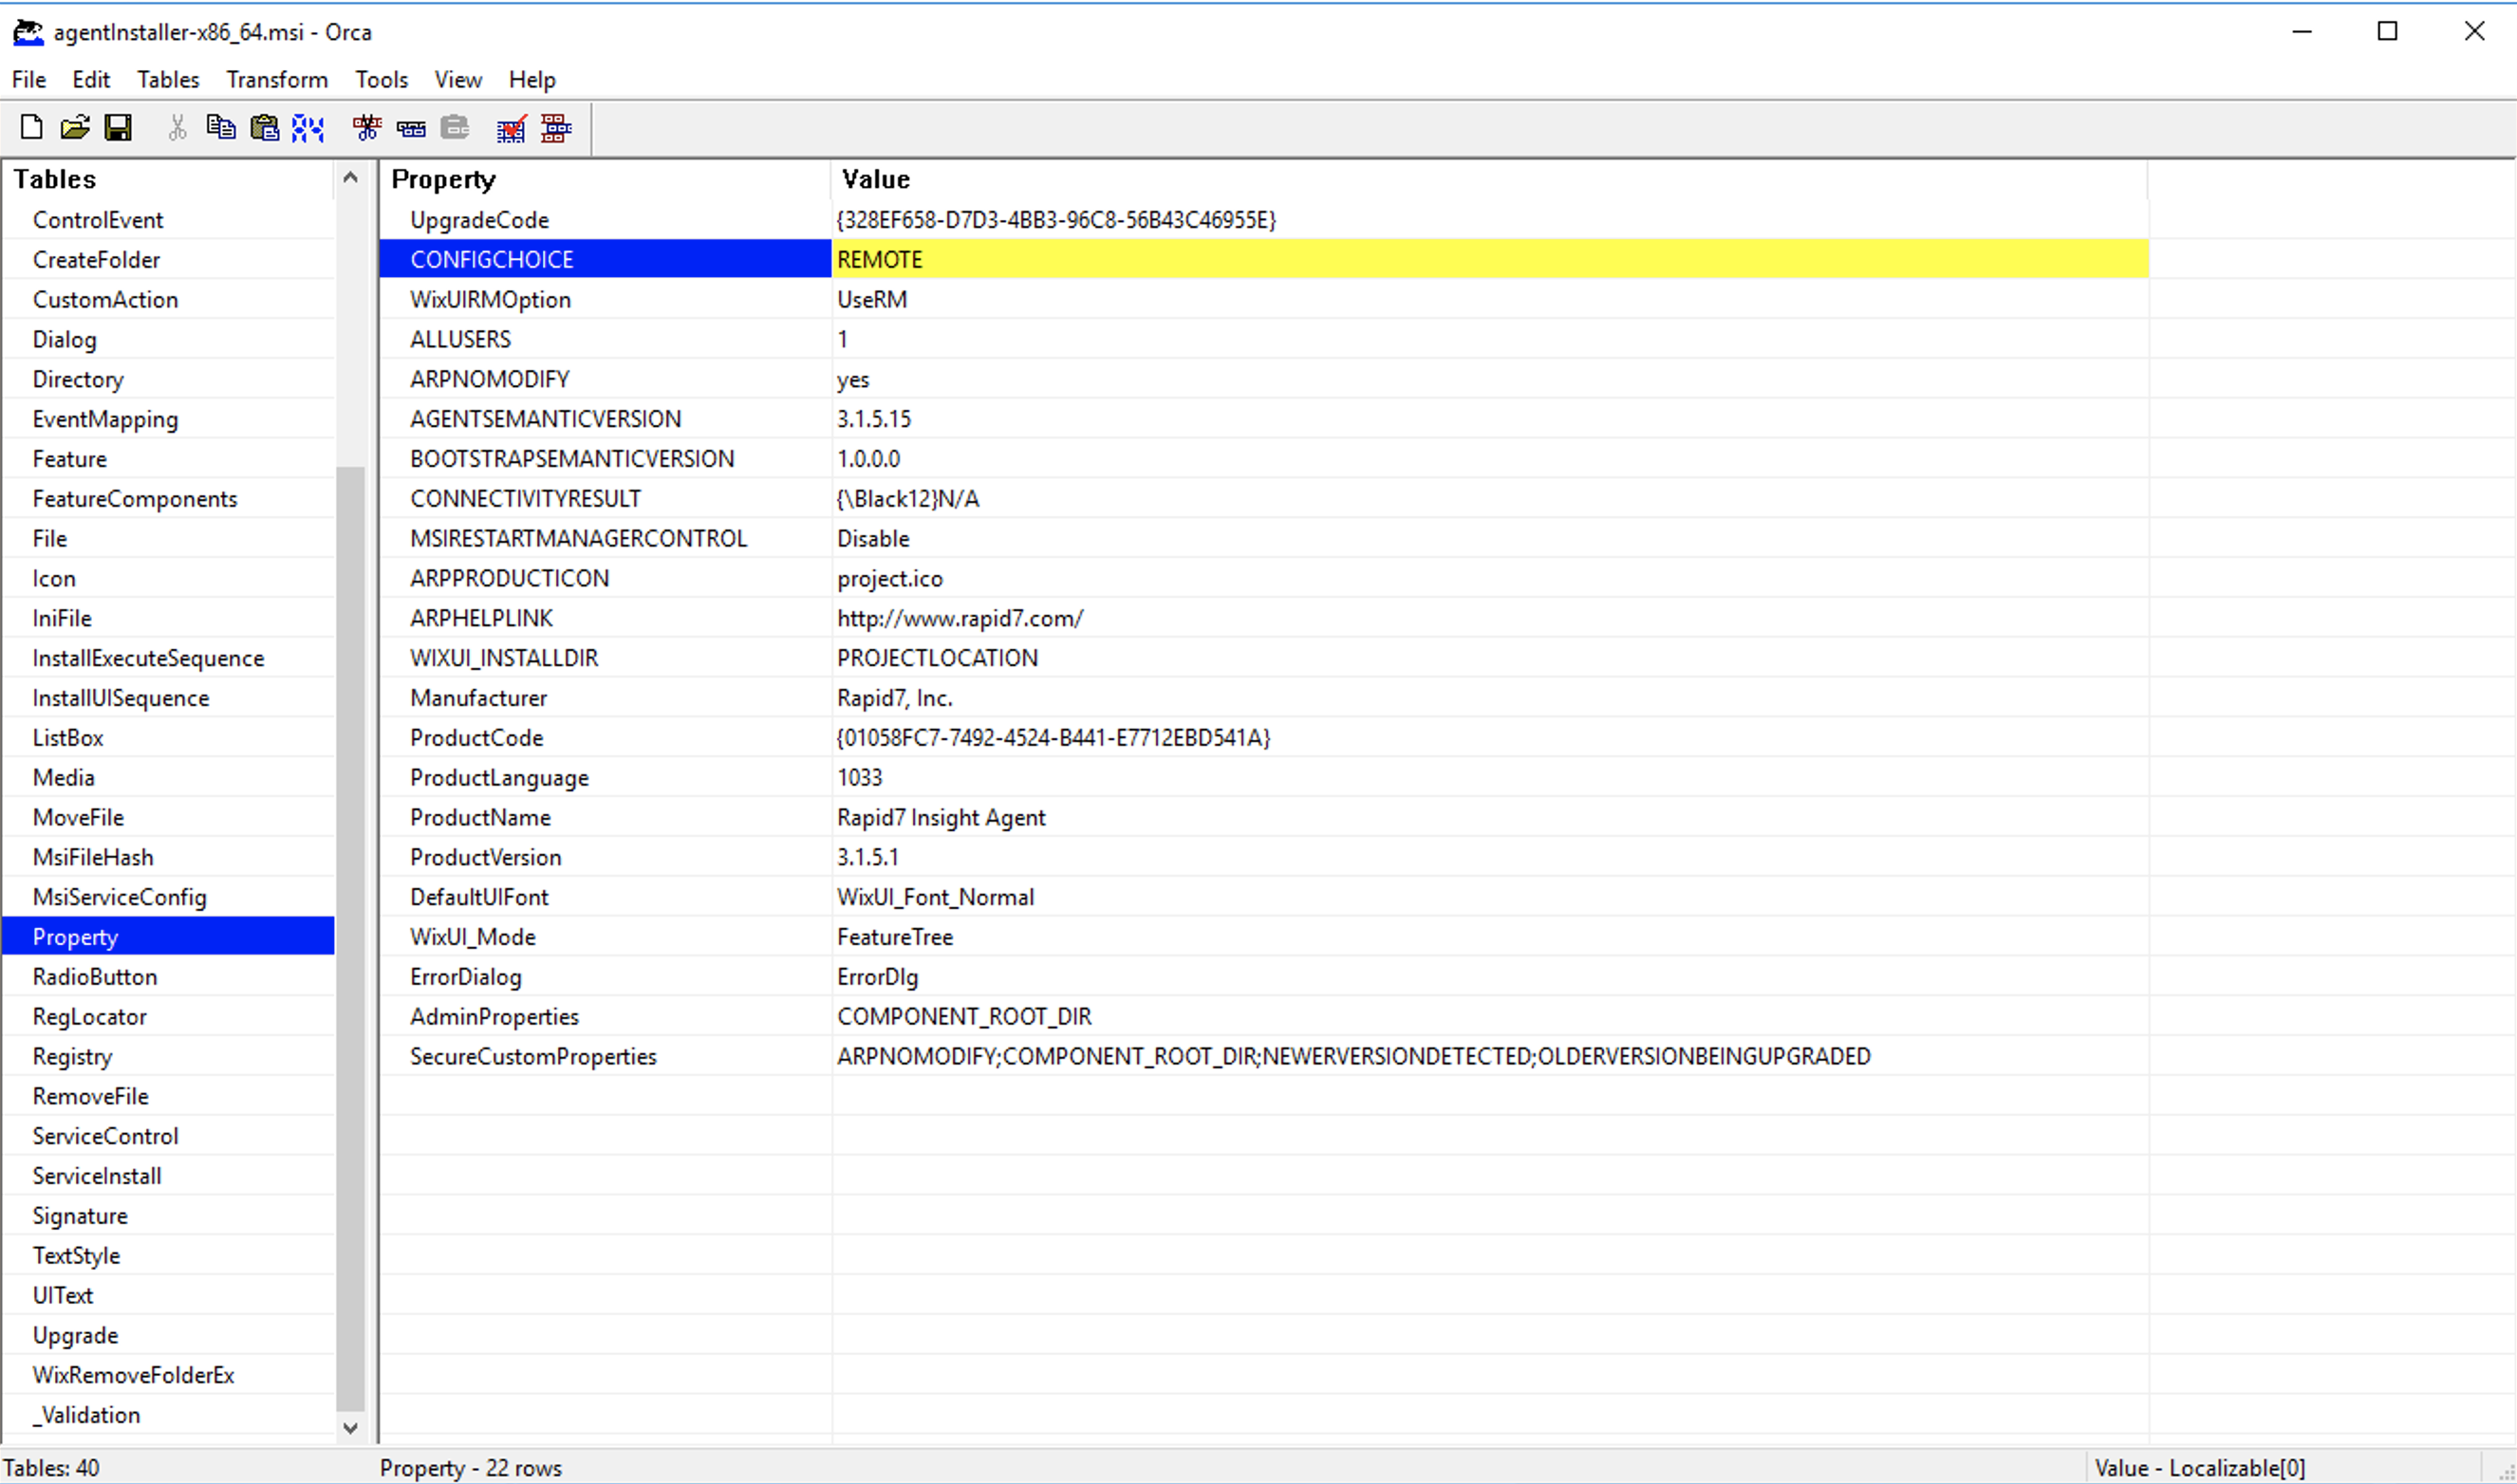
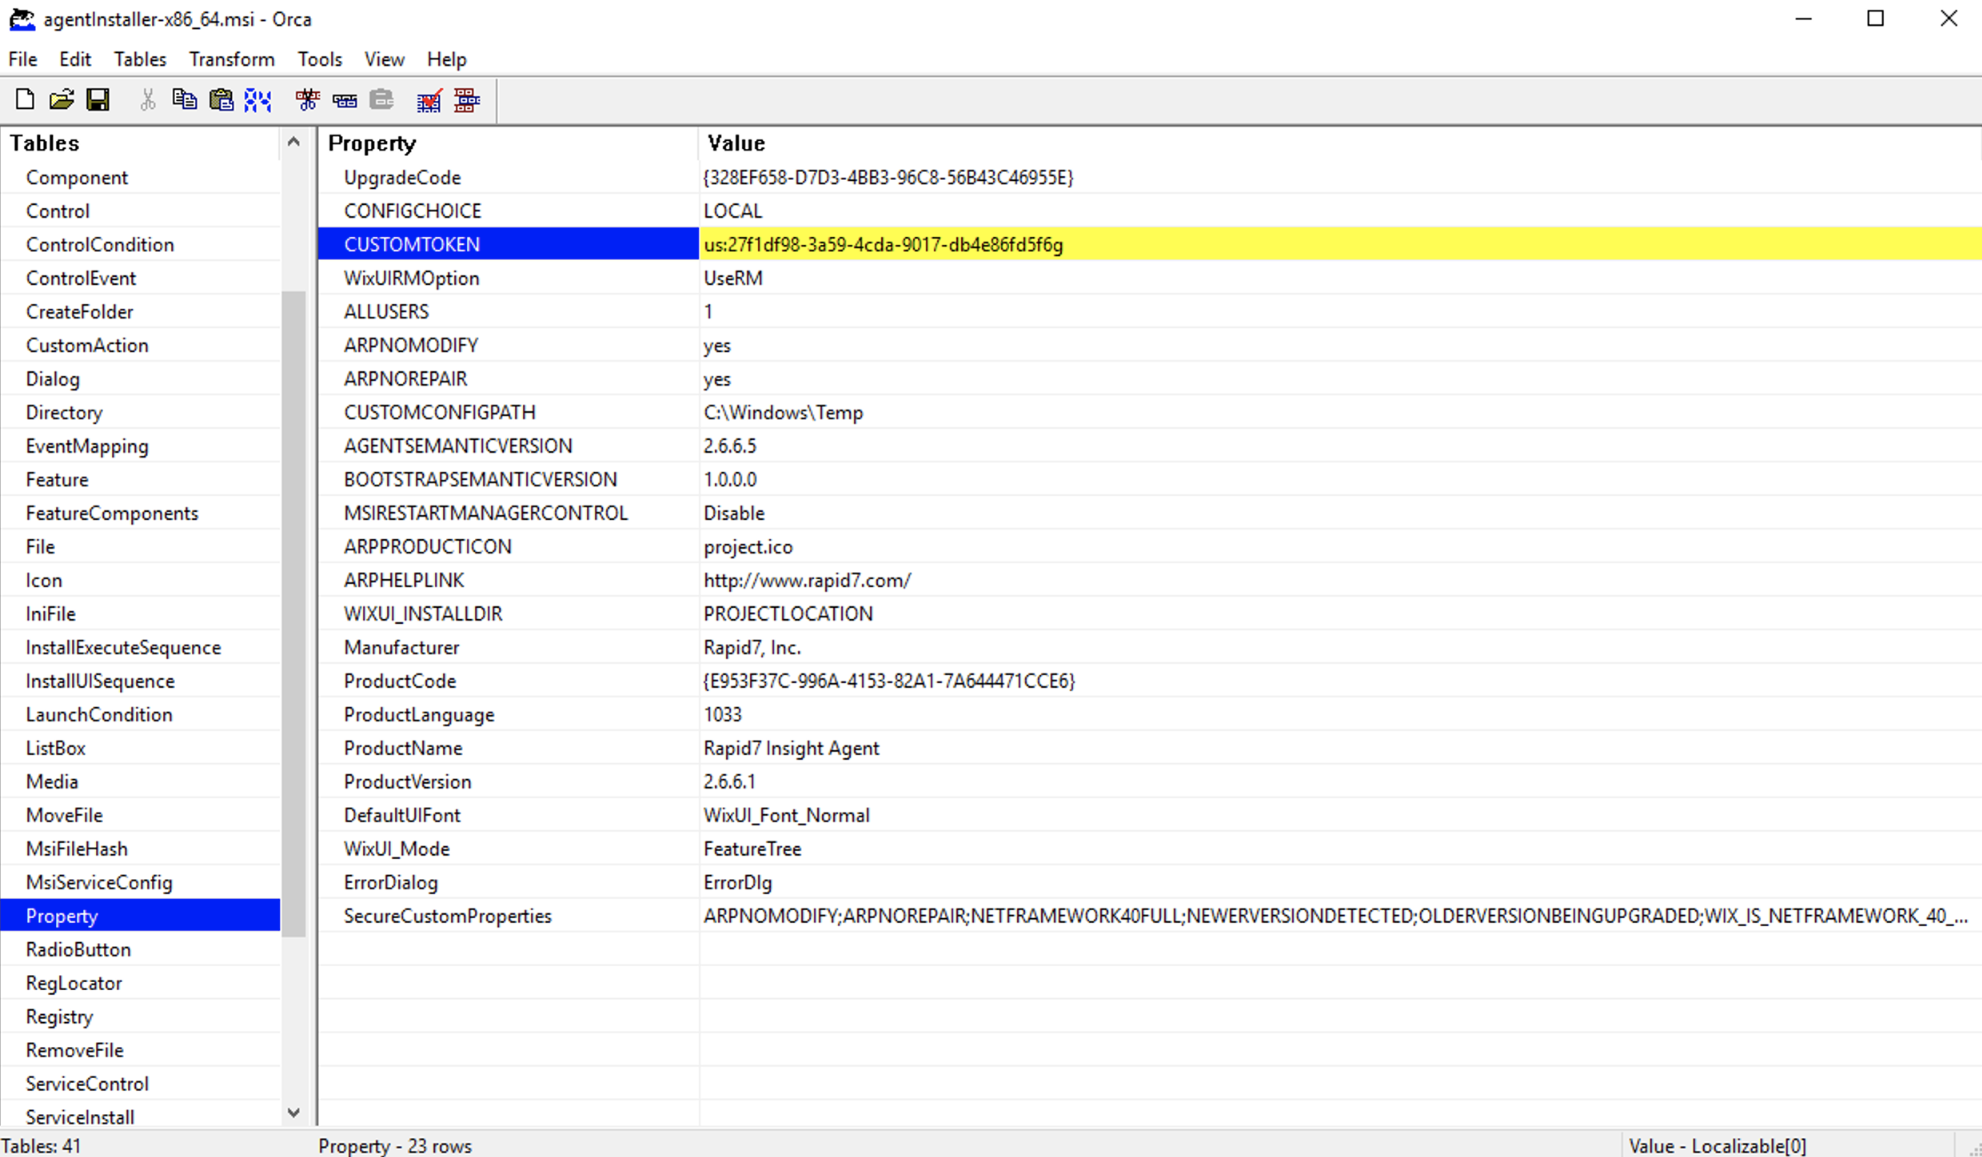
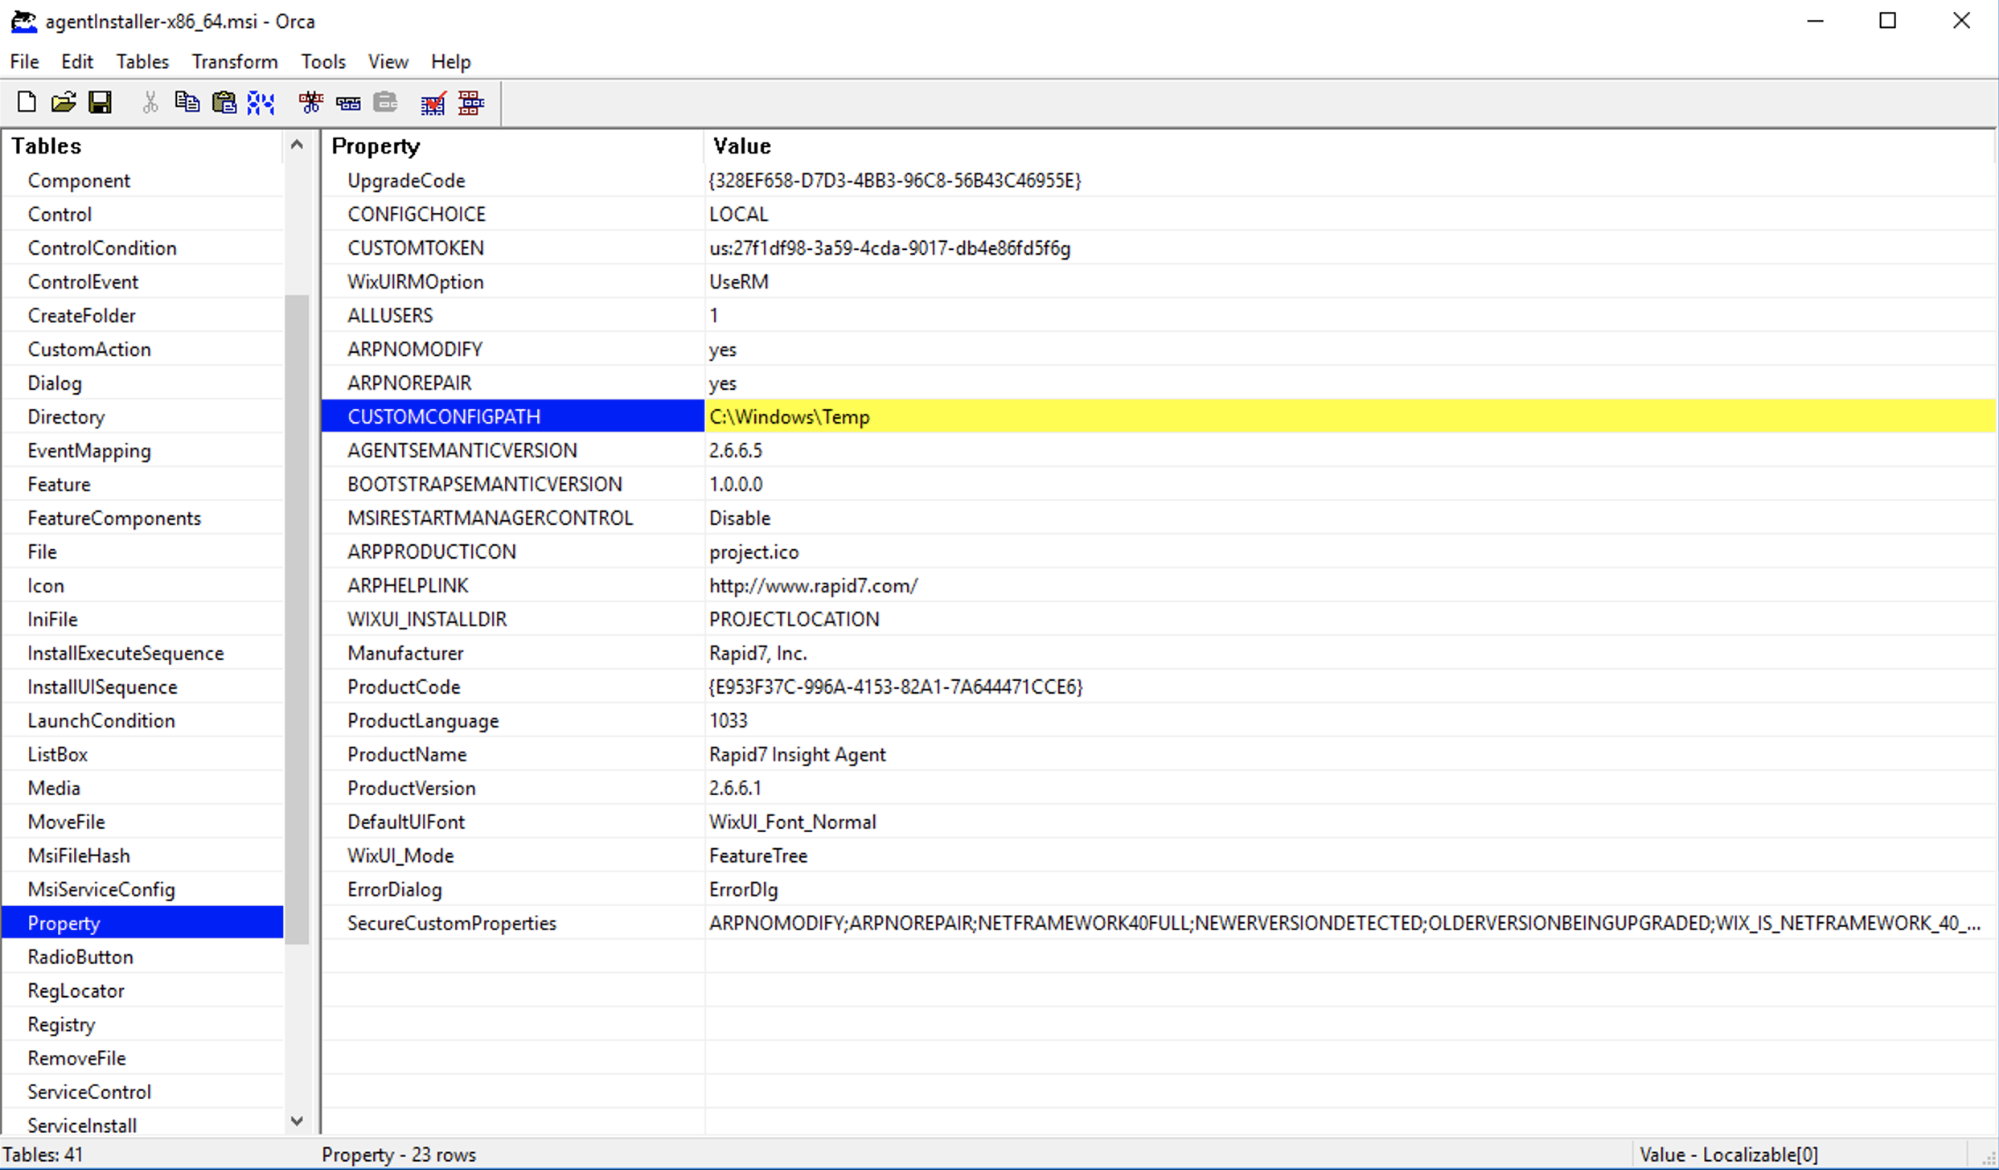
- In the Property table, reassign the value for
CONFIGCHOICEand add theCUSTOMTOKENandCUSTOMCONFIGPATH.CONFIGCHOICEmust have its assigned value changed fromLOCALtoREMOTE.CUSTOMTOKENis the region code and unique ID combination generated from Generate a Token. For example,us:9cfa797a-bbb6-4cce-b41d-7ce1c6372253.CUSTOMCONFIGPATHmust be a writable location that exists on all endpoints such asC:\Windows\Temp. TheCUSTOMCONFIGPATHis required whether you choose the certificate package installer or the token-based installer.
If you are not using the token-based install method, CUSTOMCONFIGPATH should point to a readable network share that hosts the config files and is readable by Domain Computers.
You can use the HTTPSPROXY if required and the CUSTOMATTRIBUTES if needed.


- Save the MSI
- Push the MSI as an Assigned App as through GPO (Group Policy Object).
If you cannot use the token-based installation method, you can use the legacy certificate package installation method. To install using this method you need to host the unzipped config files and certificates on a network share that is readable by Domain Computers, and then set the CUSTOMCONFIGPATH to point to the UNC path of the network share.
Distribute the Rapid7 Agent (Insight Agent)
- Download, install and extract the agent installation package.
- Copy the MSI and all other package files to the network file share that you intend to use.
Ensure that the MSI and all other supporting files are in the same directory.
- Open the Group Policy Management tool.
- Create a new group policy or edit an existing one.
- Open Computer Configuration > Policies > Software Settings > Software Installation.
- Secondary on Software Installation and select New > Package.
- Specify the UNC (Universal Naming Convention) path of the agent installer and its dependencies. For example:
\\shared_location\Rapid7\agentInstaller-<installerType>.msi - Specify the deployment type as
Assigned. - Check that the Security for the installation is properly configured. Target assets must have read permissions to the installation configuration.
CUSTOMCONFIGPATH
The CUSTOMCONFIGPATH flag functions differently depending on the agent installer used.
Certificate Package Installer
When used with the certificate package installerCUSTOMCONFIGPATH tells the .msi file where to find the configuration files that it needs to complete the installation. These configuration files must already be in a location that the installer can reference when it executes.
Token Based Installer
When used with the token-based installer, CUSTOMCONFIGPATH tells the .msi file where to save the configuration files after it downloads them from the Command Platform (Insight Platform). The installer will then pull the files from this location during the installation process. After the installation completes, the directory specified in CUSTOMCONFIGPATH is no longer required.
For Microsoft System Center Configuration Manager (SCCM) deployment procedures, the CUSTOMCONFIGPATH assignment is required, no matter how you choose to deploy.
Windows batch file
- Download, install and extract the agent installation package to a network share accessible by all endpoints.
- Copy these lines into a text editor. Substitute
<installerType>withx86_64for most Windows architectures, orarm64for Windows ARM64. - Save the file with the
.batextension:
rem Install_InsightAgent.bat Installation Batch File
mkdir c:\InsightAgent
robocopy \\<server>\<share>\packages\insight_agent\ c:\InsightAgent
cd /d c:\InsightAgent
msiexec /i agentInstaller-<installerType>.msi /quiet /qn- Run the batch file with an account whose permissions have been elevated to administrator.