Configure Custom Scan Options
There are several ways to create a custom scan config for your engine. You can configure:
To set custom options within Application Security (InsightAppSec):
- Navigate to Apps > Scan Configs.
- Choose the Scan Config you want to customize.
- Choose Custom Options.
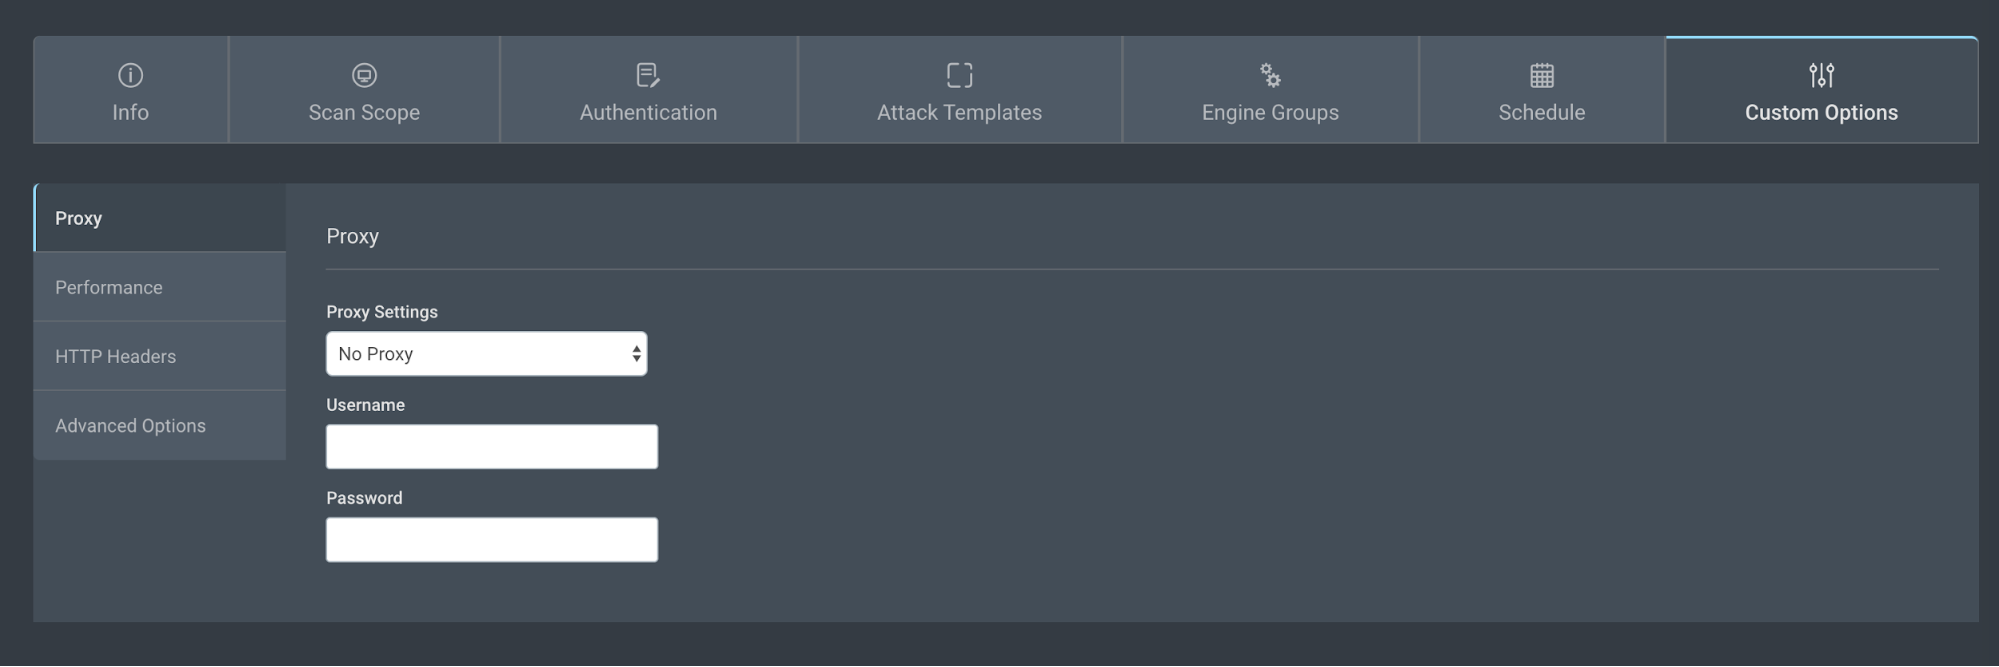
Proxy
Some organizations require users to access web applications through a proxy server so that traffic can be monitored.
You can set these proxy settings:
- No Proxy - Use this option if your app can be accessed without a proxy server.
- Manual configuration - If you know the URL/IP address and port of the proxy server, you can add it in the manual configuration section.
- Automatic configuration - Some organisations have multiple proxies and specific rules around what proxy can be used to access which application. In order to simplify this process, these rules are written in a Proxy Auto-Config (PAC) file. You can find an example of a PAC file here: https://findproxyforurl.com/example-pac-file/ . If you have a PAC file hosted online, you can provide the URL in this field. Make sure that the URL is accessible from the system running the Application Security (InsightAppSec) engine.
If the proxy requires authentication, you must provide the username and password in the respective fields.
Performance
The Performance subsection allows you to tune the balance between efficiency and thoroughness of scanning. The performance parameters will also depend on the hardware and network capabilities of your application server.
You can set these performance options:
- URL Retry Attempts - The maximum number of times Application Security (InsightAppSec) will retry a connection to a URL.
- Min delay between requests (ms) - The minimum time in milliseconds that Application Security (InsightAppSec) will wait between sending requests to the target application. This value is inversely proportional to the speed of your scan. If you are testing a slow app, you can increase the value of this parameter so that your target app requires fewer resources to support the test.
- The default value is 25 milliseconds. For light server loads, we recommend increasing the value to 200 milliseconds.
- Connection Timeout (ms) - The maximum amount of time in milliseconds that Application Security (InsightAppSec) will wait for the target application to respond to a request. You should increase this value if you are testing an app hosted on a server with limited resources or noticing a high number of timeout messages in the scan logs.
- The default value is 60,000 milliseconds.
- Read timeout (ms) - The maximum amount of time in milliseconds that Application Security (InsightAppSec) will wait to receive the complete response to any request. Read timeouts relate to how long it takes to load pages. For example, heavy reporting platforms may exceed 60 seconds to generate the page.
- The default value is 60,000 milliseconds.
- Max bandwidth (KB/s) - The maximum rate of traffic in KB/s that an Application Security (InsightAppSec) scan will generate. You can increase this number if you are scanning during periods of low network usage in your organization, and wish to increase the scan speed.
- The default value is 1,200 KB/s.
- Max concurrent requests (1-64) - In order to improve scan efficiency, Application Security (InsightAppSec) tries to crawl and attack several pages of the target app at the same time. This parameter determines the maximum number of concurrent requests that Application Security (InsightAppSec) will make to the target app.
- This parameter can have a maximum value of 64. The default value is 16.
- Close connection after every request - You should turn this on if your application has not been programmed to handle HTTP pipelining.

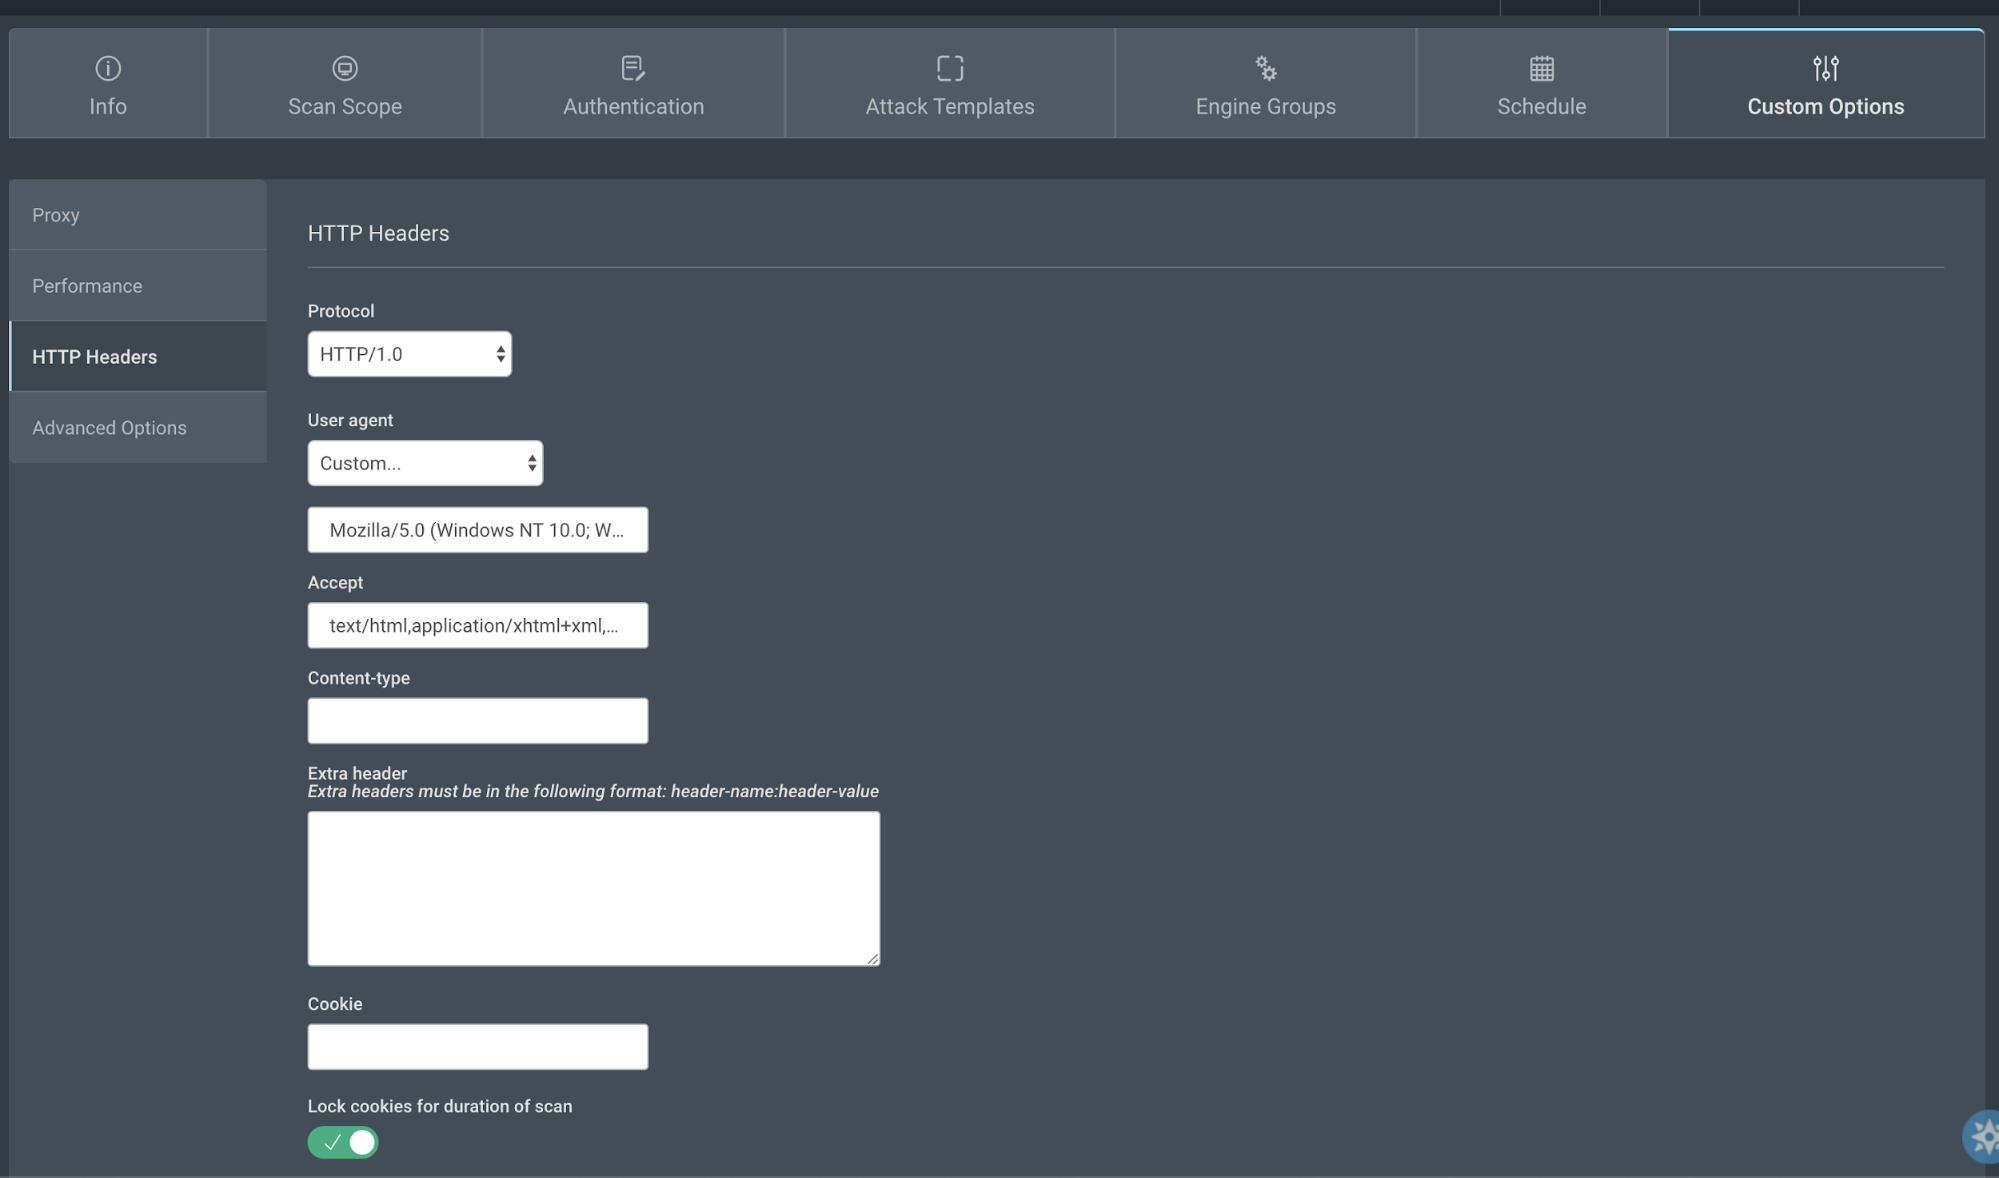
HTTP Headers
Several web applications customize their responses based on the headers in the HTTP request. By modifying HTTP header settings, you can test your web application for various scenarios, such as receiving a request from a certain device or a certain country.
You can set these HTTP headers:
- Protocol - Specifies the HTTP protocol used by your web application. The default value is HTTP/1.1. You can learn more about the different versions of the HTTP protocol here: https://developer.mozilla.org/en-US/docs/Web/HTTP/Basics_of_HTTP/Evolution_of_HTTP .
- User agent - Allows the server to identify the operating system and the software making the request. If your web application responds differently on different browsers or devices, you can use this field to request the different versions of your web application and test them. You can learn more about the User-Agent HTTP header here: https://developer.mozilla.org/en-US/docs/Web/HTTP/Headers/User-Agent .
- Accept - Informs the server of the content types the client is able to understand. You can learn more about the Accept header here: https://developer.mozilla.org/en-US/docs/Web/HTTP/Headers/Accept .
- Content-type - Informs the server of the media type. You can learn more about Content-Types here: https://developer.mozilla.org/en-US/docs/Web/HTTP/Headers/Content-Type
- Extra header - Several web applications customize their responses based on the headers in the HTTP request. By modifying HTTP header settings, you can test your web application for various scenarios, such as receiving a request from a certain device or a certain country. Extra headers must be in the following format:
header-name:header-value. - Cookie - Specifies the HTTP cookies that are necessary to retrieve the desired state in your application. Cookies are written in the
key=valueformat and separated by the semi-colon(;) character. - Lock cookies for duration of scan - Web applications can modify the values of HTTP cookies based on their current state. If you enable the Lock cookie values for duration of scan option, the value of your desired cookies will remain unchanged during the scan.
Advanced Options
The Advanced Options screen enables you to minutely configure your scan template and provides a number of options not available in other screens.
