What’s new? Validation Scanning
We’ve made changes to Validation Scanning and the following document provides information on the new user experience and the updated feature enhancements:
- You can now only run Validation scans on parent scans
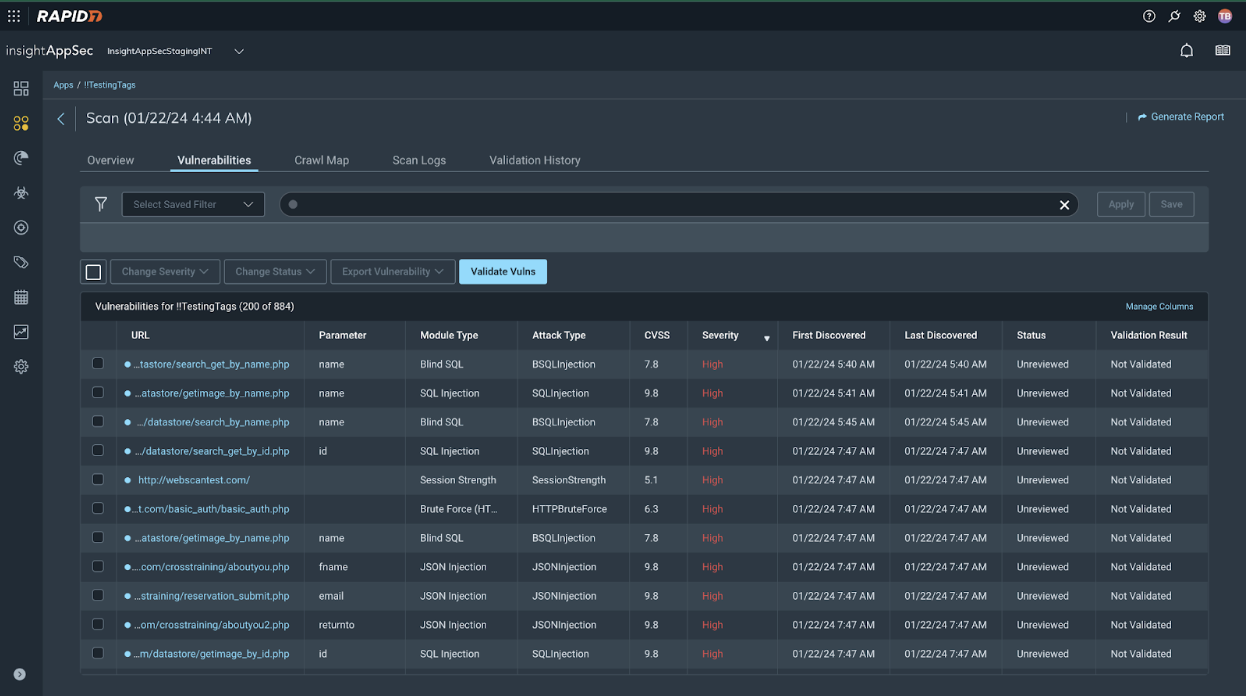
- You can validate a selection of vulnerabilities
- Validation results are now visible in the Vulnerabilities table
- Additional context on status
- Additional validation scan detail and scan history
Validate Vulnerabilities
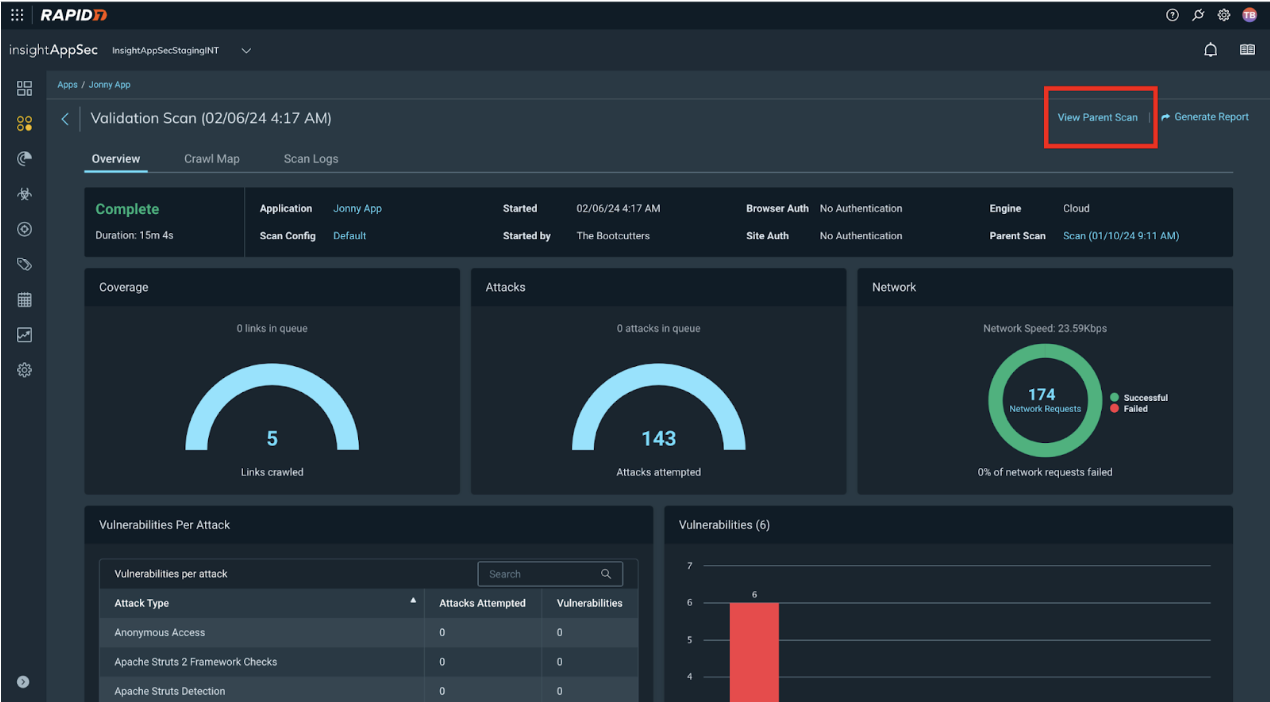
Validation scanning should be used to validate that vulnerabilities have been remediated from within a parent scan. The Validate Vulns button is now only shown on the parent parent scan page.
Parent scans should be run on regular cadence to find new vulnerabilities that may be present in your environment.
You can only run Validate Vulns on a parent scan
You cannot run Validate Vulns on a validation scan. It is recommended that you run Validate Vulns on a new parent scan for the most accurate vulnerability results.
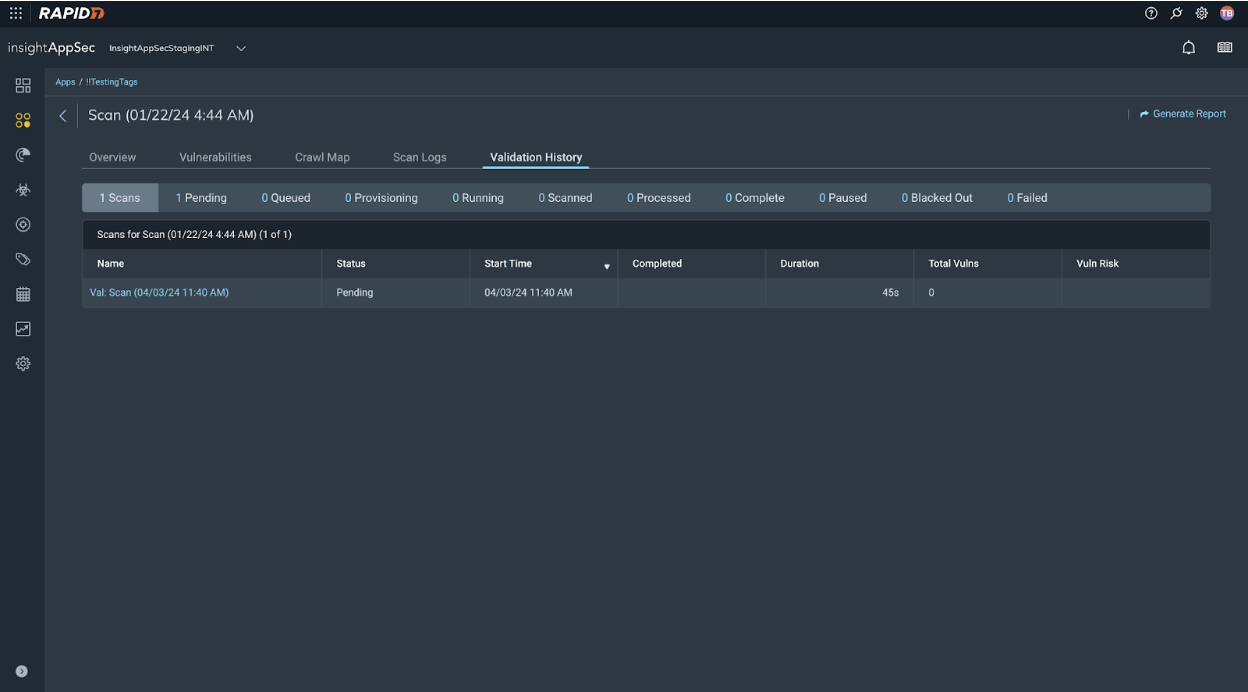
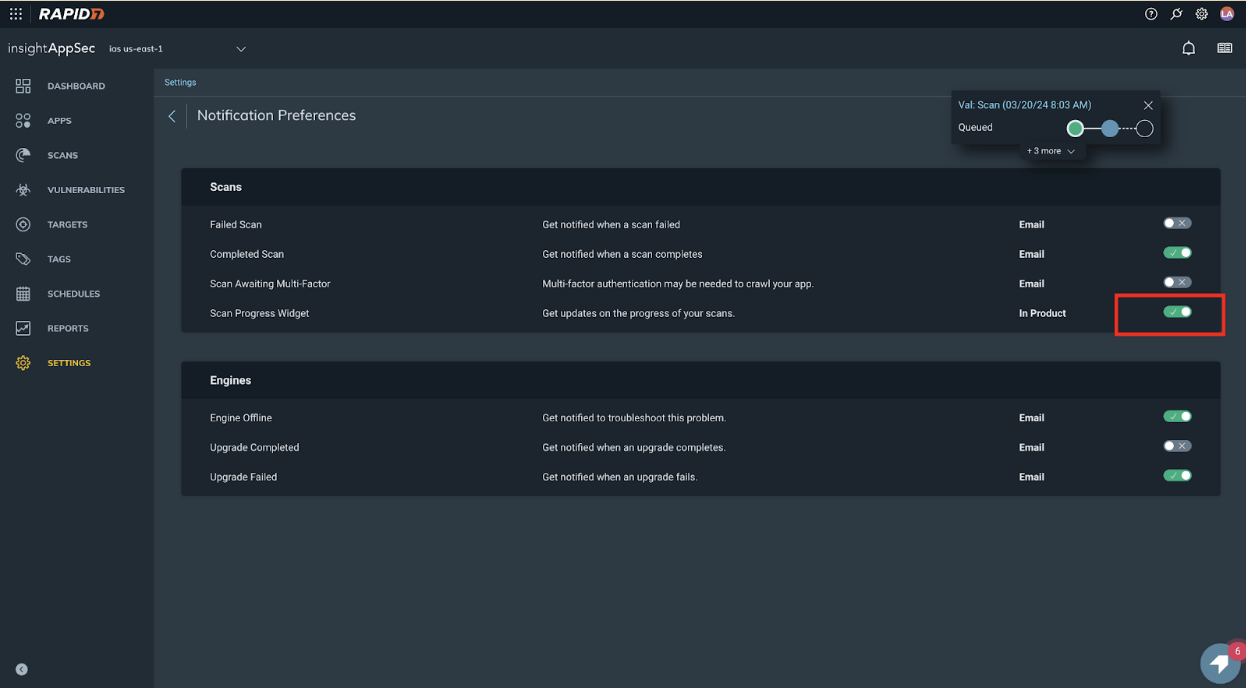
View validation scan progress
You can view the progress of a validation scan from within the Validation History tab. Alternatively you can also view validation scan progress using the scan progress widget, which can be turned on from within Settings > Manage Notification Preferences.
Validate a selection of vulnerabilities
You can now choose a selection of vulnerabilities that you want to run a validation scan on, to verify fixes for specific vulnerabilities in your environment.
You can also validate all vulnerabilities within the scan by selecting Validate Vulns.

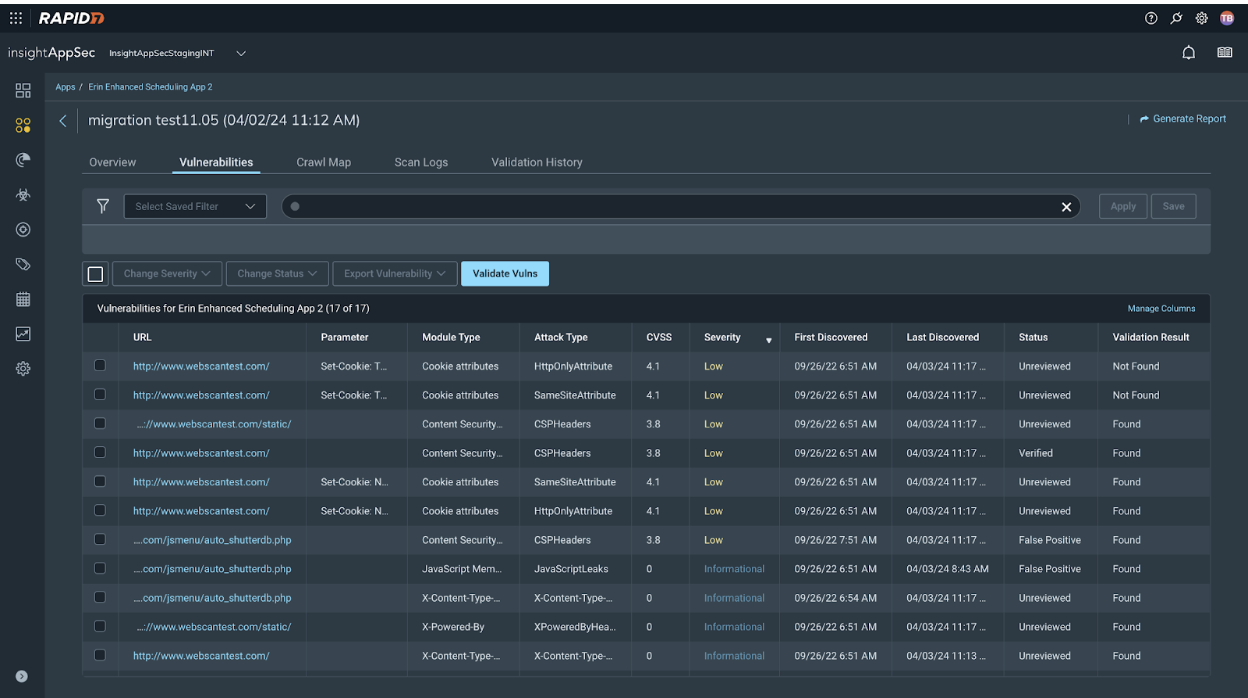
View Validation Results
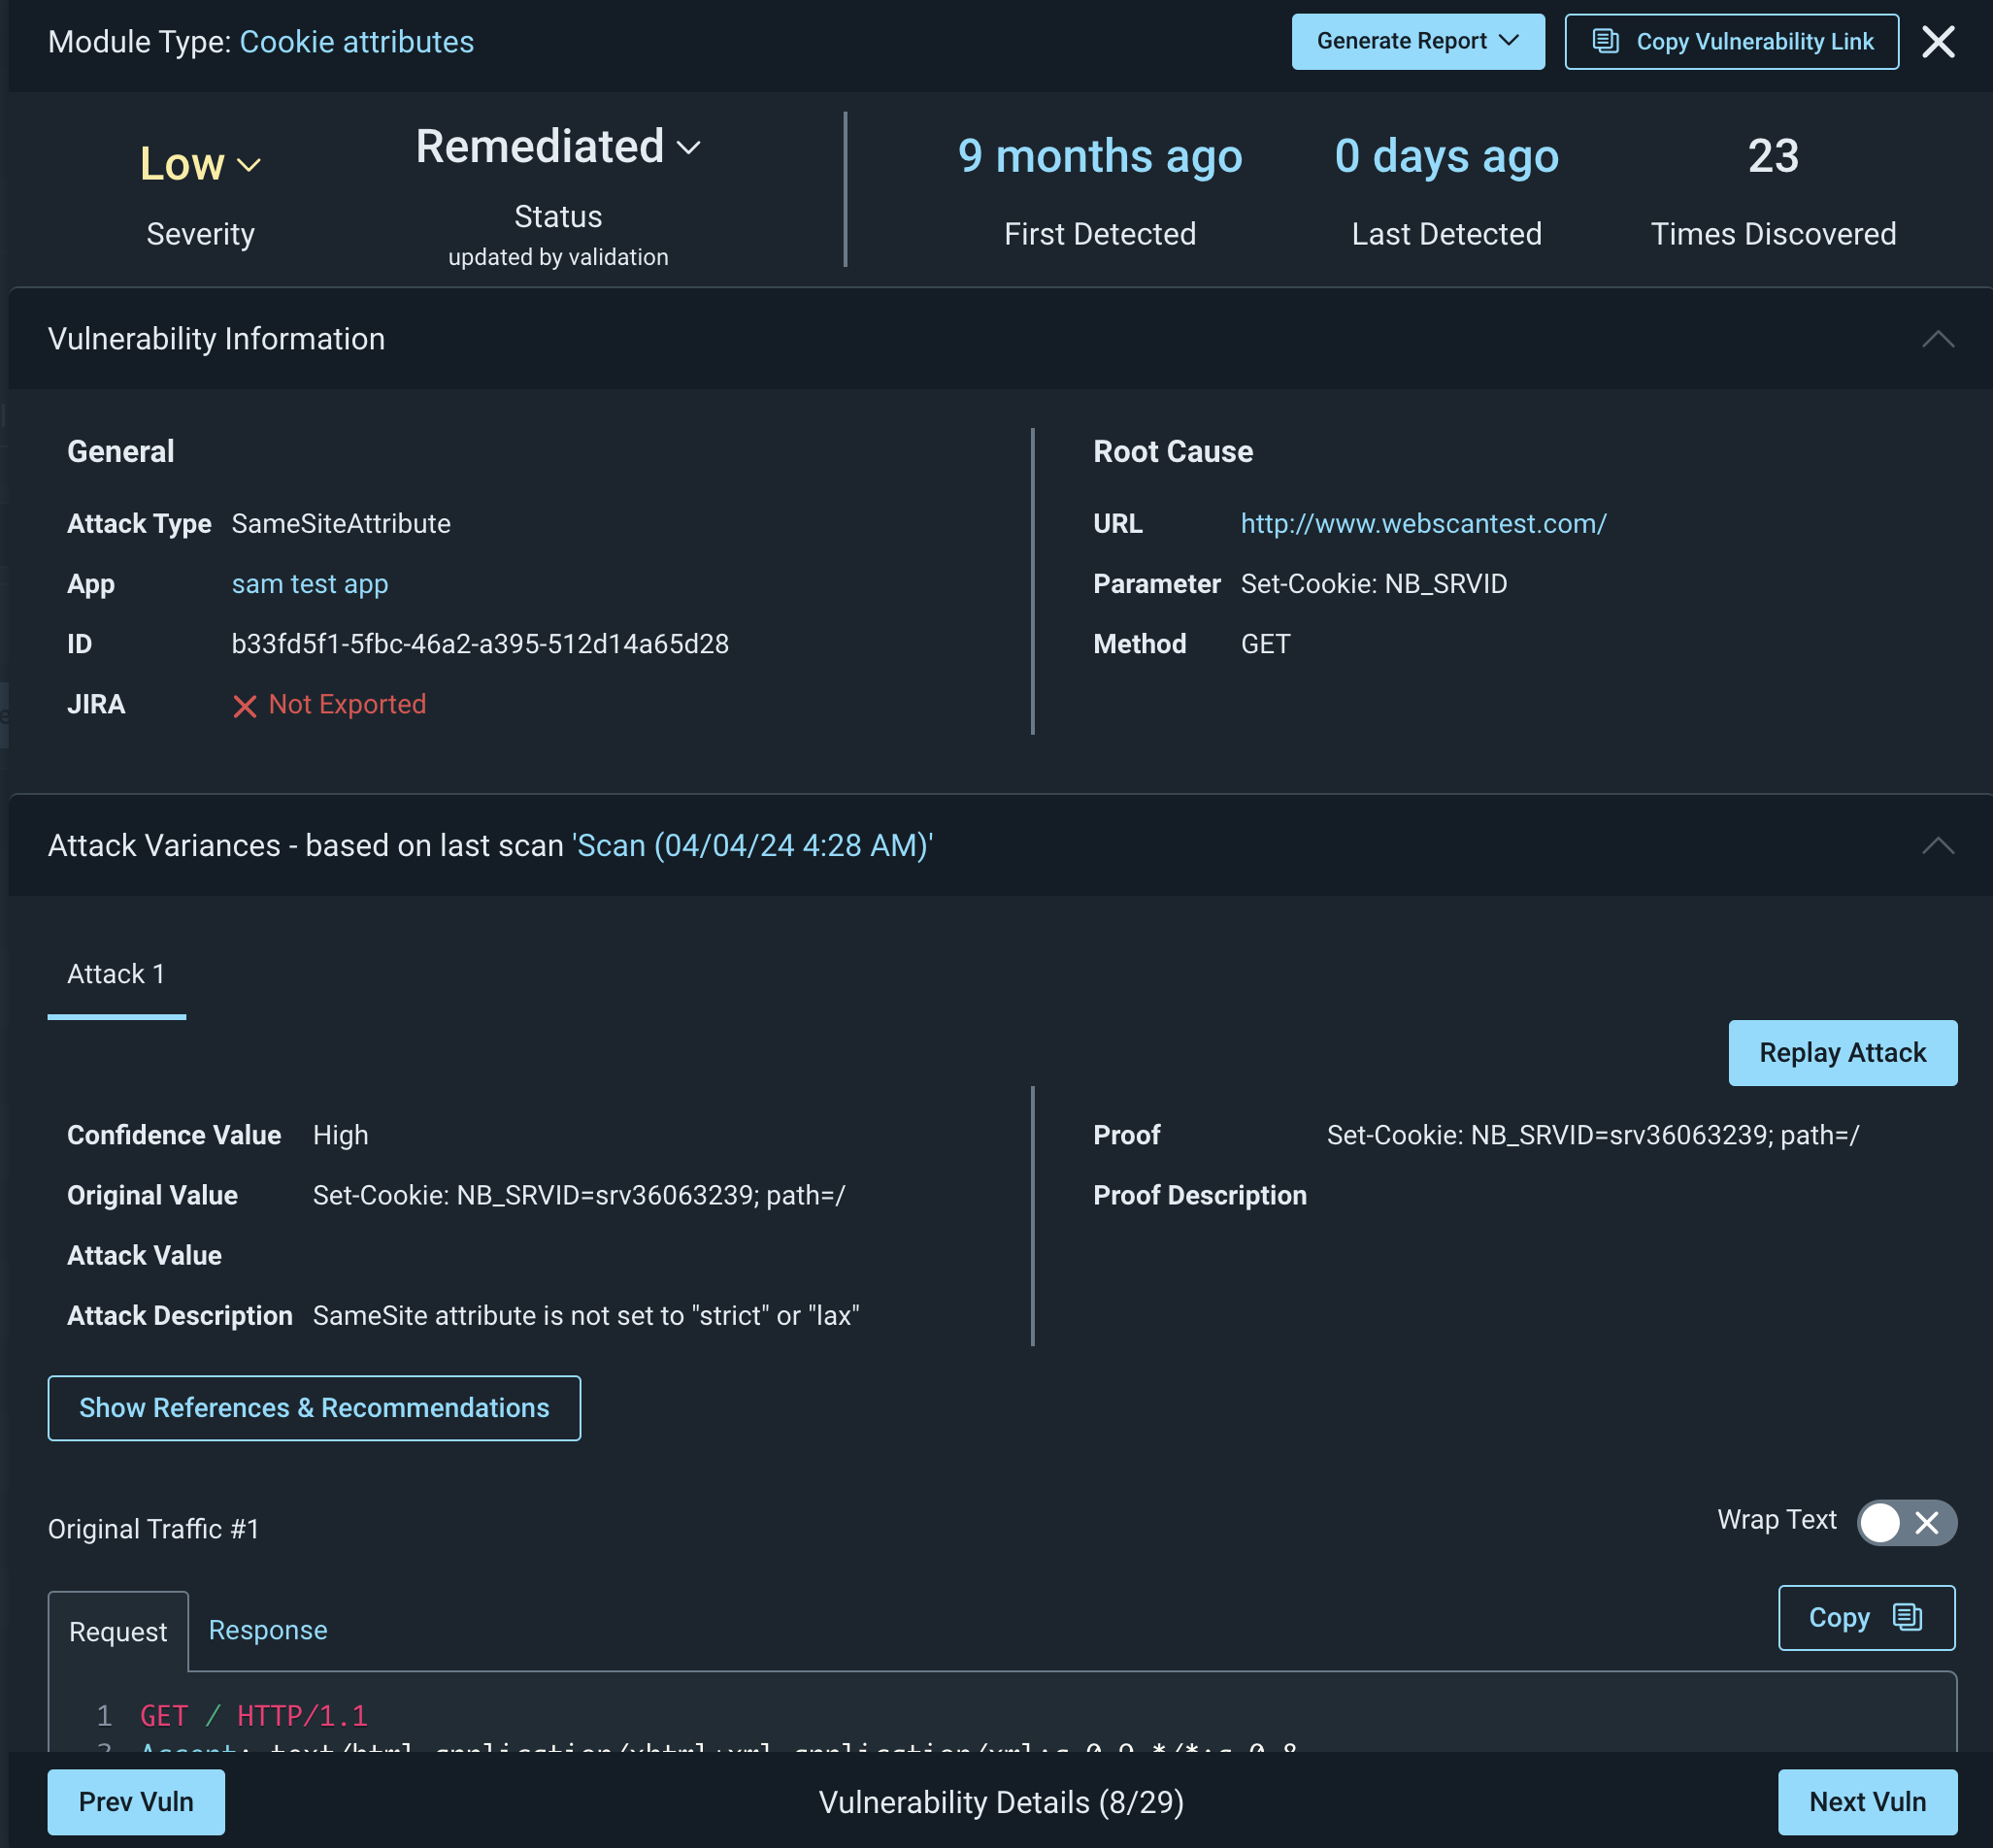
Validation scan results are now visible in the Vulnerabilities table. This includes any unconfirmed results. The Status of the vulnerability updates according to the result returned by the Validation Scan.
If a validation scan presents an error or the vulnerability cannot be validated, the status of the validation will be Unconfirmed. The vulnerability status section below explains the status for each results.
Vulnerability Status
Validation scans automatically change the vulnerability status depending on whether the vulnerability was found, not found, or unconfirmed when run against the parent scan:
- Found - This vulnerability has been found in the validation scan and status will be updated as shown in the table below.
- Not found - This vulnerability was not discovered by the scan, the status is therefore updated and shown in the vulnerabilities table.
- Unconfirmed - The validation scan could not replicate the original attacks, the unconfirmed status will include reasoning behind why this vulnerability could not be confirmed to allow for simplified triaging.
- Not validated - The vulnerability has not yet been validated and therefore has a default result of not validated.
The statuses in bold in the table indicate a change in vulnerability status based on the validation reason code assigned. For example, where the status of a vulnerability was listed as Verified after a parent scan but a validation scan returns a validated status of Not Found, the vulnerability status is updated to Remediated from Verified as the vulnerability is deemed to no longer exist.
| Original Vuln Status | Status if Found | Status if Not Found | Status if Unconfirmed |
|---|---|---|---|
| Verified | Verified | Remediated | Verified |
| Unreviewed | Unreviewed | Remediated | Unreviewed |
| Remediated | Unreviewed | Remediated | Remediated |
| Ignored | Ignored | Remediated | Ignored |
| False Positive | False Positive | False Positive | False Positive |
| Duplicate | Duplicate | Duplicate | Duplicate |
View Validation Scan History
You can now see all validation crawl logs and scan logs run upon the scan from within the Validation History tab.
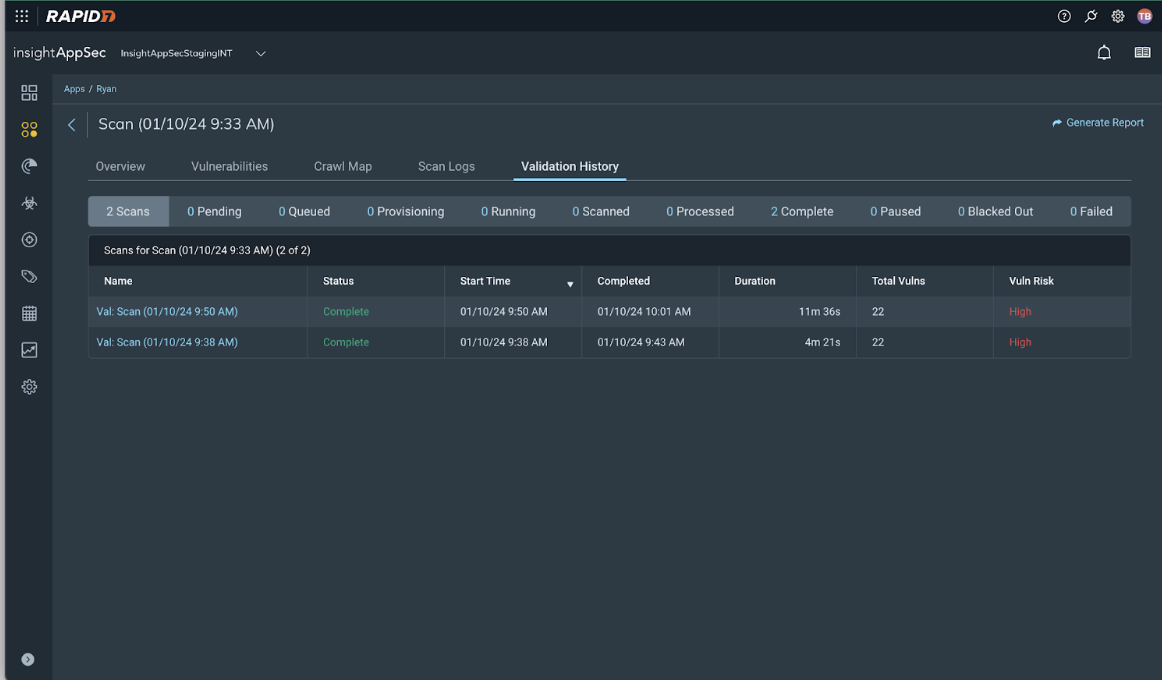
To navigate to the Vulnerability table, select View Parent Scan. This takes you to the parent scan which contains up-to-date vulnerability information based on the validation scans completed.