This product is no longer sold. We no longer update these help pages, so some information may be out of date.
S3 Archiving
Log Management (InsightOps) S3 Archiving allows Log Management (InsightOps) customers to utilize the inexpensive and massive storage capabilities of Amazon Web Services’ S3 Archiving features. S3 Archiving sends your Log Management (InsightOps) Logs to an AWS S3 Archive, (a bucket of your choice) for storing your log entries received in your Log Management (InsightOps) account as a backup.
This S3 Archiving functionality will occur once a day and store the entire day’s logs received the day before. Benefits
- Inexpensive and expansive storage of your Log Management (InsightOps) Data
- Longer retention beyond your Log Management (InsightOps) plan.
- Saves you money because these are not stored on Log Management (InsightOps) within your retention plan.
- Users may potentially analyze these logs in a manner in which Log Management (InsightOps) doesn’t provide at the moment. Requirements You must have or create an S3 Bucket. The Rapid7 account must also have S3 permissions set on the specific S3 Bucket (Detailed Below)
S3 Archiving makes it possible for the logs that you forward to Log Management (InsightOps) to also be archived on AWS S3.
S3 Bucket verify access
In order to verify access, we will create temporary files in your S3 bucket. These files will not be deleted if the bucket has versioning enabled.
Setting Up S3 Archiving You simply need to provide list and upload permissions to an S3 bucket on your AWS account. If you do not have an AWS account and wish to archive your Log Management (InsightOps) logs onto S3, you can signup to AWS.
- Create an S3 bucket on AWS account where you wish to archive your Log Management (InsightOps) data.
- You can find your bucket names under S3 in the “All Buckets” view of your AWS console.
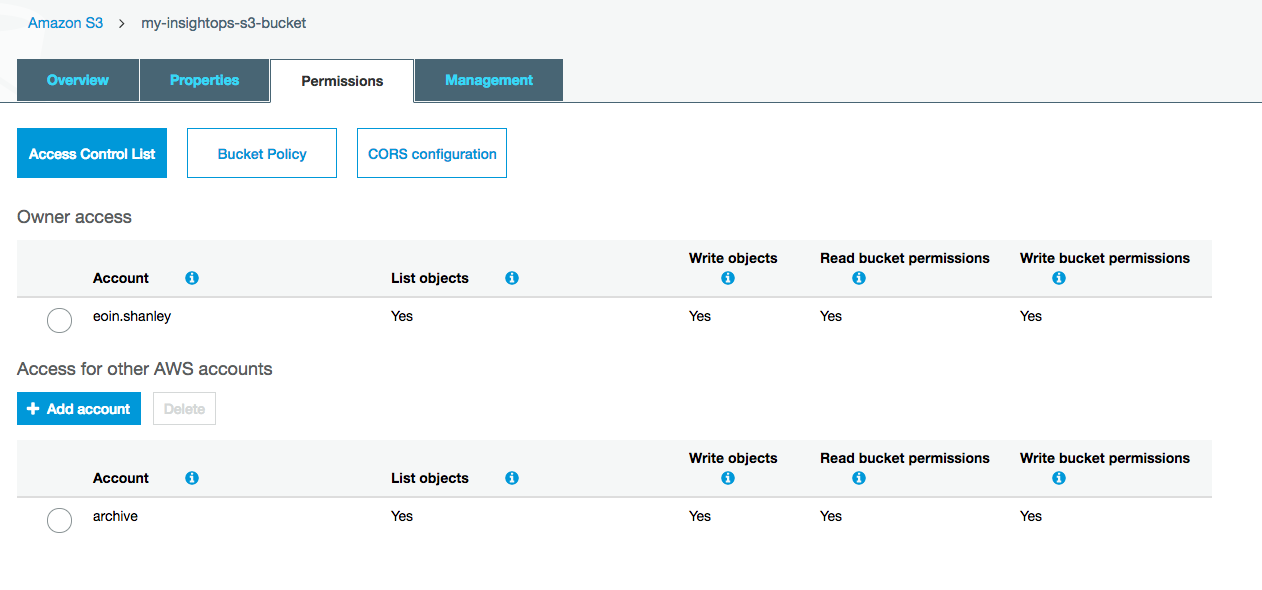
- The account that you need to give permissions to is
a9c2e4259cad99e03b67c7450d6cc9c0d4f3243363c80ca73f6b5152ff293bb0 - This account requires list, view, and upload permissions
- This account will not be available to choose from the drop down; you will need to type in the account manually. If this account does not work for you in the verification process please contact Rapid7 Support who will manually add your bucket to the service.
- After entering the account, AWS may shorten this account name to “archive”
To enable archiving to an S3 bucket, after creating the S3 bucket in AWS as detailed above:
- Login to your Log Management (InsightOps) Account
- Go to your Account Settings in the left hand navigation
- Navigate to the account setting area and select the “S3 Archiving” Tab
- Click the “Enable S3 archiving” slider so it turns green
- Enter the exact name of your S3 Bucket that you created on your AWS account to store your Log Management (InsightOps) archived log data
- Click Save and the Log Management (InsightOps) will validate your settings. If everything is validated correctly, you will see a success banner
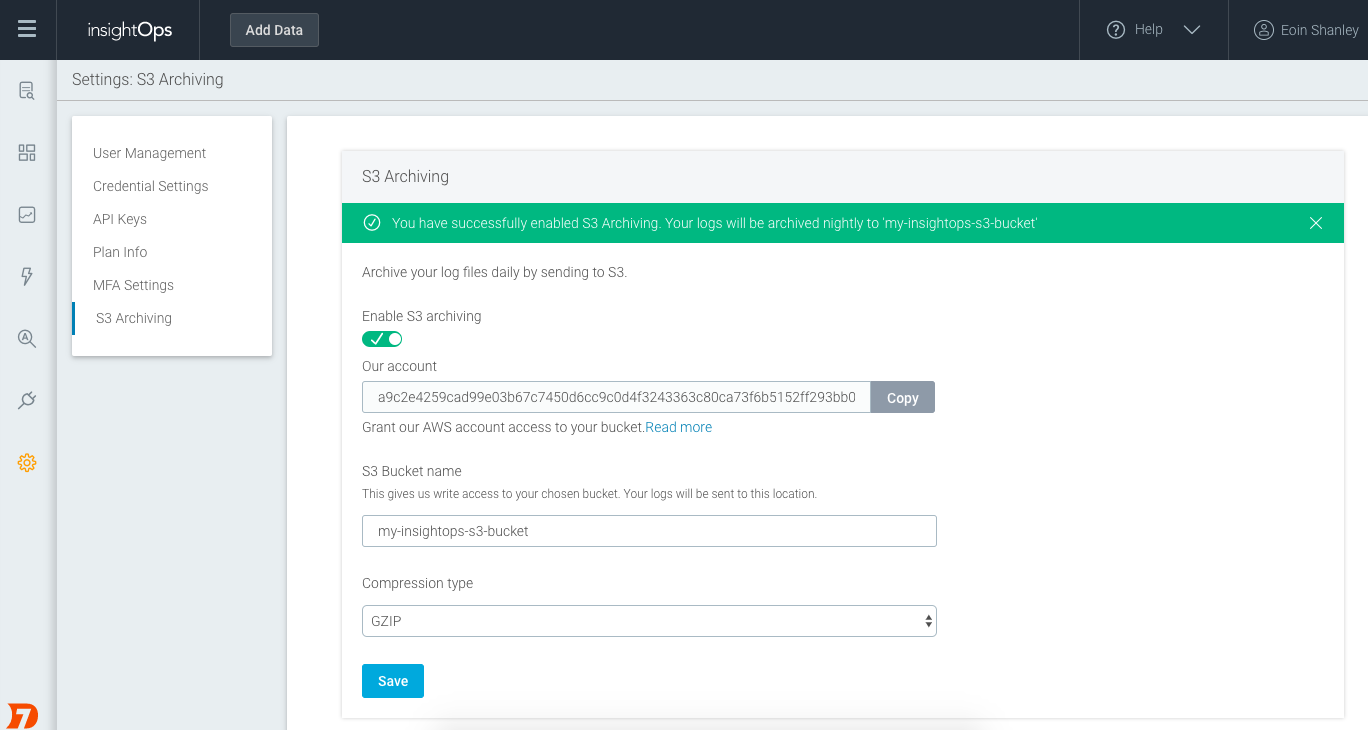
S3 Archiving is now set up and will run daily to back up your Log Management (InsightOps) logs to this S3 Archive.
Note: Archiving will not begin immediately. You should see logs in your S3 Archive approximately 24 hours after set up.
This S3 archive will store logs from this point on not retrospectively, so logs received by Log Management (InsightOps) from time of set up will be archived.
S3 Bucket region support
Due to a known issue with Amazon, only regions that have a “Signature version support” of 2 can be used for archiving your log data. You can view the list of compatible regions here: http://docs.aws.amazon.com/general/latest/gr/rande.html#s3_region
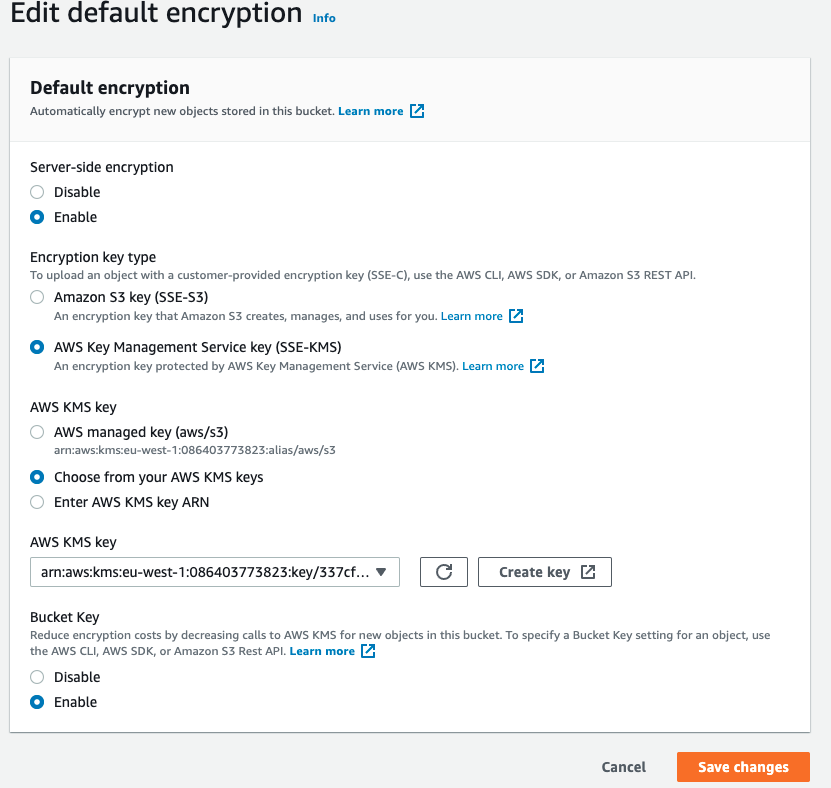
Enabling S3 encryption
This step is only required if you want to enable server side KMS encryption on your bucket. If so, follow these steps:
-
Create a new KMS key:
- Log on to your AWS Account.
- Select KMS > Customer-managed keys > Create a key.
- Select ‘Symmetric’ as your key type.
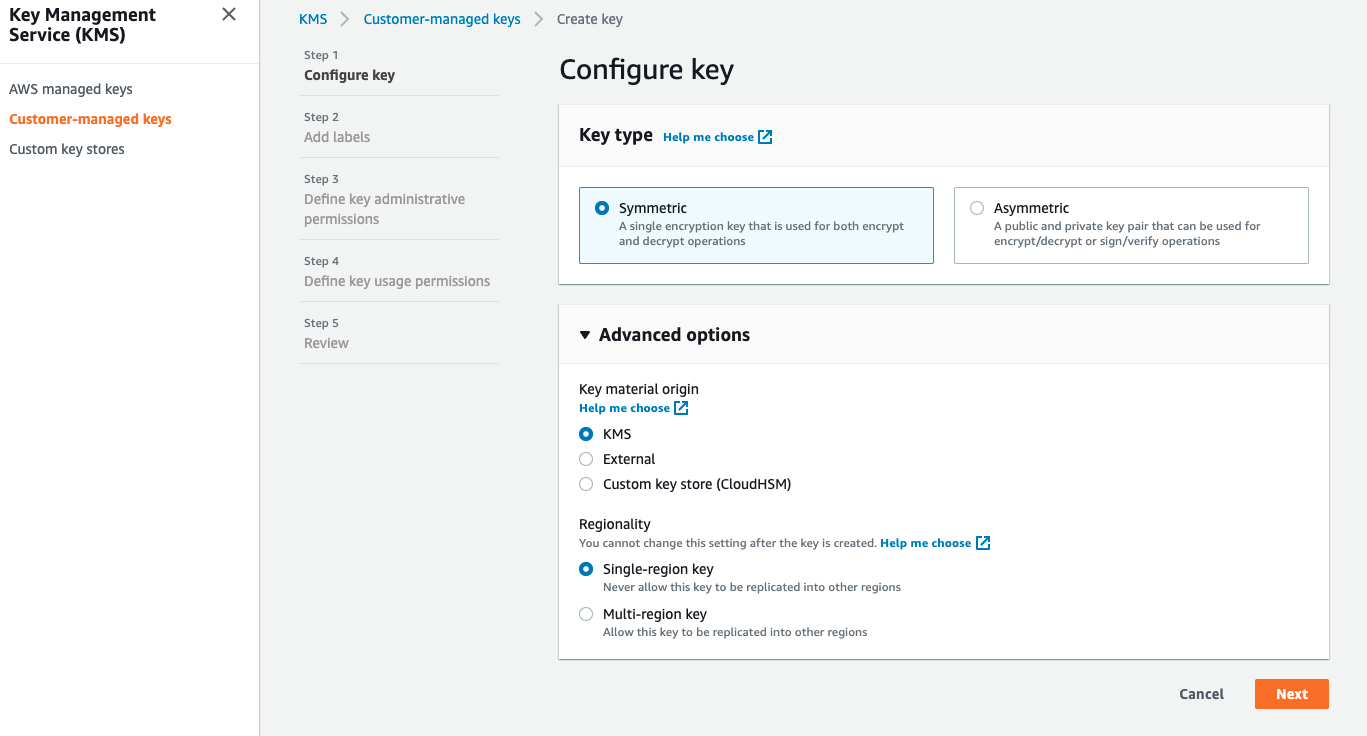
- Add labels you would like attached to your KMS key.
- Define key administrative permissions.
- You can define key usage permissions, although this is not needed.
- Review your existing key policy:
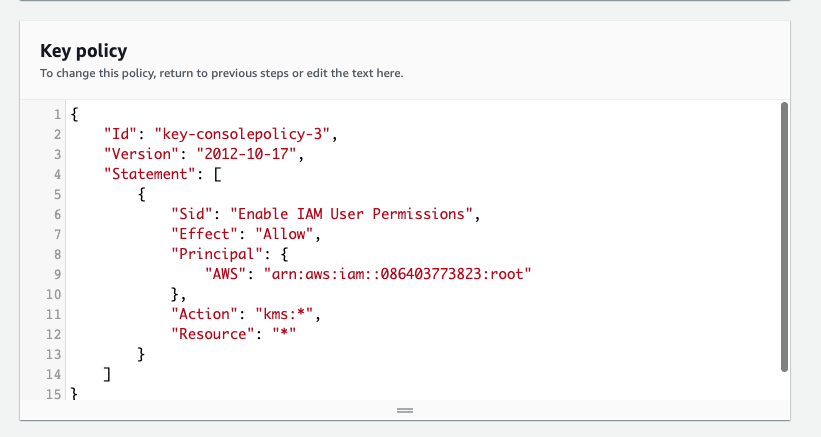
- You should insert the following under your existing ‘Statement’:
{
            "Sid": "Allow use of the key by Rapid7",
            "Effect": "Allow",
            "Principal": {
                "AWS": "arn:aws:iam::029723416200:role/learchiving"
            },
            "Action": [
                "kms:Encrypt",
                "kms:Decrypt",
                "kms:ReEncrypt*",
                "kms:GenerateDataKey*",
                "kms:DescribeKey"
            ],
            "Resource": "*"
}- Select S3 Bucket > Properties tab > Default Encryption and click ‘Edit’.
- Assign your newly created key to your bucket.