AppSpider Enterprise Backup/Restore Process
This page will take you through the process required to perform a backup and restore if the AppSpider Enterprise installation was to fail.
There are three areas which you need to be concerned with before proceeding with the re-install.
1. The Database
A database backup is made automatically to the location defined by the registry key HKEY_LOCAL_MACHINE\SOFTWARE\Microsoft\Microsoft SQL Server\MSSQL.n\MSSQLServer.
By default this should be C:\Program Files\Microsoft SQL Server\MSSQL13.MSSQLSERVER\MSSQL\Backup however it is configurable in the SQL settings.
If for some reason, there is no backup file, you would need to perform a backup before you proceed. This documnet explains how to backup a database: https://docs.microsoft.com/en-us/sql/relational-databases/backup-restore/quickstart-backup-restore-database?view=sql-server-ver15#take-a-backup
This document then explains how to restore from the backup file: https://docs.microsoft.com/en-us/sql/relational-databases/backup-restore/quickstart-backup-restore-database?view=sql-server-ver15#restore-a-backup .
Note
AppSpider Enterprise Release 3.8.231 supports a checkbox on the Upgrade page in the AppSpider Enterprise installer to allow users to enable a backup of the database before proceeding with the upgrade.
Step 2. NTOE.config
This file is located in two locations: C:\Program Files (x86)\Rapid 7\AppSpider Enterprise 3.8\AppSpiderScheduler2 and C:\Program Files (x86)\Rapid 7\AppSpider Enterprise 3.8\IIS.NET.
These files allow the user to manage their AppSpider Enterprise settings such as the DB connection string or default authentication provider. You should save a copy of each file so that they can be replaced if something goes wrong.
The other system files can be changed however it is better to let the old installer restore those changes rather than replacing the full file system yourself.
Step 3. The AppSpiderEnterprise Installer
The AppSpider Enterprise installer can be used to move to earlier builds as well as later ones.
Note
Sometimes Windows can block features of the installer and in these cases you should see a warning when you attempt to do it.
It can be unblocked using this command in Powershell:
Unblock-File <full-installer-path>.exe
There should be no output to this.
- Run the installer as Administrator.
- The specific Windows account only matters if you are using Windows authentication for the database connection. In that case it is best to use the same account that was initially used to perform the installation.
- You will be offered the opportunity to “Perform Upgrade to Existing Installation”.
- This runs an update without changing any setting, which is what you should choose in most cases.
- However, for restoring from a failed installation, you will want to turn this down.
- Instead you will be led through the installation settings again, with the defaults set as your current settings.
- After each phase, the settings will be tested and you will be given an error if a failure occurs.
- IIS settings are first, then database connection and then any optional features like LDAP or SMTP.
- You may want to stop at the database connection phase and hit the “generate” button in the top right to test and change your SQL connection settings:
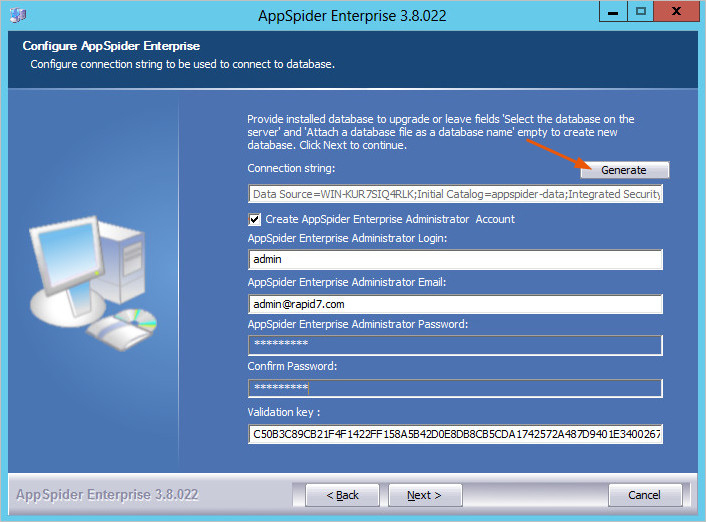
- This leads to a screen like this which lets you enter the SQL connection details and credentials and test the connection:
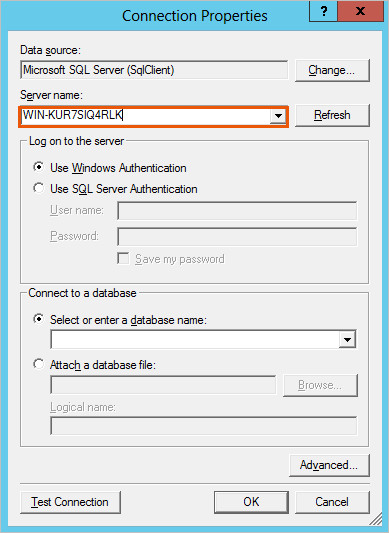
- This leads to a screen like this which lets you enter the SQL connection details and credentials and test the connection: