Conduct Mobile Application Testing using WiFi Pineapple
WiFi Pineapple is a wireless network auditing tool which enable users to quickly and easily deploy advanced attacks using intuitive web interface. It is useful for a man-in-the-middle, hot-spot honeypot to an out-of-band pentest pivot box.
WiFi pineapple creates a rogue wireless internet access point to lure users around cafeteria, shopping malls, or at public places. It acts as a Man in the Middle and able to sniff the traffic of the connected users.
To achieve this we have setup our devices as follows:
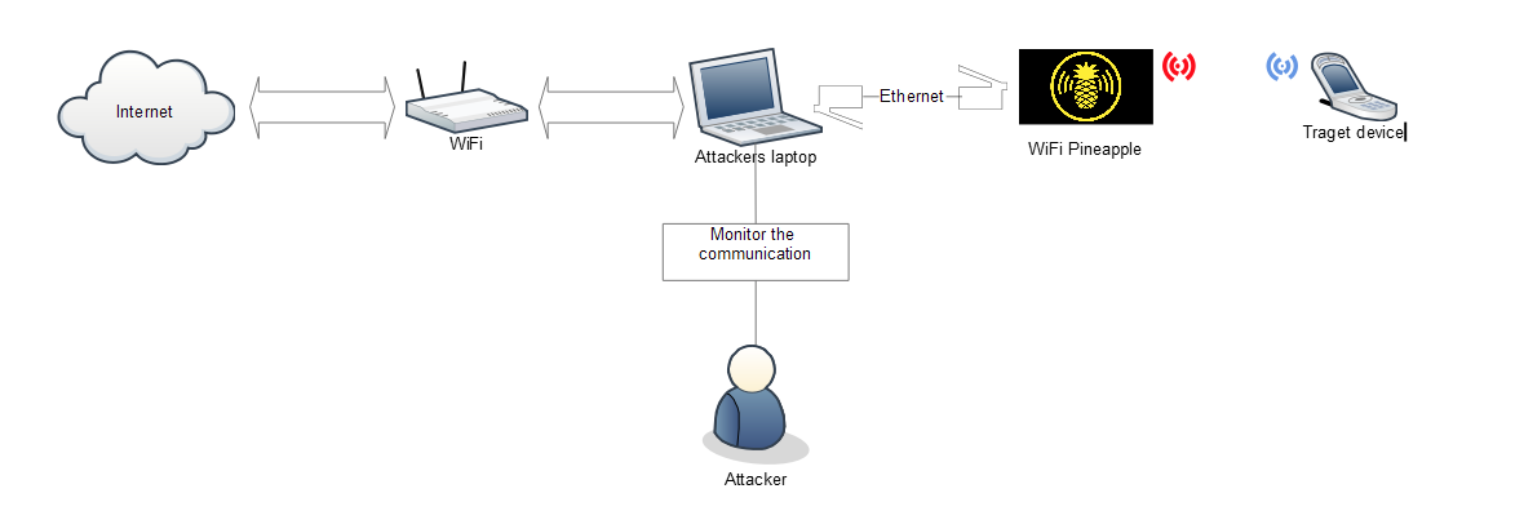
We have connected our laptop with the internet facing WiFi adapter. WiFi pineapple is connected to our laptop using ethernet. WiFi Pineapple as created an open rogue wireless access point. Target device will connect to this rogue access point and we will able to monitor the traffic of the target device.
WiFi Pineapple Setup
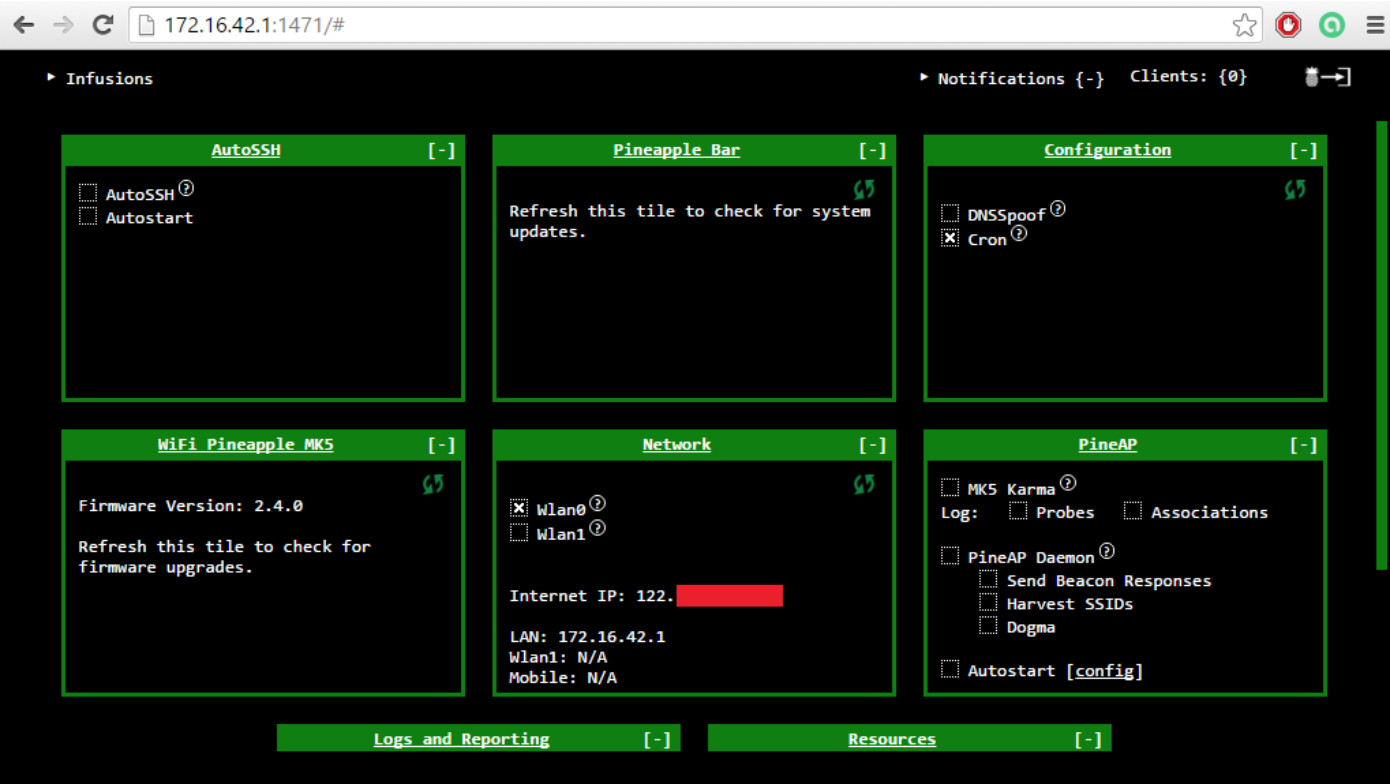
The WiFi Pineapple has a static Ethernet IP address of 172.16.42.1 and assigns clients IP address 172.16.42.0/24 range. When tethering a computer, the WiFi Pineapple will use the default gateway 172.16.42.42.
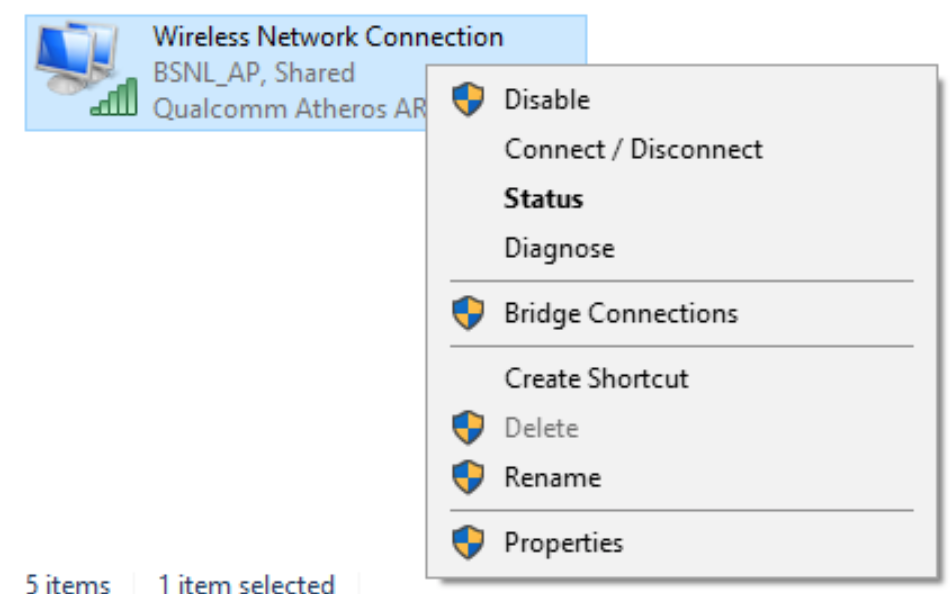
- Open Network Connections. Right click the Internet facing adapter and click properties.
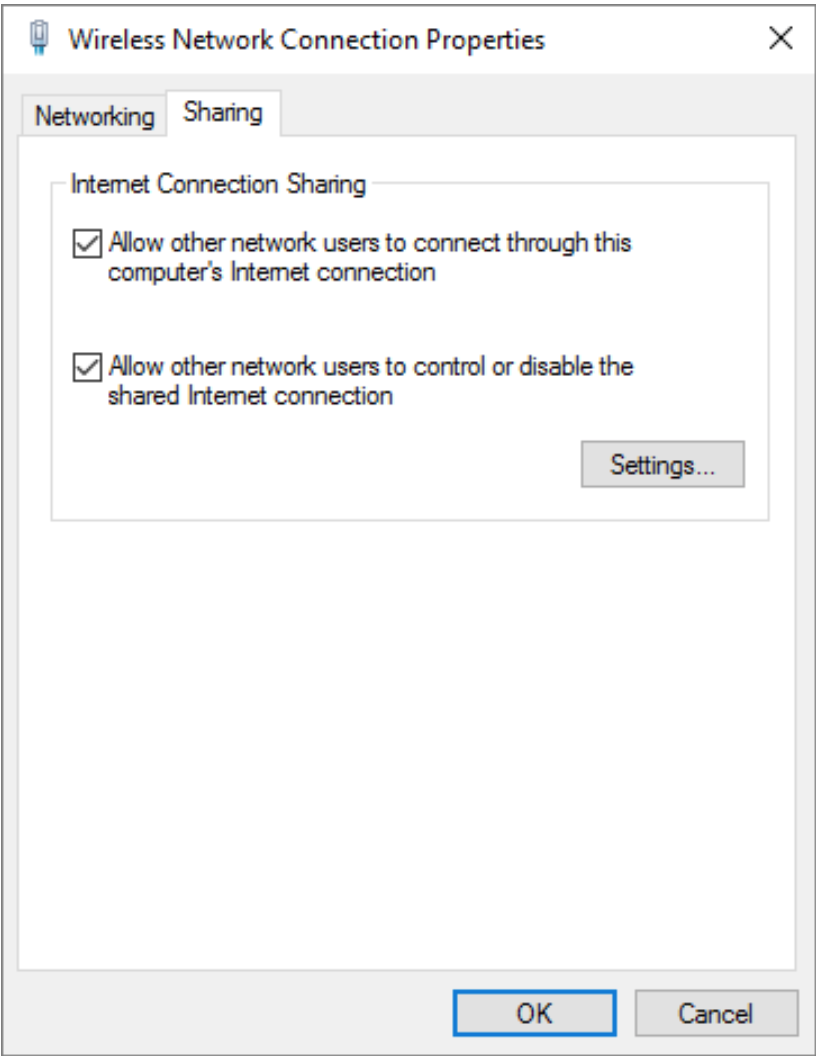
- From Sharing tab, check “Allow other network users to connect through this computer’s Internet connection” and click “OK”.
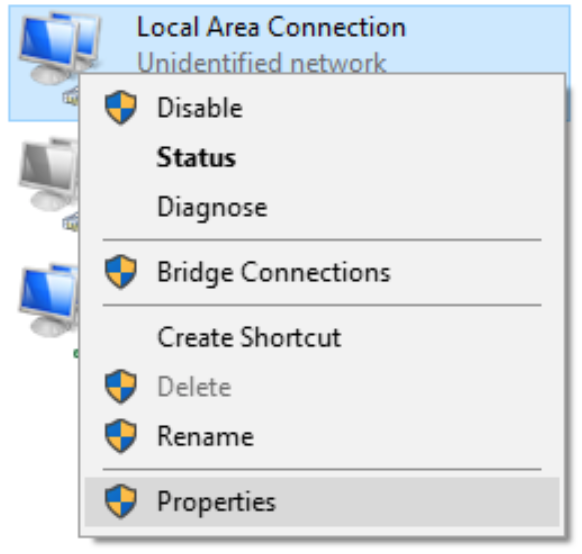
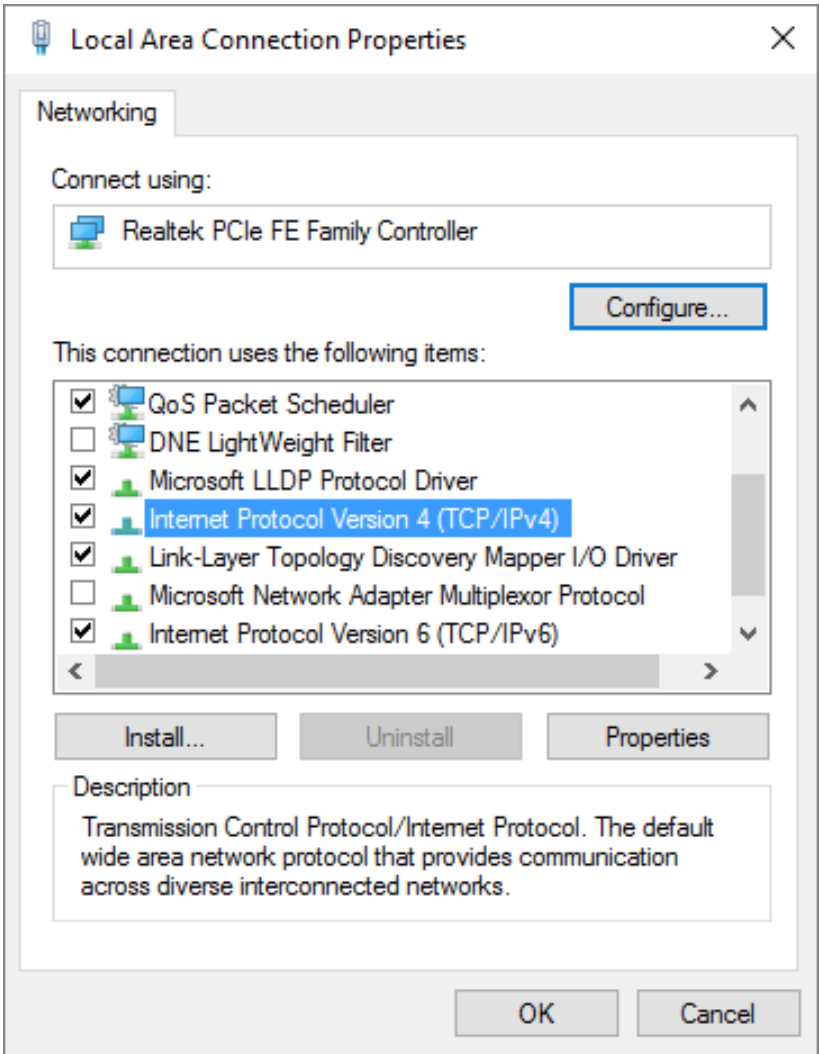
- Next view the properties of the Pineapple-facing adapter.
- Select Internet Protocol Version 4 (TCP/IP) and select Properties.
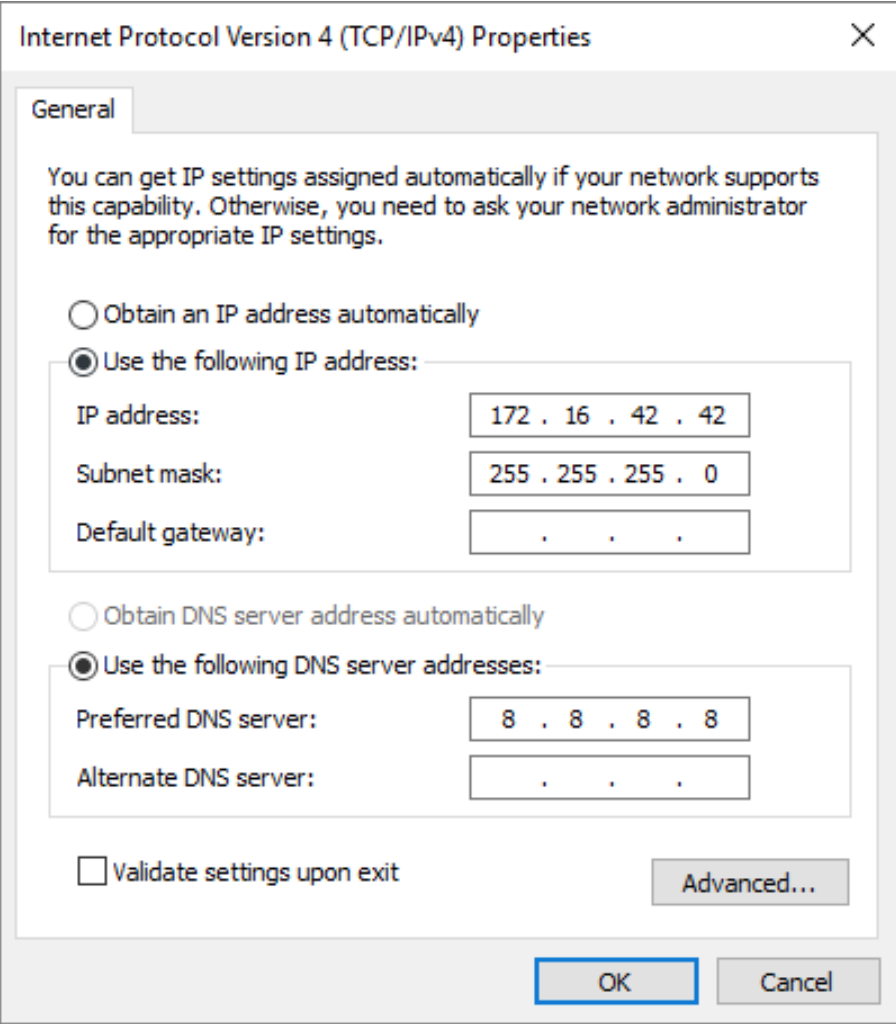
- Check Use the following IP address and specify 172.16.42.42 for the IP address and 255.255.255.0 for subnet. Leave the default gateway blank.
- Next check Use the following DNS server addresses and provide your preferred DNS server (e.g. Google’s 8.8.8.8) and click OK then Close.
- The WiFi Pineapple-facing and Internet-facing adapters have been configured and Internet Connection Sharing has been enabled. To confirm that, open and login into the WiFi pineapple. Click on the “Show” link of “Network” tab. It will show the internet address of machine.
Create a Rogue Wireless Access Point
As we have shared the internet to the WiFi Pineapple, we will create a open rogue wireless access point so that victim can trap into a honeytrap.
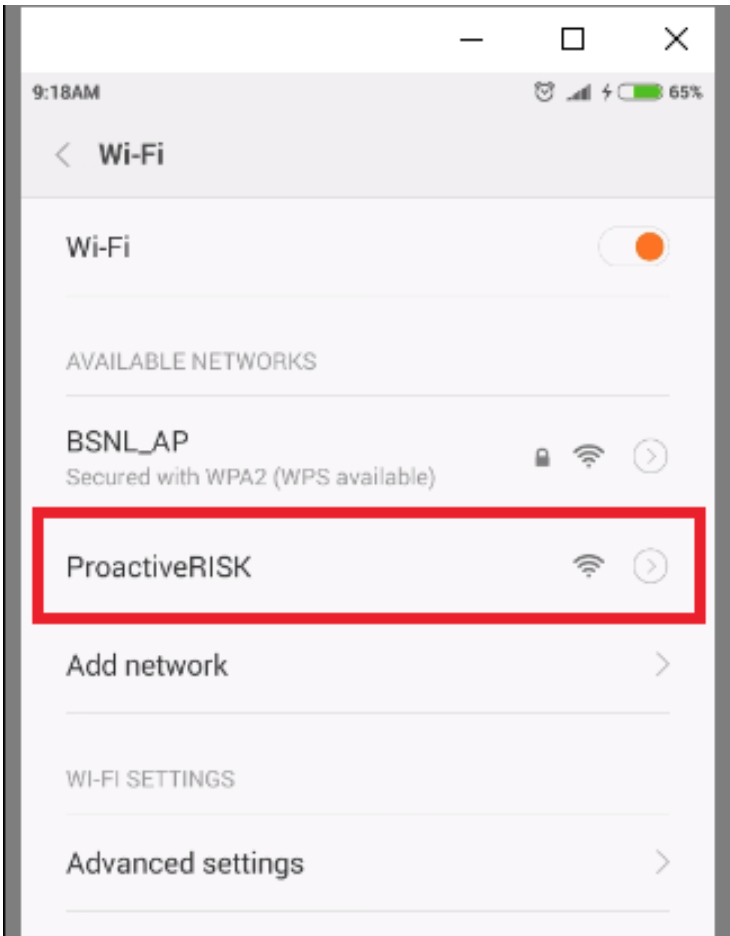
- To create an open wireless network, navigate to “Network” >> “Access Point”. Uncheck the “Hidden” option and click on the “Save” and restart the wireless network.
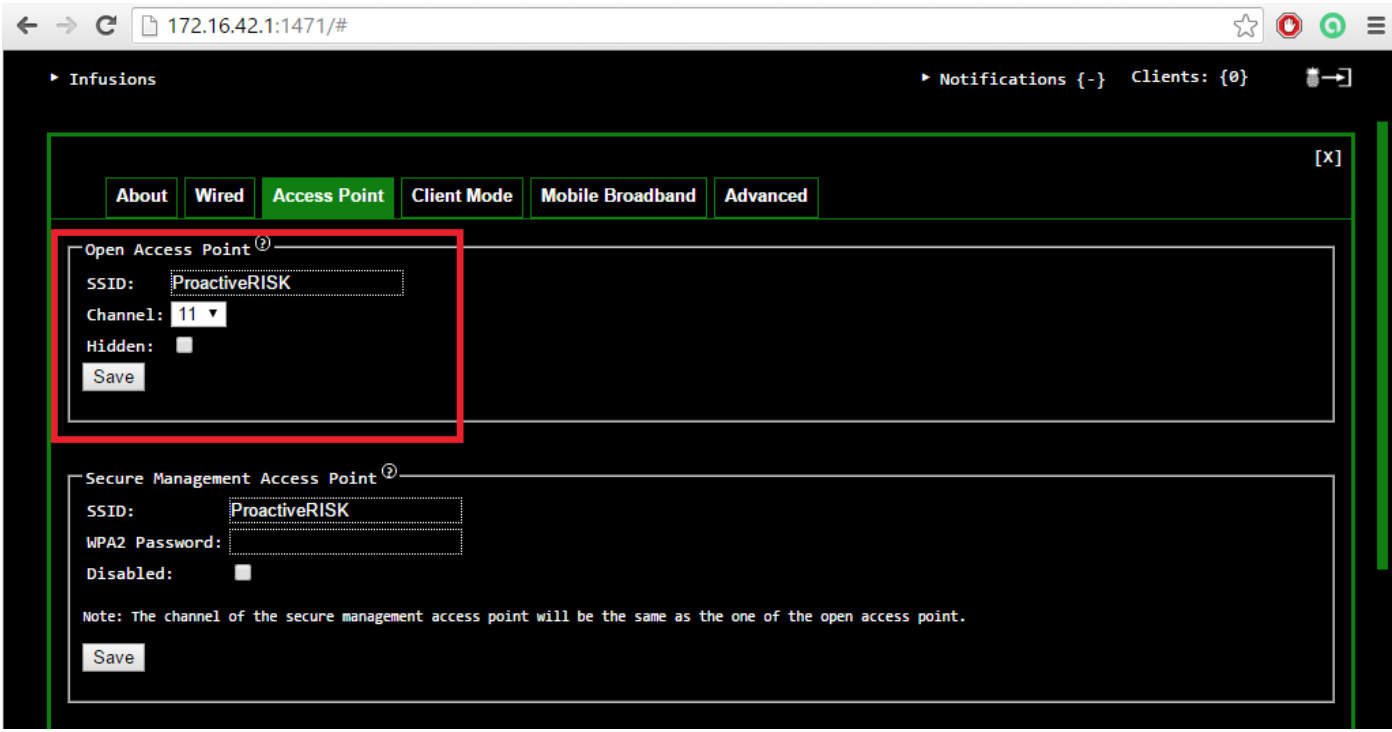
In this case, we have created an open wireless internet access point “ProactiveRISK.” A target device will get connected to this as it is an open network which does not require login credentials.
- Next SSH into WiFi Pineapple from computer using putty or winscp tools. In the following example we have used putty tool for SSH from Windows machine.

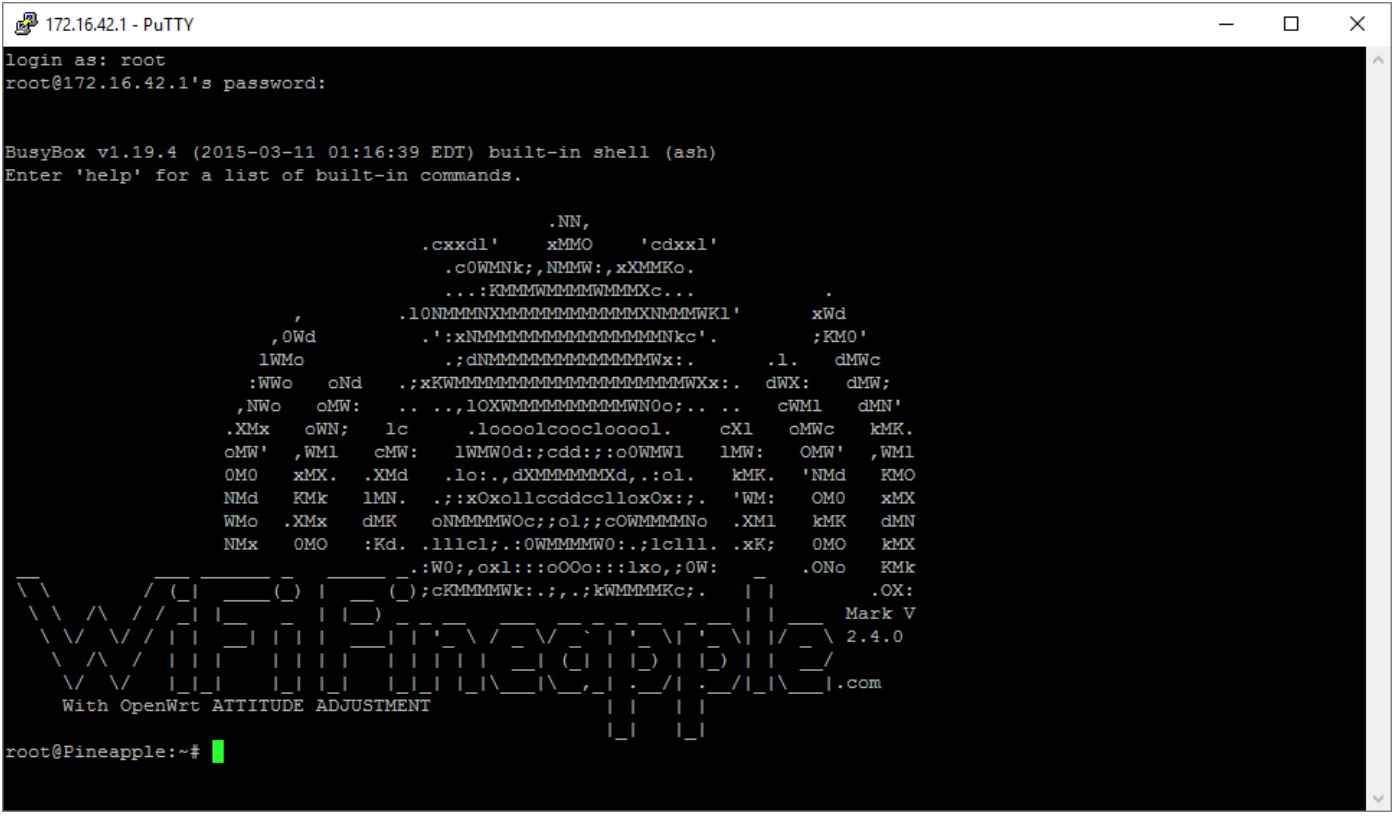
- Once SSH connection has been established, execute following commands to configure the WiFi Pineapple to forward traffic:
echo '1' > /proc/sys/net/ipv4/ip_forward
iptables -F
iptables -X
iptables -t nat -F
iptables -t nat -X
iptables -t mangle -F
iptables -t mangle -X
iptables -P INPUT ACCEPT
iptables -P FORWARD ACCEPT
iptables -P OUTPUT ACCEPT
echo '1' > /proc/sys/net/ipv4/ip_forward
iptables -t nat -A PREROUTING -p tcp --dport 80 -j DNAT --to-destination 172.16.42.42:8080
iptables -t nat -A POSTROUTING -j MASQUERADE
- Now, start a Burp Proxy tool and navigate to the “Proxy” tab and navigate to “Options” tab.
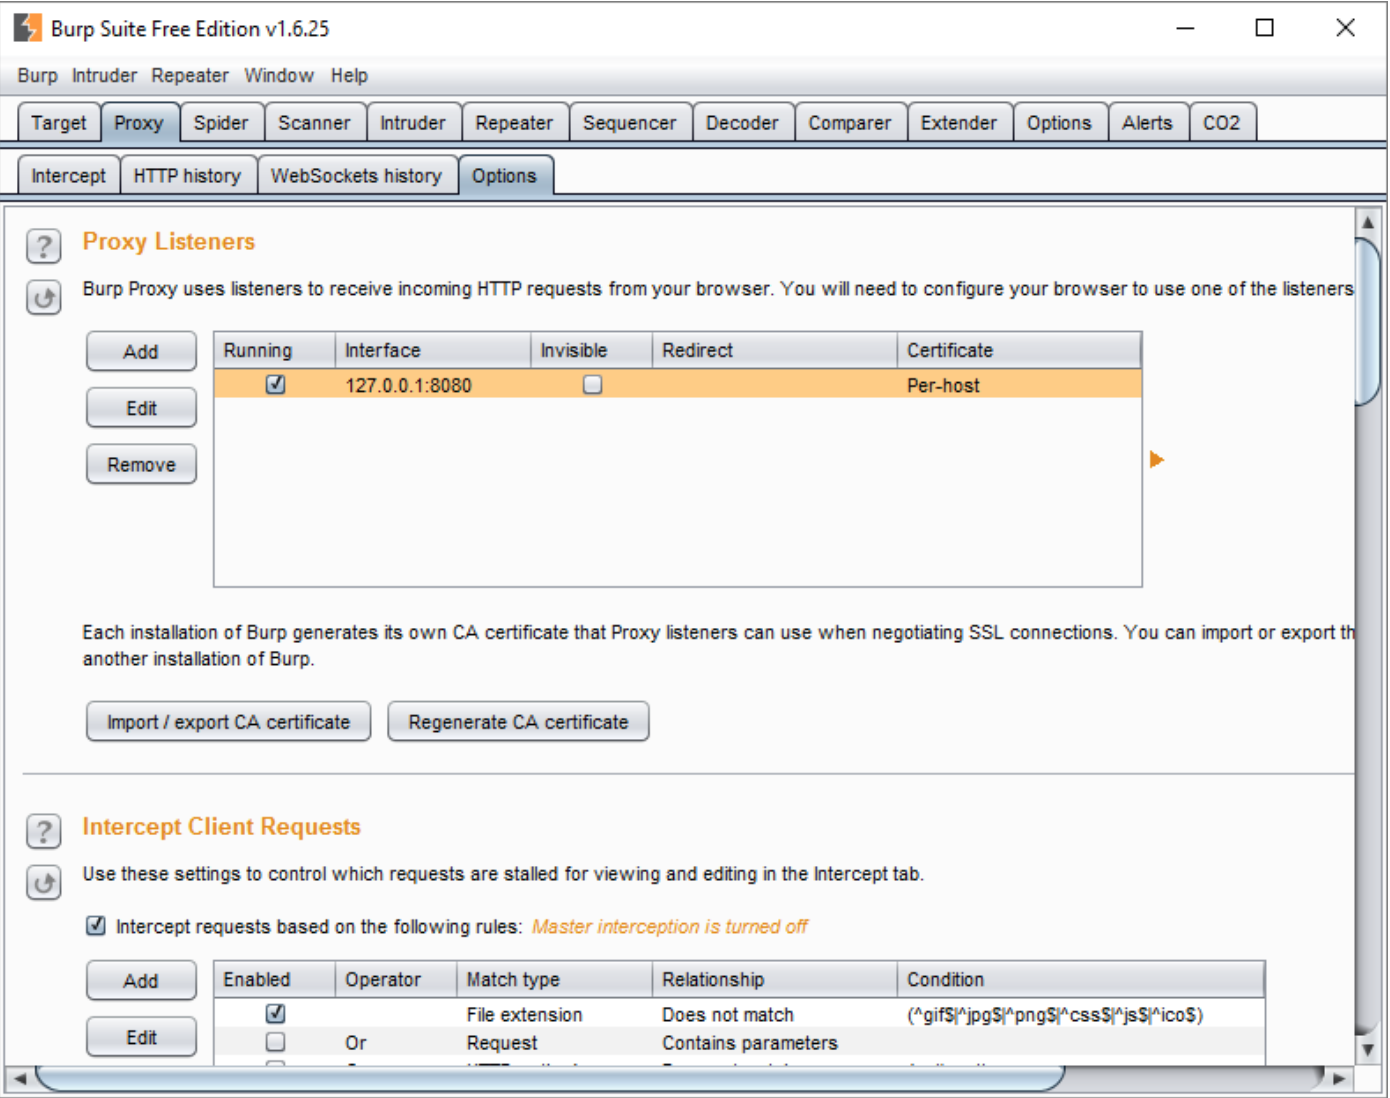
- Select and edit the 127.0.0.1:8080 under “Proxy Listener.” Change the “Blind to address” to “All interfaces.”
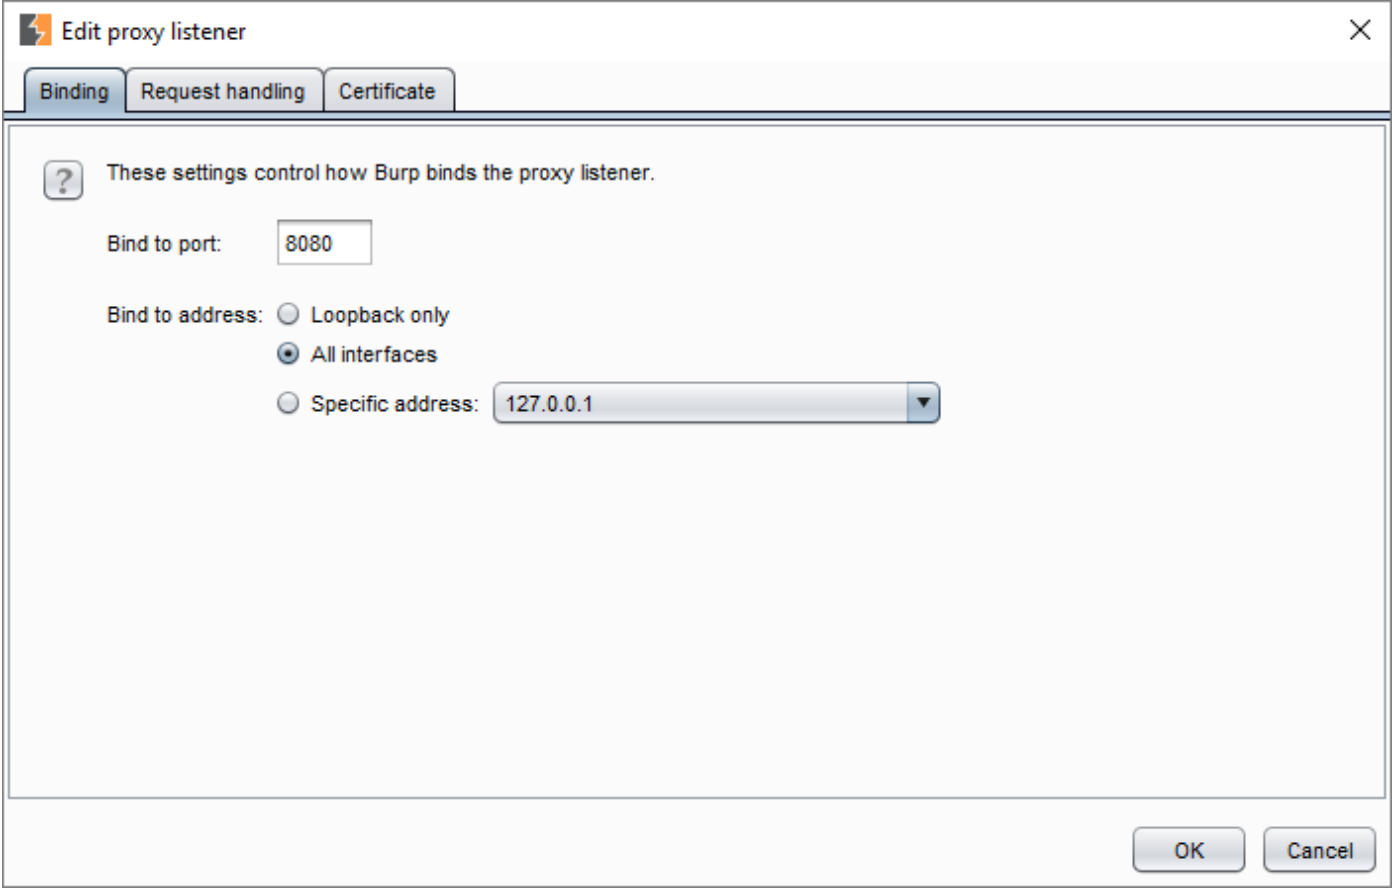
- Next select the “Request handling” tab and then check the box next to “Support invisible proxying.”
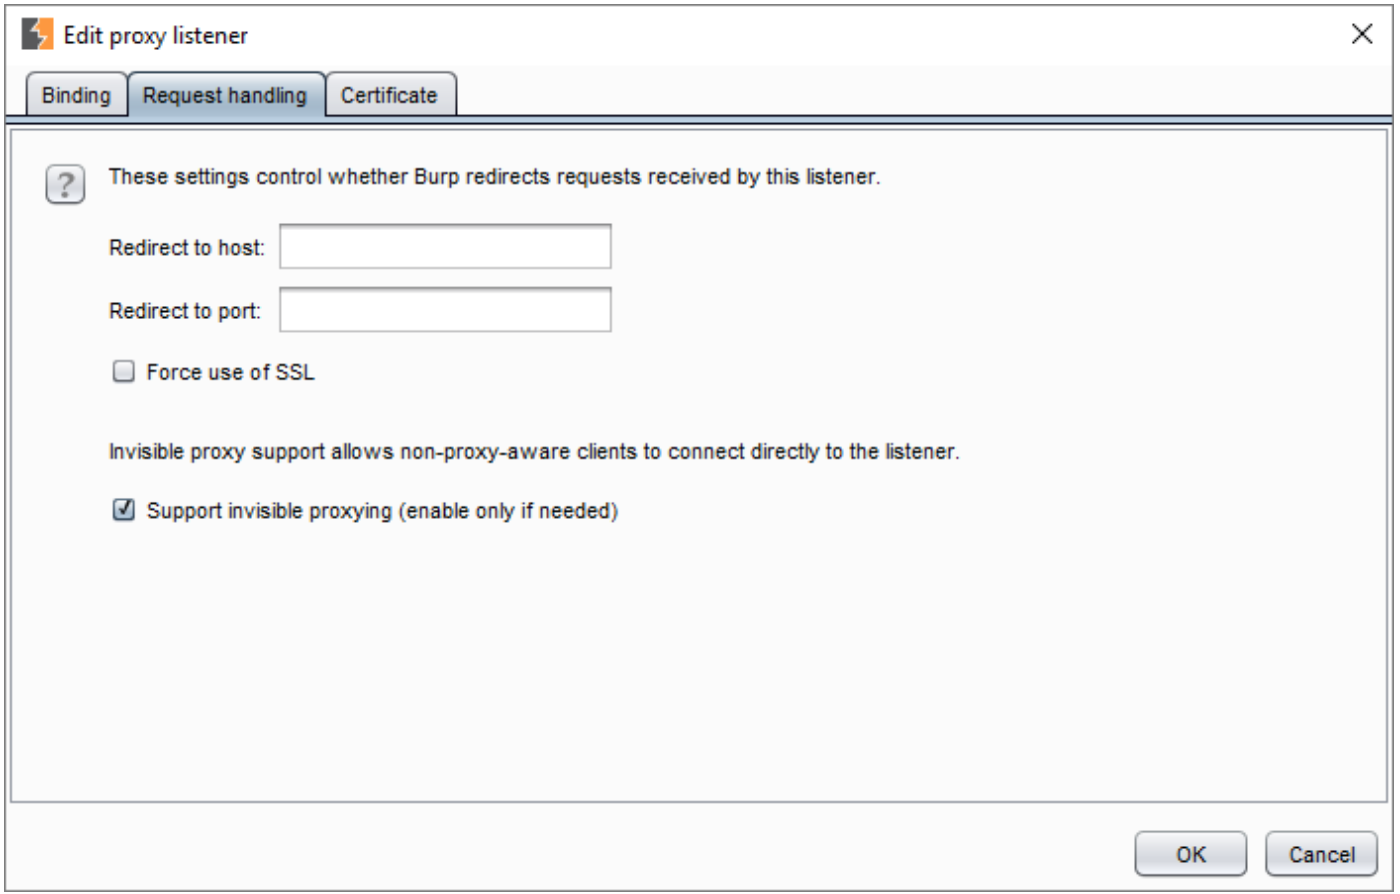
- Once checked you can then select “OK” and then select “Yes” on the confirmation pop up.
Setup has completed to intercept the mobile traffic using Burp Proxy tool.
Monitor Traffic via Burp Proxy
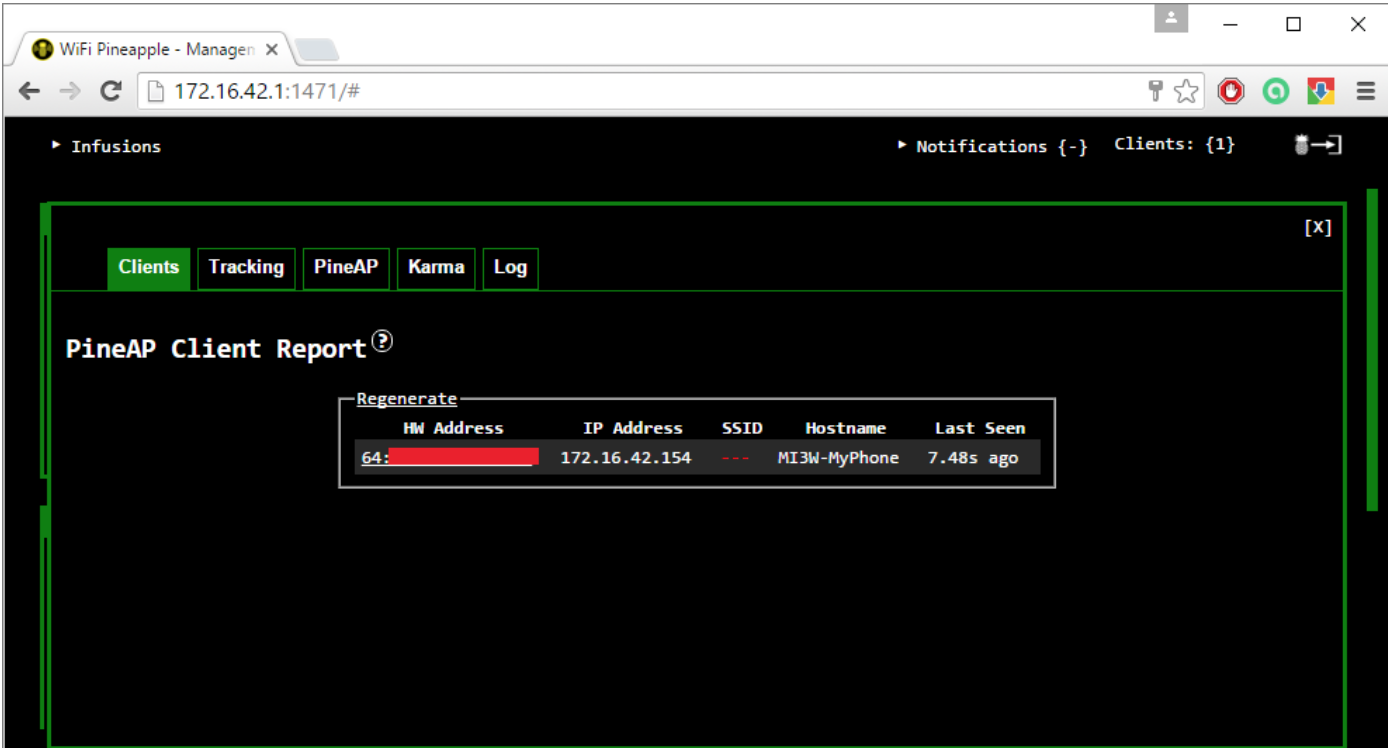
After a target device connected to the rogue wireless access point we can monitor the traffic via Burp Proxy tool. The following image demonstrates that the targeted device is connected to the WiFi Pineapple.
Let’s assume that target device is using Hackazon application to purchase few things. All the traffic will be monitor during this session.
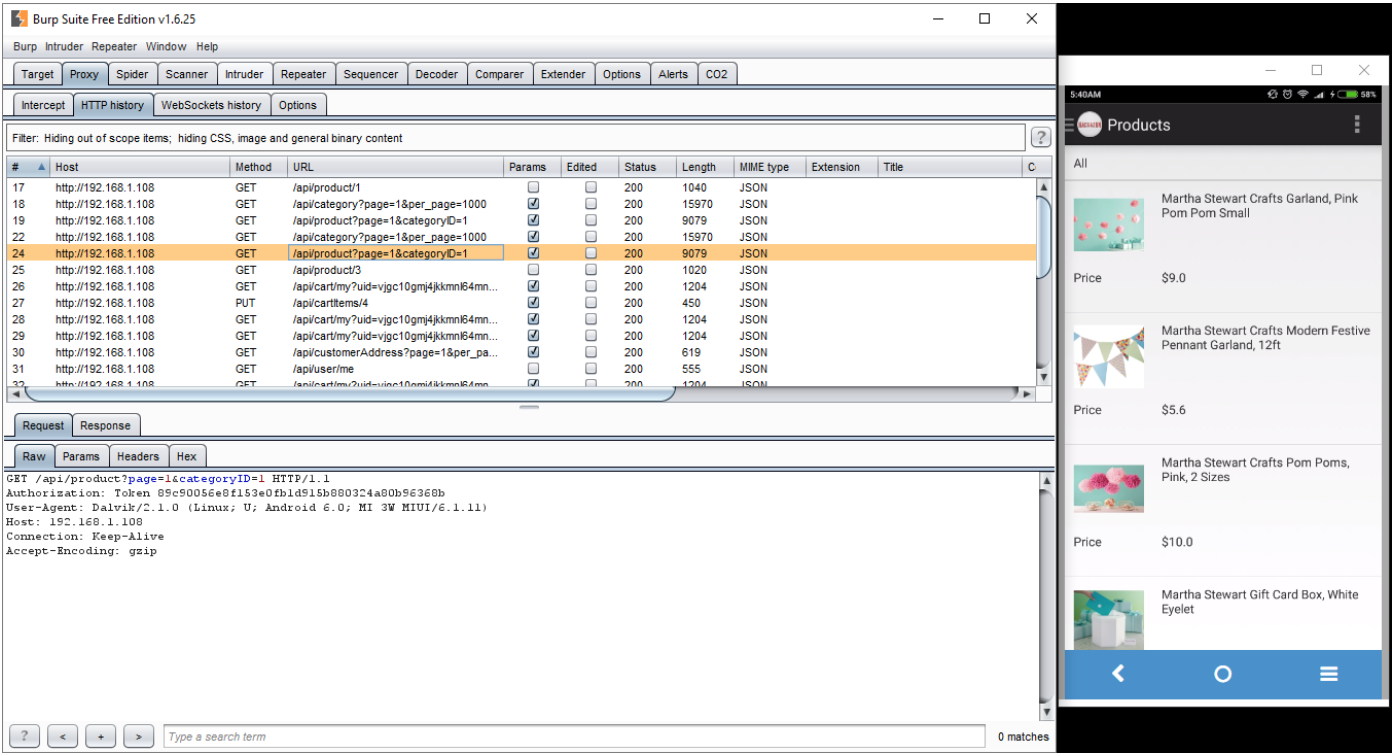
Now, we have the Hackazon application traffic with the active session. Hence, we can use this traffic to run AppSpider on it and find all the vulnerabilities.
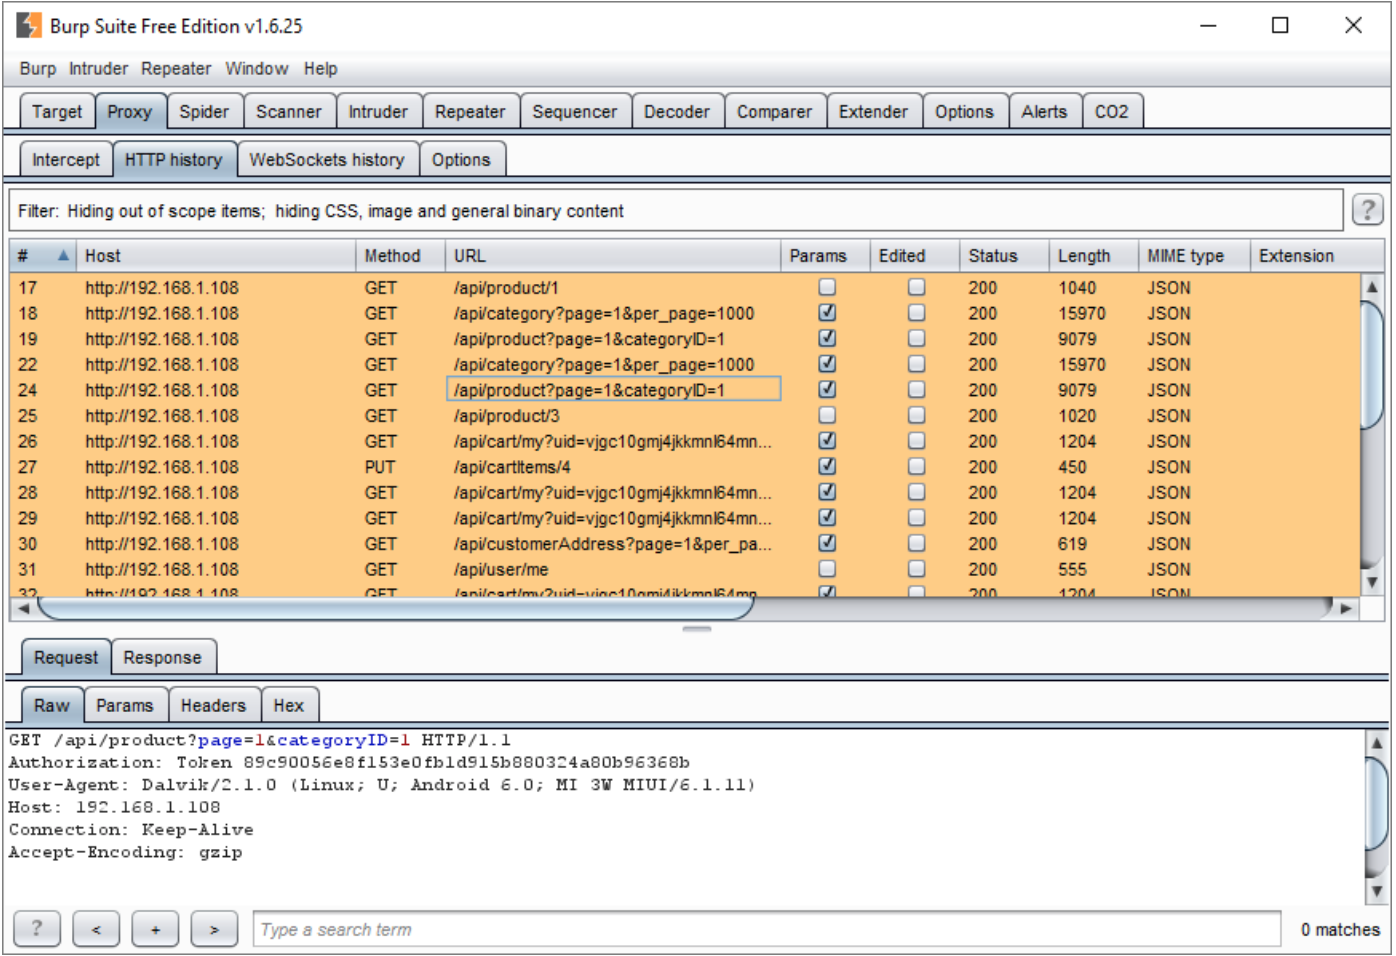
Once captured the traffic between mobile application and it’s web services, we can import them into the AppSpider for use in evaluating the web site.
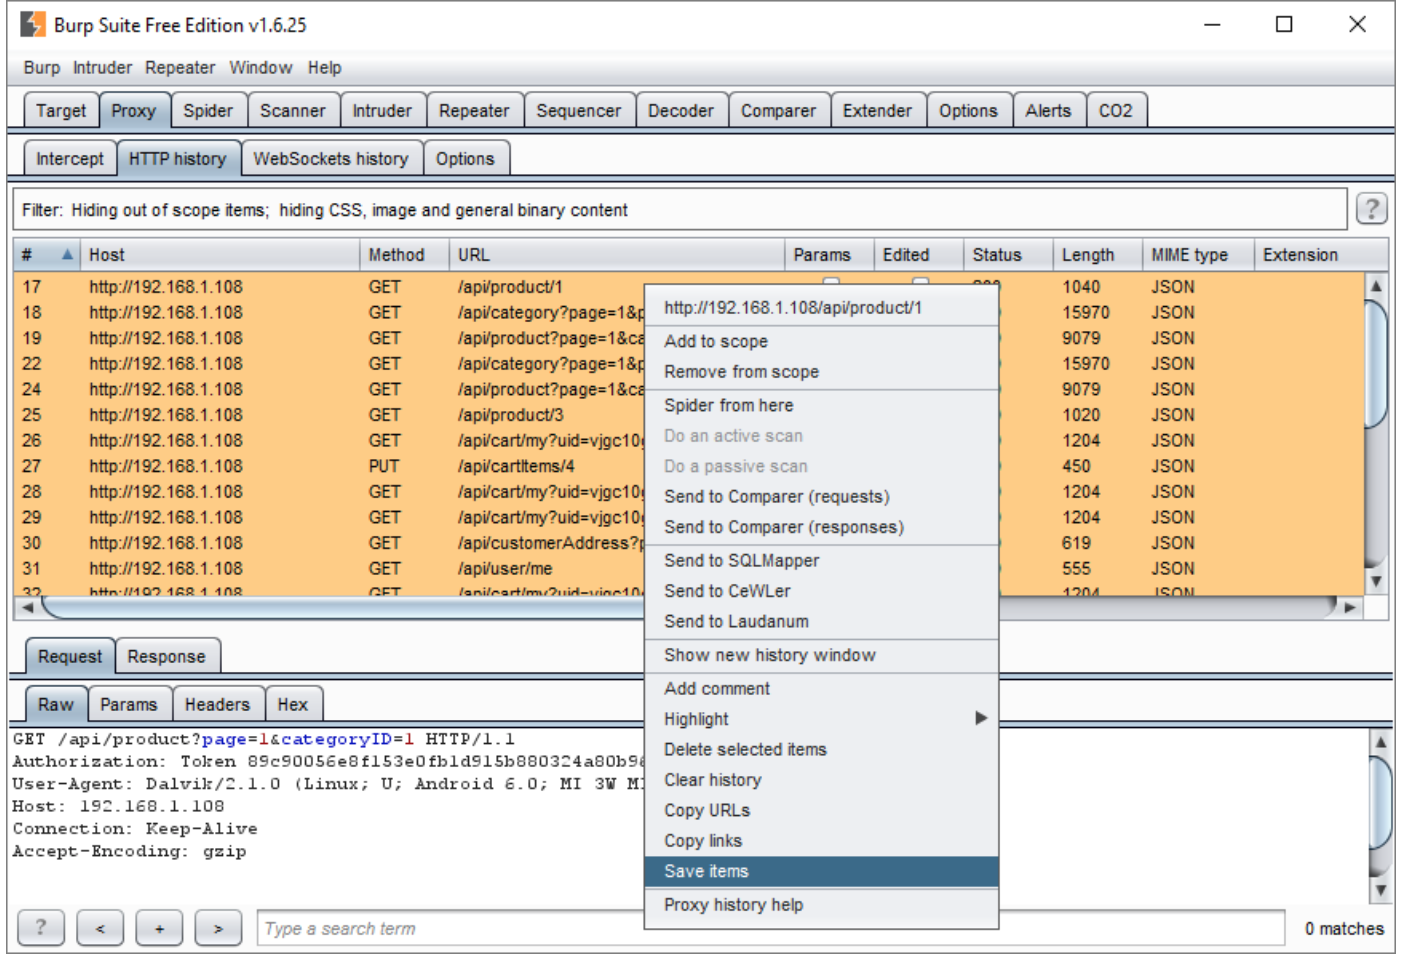
- To do this, select all of the data in the “HTTP Proxy” traffic.
- Right click on any of them and select “Save items.”
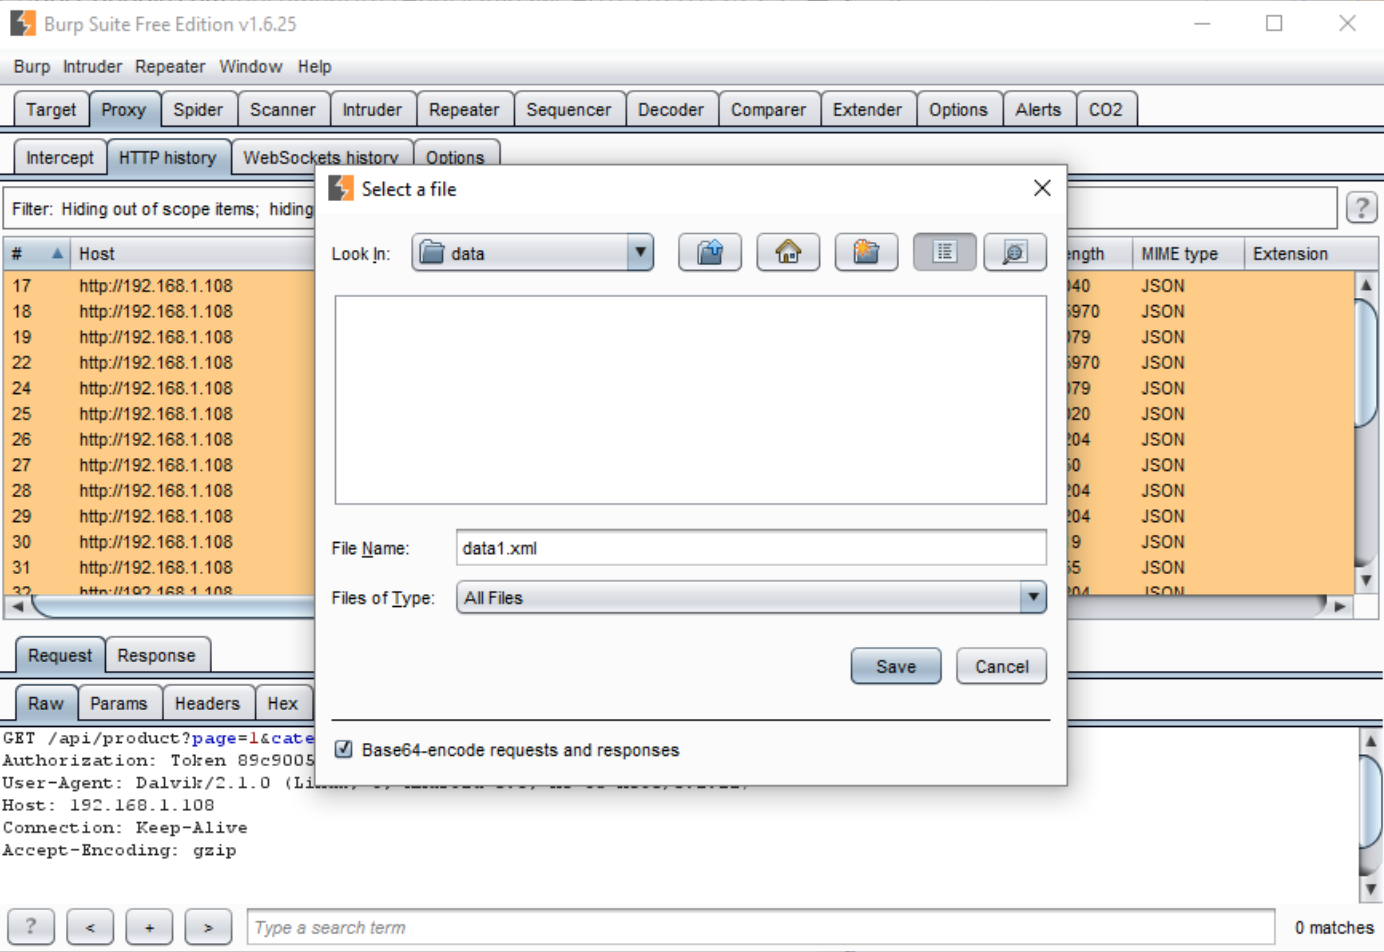
- Apply the “File Name” and select “Save.”
- To import a saved XML file, open AppSpider and create a new configuration file. Navigate to “Recorded Traffic” option.
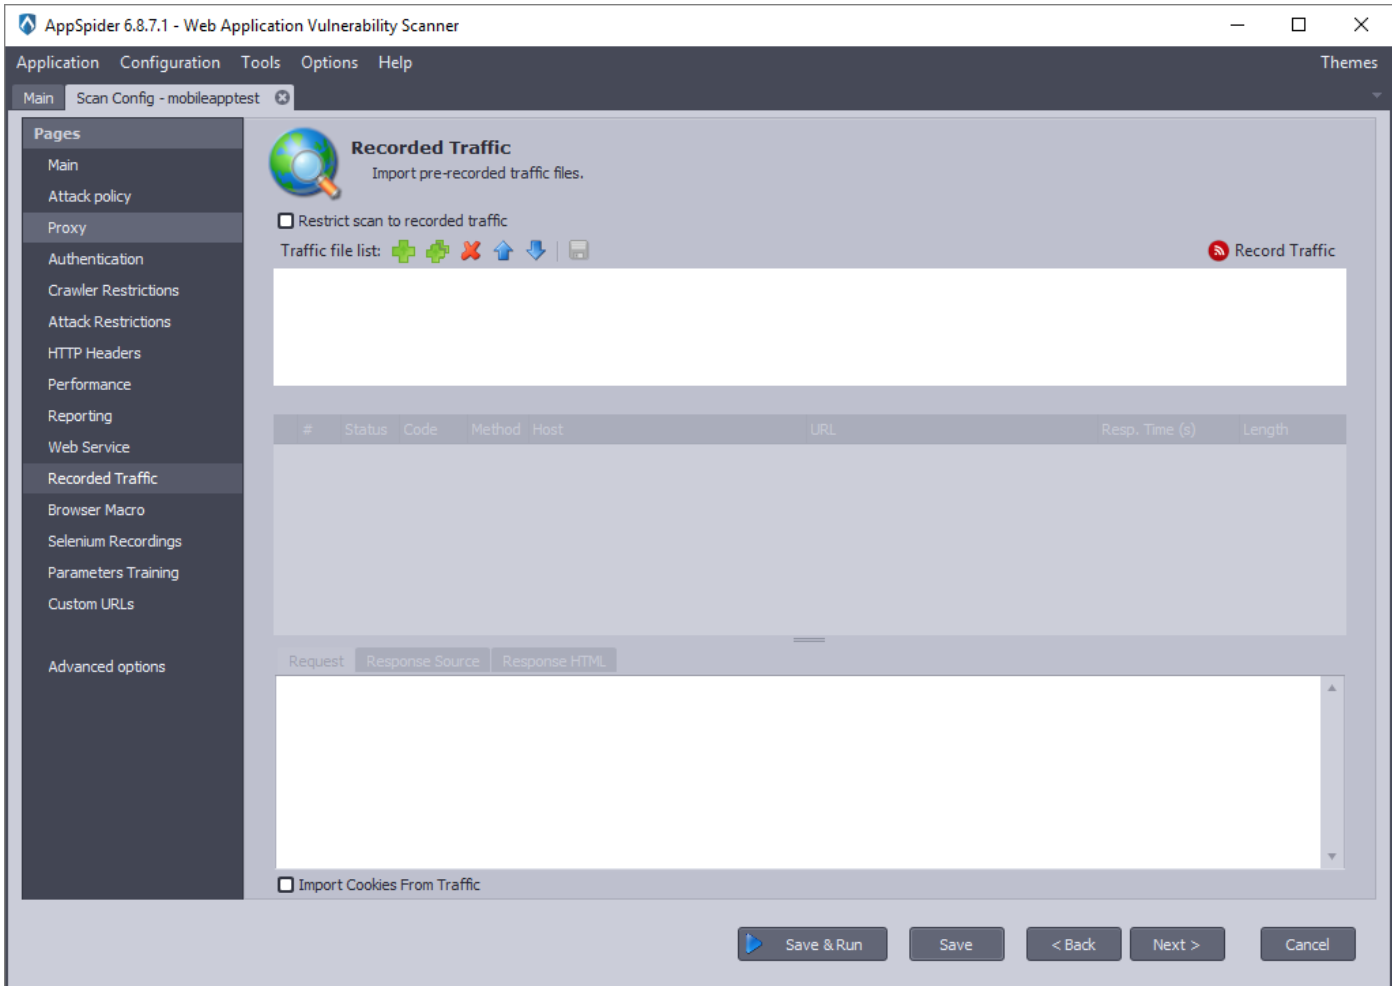
- Select the green plus button next to “Traffic file lis.t”
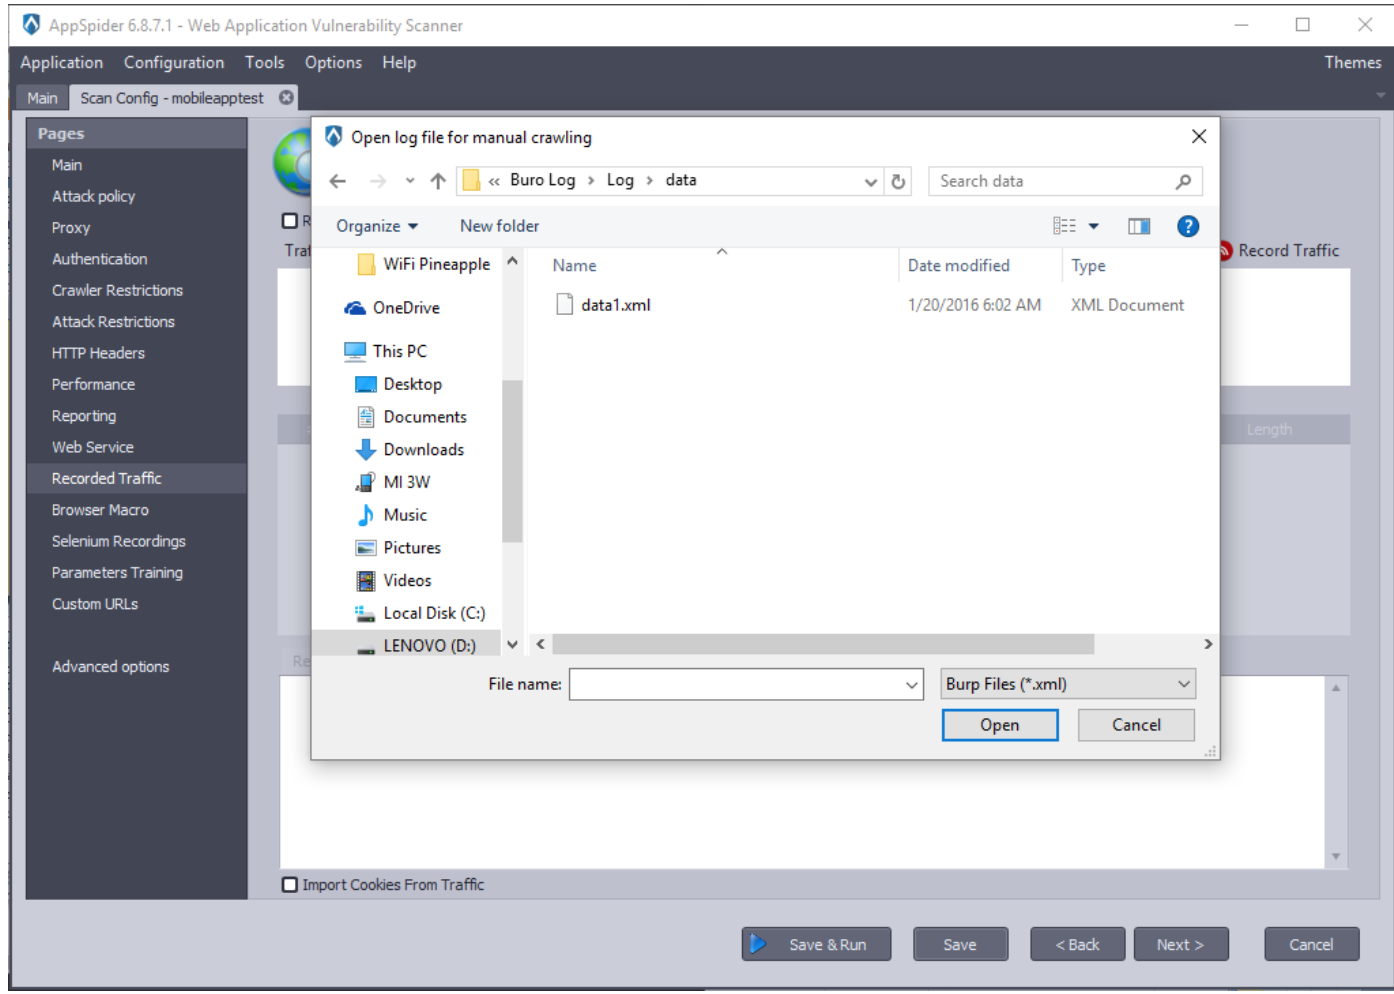
- Change the file type to “Burp Files (*.xml)” and then select the file you created with Burp Proxy.
- Click on the “Click here to view file content.”
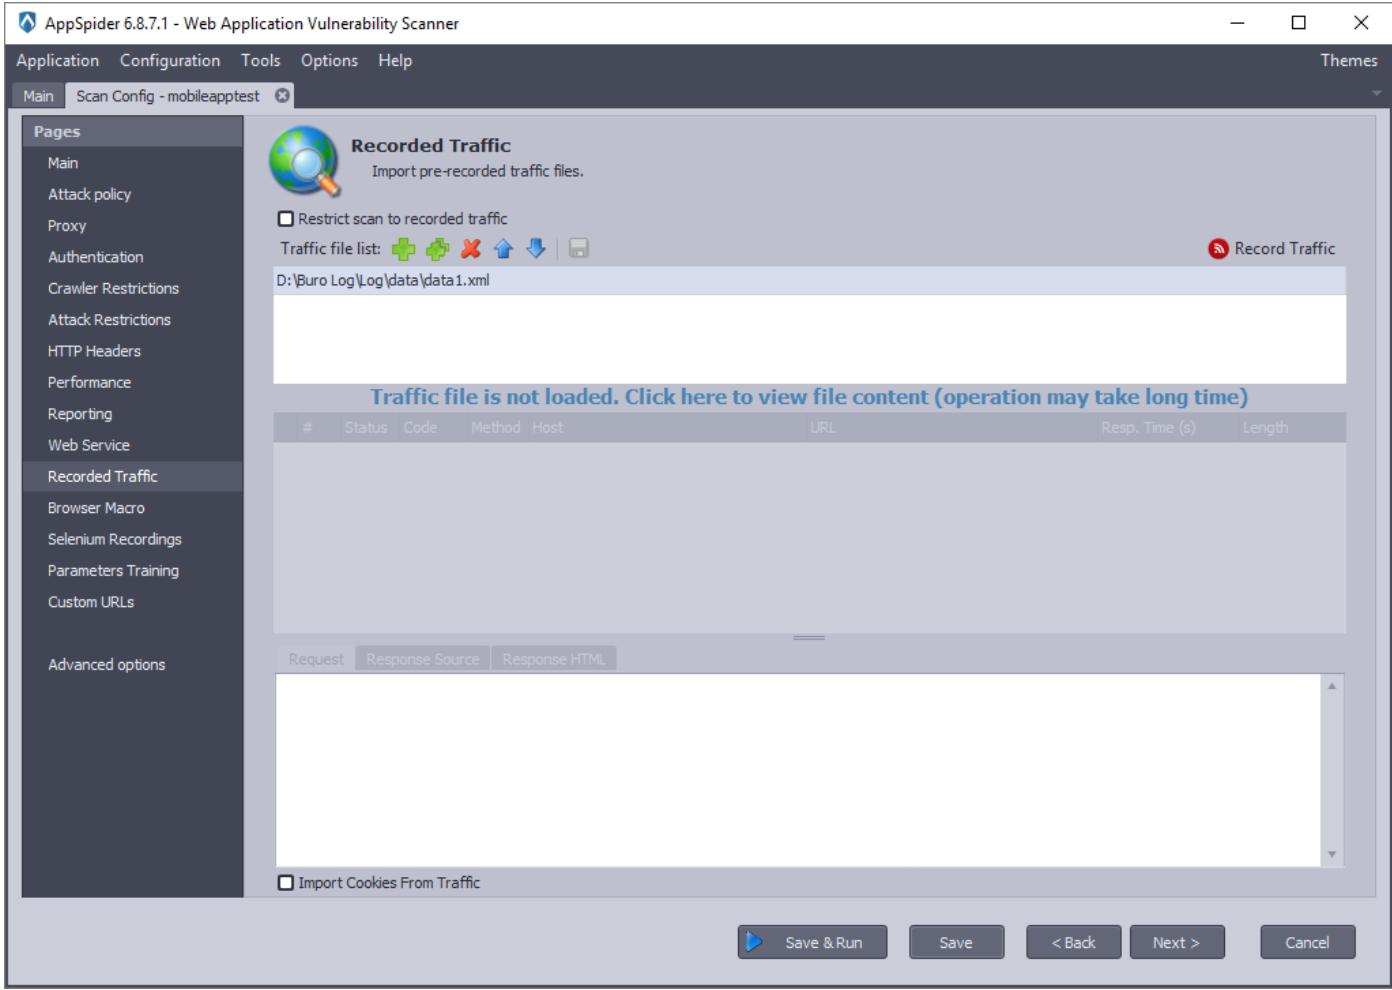
- Click on the message and the bottom area should change to add the contents of the file we just selected.
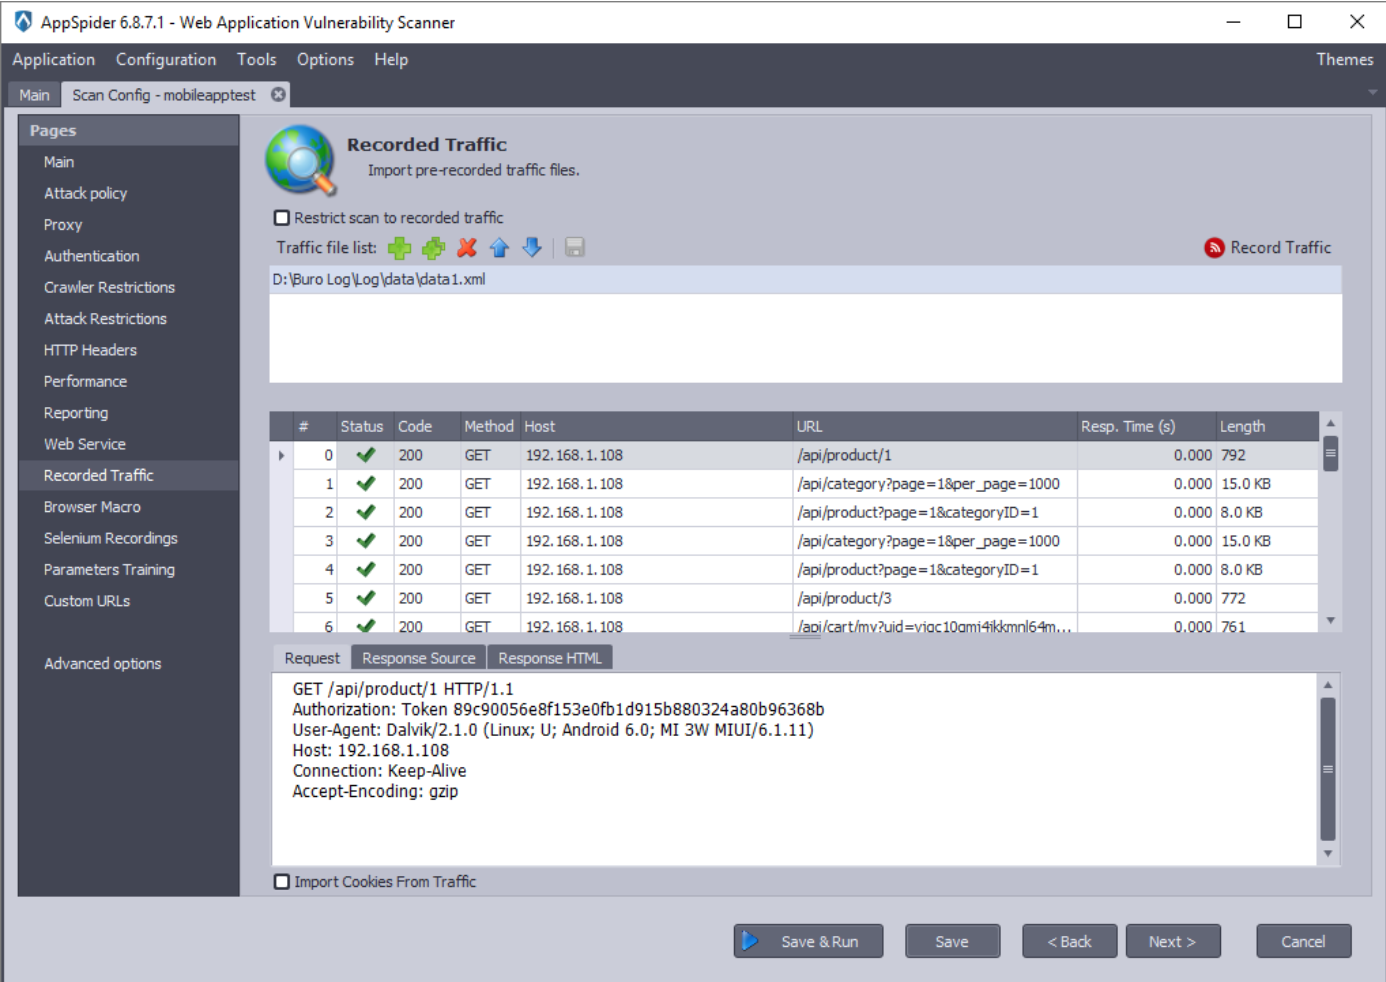
- As captured and imported mobile application data into AppSpider, click on “Save and Run” at the bottom of the configuration page and scanning of the application will initiate including mobile application information.