AppSpider Enterprise JIRA Integration
Jira Server integrations end-of-life
Effective August 19, 2024, Rapid7 will no longer provide support for Jira Server integrations with Vulnerability Management (InsightVM) Remediation Projects. This decision follows the official end-of-life announcement by Atlassian for Jira Server, which occurred on February 15, 2024. Jira Cloud support is available and will continue to be supported. Atlassian Data Center is not supported and there are no imminent plans to support it.
Read Atlassian’s announcement at: https://www.atlassian.com/blog/announcements/farewell-to-server
AppSpider integrates with JIRA cloud and on-prem so that security teams can automate work creation and assignment.
The automated ticketing feature simplifies this process while allowing you to:
- Create targeted and precise tickets automatically with rules that can be reused across projects.
- Customize ticketing templates to include as much security context as you need.
- Let your remediation teams continue to use their existing tools and processes.
If you are looking for the JIRA integration for Application Security (InsightAppSec), see Ticketing Integration.
One way JIRA integration
This integration is one way. If a ticket is updated in JIRA it does not change the status in AppSpider Enterprise.
Requirements
- JIRA username and password of a user with admin permissions.
- A client in AppSpider you want to connect to.
- URL of the JIRA instance you want to connect to.
- The JIRA integration is set up on each client individually.
Set up an AppSpider JIRA integration
- Select your client from the Client dropdown in AppSpider and click OK.
- In the dropdown go to Administration > Integration.
- On the Integration page, click Add.
- On the Add Integration server page, fill in the information for your JIRA instance.
- Server Type: This is always JIRA ADVANCED. JIRA ADVANCED works for on-prem and cloud.
- Name: Name of your JIRA server
- URL: URL where the JIRA server is located
- Username: Your JIRA username
- Password: Your JIRA password
- Click Connect to pull in the Issue Type, Issue Statuses, and Issue Priorities.
Issue Types, Issue Statuses, and Issue Priorities are mapped to a definition in your JIRA project. For example, if a vuln in AppSpider is marked as Verified, then you may want to put the ticket status in JIRA as In Progress. In the dropdown next to Verified, you would select In Progress.
To help you decide how to map them, here’s how we define Issue Types, Issue Statuses, and Issue Priorities in AppSpider.
- Issue Type
- Export as: The JIRA project issue type.
- Issue Statuses
- Verified: The issue was verified but not fixed.
- Fixed: The issue was fixed. After the next scan, the status will change based on scan results.
- Ignored: The issue was fixed, but the fix date is not available on the server. The issue will stay in the Ignored status until the date set, then the status changes based on the next scan results.
- Unreviewed: The issue was not fixed. After the next scan, the status will change based on scan results.
- Issue Priorities
- Safe: This marks a redirection point in the application and not a vulnerability.
- Informational: This is a best practice check. They are usually passive attacks.
- Low: The issue has a low priority.
- Medium: The issue has a medium priority.
- High: The issue has a high priority.
- Notes: This is an optional text box to add information about the JIRA server that is visible in AppSpider only.
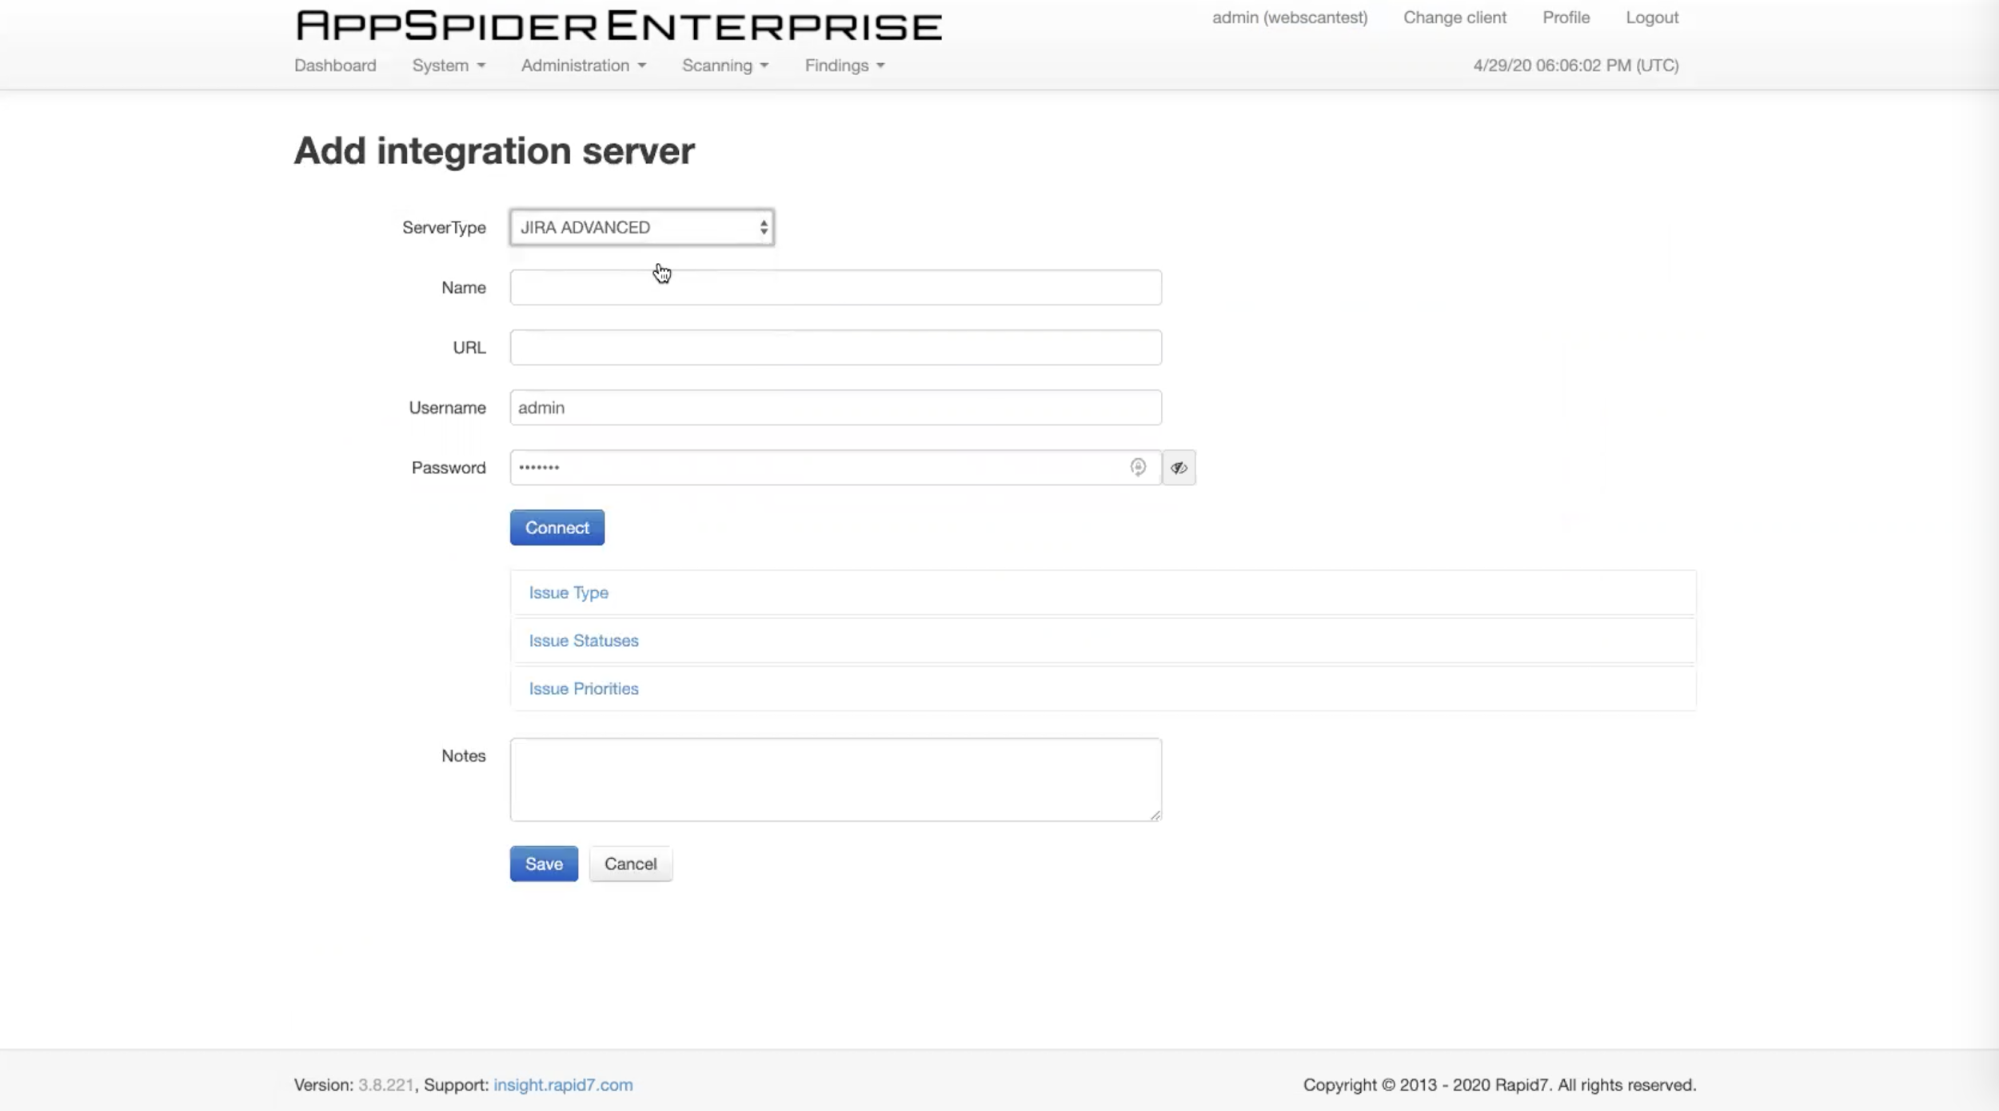
- Click Save.
Congratulations
Congratulations, your JIRA integration is now set up and ready for use.
Send an issue to JIRA
After your integration is set up, you can send an issue to JIRA from the Discovered Issues table.
- Select the issues you want to send to JIRA.
- Click on the JIRA button at the top of the page.
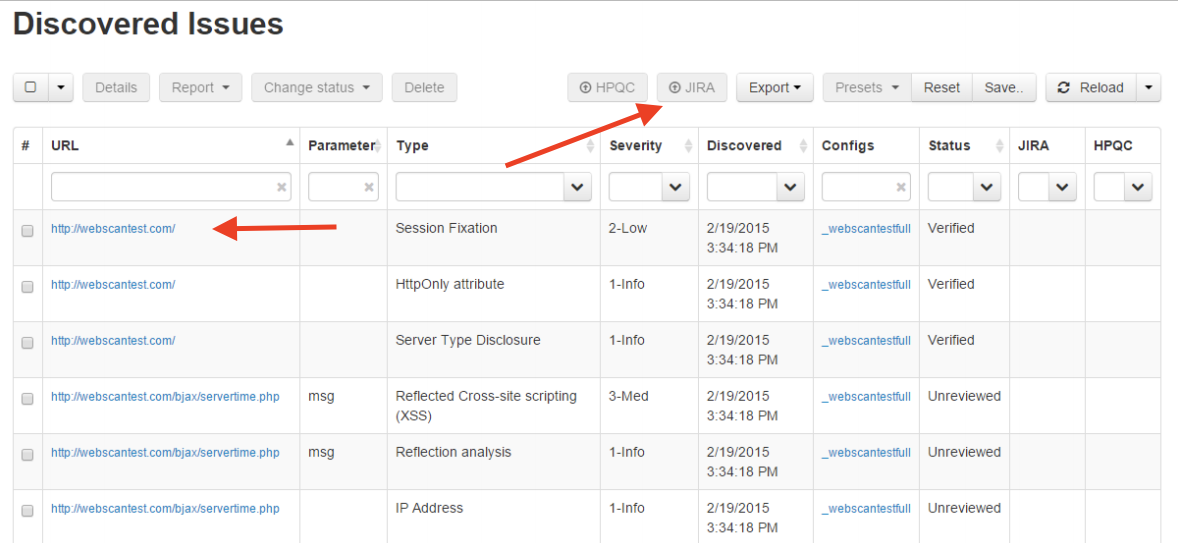
- In the popup box select the JIRA server and enter the project key.
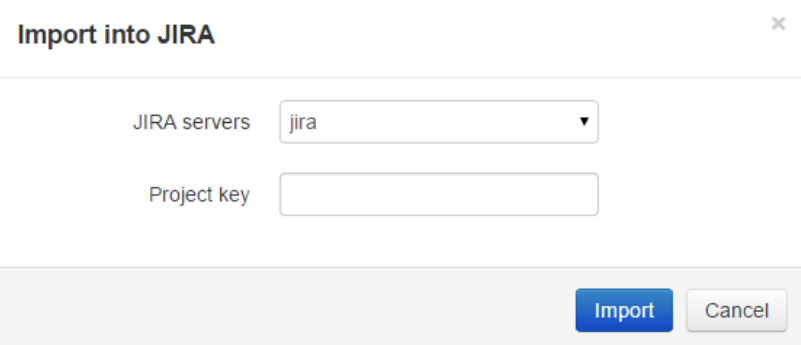
- Once the import is complete, the issues JIRA column will update with the current status.
Review JIRA issue status
Review your issue JIRA status from the Discovered Issues table.
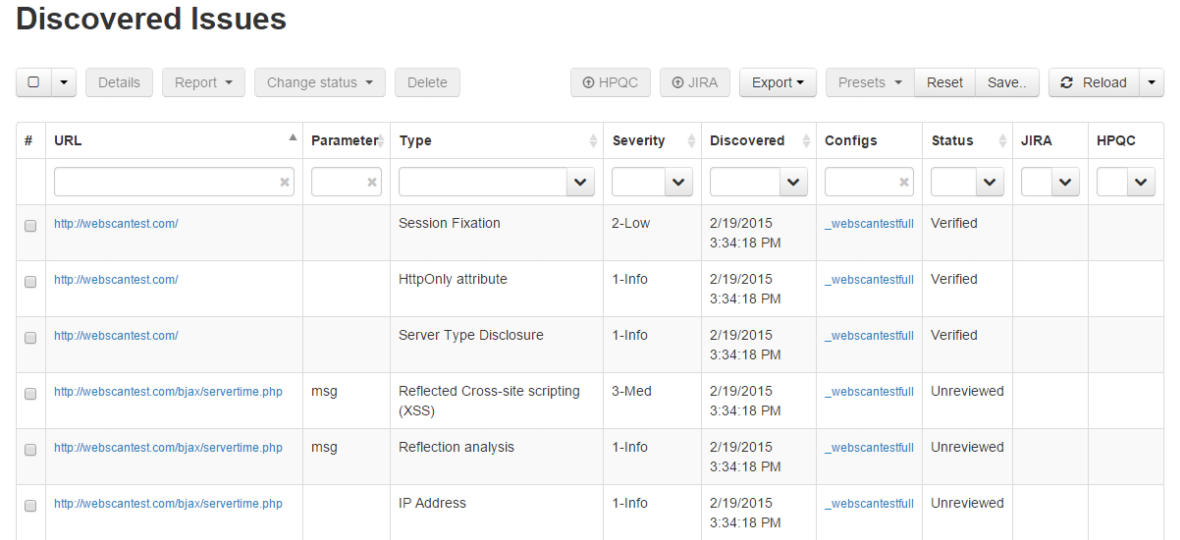
The JIRA column displays a check if the issue is imported into JIRA. You can filter the JIRA status by clicking the JIRA dropdown and selecting Imported or Not Imported.
Manage your JIRA integration
The Administration > Integration page contains all of your integrations, including JIRA.
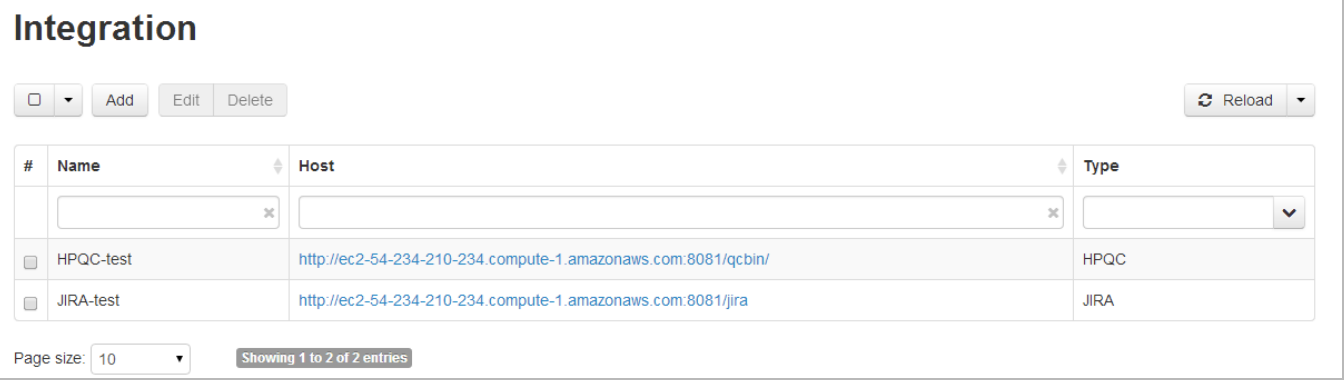
Use the Add, Edit, and Delete buttons to make changes to your integration.