Projects (GCP)
🚧 New Onboarding Process for Connecting Cloud Accounts for GCP
The following content is for our legacy onboarding process for connecting a cloud account. Beginning with our 23.4.11 release InsightCloudSec includes a new onboarding workflow - documentation on that workflow is available on the new GCP - Onboarding page.
If you are have issues or need support related to onboarding reach out to your CSA or contact us through the Customer Support Portal with any questions.
This page walks through the steps required to add a single GCP account, also known as a project, into InsightCloudSec. Read more about Google Cloud Projects here .
In addition, we also support adding multiple GCP projects (aka organizations) to InsightCloudSec. Review the details of that setup on the Organizations (GCP) page.
Prerequisites
Before you get started you will want to make sure you have the following:
- A functioning InsightCloudSec Installation
- An InsightCloudSec user with ability to add clouds (Basic user with Add cloud permission or a Domain/Organization administrator)
- Appropriate permissions in GCP to create service accounts, roles, and enable APIs
- Check out our documentation about Auto Badging (GCP) for additional details
If you have questions or concerns, reach out to us through the Customer Support Portal .
🚧 Deleting GCP Projects
For customers that onboard GCP Projects individually (and not via GCP Organizations) any GCP projects deleted upstream/via the console, will be marked as invalid and harvesting will be paused. Customers will need to manually remove these projects from the tool.
Setup Your Project in the GCP Console
Role Creation
1. Within your GCP console navigate into the project you will be onboarding into InsightCloudSec.
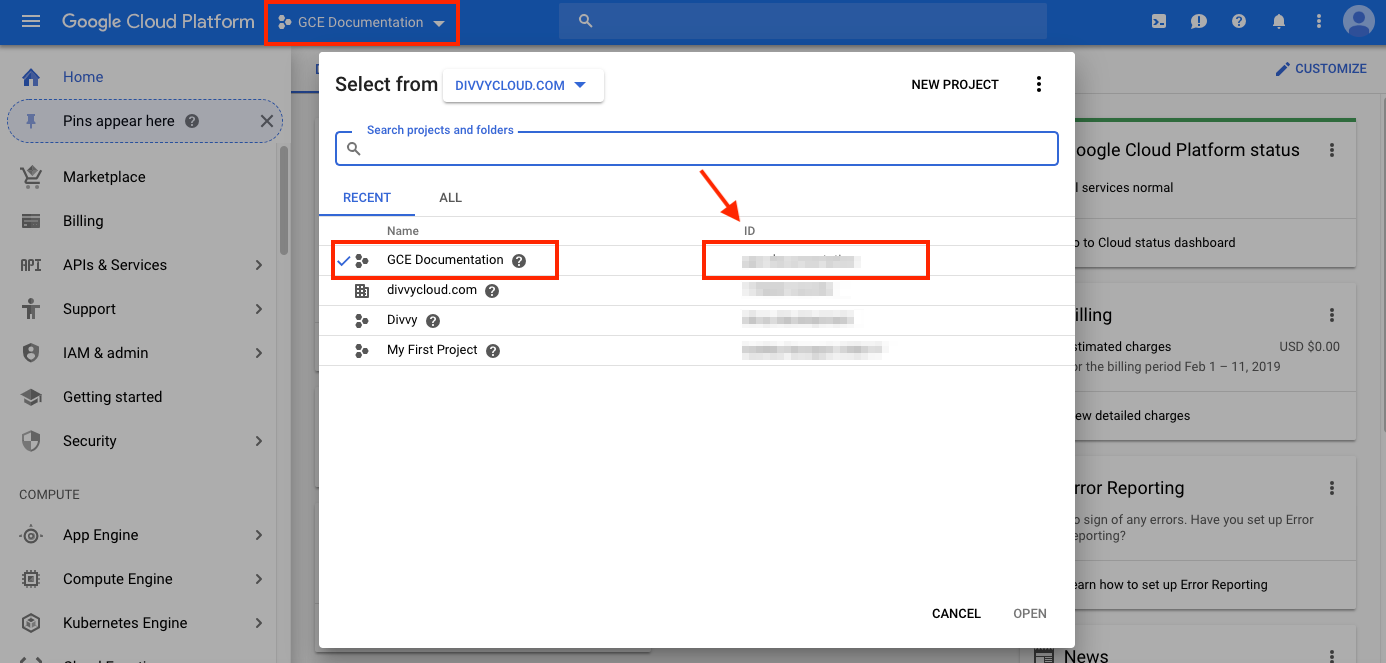
2. Navigate to “IAM & Admin > Roles”.
3. Click “Create Role” and name your role as desired, we recommend including ICS or InsightCloudSec for proper tracking.
4. Click “Add permissions”, and using the filter field provided, select the following permissions:
storage.buckets.getstorage.buckets.getIAMPolicybigquery.tables.getbigquery.tables.listcloudasset.assets.listResource- This permission is required for proper resource harvesting as InsightCloudSec expands the use of Cloud Asset Inventory.
cloudasset.assets.searchAllIamPolicies- This permission is required for proper resource harvesting as InsightCloudSec expands the use of Cloud Asset Inventory.
serviceusage.services.enable
📘 Kubernetes Security Guardrails Users
If you plan on utilizing the Kubernetes Security Guardrails and Kubernetes Remote Scanner features, you should also add the required permissions at this point in the setup process. Review the GCP (GKE) section for details.
5. Click “Add” to finalize the permissions.
6 Click “Create” to save the role.
Service Account Creation
1. Navigate to “IAM & Admin > Service Accounts”.
2. Click “Create Service Account” and complete the service account details.
- We recommend including
ICSorInsightCloudSecfor tracking
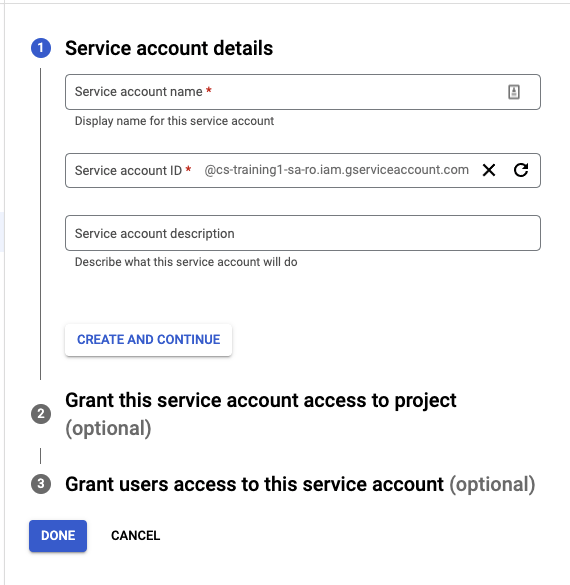
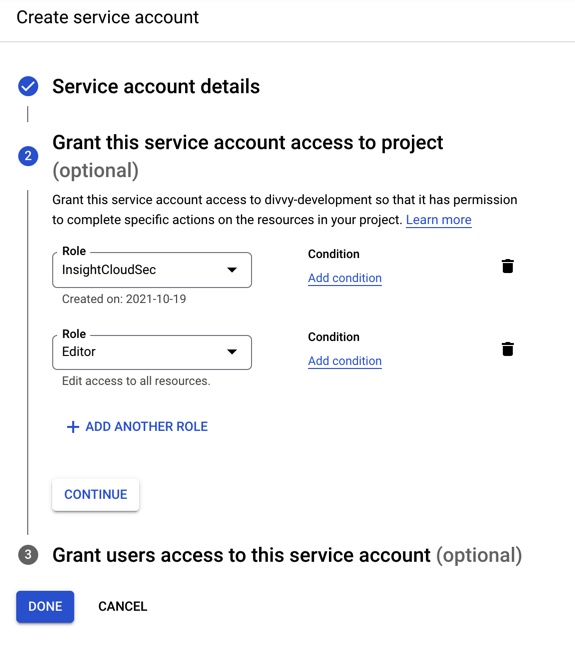
3 Click “Create and Continue”.
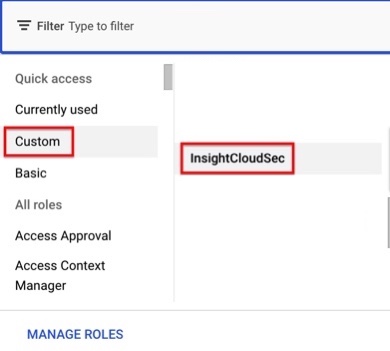
4. Select the Custom role you created in the previous steps.
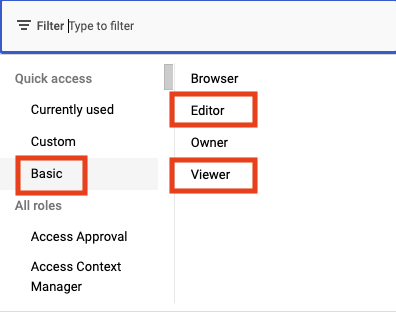
5. Click to Add another role and select the Basic viewer (read-only) or editor (read/write) role.
6. Click “Done” to finalize the new role.
Generating a Service Account Key
1. Navigate into the newly created Service Account.
2. In the Keys section, select “Add Key”.
3. Select “Create New Key”.
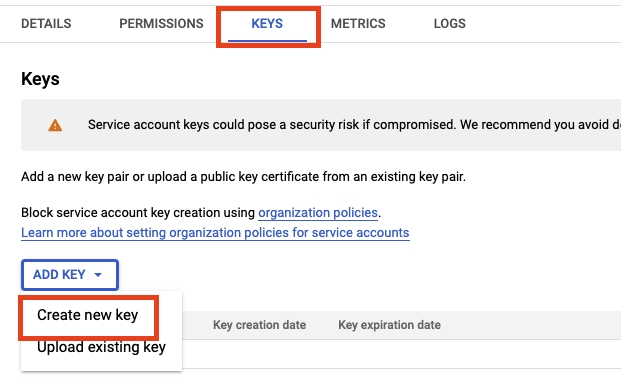
4. With Key Type as JSON, click “Create” to download the key.
❗️ Store this JSON file in a secure place; it contains the only copy of the key.
Enabling GCP APIs
We recommend that you review and enable the APIs listed under Recommended APIs in order to gain visibility and access to those GCP services.
- Review GCP Supported Services for a full list.
🚧 Required APIs
The Cloud Asset API and Service Usage API must be enabled with appropriate permissions for visibility into the project’s enabled API services and certain resource harvesting. The Cloud Policy Analyzer API needs to be enabled in each project added to InsightCloudSec so Service Accounts can be properly harvested.
If the project has all recommended APIs, you can skip to the next step in the onboarding process.
1. Navigate to the APIs & Services > Dashboard to view currently enabled APIs.
2. The Dashboard will allow you to see the currently enabled APIs and usage metrics.
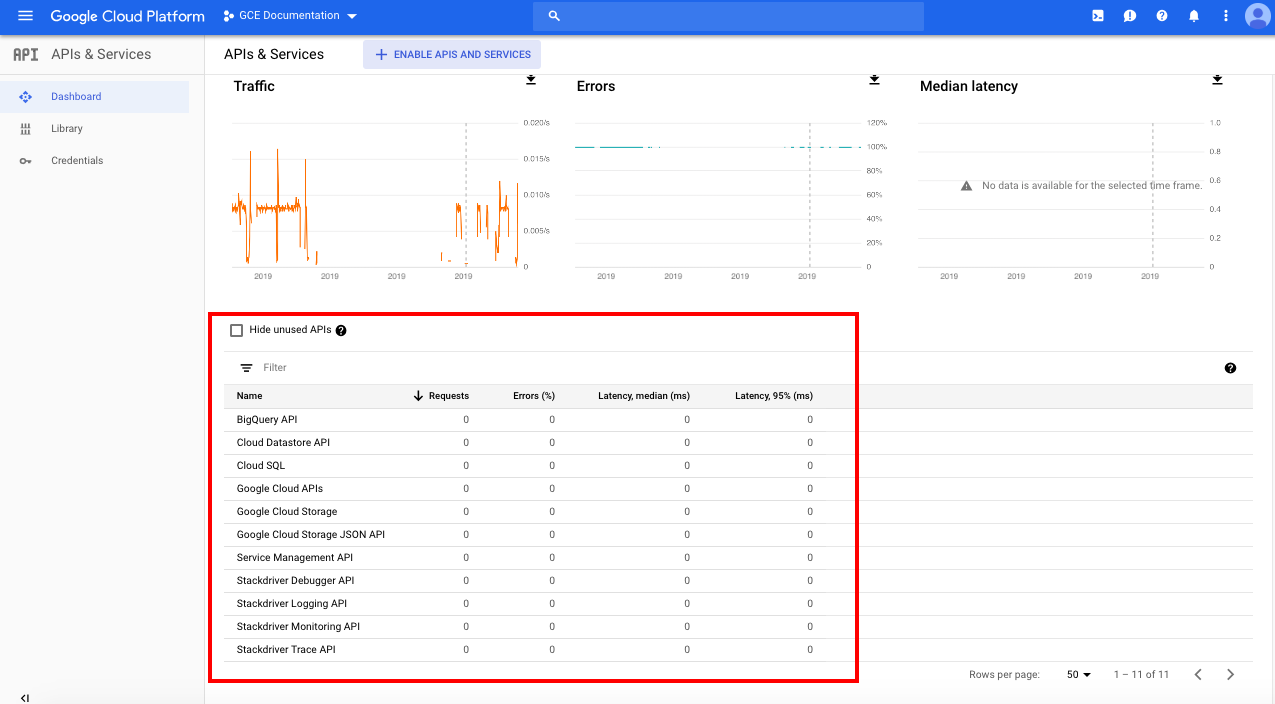
3. To Enable an API select “ENABLE APIS AND SERVICES” at the top of the page.

4. Search for the name of the API to enable and click the corresponding API service in the results.
5. Review the description and consider reading the GCP documentation regarding the API. Click “ENABLE” to enable the API in the project.

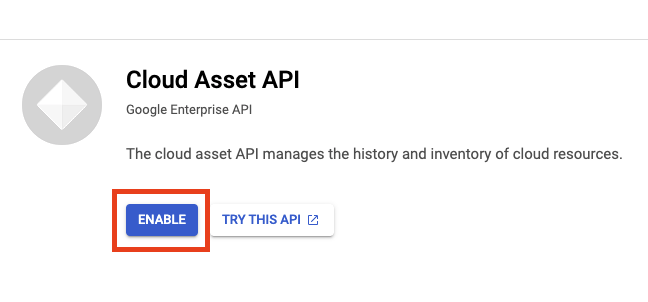
6. Repeat steps 3-5 for enabling additional APIs.
Once the above steps are completed, you can move on to adding the project into InsightCloudSec.
Onboarding A GCP Project into InsightCloudSec
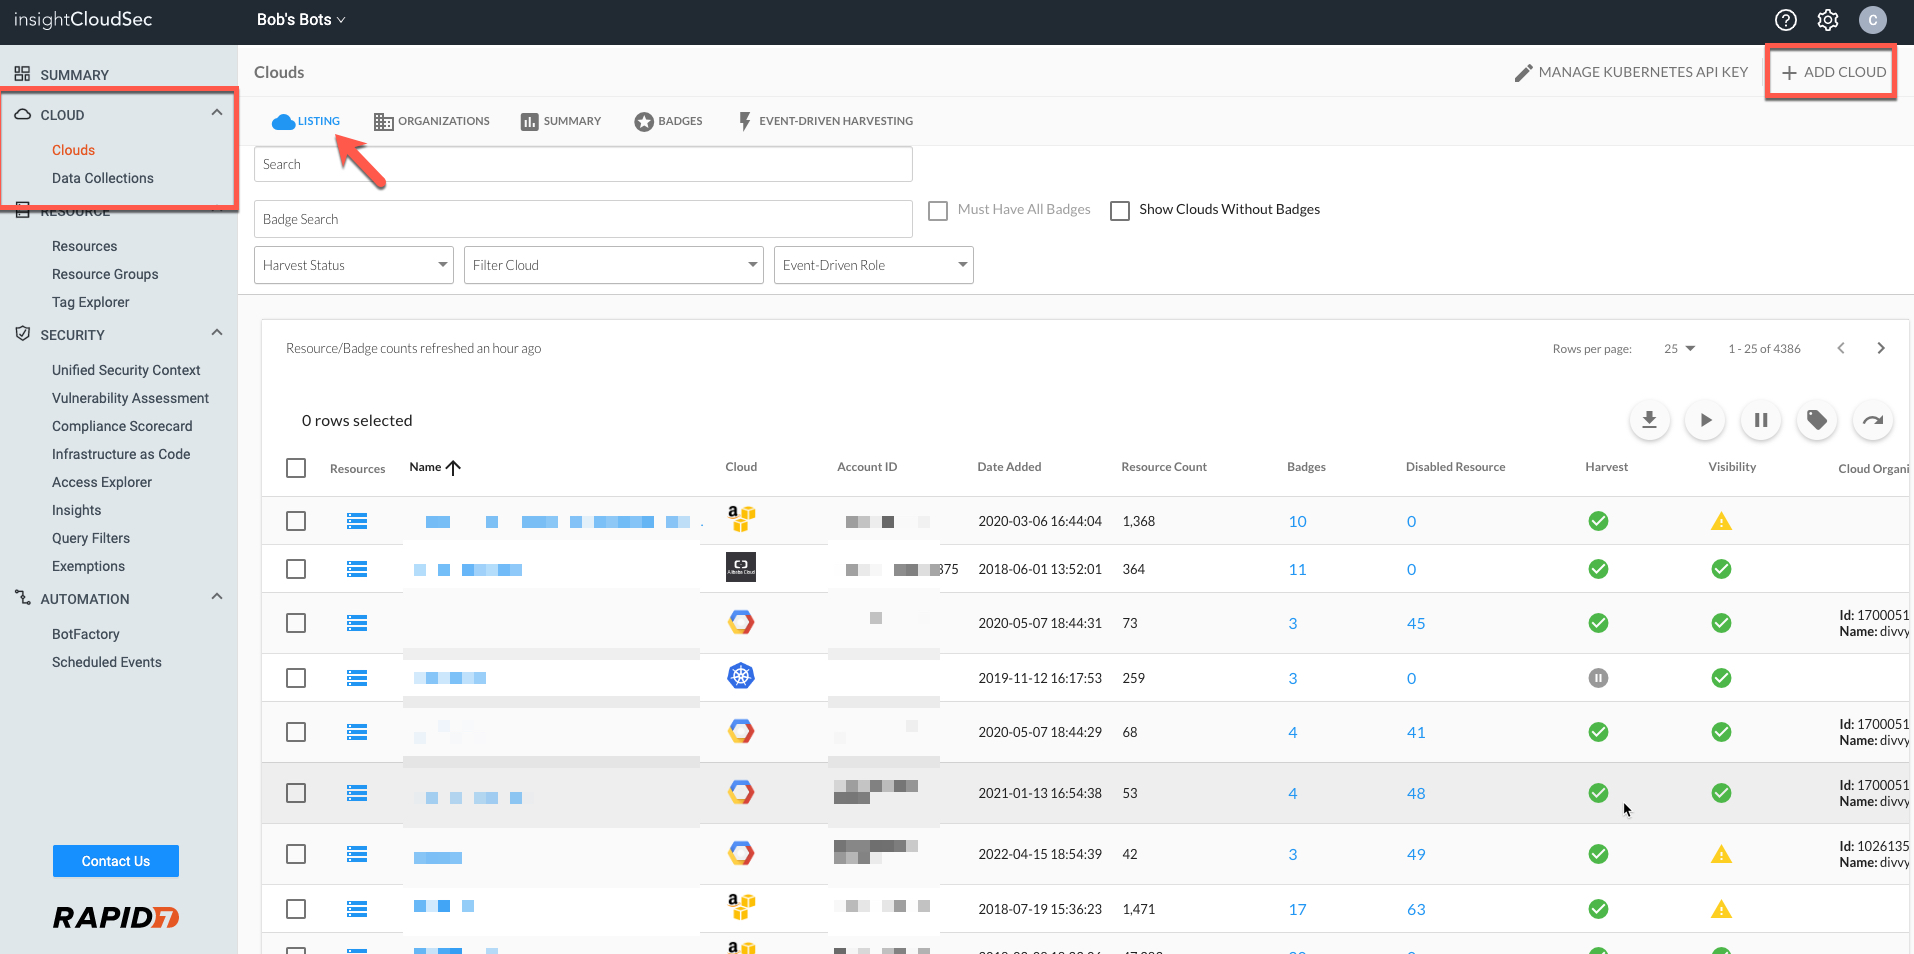
1. Go to your InsightCloudSec account. Navigate to the Clouds Listing Page “Cloud —> Clouds”. Click on “Add Cloud” in the upper right.
2. Select “Google Cloud Platform” and complete the following details:
- Nickname: Name your cloud account.
- Project ID : Provide your project ID.
- This can be found in the Service Account key previously downloaded or the home page within the GCP console.
- API Credentials: Enter the JSON from the credentials you created and saved earlier.
- Email Delegation(Optional): Enter an admin Email if you want to manage IAM and the Google Cloud Directory.
- Harvesting Strategy (Optional): Select a harvesting strategy to use for this project other than the default.
📘 Enabling Email Delegation
Providing an email within the Email Delegation field enables InsightCloudSec to collect GCP Directory (IAM) data that will be populated under both:
The email you provide must belong to a super-admin within your target GCP service account in order to transmit this data. For more details check out the page on GCP Directory Support.
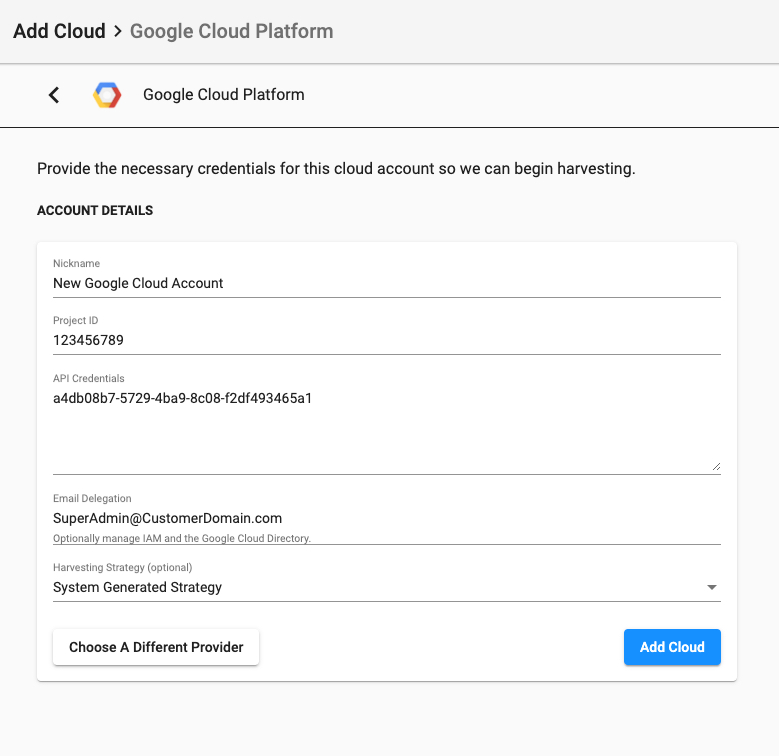
3. Select “Add Cloud”.
4. Complete the optional validation step for permissions.
- Note: InsightCloudSec includes the ability to optionally validate permissions after adding a new cloud account.
5. Add any Badges you would like to this particular cloud account. This can be performed at any point later on.
- InsightCloudSec also supports Auto Badging (GCP), so you may want to review those details.
6. InsightCloudSec will begin harvesting immediately and the data should start to surface after five minutes or so, depending upon the size of your cloud account.
- You can also confirm that your cloud account is added by returning to the Clouds main page, selecting the “Listing” tab, and searching to confirm that your newly added cloud account is listed.