Creating a SAML certificate with your IdP
SAML certificates enable you to increase security between your IdP and your SAML applications. To learn how to create SAML certificates, please visit your IdP’s documentation. You’ll need to create one for AppSpider Enterprise.
After you create the SAML certificate, you’ll need to download the certificate, and store it on your AppSpider Enterprise server. You’ll need details from the SAML certificate, such as the location of where the certificate is installed, to configure SAML for AppSpider Enterprise.
Installing the IDP certificate on your AppSpider Enterprise Server
To install your IDP certificate, you need to know the installation location and your certificate identifier: https://docs.microsoft.com/en-us/dotnet/framework/wcf/feature-details/how-to-retrieve-the-thumbprint-of-a-certificate .
Depending on the file format of the certificate downloaded, you may have to use one of the X.509 (.cer,.crt) formats.
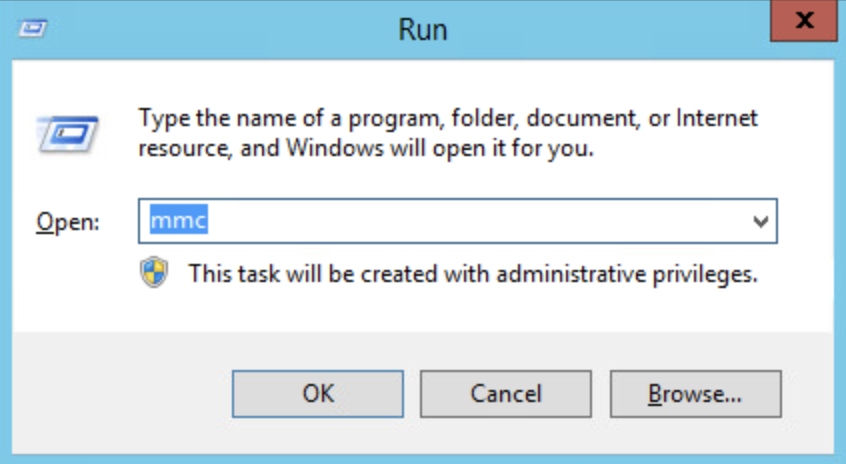
- Go to Start, open Run and type in
mmc, to open the Microsoft Management Console.
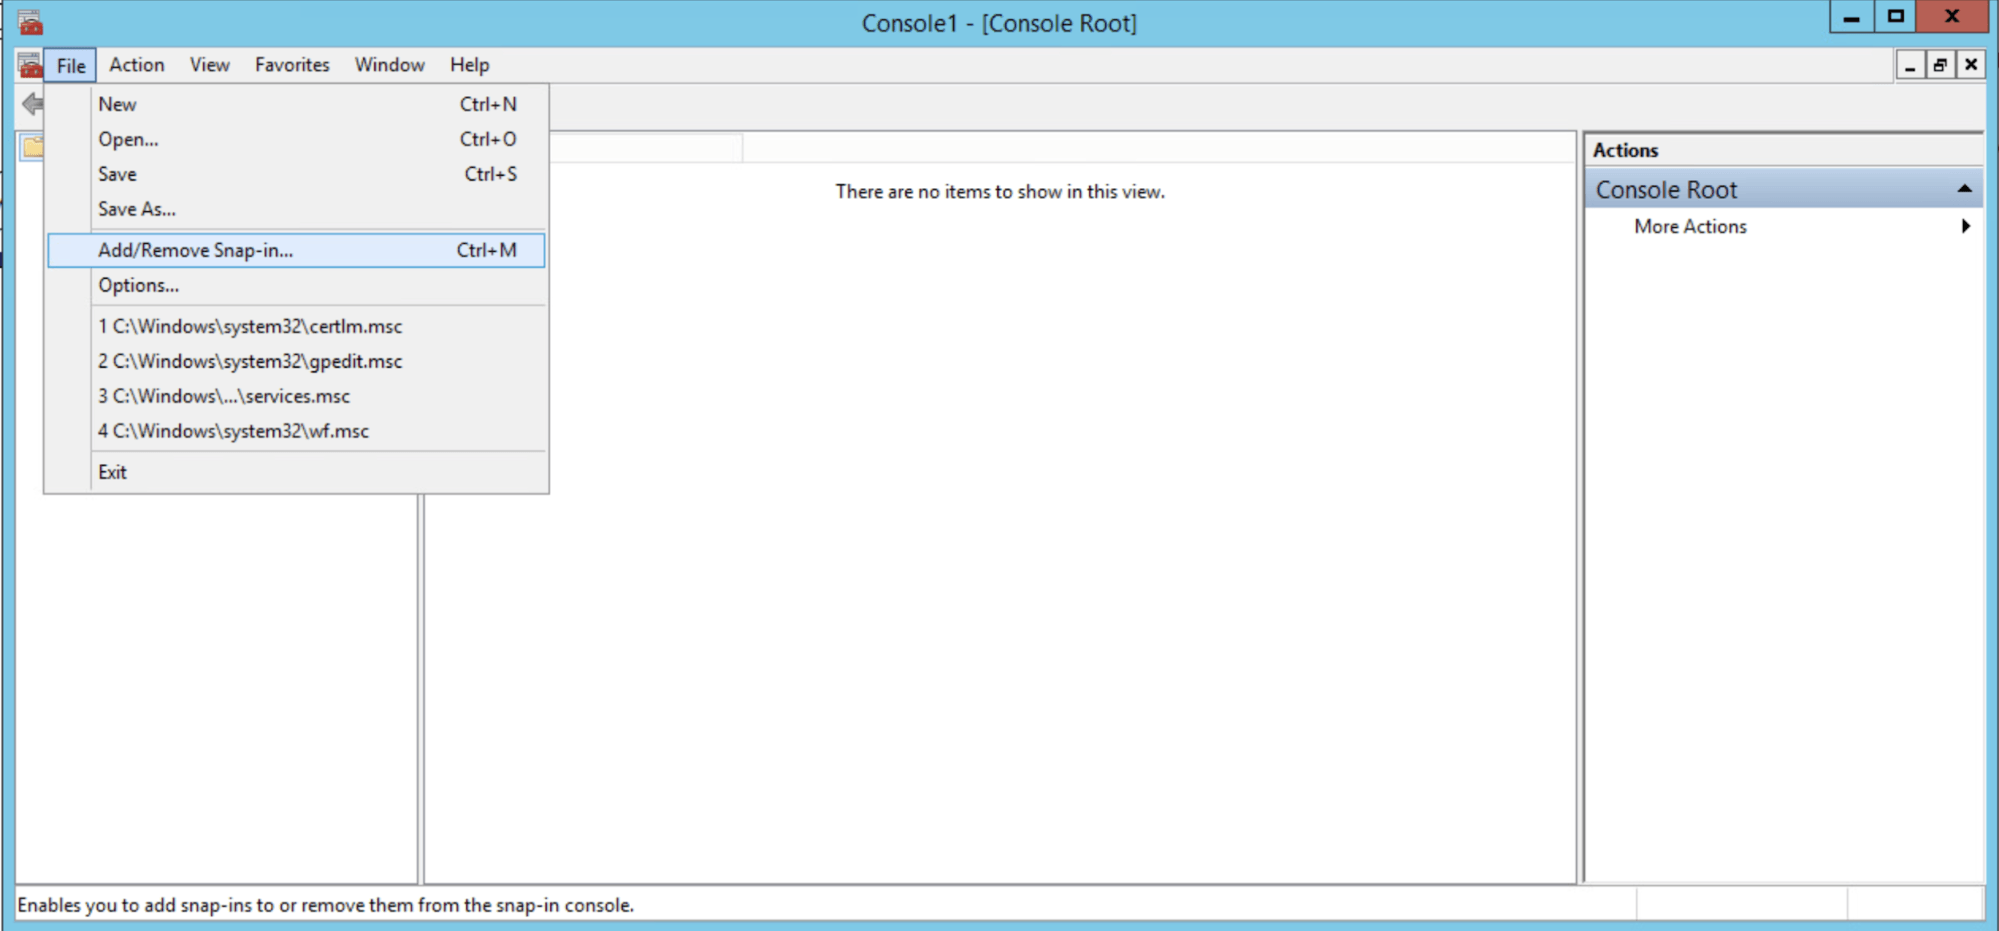
- Go to File and click Add/Remove Snap-in…
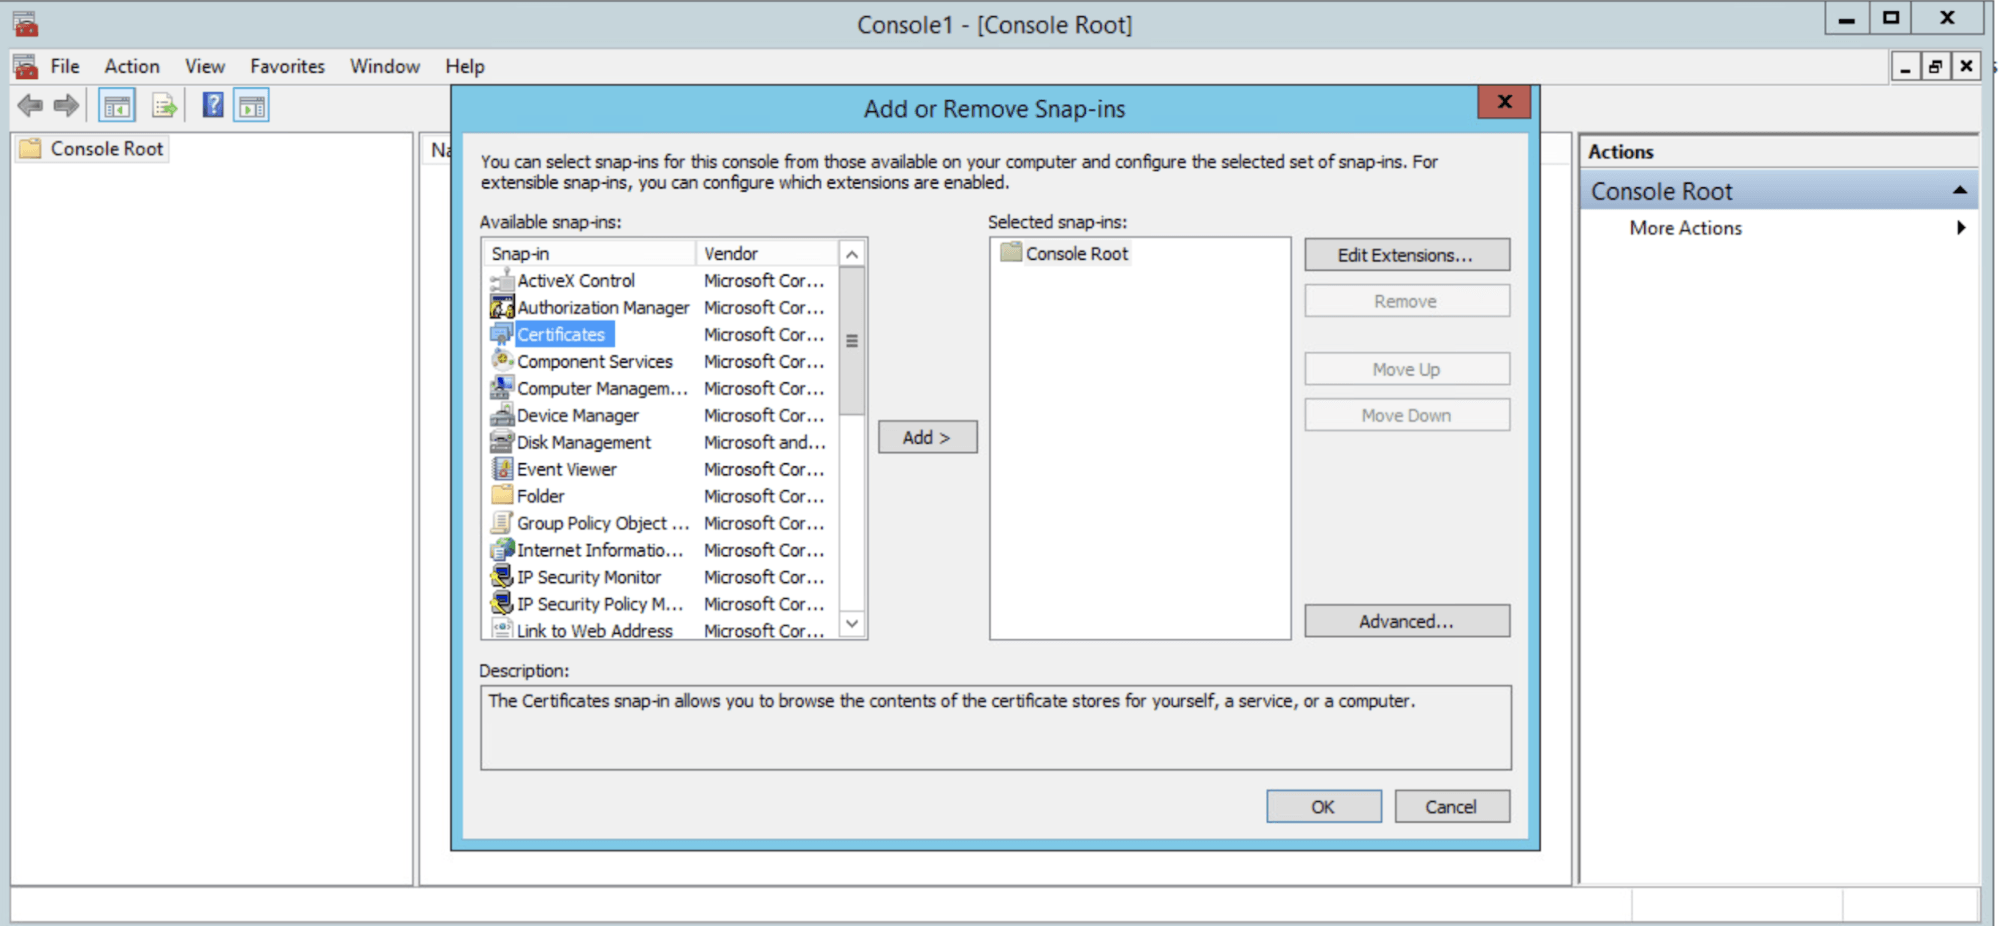
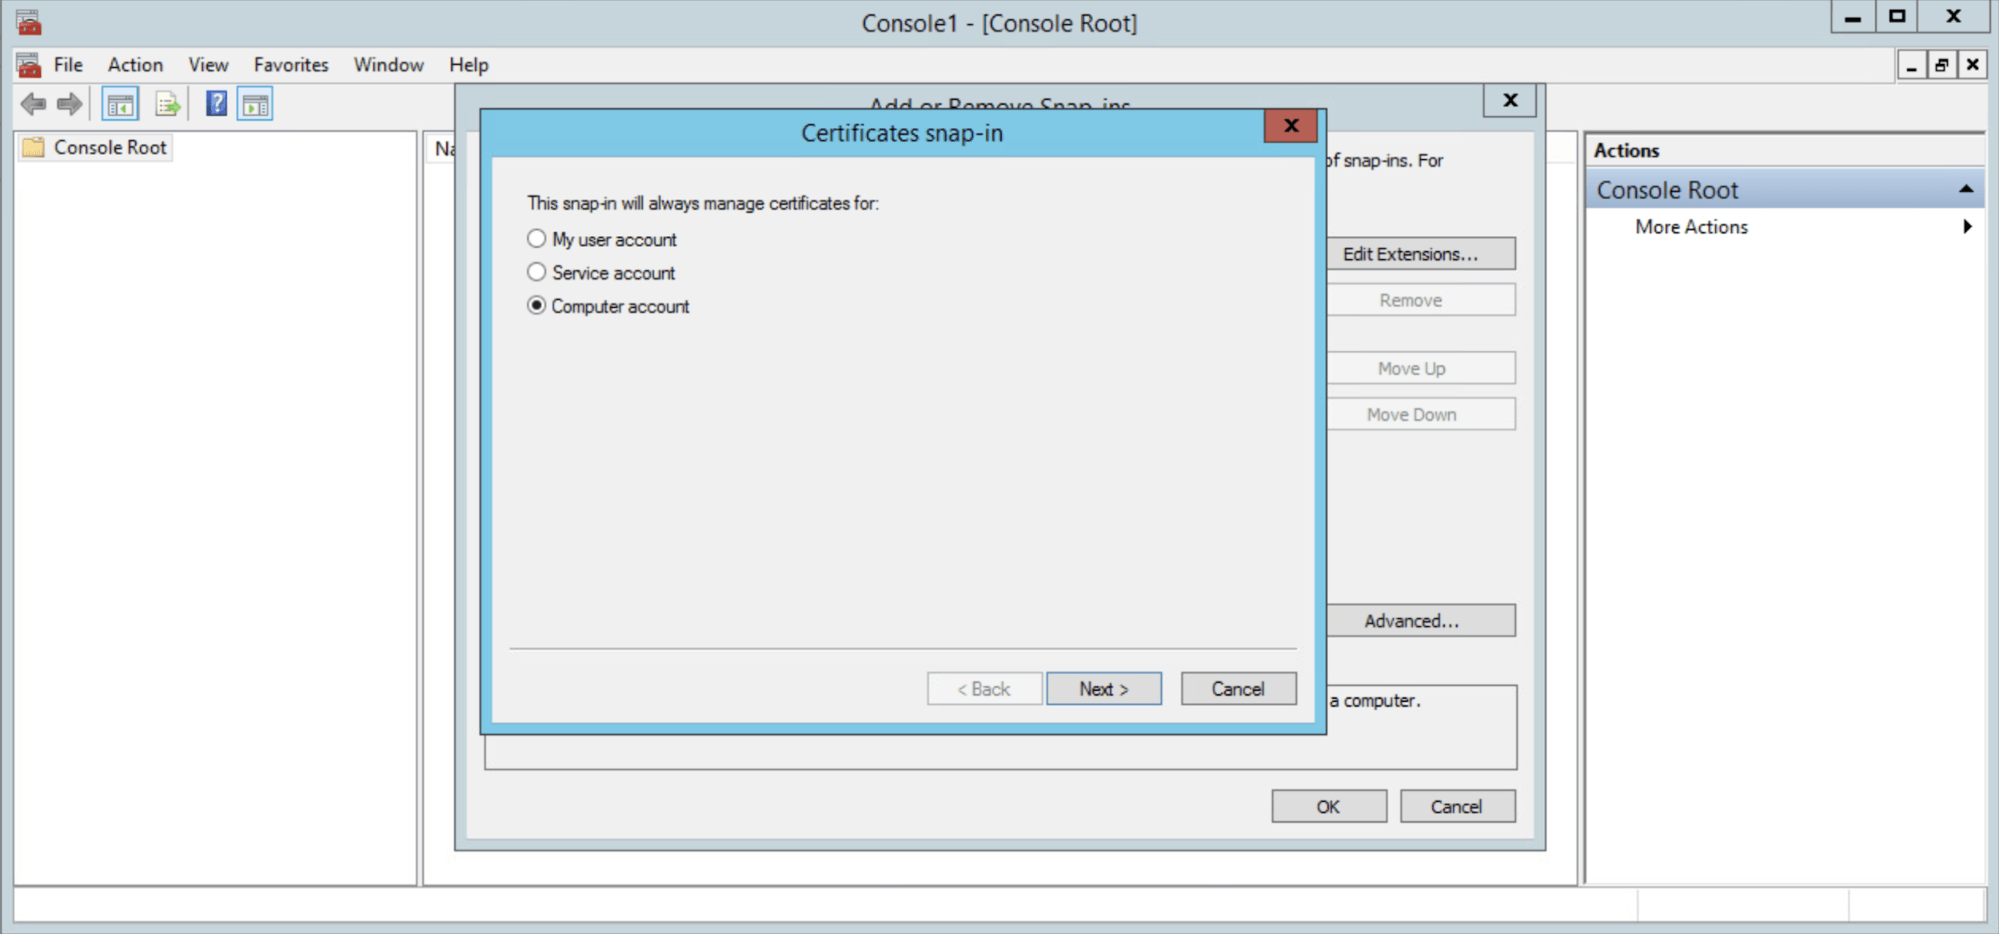
- Click Certificates then OK.
- Select Computer Account.
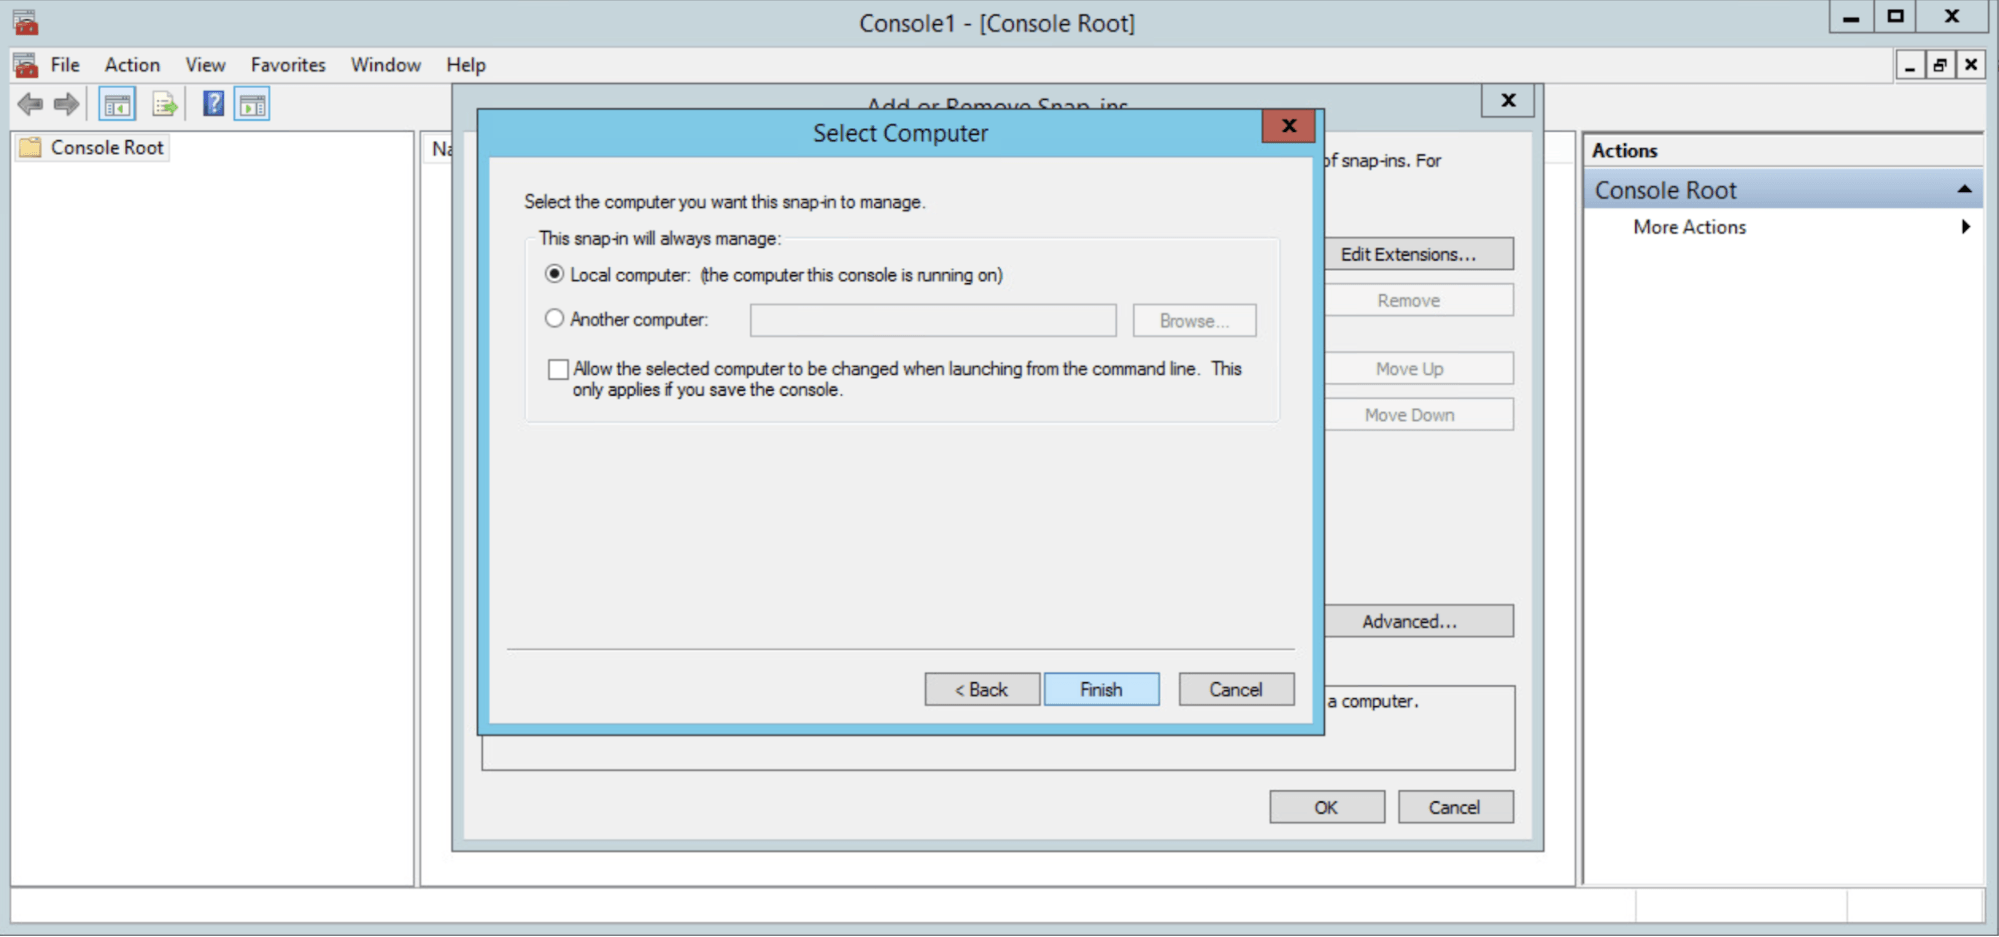
- Keep the setting at Local Computer and click Finish.
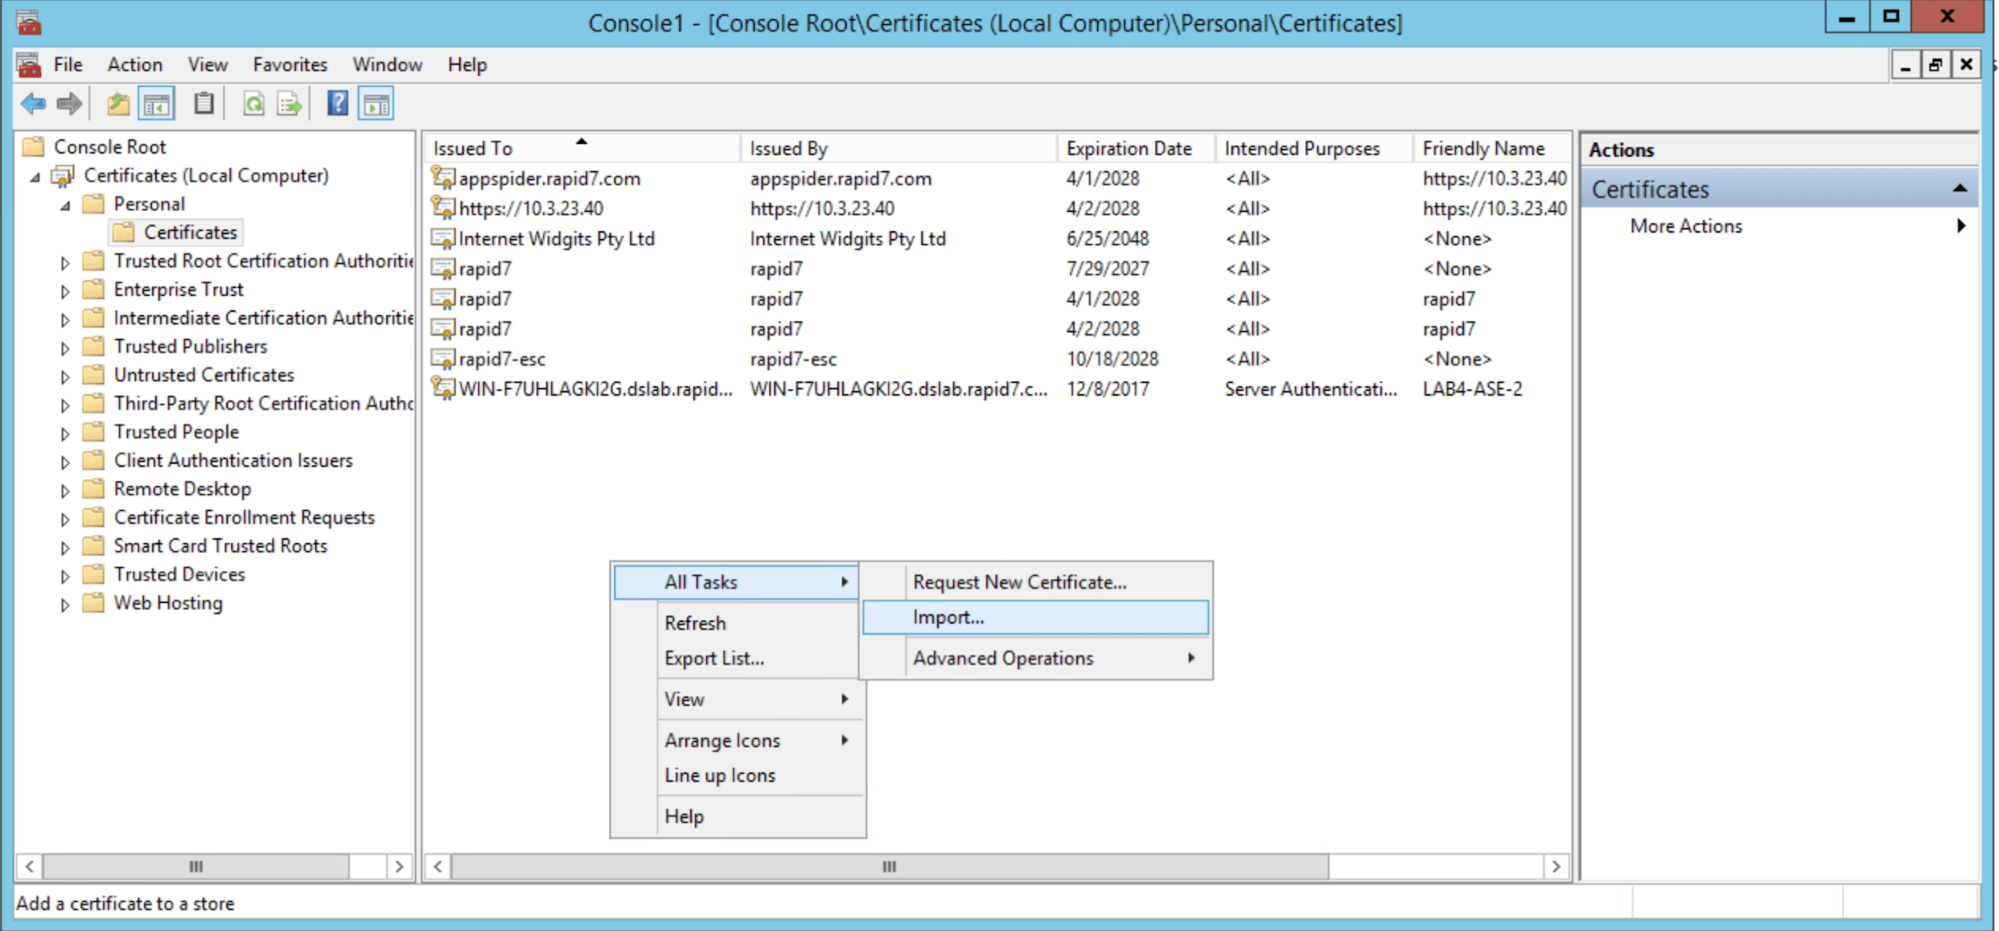
- After the Snap-in is added, expand the Certificates section in the left panel to expose the Personal Folder, secondary click to see All Tasks, and select Import.
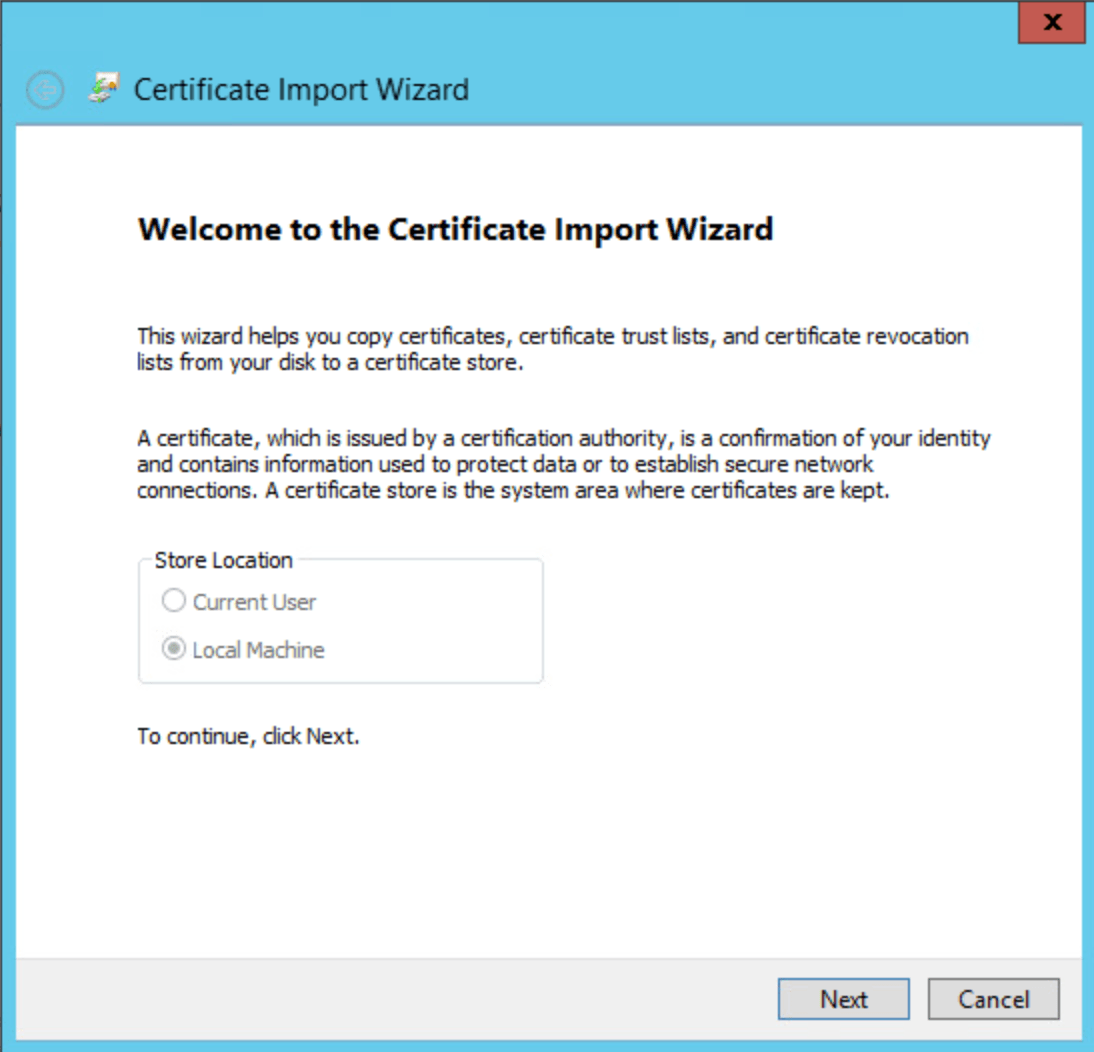
- The Certificate Import Wizard opens. Make sure Local Machine is selected, then click Next to continue.
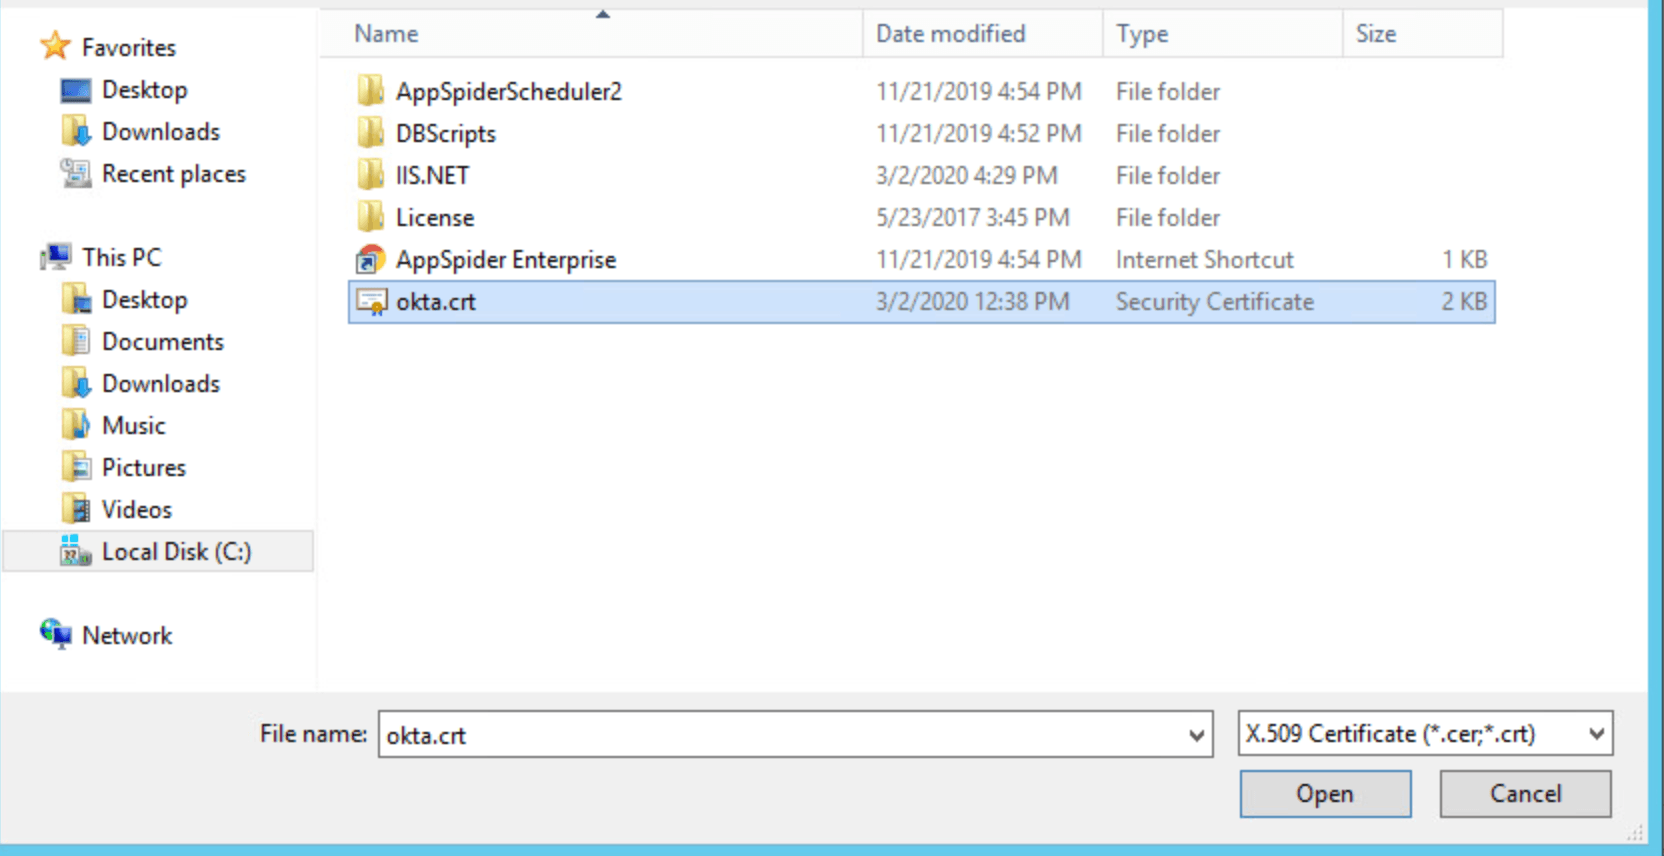
- Open the directory where your certificate is stored. We recommend storing your certificate in the same location as your AppSpider Enterprise installation.
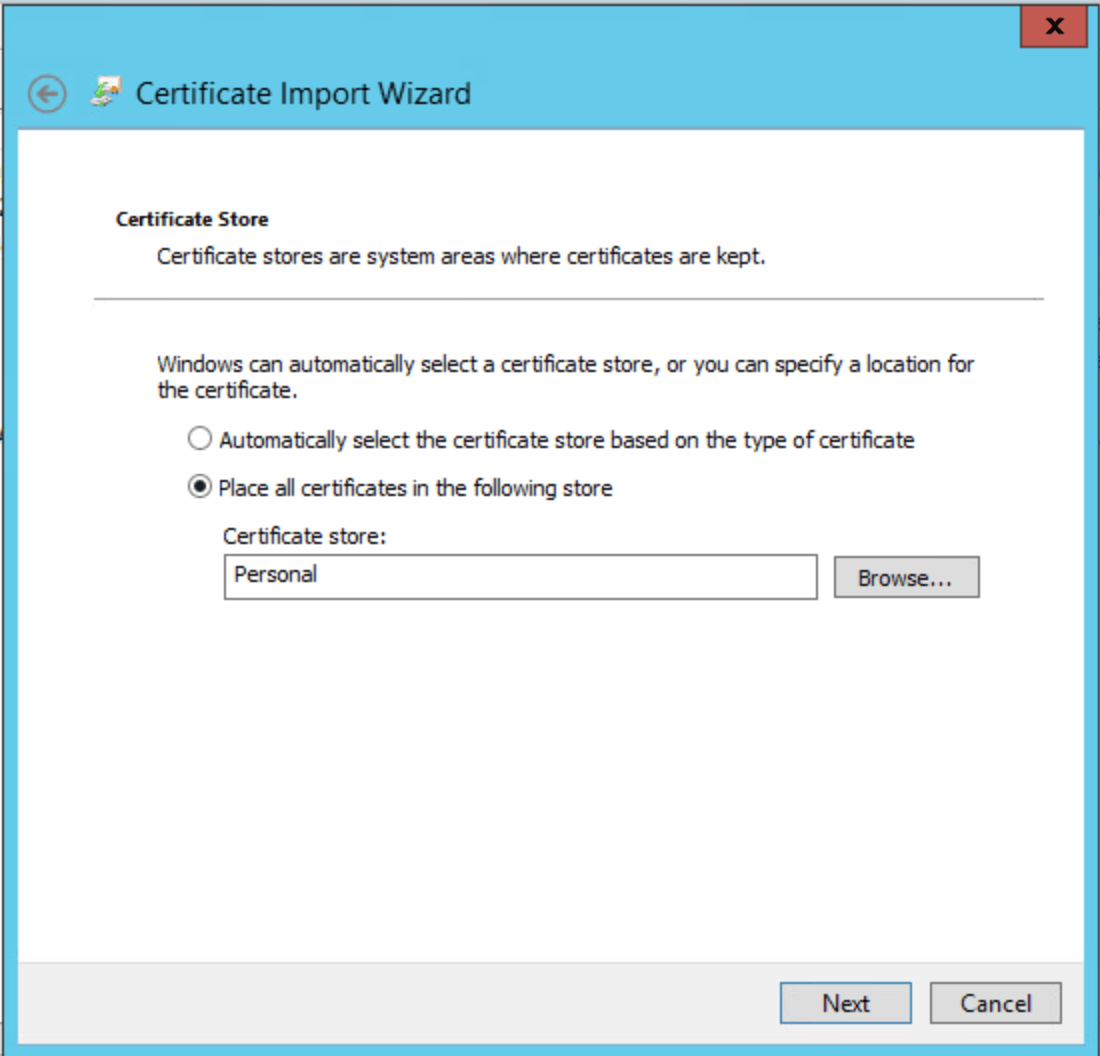
- Place the certificate in the Personal Certificate Store and click Next.
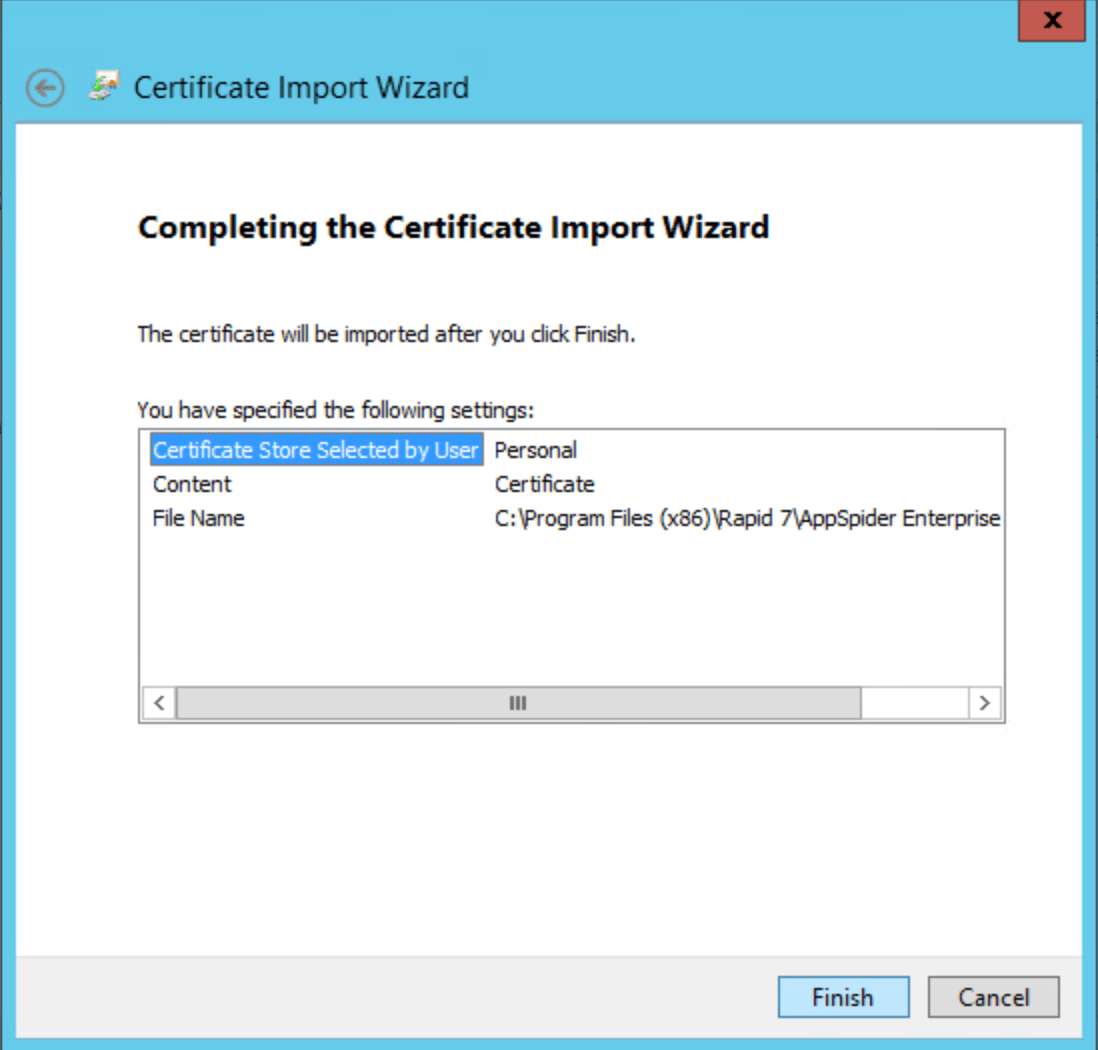
- Click Finish.
Certificate import complete
After you complete the import process, you’ll see the Certificate in the Personal Store.
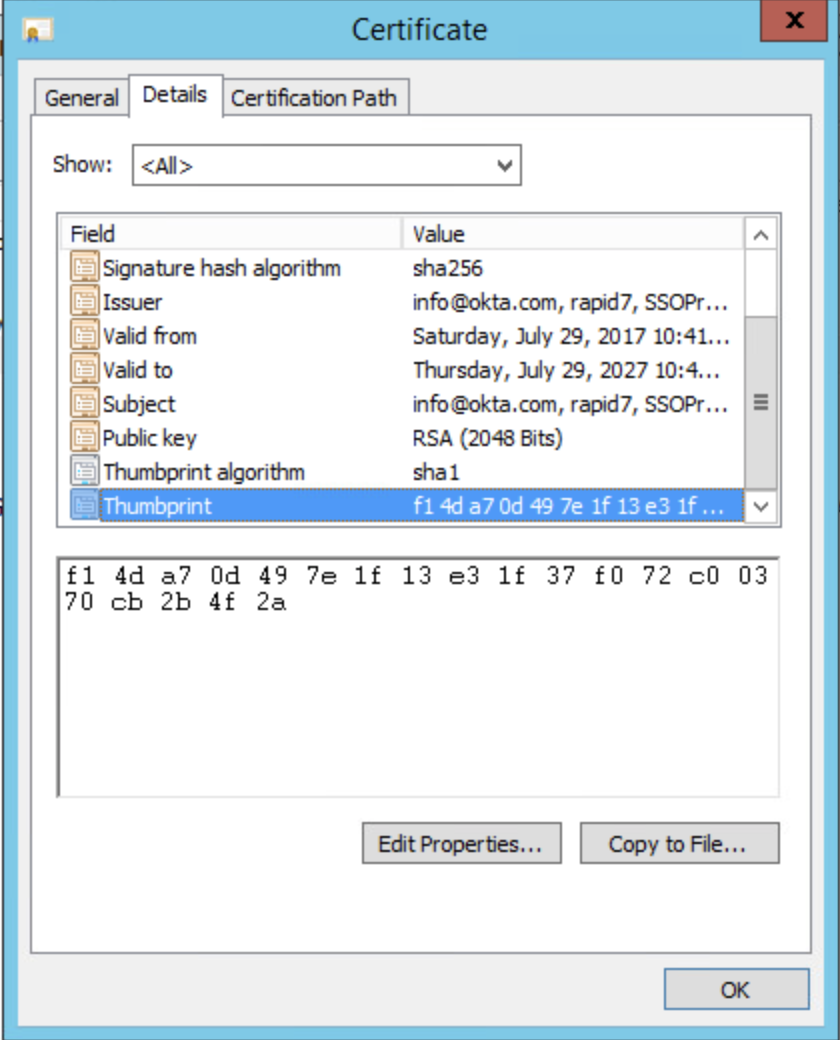
Capture certificate name and thumbprint
Before you can continue to Modifying the SAML configuration file, you need to locate the certificate name and thumbprint.
To capture certificate name and thumbprint:
- Open your certificate and select the Details tab.
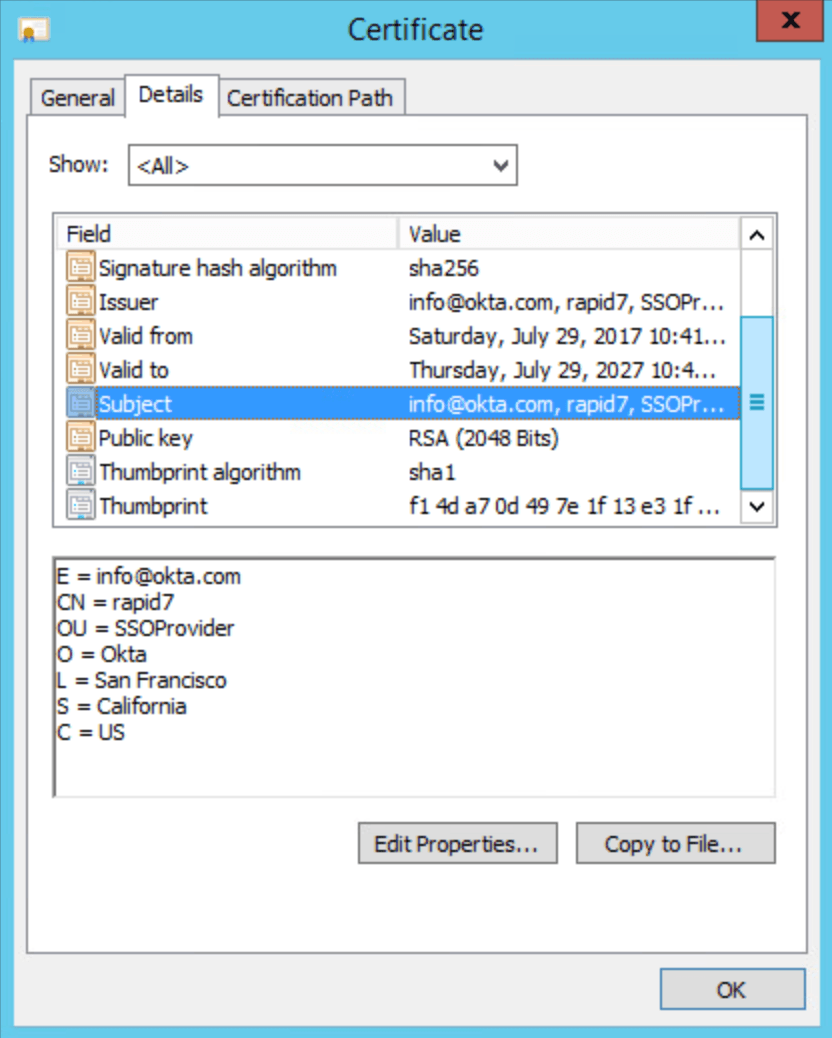
- Copy the Thumbprint or the SubjectName. For the SubjectName, you can copy the CN information of your certificate. Rapid7 recommends using the Thumbprint.