Create a Custom Attack Module
AppSpider has over fifty in-built attack modules. In some cases, users may want to create a custom attack specific to their environment. Hence, AppSpider provides unique functionality which allows users to create a custom attack module to explore a new attack module based on their application environment.
To create a custom attack module we have create a Library project in Visual Studio Express. It is a freeware tool from Microsoft. It can be downloaded from the following link.: https://www.visualstudio.com/en-us/products/visual-studio-express-vs.aspx
Create the Custom Attack Module
New Library Project
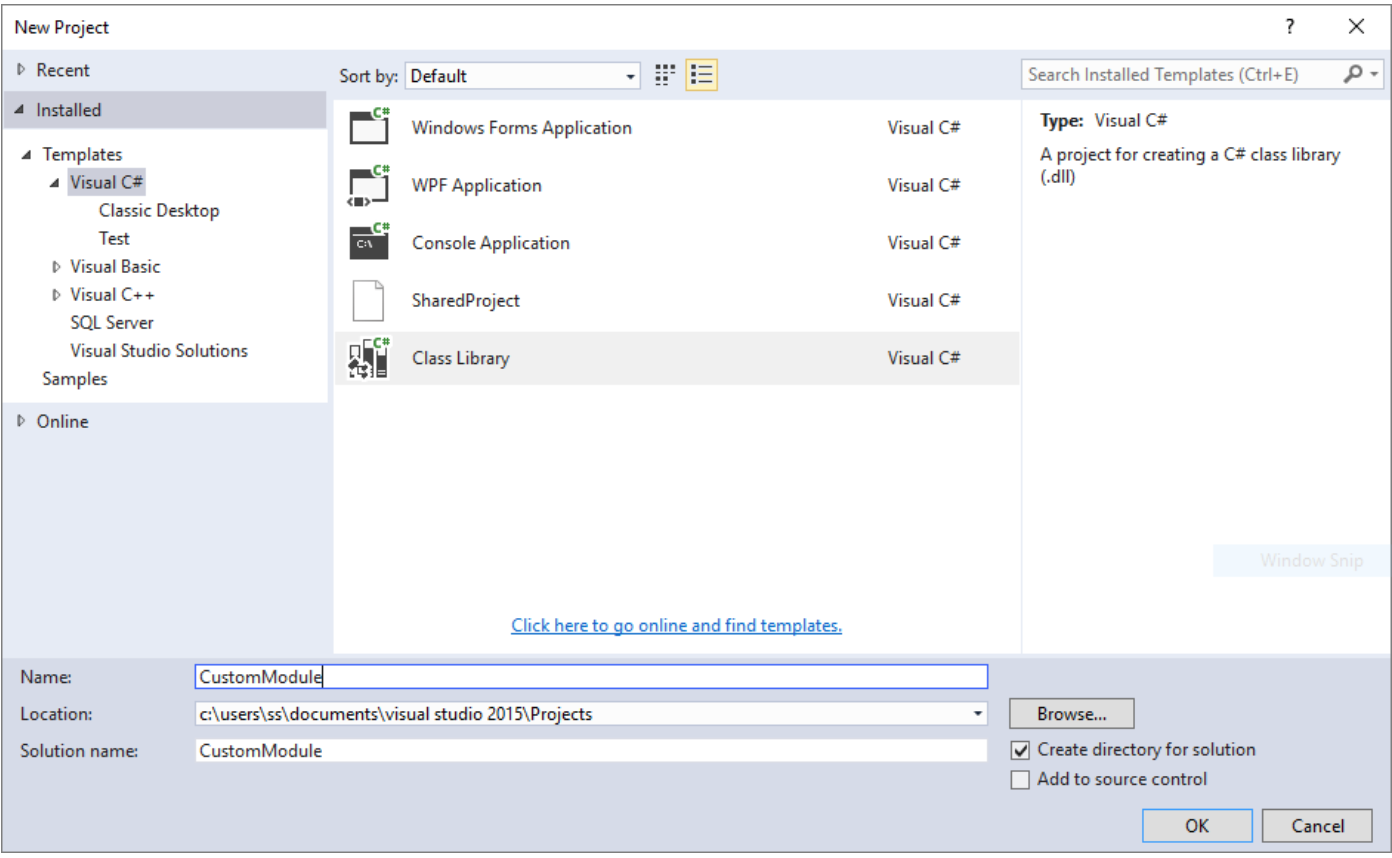
After installation, open VS Express and create a new Class Library project.
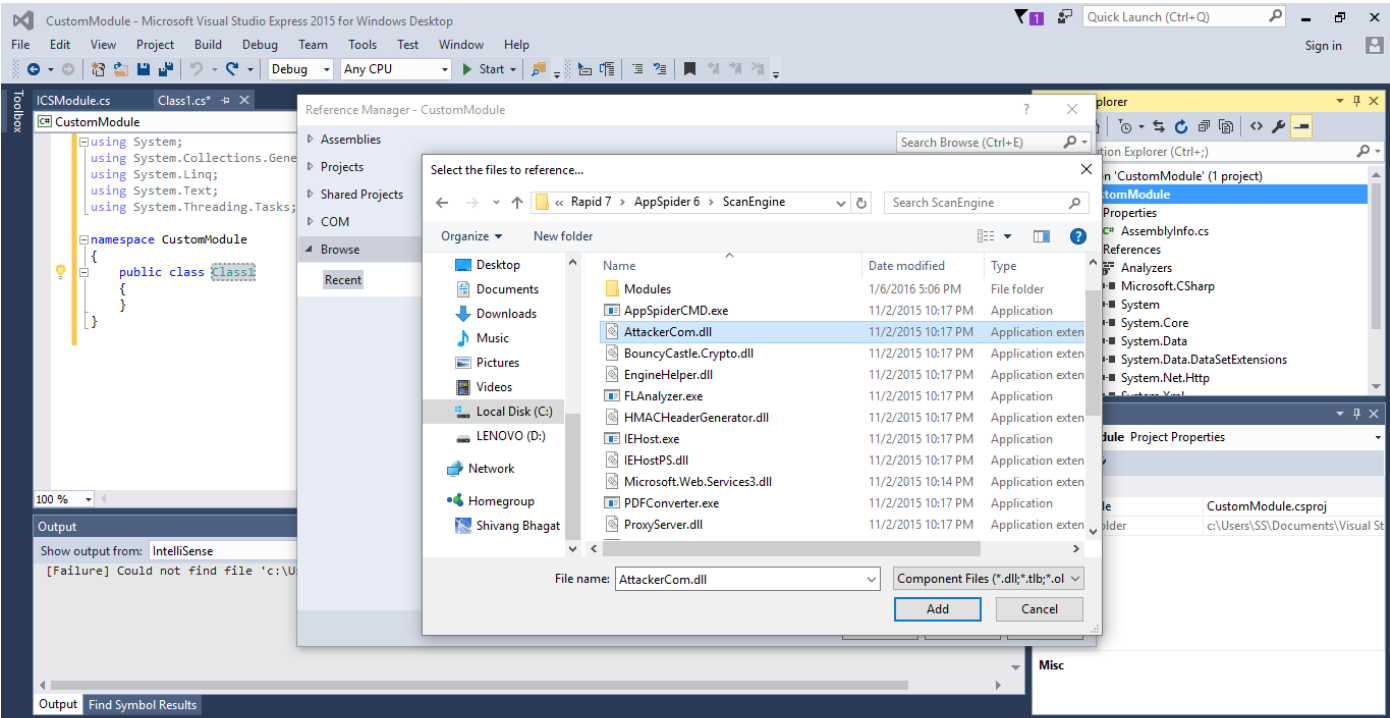
Add a reference dll (AttackerCOMLib.dll) from the installation file. Use following steps to add a new reference ddl in the project:
- Right click on the project
- Navigate to “Add” >> “Reference”
- Click on the “Browse” button
- Navigate to “AttackerCom.dll” into the AppSpider installation directory and select it.
- Click on the “Add” button

Create New Classes
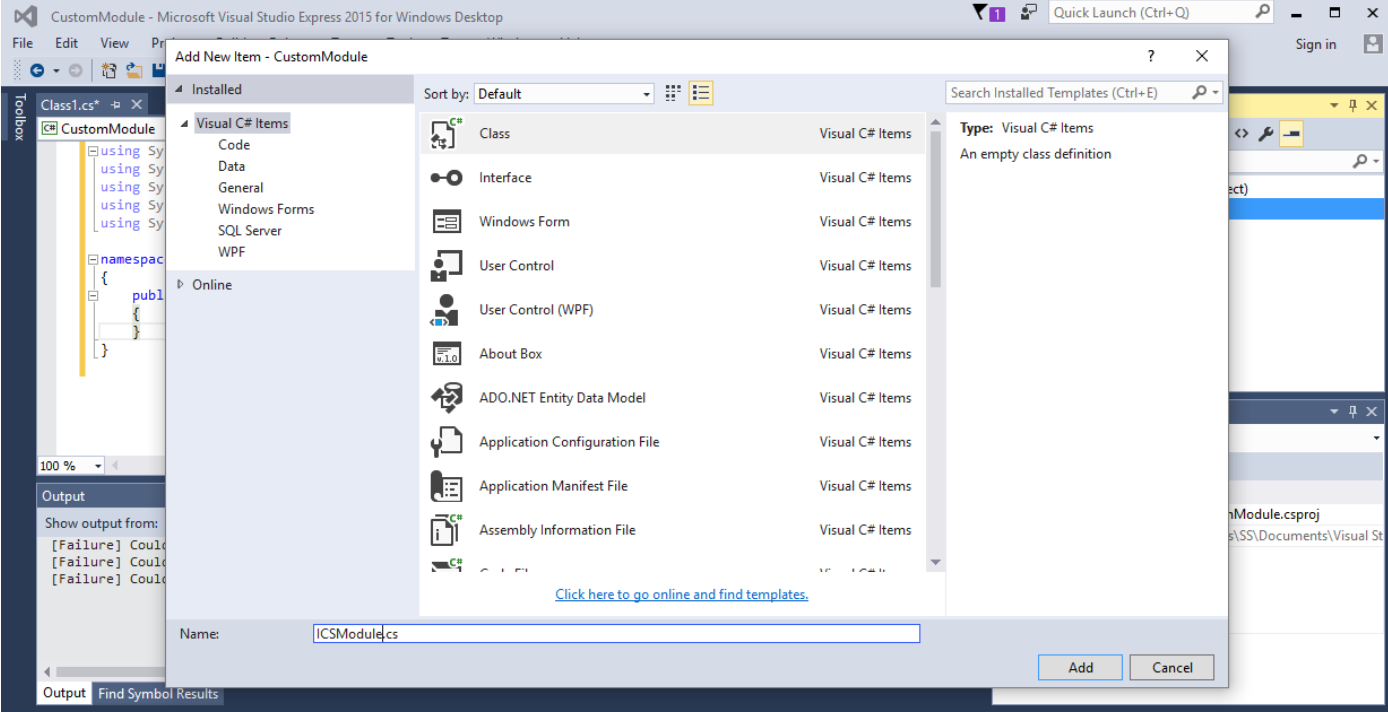
Now, create two new classes ICSAodule.cs and ICSAoduleFactory.cs. Use following steps to create a new class in VS Express:
- Right click on the project
- Navigate to “Add” >> “New Item”
- Select a C# class item and name it to “ICSAodule.cs”
- Likewise we can create multiple class files

- Add following code for
ICSAodule.cs:
using System;

namespace CustomModule
{
    public interface ICSAodule
    {
        void Load(uint moduleRunnerId);

        uint CalculateNumberOfAttacks();
        bool RunAttack(uint attackIndex);
    }
}- Add following code for
CSAoduleFactory.cs:
using System;

namespace CustomModule
{
    public interface ICSAoduleFactory
    {
        bool CreateModule(Guid moduleGuid, out ICSAodule module);
    }
}- Add a new class file ModuleFactory.cs. In this class we need to add a unique GUID, which will be used to attach in the Attack module in future.
using System;
using AttackerCOMLib;
using System.Text.RegularExpressions;

namespace CustomModule
{
   public  class CSAoduleFactory : ICSAoduleFactory
    {
        public bool CreateModule(Guid moduleGuid, out ICSAodule module)
        {
            Guid correctGuid = new Guid("7DEE1967-063D-4BE0-8061-028D3E707FCE");
            if (correctGuid == moduleGuid)
                module = new Internal();
            else
                module = null;
            return module != null;
        }

    }
}- Now, add an
Internal.cswith following code:
using AttackerCOMLib;
using System;
using System.Text.RegularExpressions;

namespace CustomModule
{
    /// <summary>/// Internal module name as per location indicated in module.cfg ///</summary>
    public class Internal : ICSAodule
    {

        IModuleRunner _moduleRunner;

        public bool AttackPointIsRelevant()
        {
            throw new NotImplementedException();
        }

        public uint CalculateNumberOfAttacks()
        {
            IAttackPoint attackPoint = _moduleRunner.GetAttackPoint();
            if (attackPoint.Type == AttackPointType.ATTACKPOINT_PARAMETER)
            {

                return 1;
            }
            else
            {

                // Other attack points are:
                // CrawlResult
                // File
                // Directory
                // Host
                return 0;
            }
        }


        public void Load(uint moduleRunnerId)
        {
            _moduleRunner = new ModuleRunner();
            _moduleRunner.SetModuleInstanceID(moduleRunnerId);
}- Place a “attack.cfg” and “module.cfg” by creating a new folder “Internal” at “C:\Program Files (x86)\Rapid 7\AppSpider 6\ScanEngine\Modules”
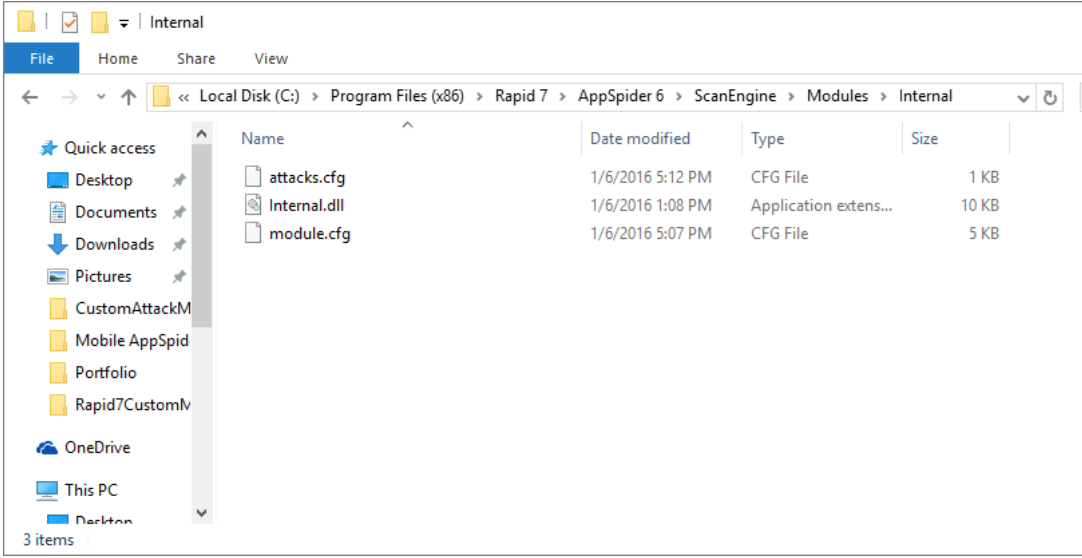
- Compile and run the project and it will generate a “internal.dll” file. Copy and paste to the “C:\Program Files (x86)\Rapid 7\AppSpider 6\ScanEngine\Modules\internal” path.
- Edit “ApplicationPolicies.xml” file from “C:\Program Files (x86)\Rapid 7\AppSpider 6\ScanEngine\Config\” path. Add following code into the xml.
 <AttackModulePolicy>
  <Enabled>1</Enabled>
  <ModuleId>7DEE1967063D4BE08061028D3E707FCE</ModuleId>
  <ModulePriority>Medium</ModulePriority>
  <Severity>Informational</Severity>
  <MaxVulnLimit>100</MaxVulnLimit>
  <MaxVarianceLimit>1</MaxVarianceLimit>
  <PassiveAnalysisOnAttacks>0</PassiveAnalysisOnAttacks>
  <EnforceEncoding>0</EnforceEncoding>
  <AttackPoints>Response Analysis</AttackPoints>
  <ParameterLocations>Directory|File|Path|Query|Fragment|Post|Http Header|Cookie|Referer</ParameterLocations>
  <RequestOriginations>HTML|Form|AJAX|Flash|Silverlight|WSDL</RequestOriginations>
</AttackModulePolicy>- Create a new scan from AppSpider GUI. Navigate to configuration file in %Documents%/AppSpider/scans/Configname/config.scfg.
- Edit the configuration file and add following code.
<AttackModulePolicy>
<Enabled>1</Enabled>
<ModuleId>7DEE1967063D4BE08061028D3E707FCE</ModuleId>
<ModulePriority>Medium</ModulePriority>
<Severity>Low</Severity>
<MaxVulnLimit>100</MaxVulnLimit>
<MaxVarianceLimit>1</MaxVarianceLimit>
<PassiveAnalysisOnAttacks>0</PassiveAnalysisOnAttacks>
<EnforceEncoding>0</EnforceEncoding>
<AttackPoints>Parameter</AttackPoints>
<ParameterLocations>Directory|File|Path|Query|Fragment|Post|Cookie|Referer|Http Header</ParameterLocations>
<RequestOriginations>HTML|Form|AJAX|Flash|Silverlight|WSDL</RequestOriginations>
</AttackModulePolicy>
You can see a new attack module in attack policy.
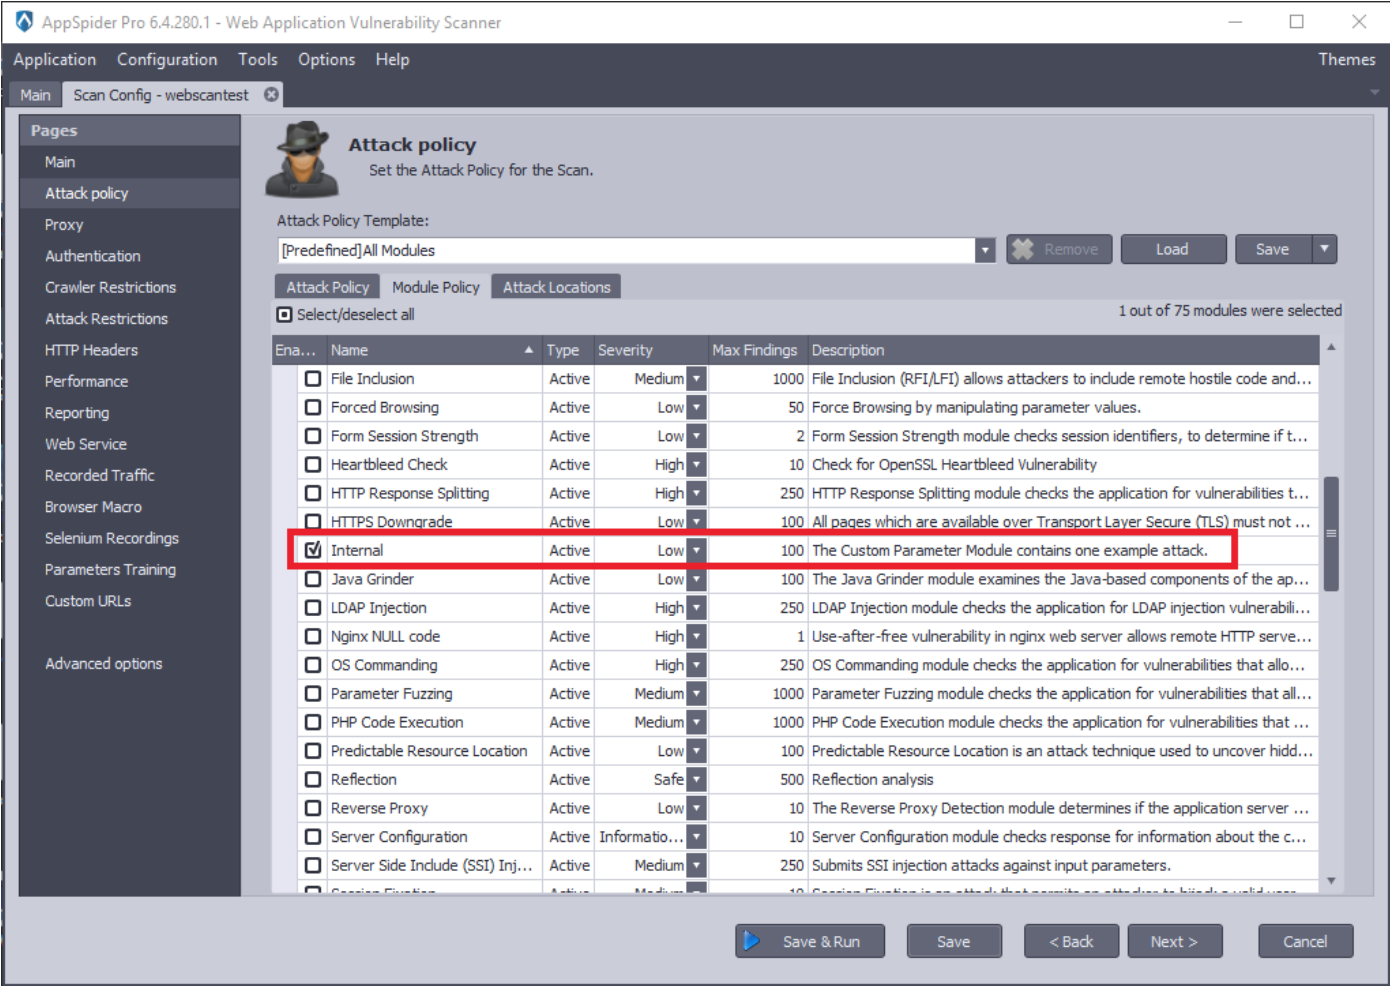
- Select the custom attack module and run a scan.