Create a Custom Campaign
We’ll walk through creating a custom campaign. Custom campaigns allow you to add components in any order you want to create a campaign. With a custom campaign you can move your targets through any number of emails, web pages, and file downloads.
In this walkthrough, we will create an email that contains a malicious file for recipients to download. On download, the file will open a session on the target host computer, which you can then run post exploitation modules using Meterpreter.
To see all available options for custom campaigns visit Touring the Campaign Page .
Prerequisites
- Email Server - A machine that acts as a mail transfer agent (MTA). Metasploit Pro does not provide an MTA for you to send email. You must supply Metasploit Pro with the SMTP settings for your mail server. Before you define the SMTP server, make sure that the port that your mail server uses is not blocked by the Metasploit instance. Generally, ports 25 and 587 are recommended SMTP ports.
- Web Page - The web page that the target visits. Either a custom page or Metasploit Pro has the ability to clone a page.
- Web Server - A machine that serves the web pages for the campaign. Metasploit Pro creates a web server locally to serve the web page.
- Target List - A list that defines the targets that you want to email a phishing attack. This can be entered manually when setting up the campaign, or you can have a
.csvformatted list available.
Campaign Restrictions
The following restrictions apply to campaigns:
- A campaign can only contain one email.
- A campaign you build with the canned phishing campaign can only contain one email and up to two web pages. One web page is used for the landing page, and the other web page is used for the redirect page. If you need additional redirect pages, do not use the built in phishing campaign to create a campaign, use the custom campaign builder instead.
- Each instance of Metasploit Pro can only run one campaign at a time.
Adding a Campaign Component
To send an email with a malicious file attached, you need to add a custom component.
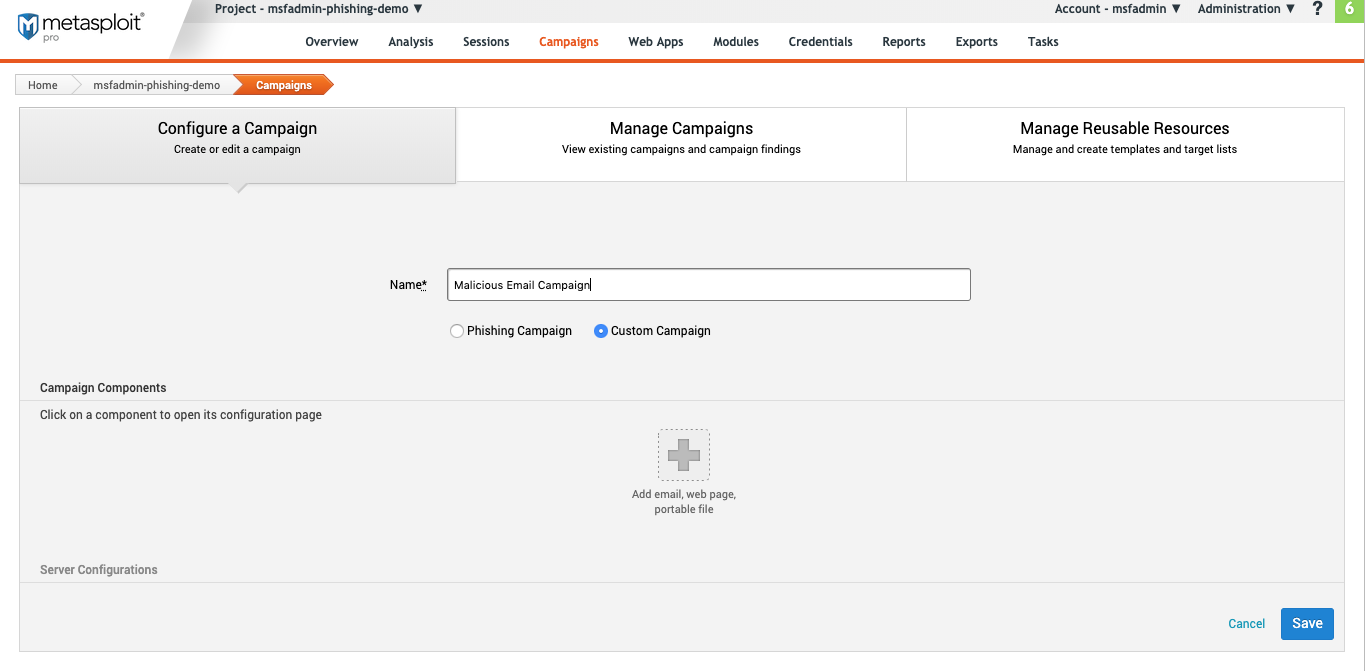
From the “Configure a Campaign” main page:
- Enter a campaign name.
- Choose Custom Campaign.
- Click the plus sign to add a component.
When the next screen appears, choose E-mail.
Configuring Your Email Settings
On this screen, you will set the target emails and the kind of file to attach to the email. We are going to create a fake Windows executable. To see all available options for email headers configuration, see the Touring the Campaign Page .
Configure a server
If you configure a server from within the campaign it will override the global mail server.
Email General Settings
Change the From Address and From Name to match your target.
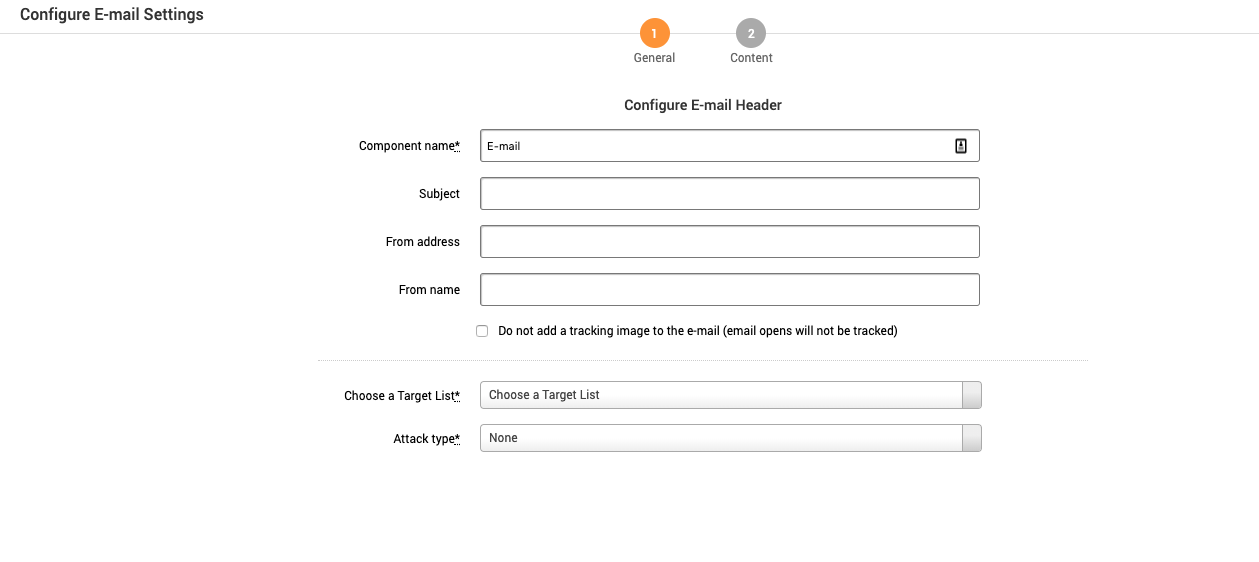
Update the settings with the following information:
- Component Name - This is automatically populated based on the component chosen. Do not edit this name.
- Subject - Windows 10 Update.
- From address - Enter an email familiar to the recipient.
- From name - Enter a name that is familiar to the recipient.
- Do not add tracking - If checked, emails that are opened will not be tracked.
- Choose Target List - List of recipients. To learn more about target lists, see Managing Target Lists .
- Attack Type - Attach File
- Check Zip Attachment
- Attachment File Name - Windows_10_18345
- File generation type - .exe agent
After entering the information above, click Next to move onto the email content.
The email content screen is blank for custom campaigns. Here you can use a template or add a custom HTML email. When creating the email body, make sure to mention the Windows 10 update is attached.
After adding the email information, click Save.
Email Server
To configure your server, click on E-mail Server on the “Configure a Campaign” main page. When using the email server, you can either configure the SMTP settings for each campaign or set a global email server that will fill in the email server settings.
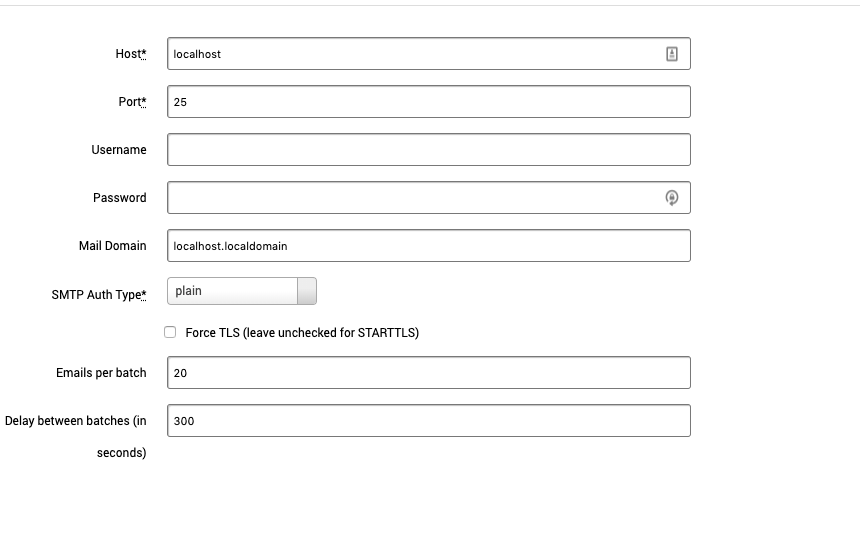
You must configure the following options for your email server:
- Host - Server host address.
- Port - Server port.
- SMTP Auth Type:
- plain
- login
- Cram_md5
You can also optionally configure the following fields:
- Username - Email server username. This will need to be set if the server requires a username.
- Password - Email server password. This will need to be set if the server requires a password.
- Mail Domain - The domain name of the email. For example, mail.mybusiness.com
- Force TLS (leave unchecked for STARTTLS)
- Emails per batch - Number of emails to send in a batch.
- Delay between batches - Delay between batches in seconds.
After configuring the email server, click Save.
Deploying Your Campaign
At this point, your campaign is ready. To recap, the basic setup is:
- A user receives an email stating they need to update Windows and you have attached the file.
- The user downloads the file and clicks to open it.
- The user sees no changes on their system.
- In Metasploit Pro, a listener waits for the connection and a Meterpreter session is opened allowing you to remotely execute commands.
To deploy your campaign, go to the “Manage Campaigns” screen and click Start.
