Creating and Managing Projects
A project contains the workspace that you use to perform the different steps for a penetration test and stores the data that you collect from targets. You create a project to configure tasks and to run tests. You can create as many projects as you need and switch between projects while tasks are in progress.
You can create projects to separate an engagement into logical groupings. Oftentimes, you may have different requirements for the various departments, or subnets, within an organization. Therefore, it may be more efficient for you to have different projects to represent those requirements.
For example, you may want to create a project for the human resources department and another project for the IT department. Your requirements for these departments may vary greatly, so it would be logical for you to separate the targets into different projects. At the end of the engagement, you can generate separate reports for each department to perform a comparative analysis and present your findings to your organization or client. Creating a Project A project is the workspace that you use to build a penetration test. Each project logically groups together the hosts that you want to exploit and the type of information that you want to obtain. Every project has the following information:
- Name - Provides a unique identifier for the project.
- Description - Describes the purpose and scope of the project.
- Network range - Defines the default network range for the project. When you create a project, automatically populates the default target range with the network range that you define for the project. Metasploit Pro does not force the project to use the network range unless you enable the network range restriction option.
- Network range restriction - An option that restricts a project to a specific network range. Enable this option if you want to ensure that the test does not target devices outside the scope of the engagement. If you enable this option, Metasploit Pro will not run tasks against a target whose address does not fall within the network range.
To create a project:
- From the Projects page, click the New Project button.

- When the New Project page appears, find the Project Settings area, and enter the project name, description, and network range:

- Select the Restrict to network range option if you want to enforce network boundaries on the project. (Optional)

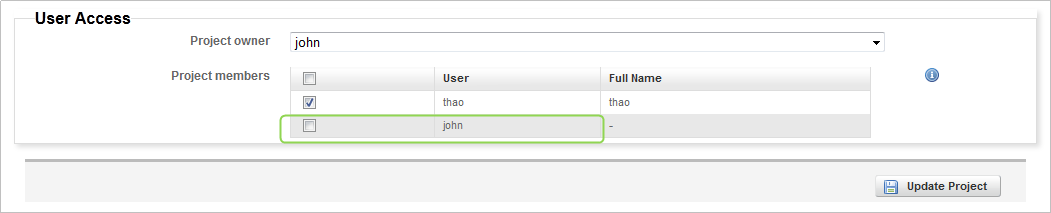
- From the User Access area, select the following information:
- Project owner - The person who owns the project.
- Project members - The users who can access, edit, and perform tasks in the project.
- Create the project. Deleting a Project When you delete a project, you remove all the data that the project contains, including reports, host data, evidence, vulnerability data, and host tags. After you delete a project, you cannot view or access the project again.
If you want to delete the project, but save the project data, you can export the project data. When you export the project data, the system provides you with an XML or ZIP file of the project contents. You can import the XML or ZIP file to bring the project data back into Metasploit.
- Select Projects from the Main menu.

- When the Projects page appears, select the projects that you want to delete.
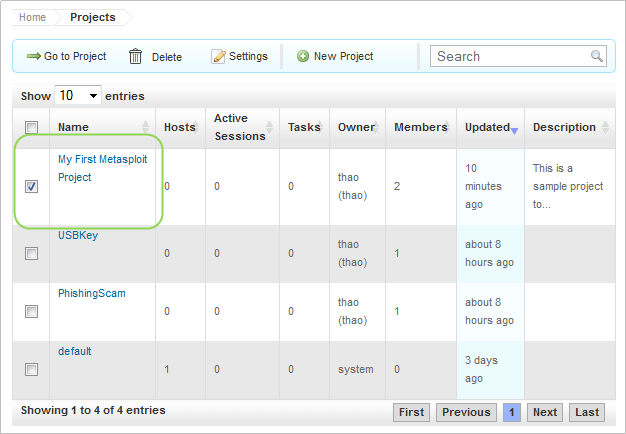
- Click Delete.
- When the confirmation window appears, click OK to delete the project. Restricting a Project to a Network Range You can restrict the network range to enforce network boundaries on a project. When you restrict a project to a network range, you cannot run any tasks unless the target addresses fall within network range that you define.
For example, if you have a client who wants you to test a specific network range, you can set the network range and restrict the project to it to ensure that you do not accidentally target any devices that are outside of that range.
You do not need to set the network range unless you want to enforce network boundaries. If you choose to enforce network boundaries on a project, Metasploit uses the network range that you define for the project.
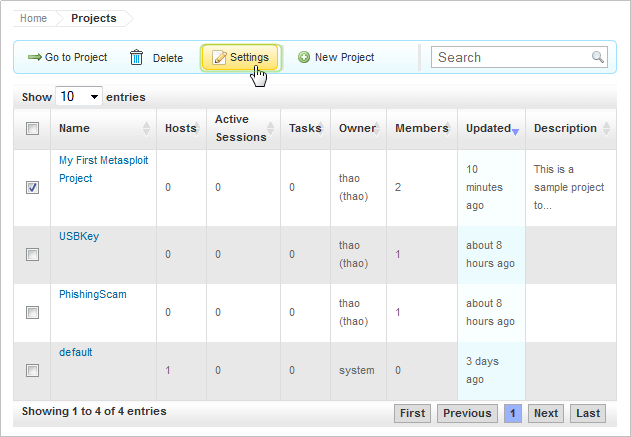
- From within a project, select Projects from the Main menu.
- When the Projects page appears, select the project that you want to edit using the Edit button.
- In the Network range field, enter the network range that you want to restrict the project to. You can enter a single IP address, an IP range described with hypens, or a standard CIDR notation. If you define a CIDR notation, you can use an asterisk as a wild card. For example 192.168.1.* indicates 192.168.1.1-255.
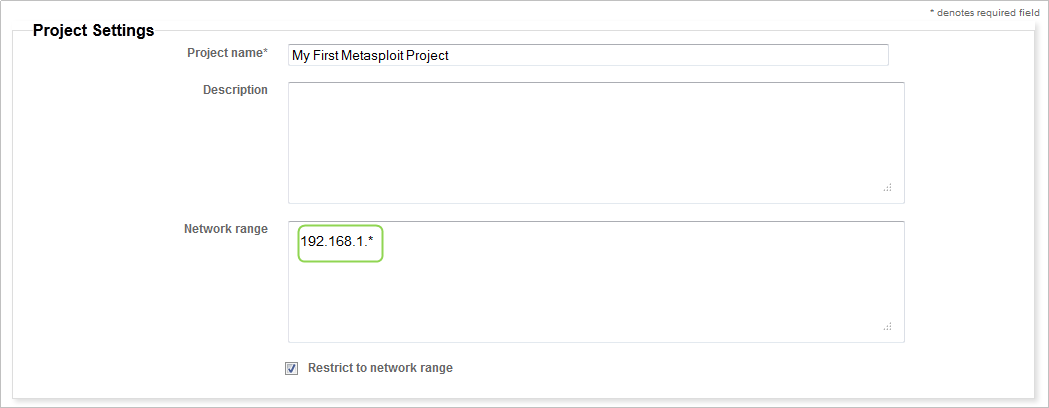
- Select the Restrict to Network Range option.
- Click the Update Project button. Changing the Project Owner By default, the project owner is the person who initially sets up the project. You can change the project owner to transfer ownership and to assign projects to team members.
The project owner provides a way for you and your team members to easily identify the projects that each of you own. For example, if you want to see the projects that you have been assigned, you can sort the project list by owner. All of your projects will be grouped together.
- From the Main menu, select Projects.
- When the Projects page appears, select the project that you want to assign an owner using the Edit button.
- When the Project Settings page appears, find the User Access area.
- Click the Project owner dropdown and select the person you want to assign the project to.

- Click the Update Project button. Managing User Access Every project has an owner. The owner can choose the users who can access the project to edit, view, and run tasks. However, users with administrative access can view and edit any project, regardless of whether or not the project owner gives them access.
As the project owner, you may want to restrict the team members who can view and edit your project. For example, if you have data that you do not want anyone to overwrite, you can disable the access rights for other team members.
Team members that have administrative rights can view and modify all projects, regardless of the user access settings.
To manage the access that a user has to a project:
- From the Main menu, select Projects.
- When the Projects page appears, select the project that you want to edit using the Edit button.
- When the Project Settings page appears, find the User Access area.
- Select project members to enable them to view and modify the project or deselect project members to prevent them from modifying the project.
- Click the Update Project button.