Credentials Tutorial
Credentials provide a gateway into various accounts and systems and can potentially provide access to additional targets on the network and lead to the extraction of confidential data from these targets. Therefore, as part of a penetration test, it is important to discover and present credential data that compels organizations to strengthen and enforce complex password policies to prevent vulnerabilities like password reuse and weak passwords.
As part of a security audit, you may need to test the strength of password policies and verify whether they meet the minimum industry requirements. To do this, you will need to leverage methods like bruteforce, phishing, and exploits to gather passwords so you can identify the weak passwords, common passwords, and top base passwords used by an organization. Once you actually have credentials, you can try to reuse them on additional targets so you can audit password usage and identify the impact of the stolen credentials across a network.
To help you gain a better understanding of how credentials are obtained, stored, and used in Metasploit, this tutorial will show you how to exploit a Windows XP target that is vulnerable to the Microsoft Security Bulletin (MS08-067), gain access to the system, collect credentials from it, and reuse those credentials to identify additional targets on which they can be used. Before You Begin Before you start on this tutorial, please make sure you have the following:
- Access to a Metasploit Pro instance.
- Access to a vulnerable target that has the MS08-067 vulnerability.
- Access to other systems that can be reached from the Metasploit Pro instance to test for credential reuse.
Terms You Should Know
-
Bruteforce - A password guessing attack that systematically attempts to authenticate to services using a set of user supplied credentials.
-
Credential - A public, private, or complete credential pair. A credential can be associated with a realm, but it is not mandatory.
-
Credential reuse - A password guessing technique that tries to authenticate to a target using known credentials.
-
Credential type - A plaintext password, SSH key, NTLM hash, or non-replayable hash.
-
Login - A credential that is associated with a particular service.
-
Origin - The source of the credential. The origin refers to how the credential was obtained or added to the project, such as through Bruteforce Guess, an exploit, manual entry, or an imported wordlist.
-
Realm - The functional grouping of database schemas to which the credential belongs. A realm type can be a domain name, a Postgres database, a DB2 database, or an Oracle System Identifier (SID).
-
Private - A plaintext password, hash, or private SSH key.
-
Public - A username.
-
Validated credential - A credential that has successfully authenticated to a target. Tutorial Objectives This tutorial will walk you through the following tasks:
-
Creating a project
-
Scanning a target
-
Checking for MS08-067
-
Exploiting MS08-067
-
Collecting credentials
-
Viewing credentials
-
Validating credentials
-
Reusing credentials Create a Project The first thing we need to do is create a project, which will contain the workspace and store the data we will collect during this tutorial.
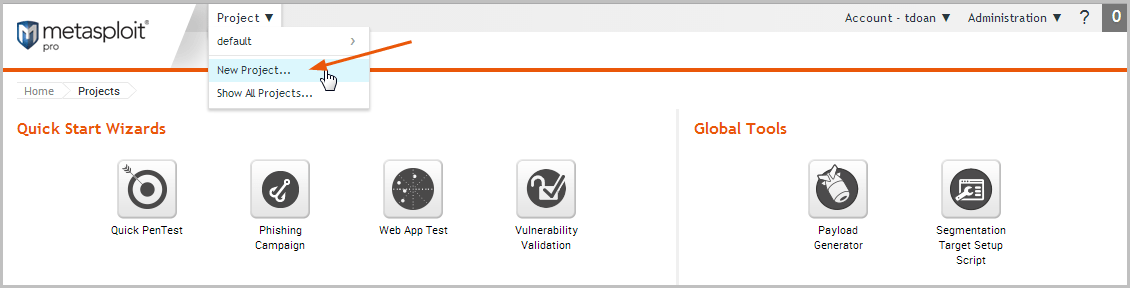
To create a project, select Project > New Project from the global menu bar.
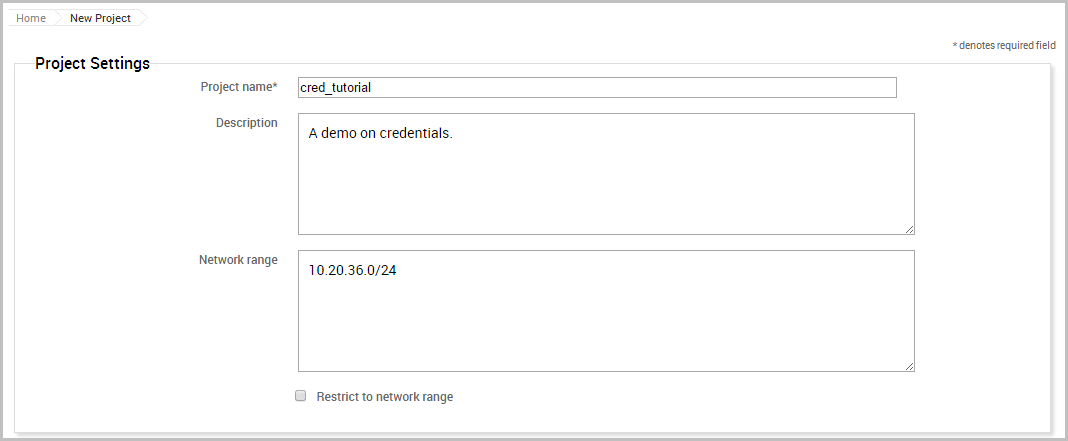
When the New Project page appears and displays the configuration form, we will need to define the project name, description, and network range.
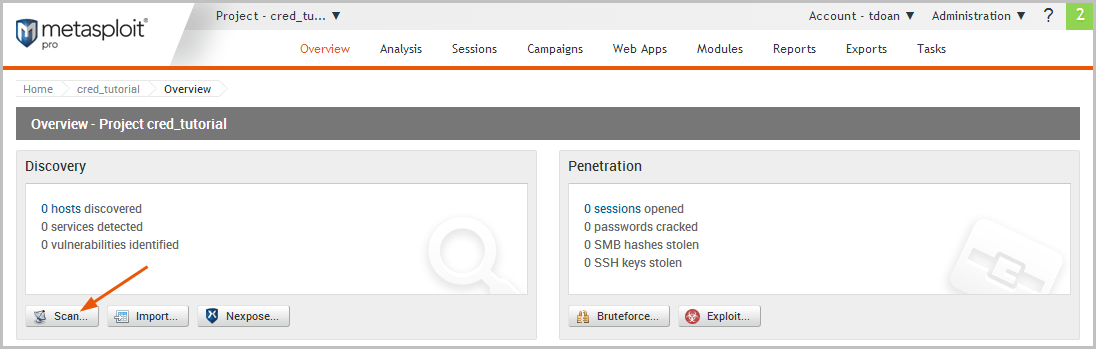
Scan the Target The next thing we need to do is run a Discovery Scan on our target to fingerprint the system and to enumerate open ports and services. We will use the scan data to identify potential vulnerabilities and attack vectors that are available to exploit the target.
To access the Discovery Scan, click the Scan button located on the Overview page.
When the configuration page appears, we will need to define the address of the host we want to target. Since we do not need to customize any additional settings, we can use the default settings for the rest of the scan.
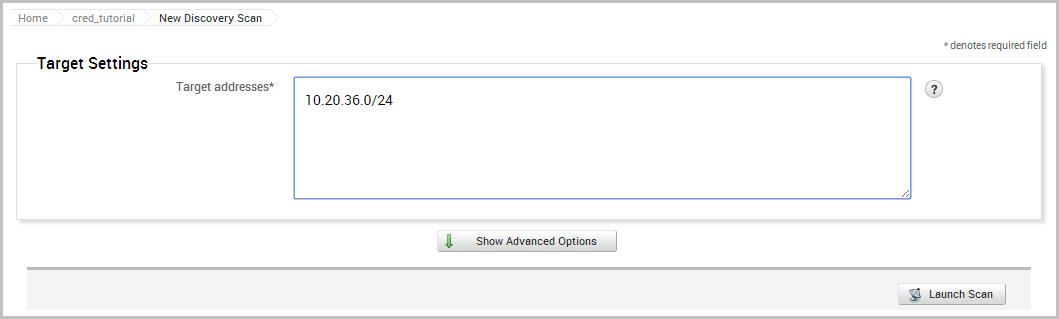
Now we will launch the scan.
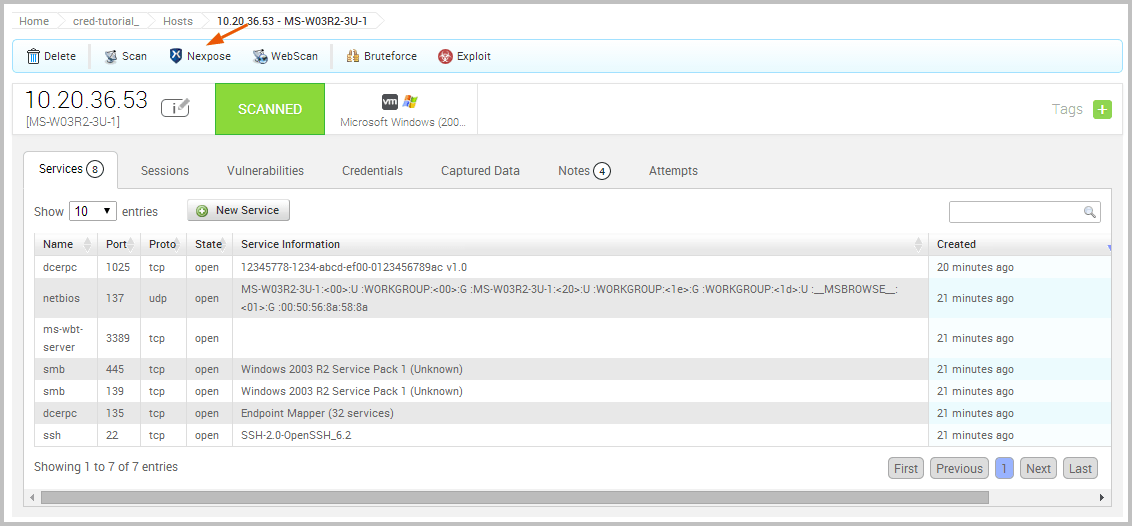
When the scan completes, we will need to review the data that it was able to gather about the hosts. To see the host data, select Analysis > Hosts from the project tab bar and then click on the host name.
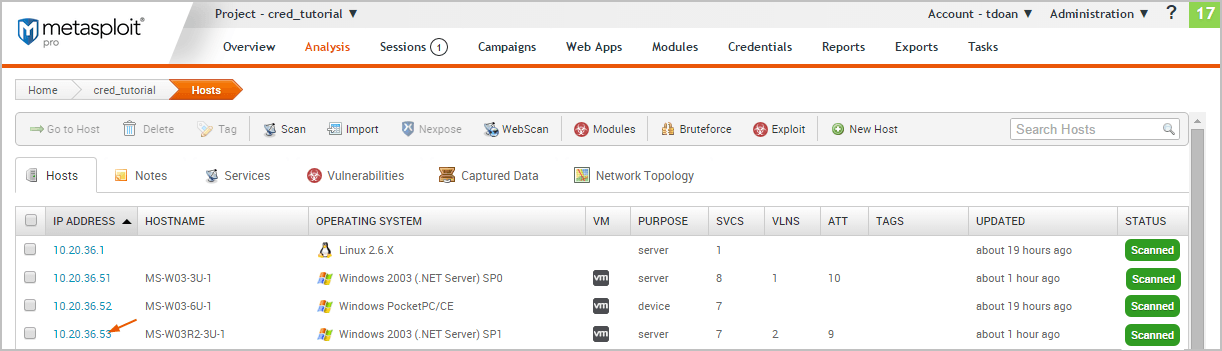
Looking at the host details, we can see that the target is a Windows XP system with 8 open services.
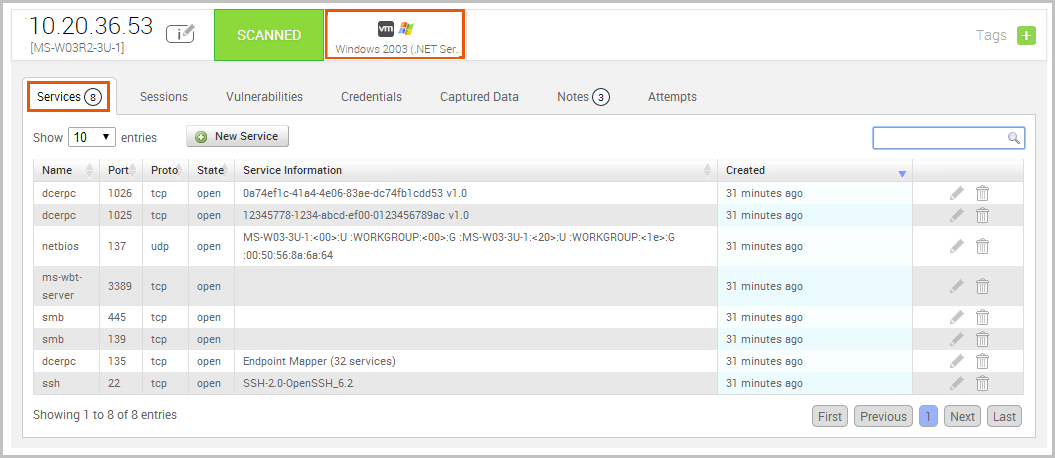
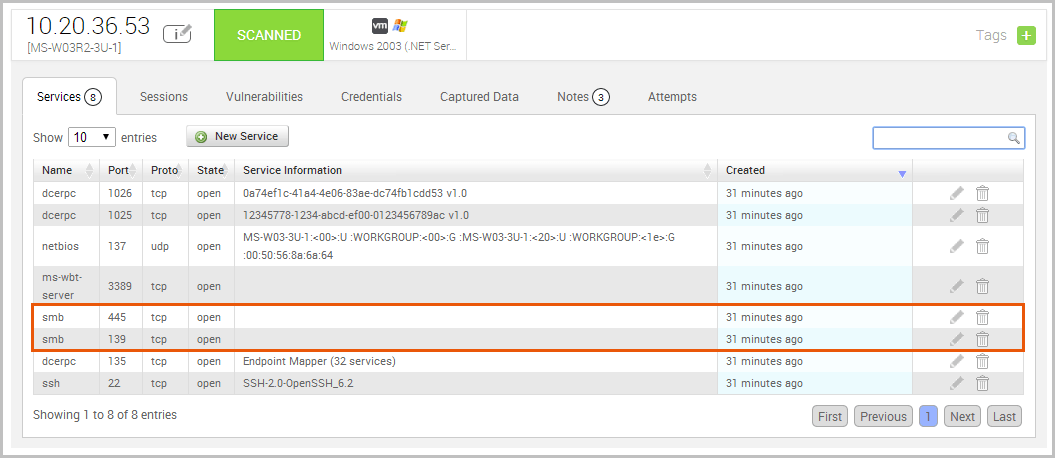
We can also see that ports 445 and 139 are open, which indicates that the target can potentially be vulnerable to MS08-067.
Check for Vulnerabilities Now that we have a potential vulnerability, let’s run a Nexpose scan to confirm our suspicions. Nexpose will identify any vulnerabilities that our host may have, based on the services that we enumerated earlier.
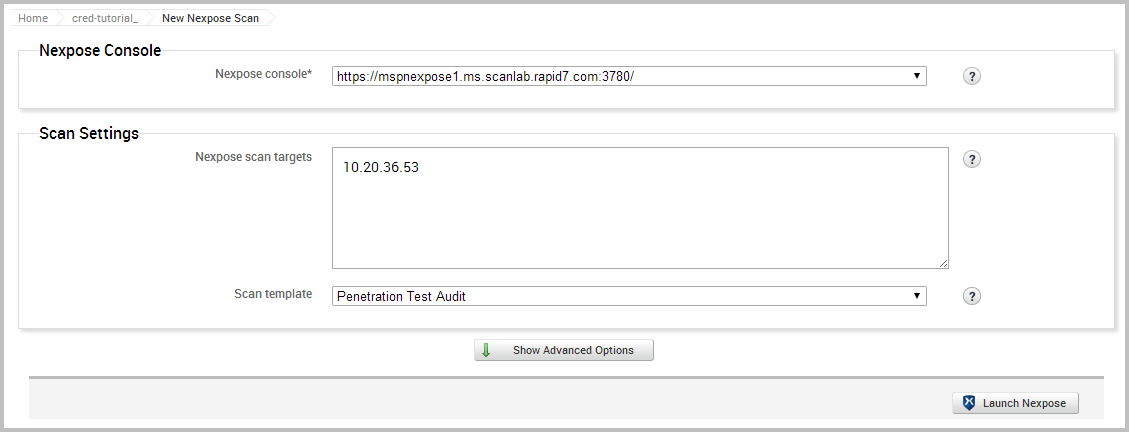
We have already set up our Nexpose console through the Global Settings, so we can go ahead and launch the Nexpose scan.
We will need to choose the Nexpose console that we want to use, define the target we want to scan, and choose the scan template we want to use. For our purposes, we will use the Penetration Test Audit template, which will scan the target using only safe checks. Since we do not have any credentials to provide for the scan or need to specify any additional scan settings, we can go ahead and launch the scan using the default scan configuration.
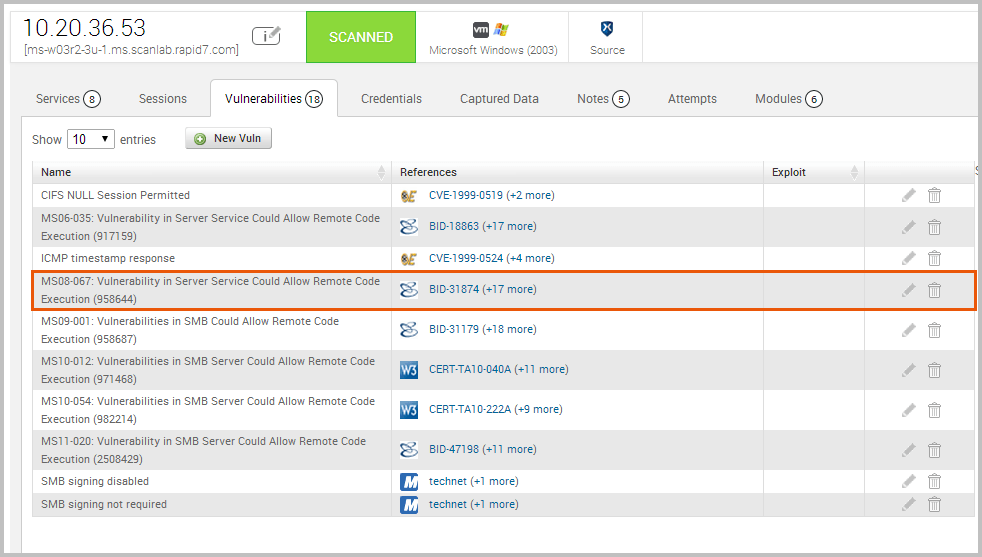
After the scan completes, take a look at the host data again to identify any vulnerabilities that Nexpose was able to find. As we can see from the list, MS08-067 is listed as one of the discovered vulnerabilities.
Exploit the Target Now that we have confirmed that our target is missing the MS08-067 patch and vulnerable to exploitation, we’re ready to exploit the target.
To exploit the MS08-067 vulnerability, we will need to search for a matching exploit in the module database.
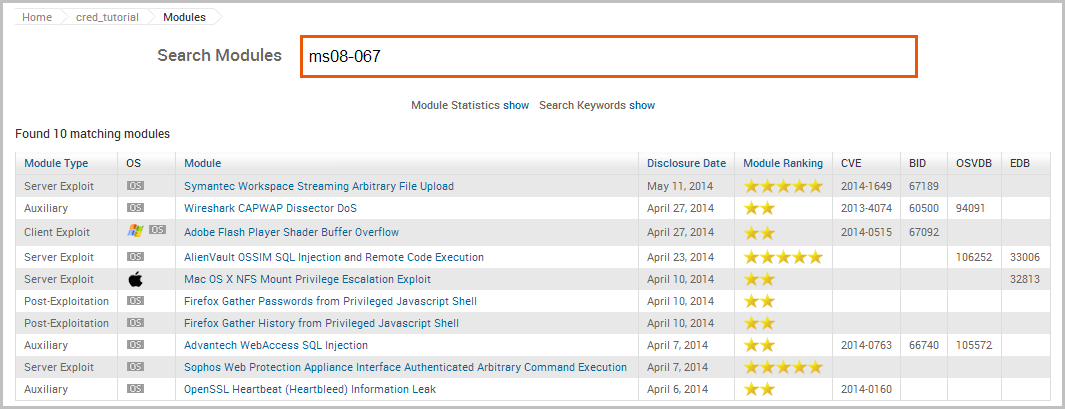
The search returns a match for our query. Click on the module name to open its configuration page.
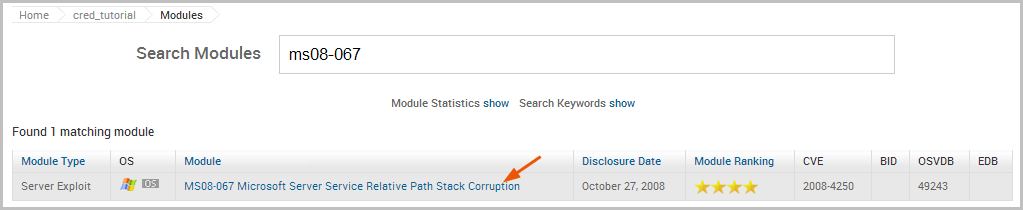
The configuration page provides us with some basic information about the module, such as its type, ranking, disclosure date, reference IDs for the vulnerability, and whether the module grants high privileges on the target.
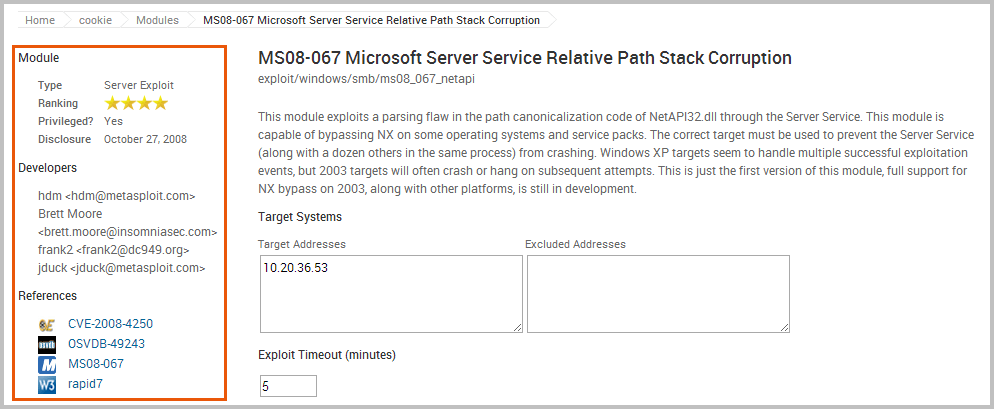
There are also target, payload, module, evasion, and advanced options that you can configure to fine tune the exploit.
At a minimum, we will need to define the target address and the target port (RPORT). Our target has the SMB service running on ports 139 and 445, Since we can only set one RPORT for a module run, we will go ahead and use the default target that has already been predefined for us.
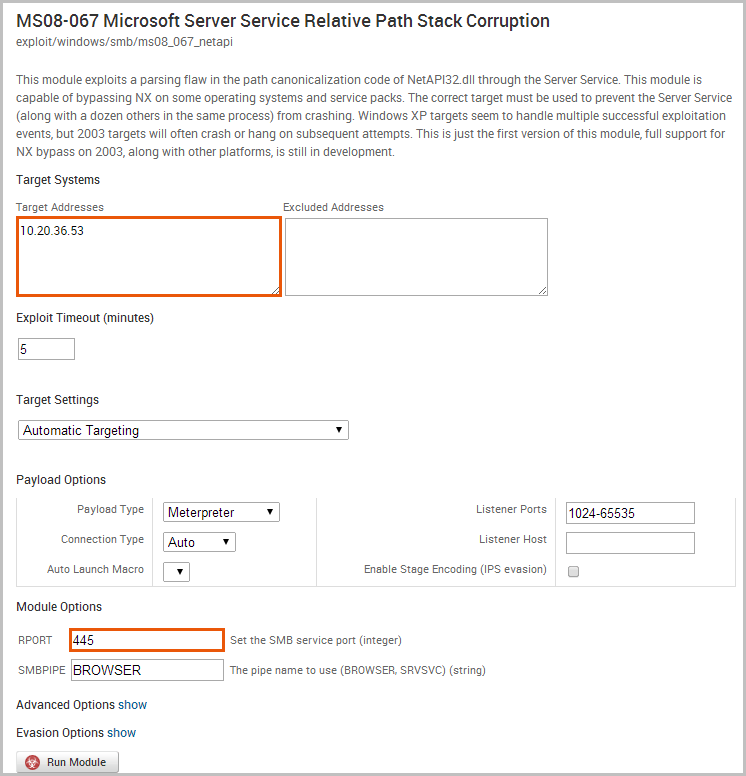
The next thing we want to do is configure the payload settings. Since we are attempting to exploit a Windows target, we will want a Meterpreter payload type. We will leave the Auto connection type so that Metasploit will automatically choose a compatible payload connection type for us. In most cases, the Auto option will select a reverse connection because it is more likely to establish a connection between a target machine and the attacking machine.
We are now ready to run the module. Click the Run Module button to launch the exploit.
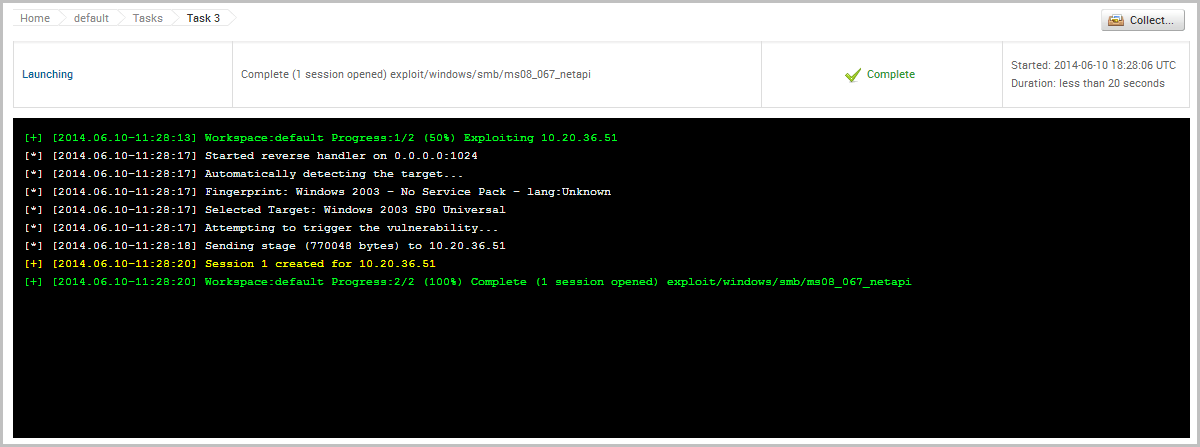
When the exploit finishes, we can see from the Task Log that we were able to successfully open a session on the target, which will enable us to interact with the target to do things like gather system information and collect credentials.
Collect Credentials To access the open session, we will need to go to the Sessions list and click on the Session ID. This will open the session page, which will display a list of commands that are available to us.

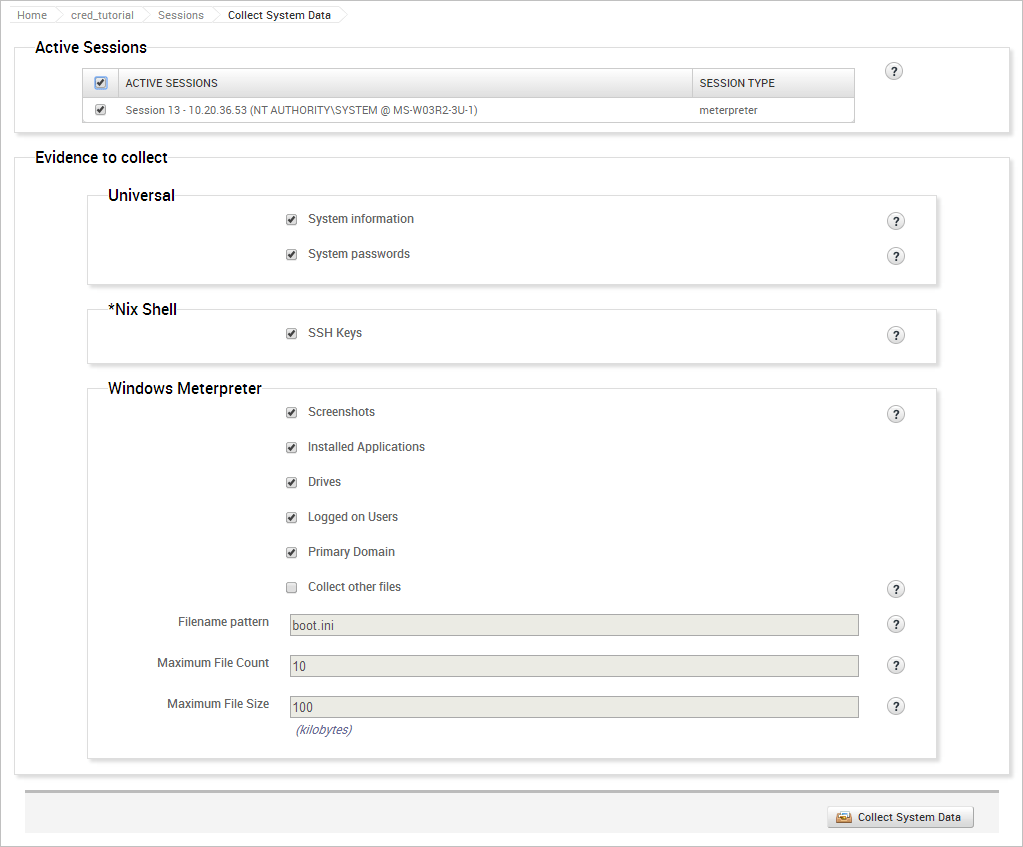
The command we will use is Collect System Data, which will let us loot the hashes and passwords from the system.
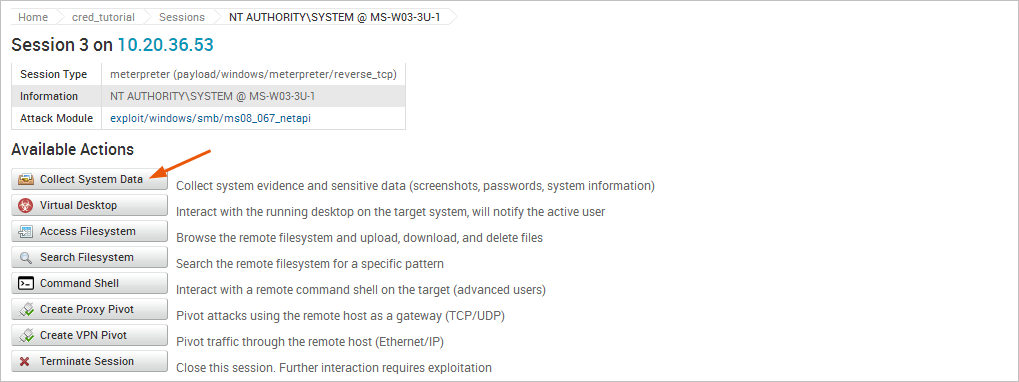
In addition to hashes and passwords, there are other pieces of evidence we can collect as well, such as system information files, services lists, diagnostics logs, and screenshots.
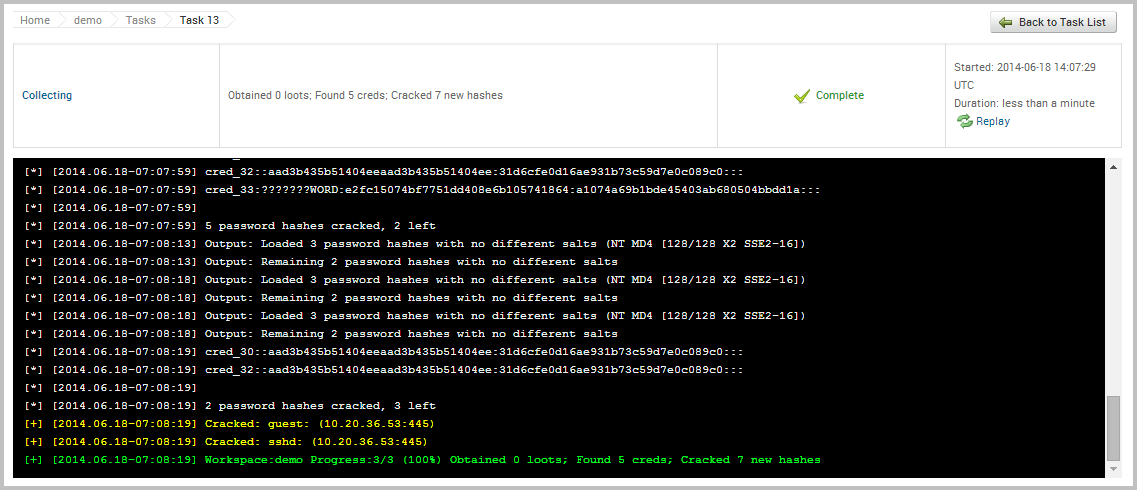
When you run the collection task, the task log will display and show you the events that are occurring.
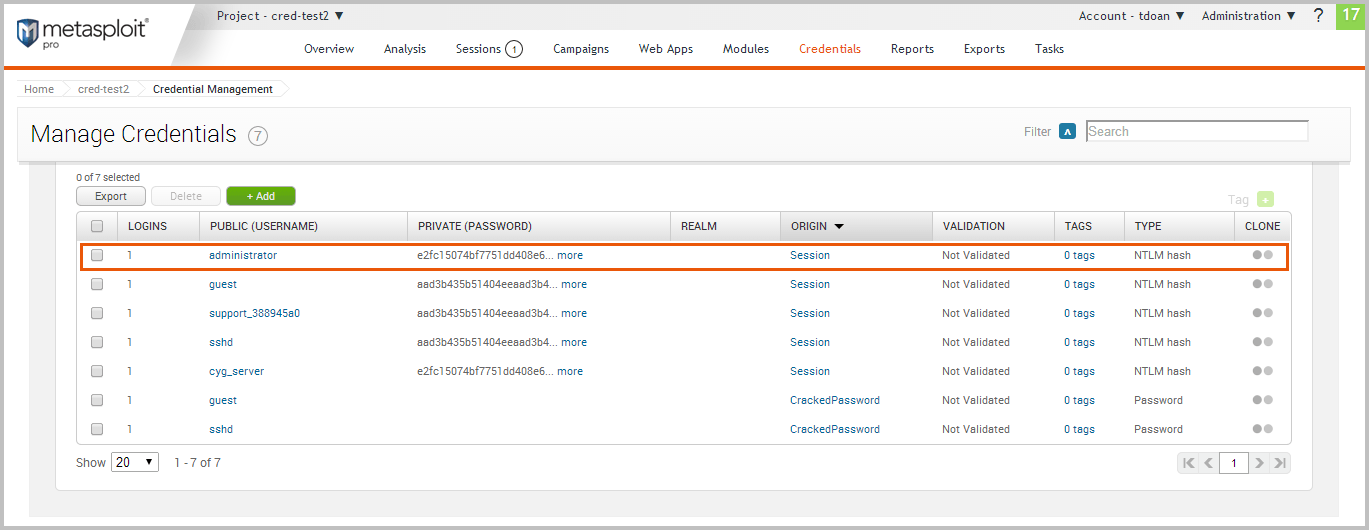
View Credentials in a Project Now that we have been able to loot some credentials from the target, let’s take a look at how stores and displays them. To view all credentials that are stored in a project, we need to select Credentials > Manage. When the Manage Credentials page appears, it’ll show us all of the credentials that are currently stored in the project, as shown below:
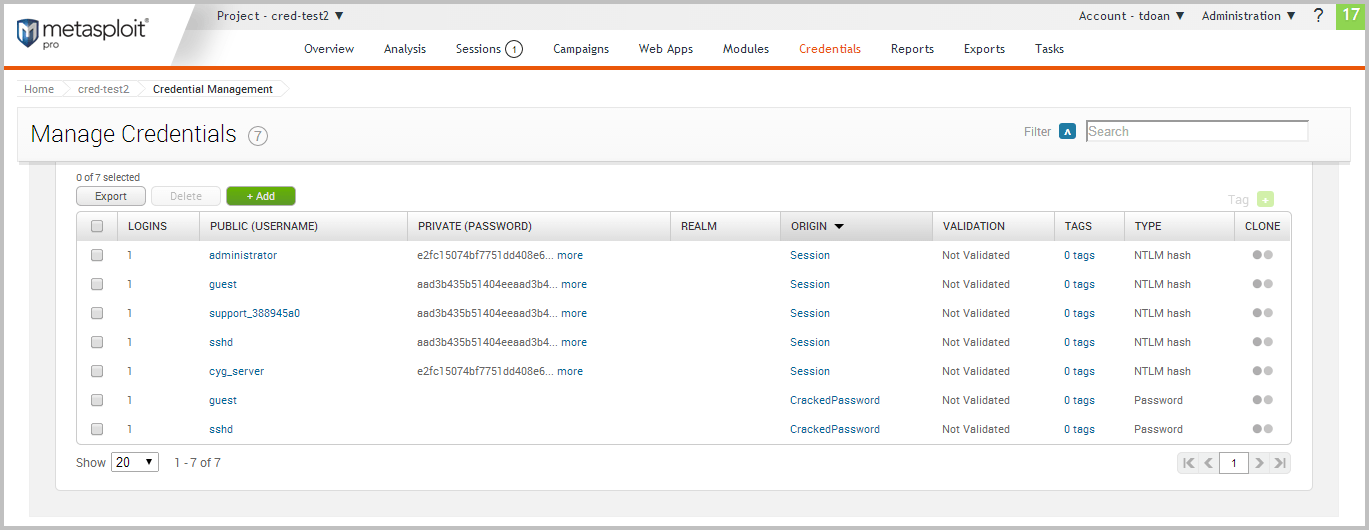
For each credential, Metasploit displays the following data: logins, private, public, realm, origin, validation status, tags, and private type. Validate a Credential Now that we have a list of credentials, we can go through and validate them to see if they can actually be used to log in to a target. To do this, we will need to access the single credential view. The single credential view will show us the metadata and the related logins for a particular credential.
Let’s take a look at the first credential in the list. To view the details for the credential, we will need to click on the username.
The single credential view is shown below:
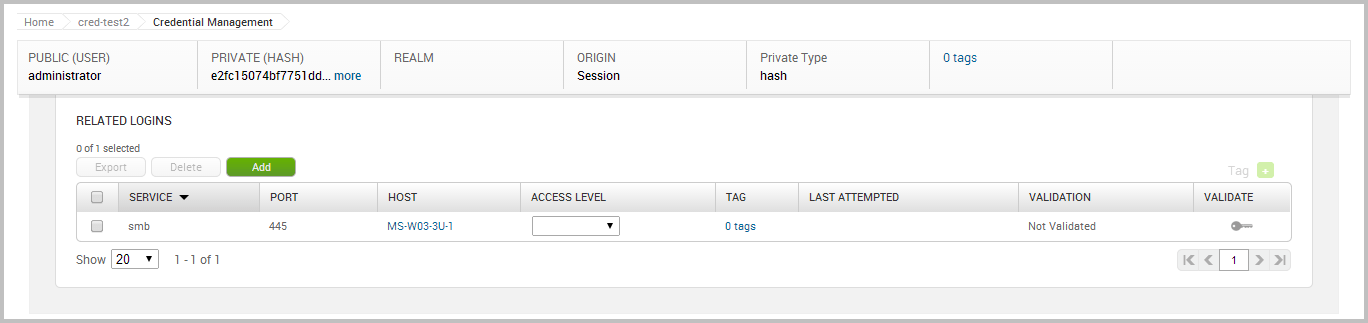
We can see the public value, private value, private type, and related logins for this credential. Earlier, we defined a login as a credential that can be used against a particular service. In this case, the logins were automatically created by when the credentials were looted from the exploited target. Metasploit detected that the looted credentials were NTLM hashes, which means that they can be used with SMB. Based on this assumption, Metasploit created a login for the credential and the SMB service.
To validate the login, we will need to click on the Validate key.
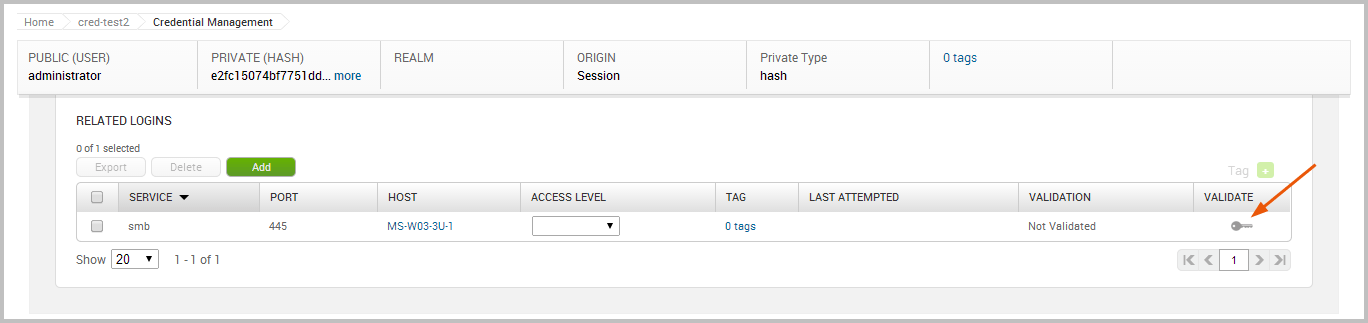
While the login is being validated, you will see the validation status change to “Validating”. When the validation is complete, the status will change to “Not Validated” if was unable to authenticate to the service. Otherwise, the status changes to “Validated” if was able to successfully authenticate to the service.
The validation for the credential was successful, as shown below:
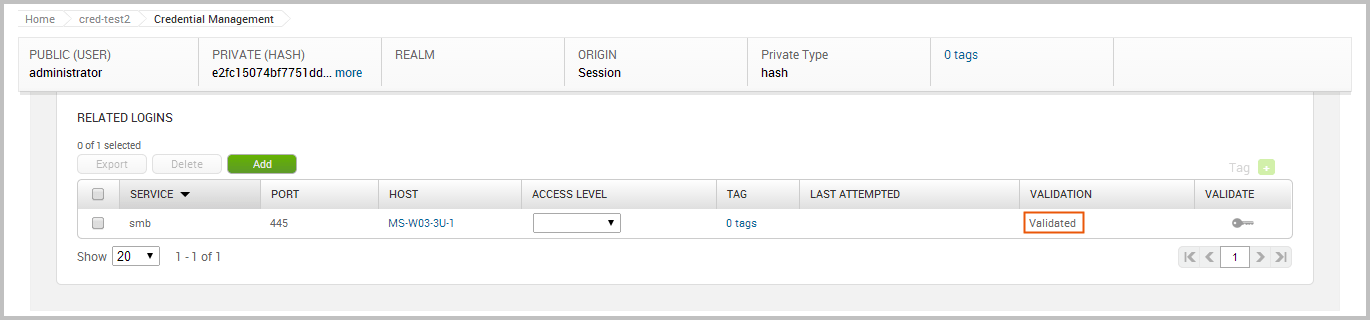
Reuse a Validated Credential Now that we have a known and valid credential, we can try to reuse that credential to log in to additional systems. Since password reuse is a common issue, it is possible that the credential might work with other targets in our project. To test the credential with other targets, we are going to use the Credentials Reuse feature. The Credentials Reuse feature provides a guided workflow that helps you select targets and credentials that will be systematically tested for authentication.
To access Credentials Reuse, we will need to select Credentials > Reuse from the Project Tasks bar.

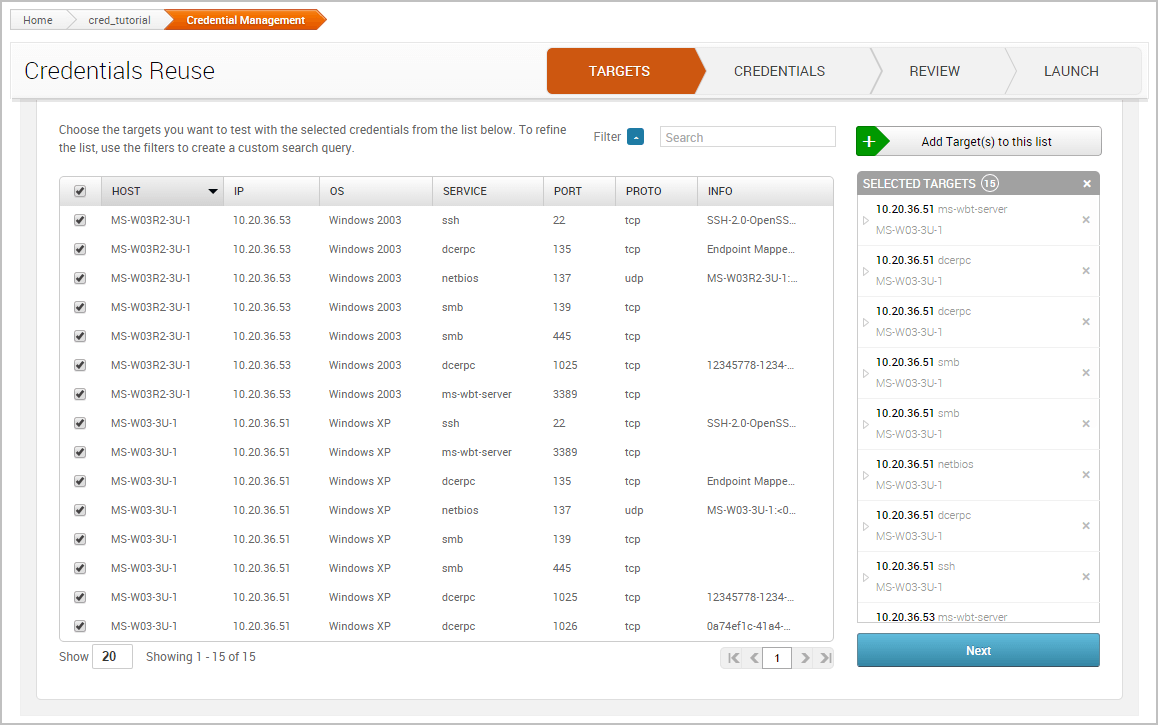
When the Credentials Reuse page appears, it’ll show the targets that are available for testing. These targets are based on the hosts and services that are in the project.
The first thing we want to do is select the targets we want to test the credential against. Go ahead and select all of the targets in the project. We’ll need to click the Add Target(s) button after we have selected the credentials we want to add to the workflow.
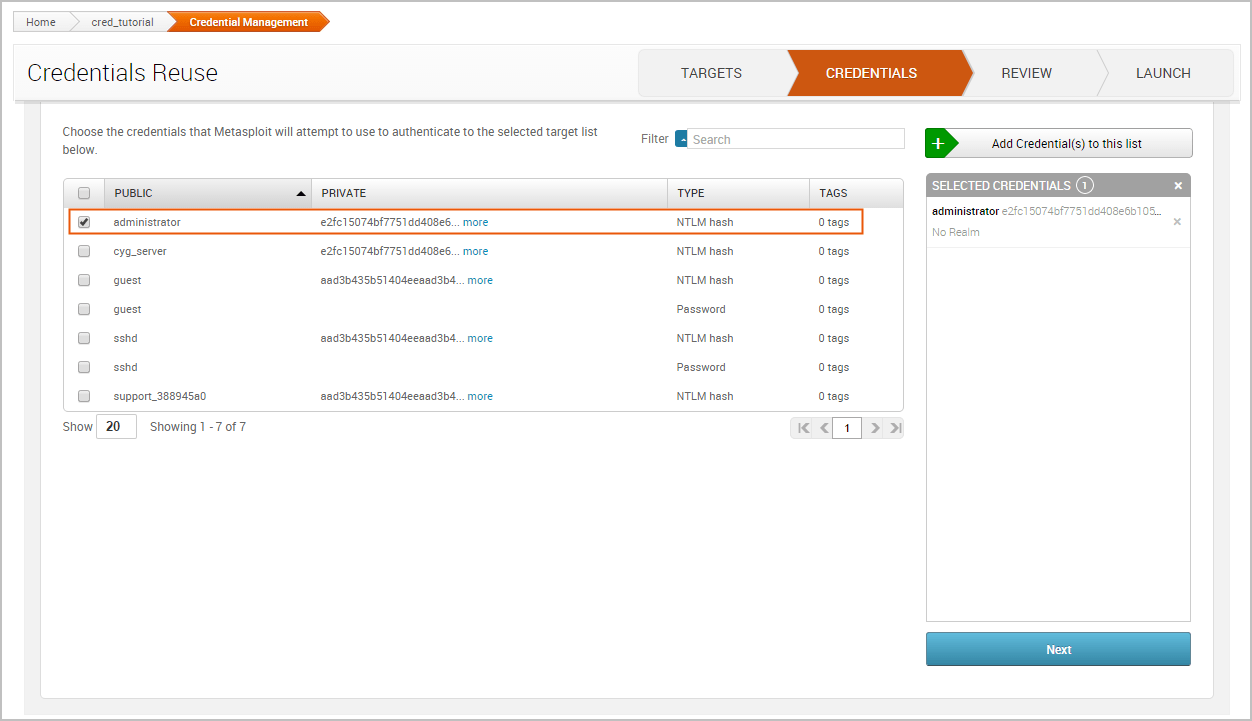
Now click on the Credentials tab. Similarly to the Targets tab, we’ll need to select the credentials that we want to add to the workflow. We’ll reuse the credential that we validated in the previous task. Since we know that this credential has a valid login for the SMB service on port 445, we’ll want to see if we can reuse it on other SMB services.
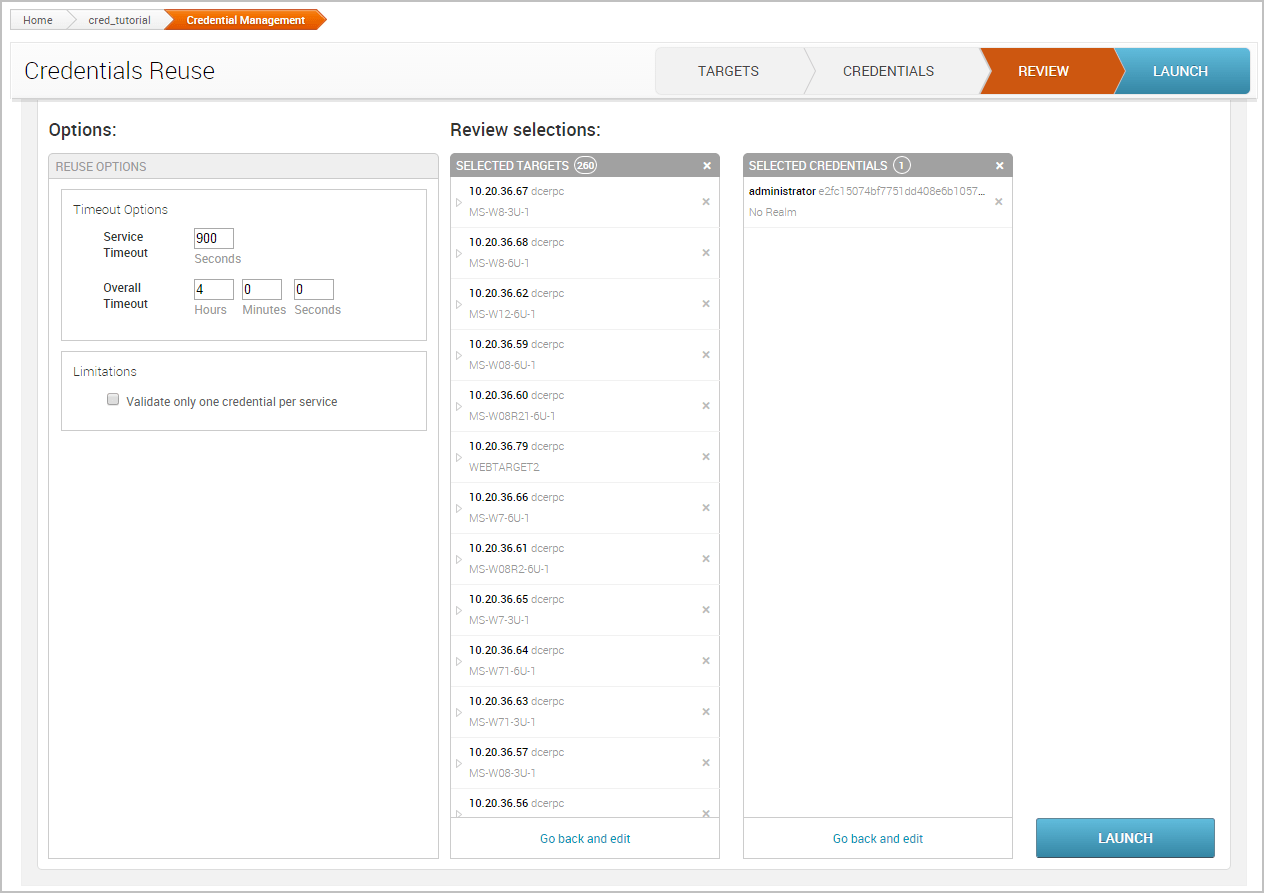
Click the Next button to review the selections.
If everything looks good, we can launch the attack.
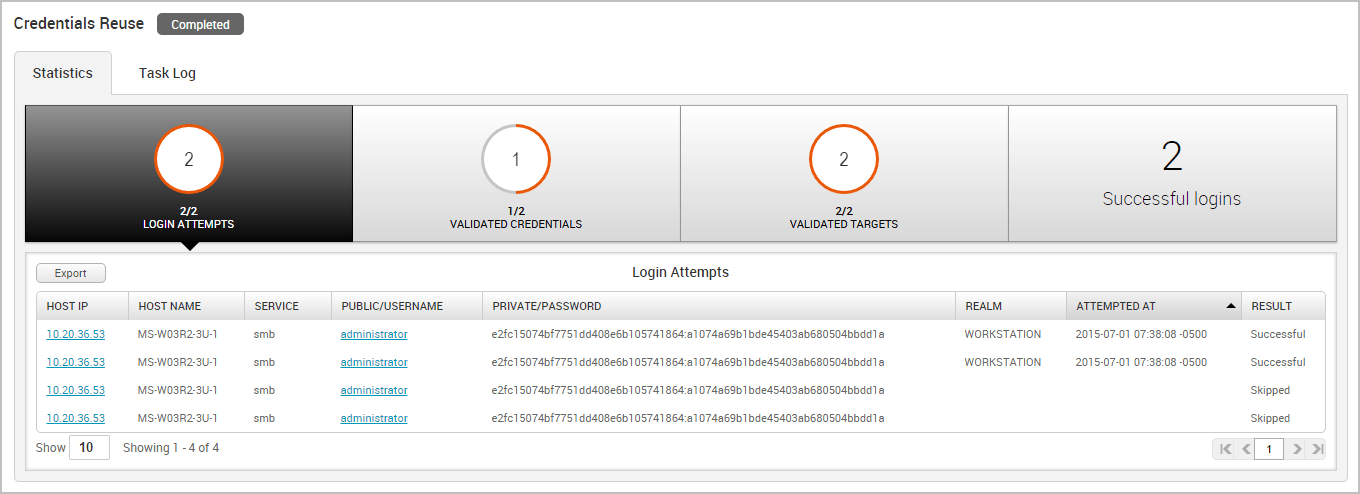
When the task completes, we can see the total number of credentials that were validated, the total number of targets that were validated, and the total number of logins that were successful. Now that we have more valid logins, we can try to reuse them find additional targets that can be compromised and additional logins that can be reused. The process can continue until we are no longer able to reuse the credentials on any additional targets.