Importing Project Sonar
Project Sonar is a global security research initiative by Rapid7 to actively scan and analyze public networks. It performs non-invasive scans of IPv4 addresses of all internet-facing systems, archives its findings, and shares it with the security community. The type of data that Project Sonar collects includes domain names, IP addresses, and some port information.
Project Sonar scans the following ports for each host that it discovers: 53, 80, 111, 123, 137, 443, 623, 1434, 1900, 5060, 5351, 5353, 5060, 17185, and 47808.
The integration between Project Sonar and Metasploit Pro enables you to import that data for further analysis and take additional actions as needed. Basically, you can interact with Project Sonar data the same way you would interact with any data you would import into Metasploit.
As a Metasploit Pro user, Project Sonar provides you with some key benefits. By leveraging Project Sonar data, you can obtain a clearer understanding of an organization’s global exposure to common vulnerabilities, identify public facing assets that belong to an organization, and find assets that an organization may not be tracking. Connecting to Sonar to Retrieve Data To connect to Project Sonar, you need a valid license key for Metasploit Pro. If you have a valid Metasploit Pro license, you don’t need to take any additional steps to enable the Project Sonar integration. Everything will be automatically set up for you.
To access Project Sonar, open a project and go to the Import page.
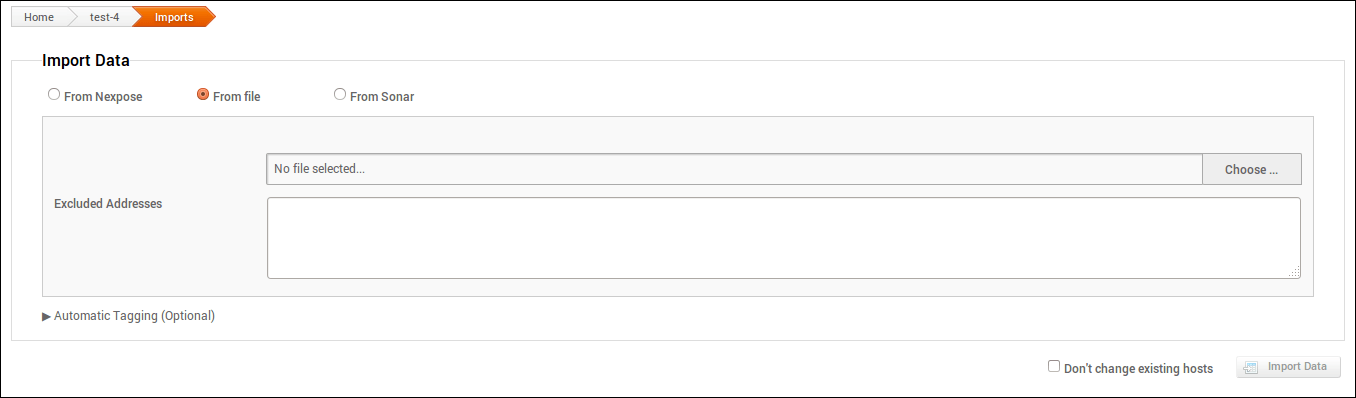
The Import page will display an import option called From Sonar. You’ll just need to select that option to view the configuration settings for Project Sonar.
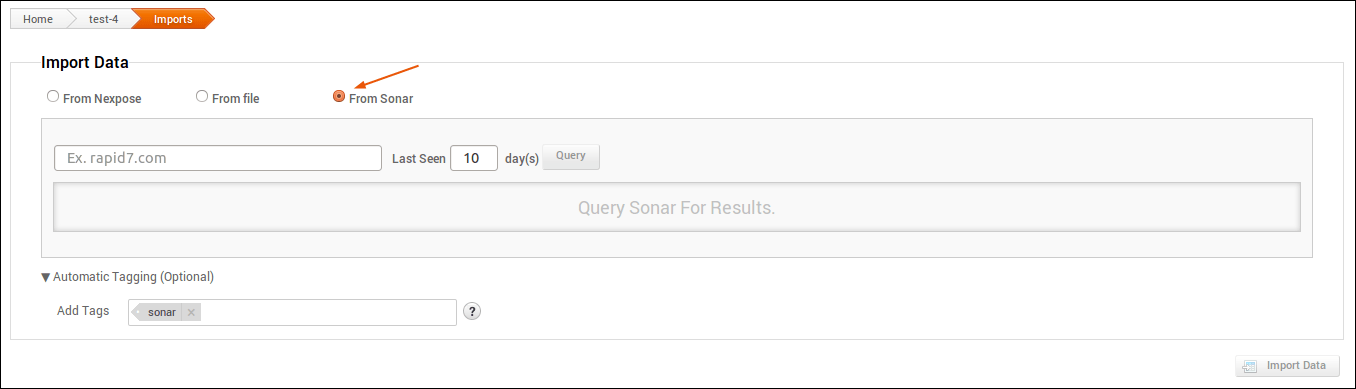
Querying Project Sonar When you’re ready to query data from Project Sonar, you’ll need to provide a domain name, such as ‘rapid7.com’. This query includes all subdomains under the rapid7 domain. Any query that does not include a subdomain, such as ‘www’, uses a wildcard for the subdomain.
For example, if you enter ‘rapid7.com’, the query searches for ‘*.rapid7.com’, which can include domains like ‘support.rapid7.com’ and ‘help.rapid7.com’. To limit the assets to a specific subdomain, you should use a subdomain, such as ‘www’, in your query.
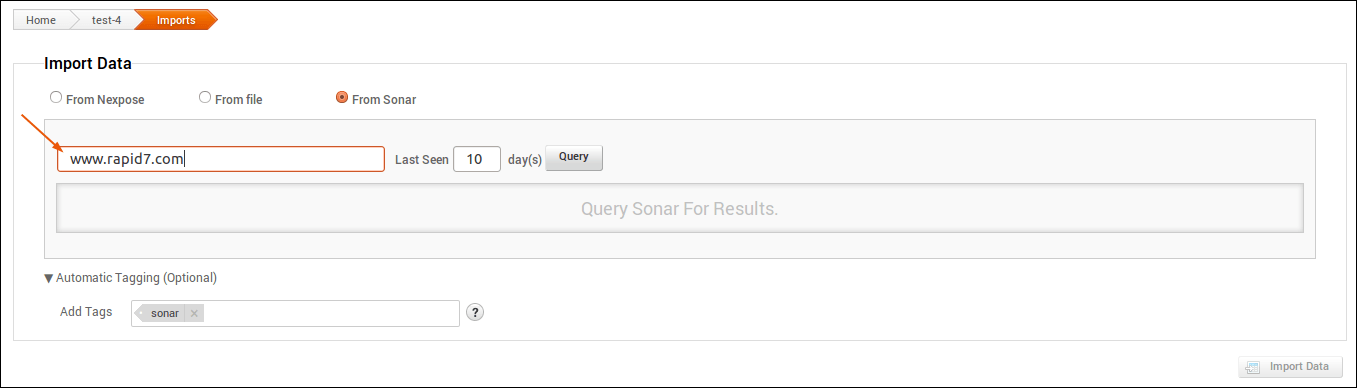
To query Project Sonar for a particular domain, enter the domain name in the following text box:
By default, the query checks Project Sonar for any data that it has for the domain that was discovered within the last 10 days. You can change the range to be any value between 1-90 days.
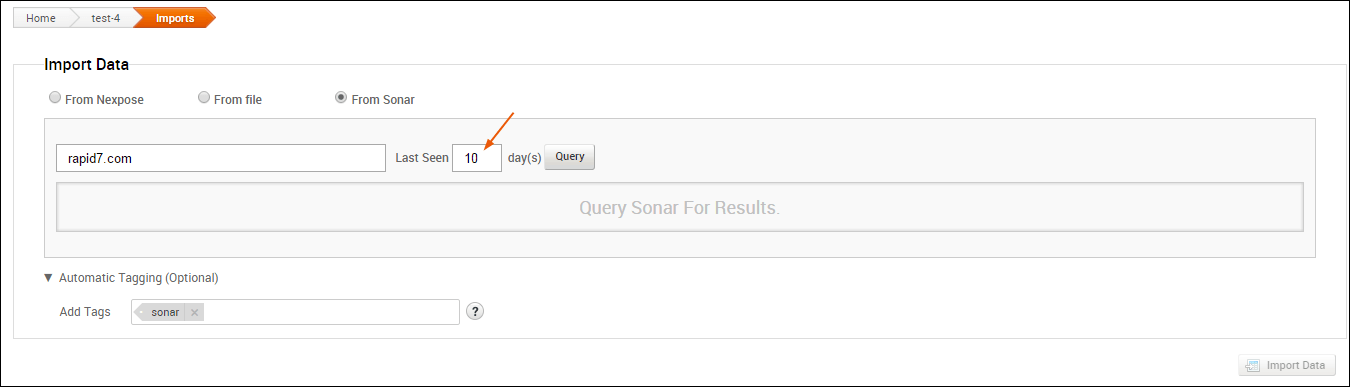
The lower bound of 1 indicates you want data from within the last 24 hours. Since Project Sonar only archives data for 90 days, the upper bound of 90 indicates that you want all the data that Project Sonar has for the domain.
After you have entered a domain and specified a last seen range, you can run the query. The query should take less than a minute to complete.
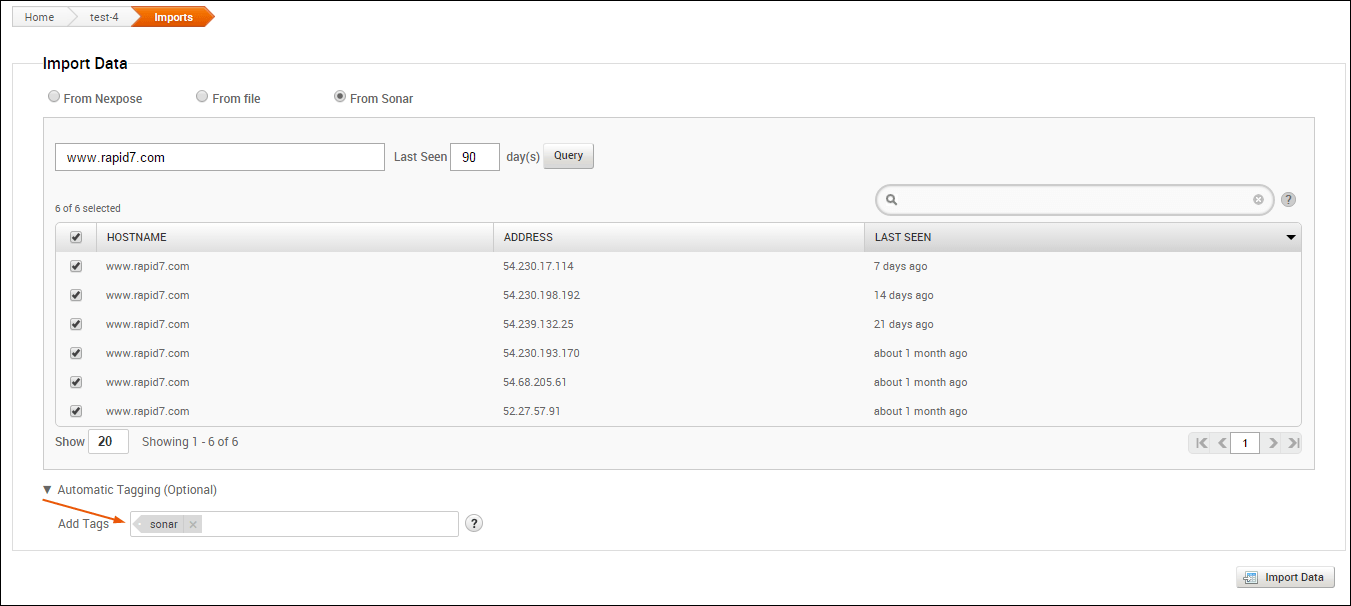
When the query completes, the table populates with a list of hosts that Project Sonar has found for the specified domain. At this point, you can choose the hosts you want to import into your project.
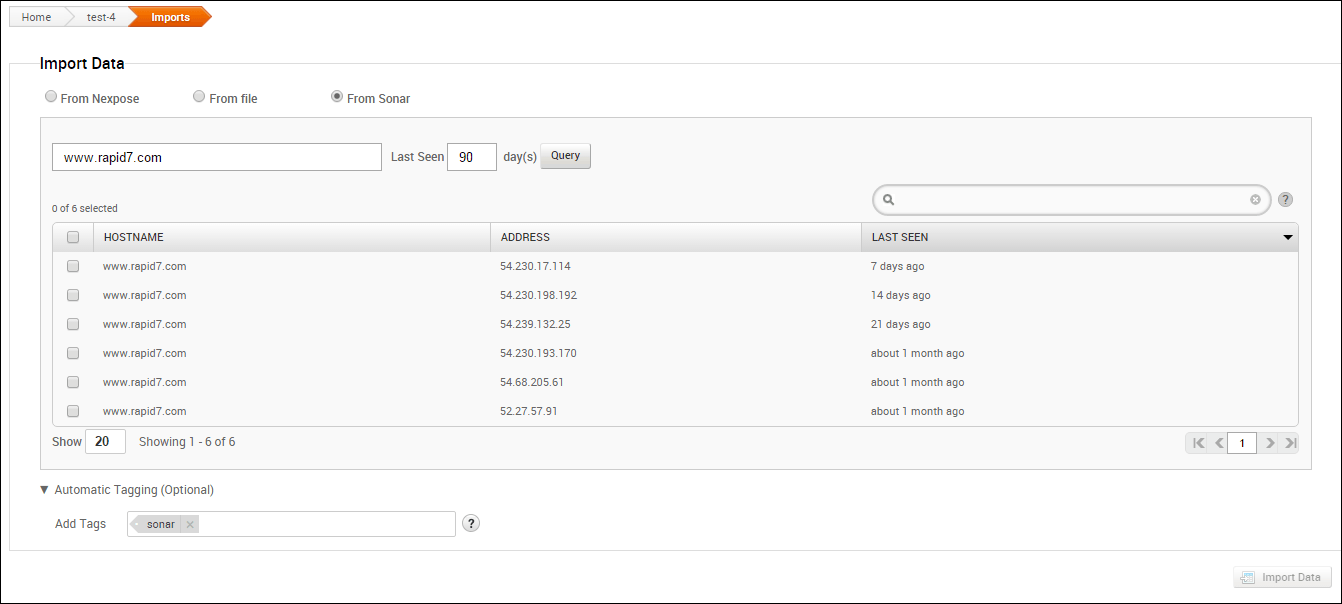
The data in the table is not stored in the project until you import it. This just means that each time you perform a query or navigate away from the Sonar Import page, the data in the table refreshes. It does not retain the data from the previous queries. So, in short, don’t navigate away from the page or run a new query unless you have already imported the data you need or you are okay with losing the results from the previous query.
Importing Data from Project Sonar Now that you can see the data that is available from Project Sonar, you can choose the hosts you want to import into your project.
This is the fun part. You can import everything that Project Sonar has found or you can filter the results down to a specific set of hosts that share a set of criteria, such as a host name.
It should be obvious, but it’s worth stating again: please be responsible. You should only query and import domains that you have permissions to scan and test.
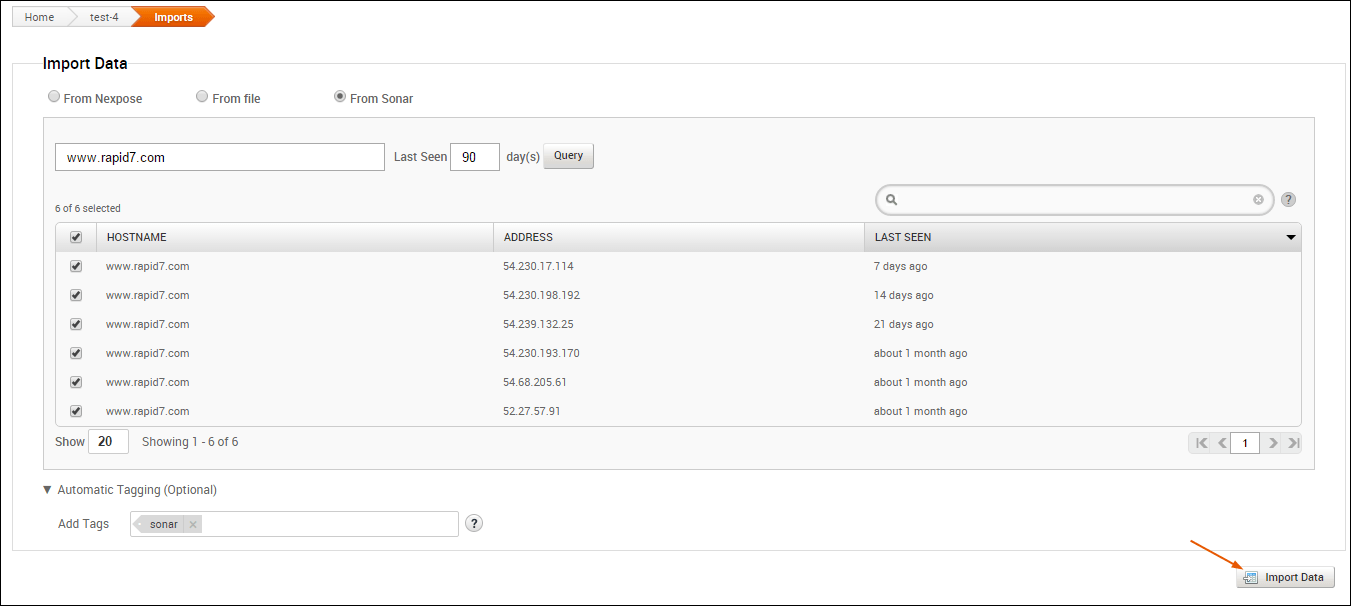
To import data from Project Sonar, select the hosts you want to import and click the Import button.
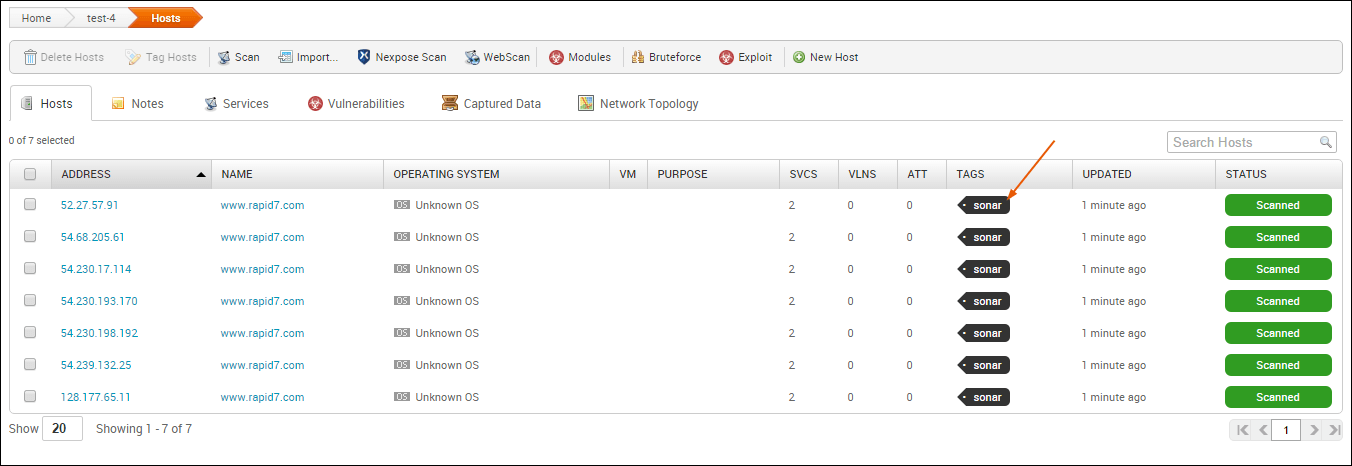
The task log appears and shows you the status of the import. When the import completes, the task log displays a ‘Completed’ status. To see the imported data, select Analysis > Hosts to go to the Hosts page. Sort the Updated column by last updated to see all recently imported hosts or search for the sonar tag.
Filtering Project Sonar Data by Host Name and Address
To filter the results, click on the Search field. A dropdown displays and shows you the search operators that are available. You’ll see two options: address and hostname.
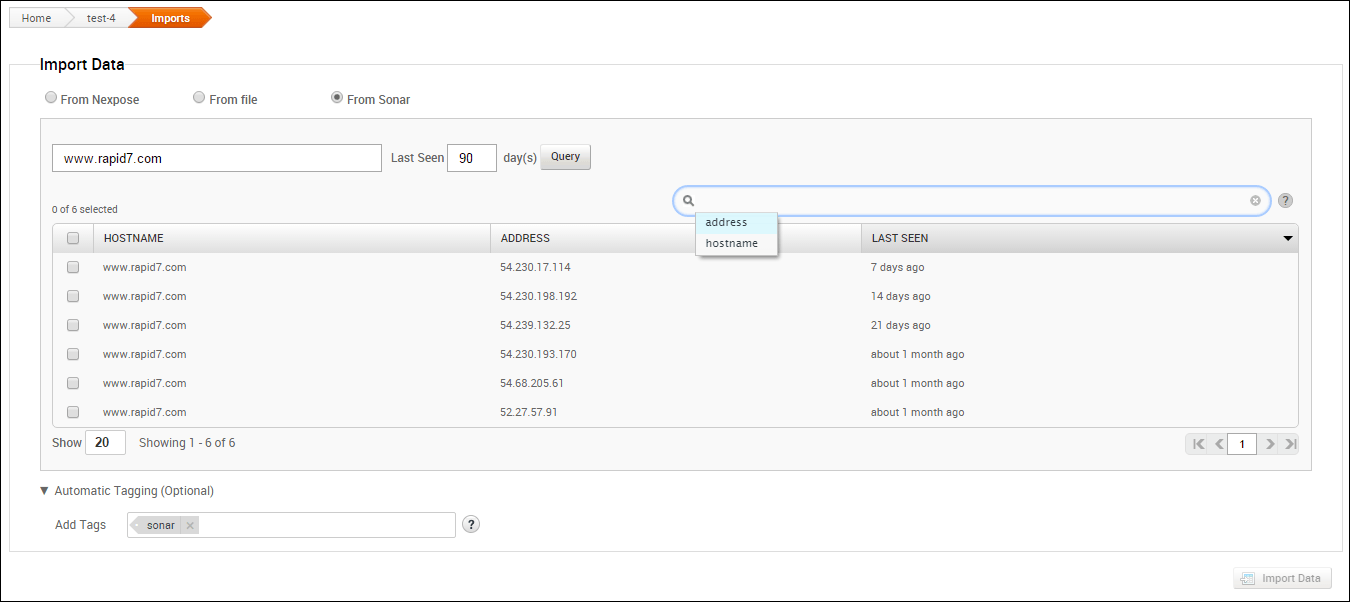
You’ll need to select a search operator from the list to continue. The search field will display the possible keywords that are available for the selected operator. You can choose a keyword from the list or you can start typing to refine the list.
If you input an invalid search query, the table clears and shows 0 results. You must enter a valid query to filter the results. A valid query requires that you enter a host name or address that exists in the table.
You can create as many search operators as you need. As you add search operators to the query, the table automatically updates the hosts that are listed.
Tagging Project Sonar Data
By default, all imported Project Sonar data includes a sonar tag. This helps you easily search for Project Sonar data in the Analysis area of your project. If you want to add additional tags to your Project Sonar data, you can enter them in the Add Tags field.