Managing Credentials
During a credentials audit, you will be collecting sensitive data from your targets and managing it from the Manage Credentials page. The Manage Credentials page displays all the credentials that are available in a particular project and provides access to features that let you add, delete, and export credential data. The following sections will show you how you can manage credential data within a project.
Add credentials
To add credentials to a project, you can either manually input each credential individually or you can import a PWDump or CSV file. The following sections show you how to manually add a plaintext password, SSH key, NTLM hash, and nonreplayable hash.
Manually Entering a Password
You can manually add a password when you have a single plaintext password that you want to add to a project, such as a common default like admin/admin. If you have multiple credentials that you want to add, you should create a CSV file for them and import them into the project. Importing credentials, in that particular case, will be much more efficient.
To manually add a password to a project:
- From within a project, go to Credentials > Manage to access the Manage Credentials area.
- When the Manage Credentials page appears, click the Add button.

The Add Credential(s) window appears and displays tabs for the three different parts of a credential: the realm, the public, and the private. You can click on any of the tabs to configure their options.
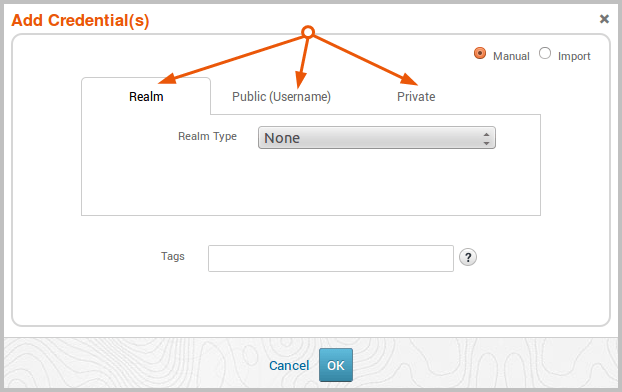
- Click the Private (Passwords) tab.
- Click the Credential Type dropdown and select Plaintext Password.
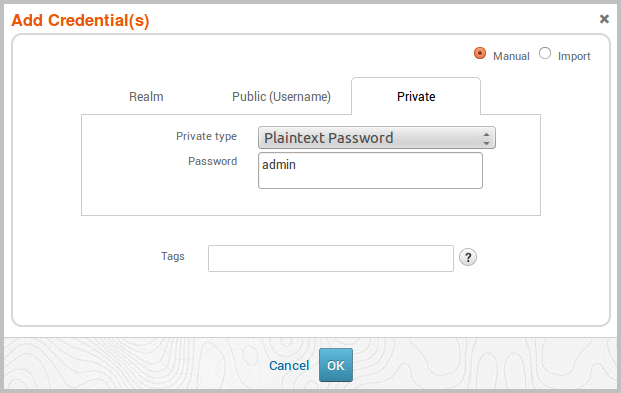
- Enter the password in the Password field.
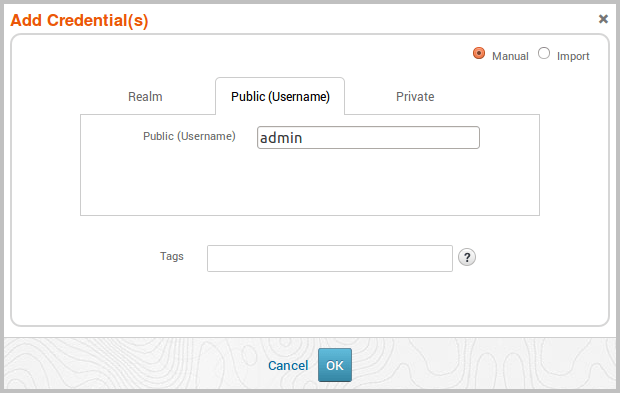
- Click the Public (Username) tab and enter the username. The username will be *BLANK* if you do not specify one. (Optional)
- Click the Realm tab and select one of the following realm types: None, Active Directory Domain, Postgres DB, DB2, or Oracle SID. (Optional) If you do not know the realm, you can use the default value of None.
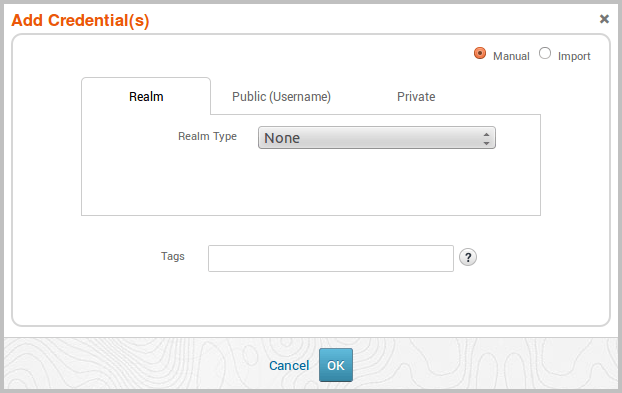
- If you specified a realm type, enter its name in the Realm Name field. (Optional)
- Enter tags for the credential pair. (Optional)
To enter a tag, start typing the name of the tag you want to use in the Tag field. As you type in the search box, Metasploit Pro automatically predicts the tags that may be similar to the ones you are searching for. If the tag does not exist, Metasploit Pro adds it. 10. Click OK.
The password is added to the project and is viewable from the Manage Credentials page.
Manually Adding a Private SSH Key
- From within a project, go to Credentials > Manage to access the Manage Credentials area.
- When the Manage Credentials page appears, click the Add button.

- The Add Credential(s) window appears and displays tabs for the three different parts of a credential: the realm, the public, and the private. You can click on the tabs to configure their options.

- Click the Private (Passwords) tab.
- Click the Credential Type dropdown and select SSH Key.
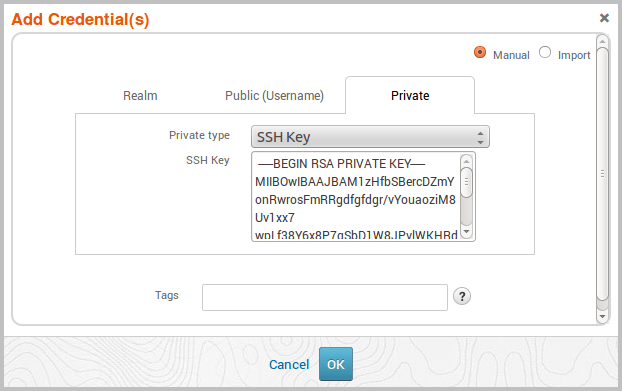
- Copy the contents of the private SSH key and paste it into the SSH key field. The key must start with
-----BEGIN RSA PRIVATE KEY-----and end with-----END RSA PRIVATE KEY-----. - Enter tags for the SSH key. (Optional)
To enter a tag, start typing the name of the tag you want to use in the Tag field. As you type in the search box, Metasploit Pro automatically predicts the tags that may be similar to the ones you are searching for. If the tag does not exist, Metasploit Pro creates it. 8. Click the Public (Username) tab and enter the username. All SSH keys must have a username.

- Click OK.
The SSH key is added to the project and is viewable from the Manage Credentials page.
Manually Adding an NTLM Hash
- From within a project, go to Credentials > Manage to access the Manage Credentials area.
- When the Manage Credentials page appears, click the Add button.

The Add Credential(s) window appears and displays tabs for the three different parts of a credential: the realm, the public, and the private. You can click on the tabs to configure their options.

- Click the Private (Passwords) tab.
- Click the Credential Type dropdown and select NTLM Hash.
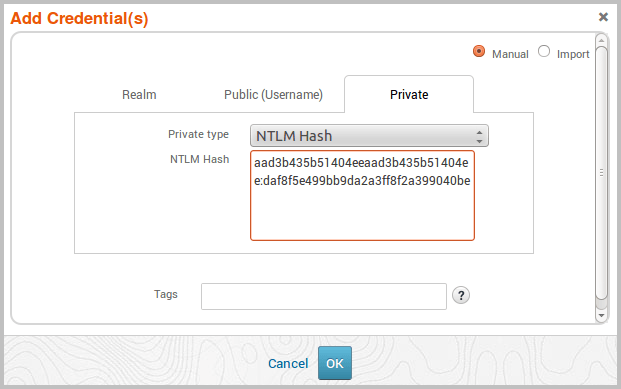
- Copy the hash and paste it into the NTLM Hash field.
A valid NTLM hash uses the following format: <LAN Manager hex digest>:<NT LAN Manager hex digest>, where each hex digest is 32 lowercase hexadecimal characters. For example, the following is a valid input for an NTLM hash: aad3b435b51404eeaad3b435b51404ee:daf8f5e499bb9da2a3ff8f2a399040be.
6. Click the Public (Username) tab and enter the username. The username will be *BLANK* if you do not specify one. (Optional)

- Click the Realm tab and select one of the following realm types: None, Domain Name, Postgres DB, DB2, or Oracle SID. (Optional)
- If you specified a realm type and know its name, enter its name in the Realm Name field.
- Enter tags for the NTLM hash. (Optional)
To enter a tag, start typing the name of the tag you want to use in the Tag field. As you type in the search box, Metasploit Pro automatically predicts the tags that may be similar to the ones you are searching for. If the tag does not exist, Metasploit Pro creates it. 10. Click OK.
The NTLM hash is added to the project and is viewable from the Manage Credentials page.
Manually Adding a Nonreplayable Hash
- From within a project, go to Credentials > Manage to access the Manage Credentials area.
- When the Manage Credentials page appears, click the Add button.

The Add Credential(s) window appears and displays tabs for the three different parts of a credential: the realm, the public, and the private. You can click on the tabs to configure their options.

- Click the Private (Passwords) tab.
- Click the Credential Type dropdown and select Hash.
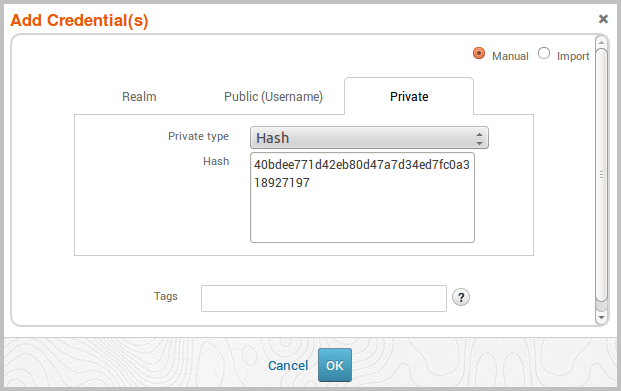
- Copy the hash and paste it into the Hash field.
- Click the Public (Username) tab and enter the username. (Optional)

The username will be *BLANK* if you do not specify one. 7. Click the Realm tab and select one of the following realm types: None, Domain Name, Postgres DB, DB2, or Oracle SID. (Optional) 8. If you specified a realm type, enter its name in the Realm Name field. 9. Enter tags for the hash. (Optional)
To enter a tag, start typing the name of the tag you want to use in the Tag field. As you type in the search box, Metasploit Pro automatically predicts the tags that may be similar to the ones you are searching for. If the tag does not exist, Metasploit Pro creates it. 10. Click OK.
The SSH key is added to the project and is viewable from the Manage Credentials page. Importing and Exporting Credentials You can import and export credentials to easily share them between projects or with other members of the organization. It is vital that this confidential information be shared responsibly, as it may contain plaintext credentials and extremely sensitive data.
Credentials can be imported in a couple of ways. You can import them as part of a workspace ZIP, which will automatically include all credentials contained in the export, as well as any other data that was part of the project. Workspace ZIP files can be imported from the Hosts or Overview page. If you only want to import credentials, you will need to do so from the Manage Credentials page. You can import credentials that have been exported from a project, or you can import a credentials list that you have manually created.
When you export credentials from a project, Metasploit Pro creates a manifest file that contains the credential data and compresses it into a ZIP file. The manifest file is a CSV file that lists every credential in the project and includes the following information for each credential: username, private type, private, realm type, realm name, host address, service port, service, and service protocol. If the project contains SSH keys, they will be included in the exported file. Each SSH key will be mapped to its corresponding username in the manifest file.
To help you understand how you can share credentials, the following sections walk you through importing and exporting credentials.
Importing Credentials Exported from Other Projects
When you export credentials from a project, Metasploit Pro creates a manifest file, which is a CSV file that contains all of the project’s credential data, and compresses it into a ZIP file. You must import the ZIP file, not the CSV file.
If you want to import credentials that have been exported from another project, you must import the workspace ZIP file. This ensures that the file contains the required header row that Metasploit Pro needs to properly import the credentials and any additional data, such as SSH keys, that are associated with the manifest file. You cannot simply import the manifest.csv file; the import will fail if you attempt to import a manifest file that was created by Metasploit Pro.
To import exported credentials:
- From within a project, go to Credentials > Manage to access the Manage Credentials area.
- Click the Add button.

The Add Credential(s) window appears. 3. Select the Import option.
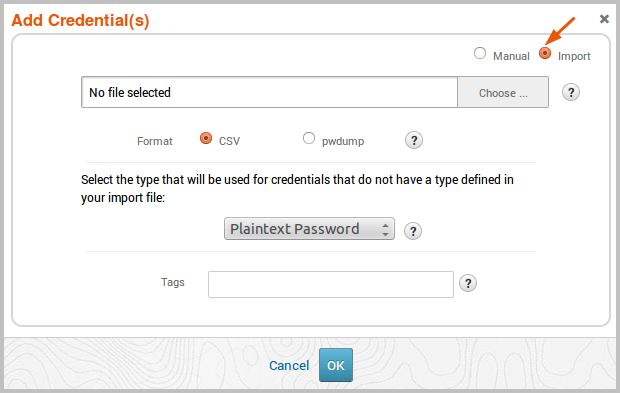
- Click the Choose button and navigate to the location of the ZIP file you want to import.
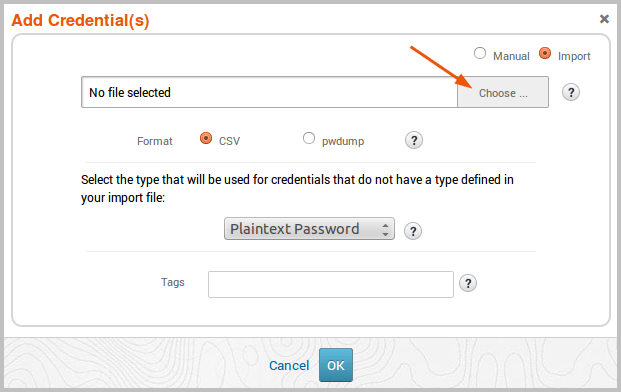
- Select the file and click Open.
- From the Add Credentials window, select CSV as the format.
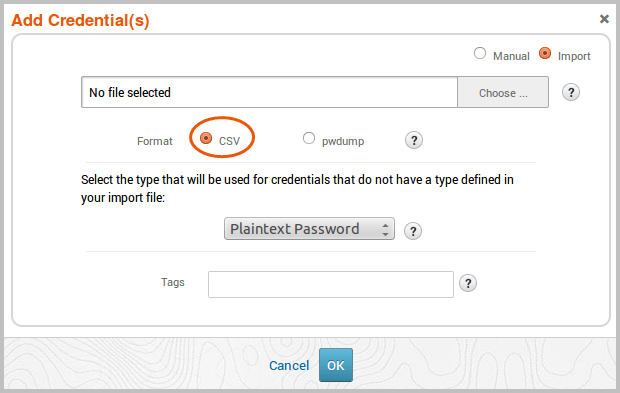
- Click the Password Type dropdown and select the type you want to assign to credentials that do not have a type defined in your import file.
Any credential that has a private must have a type defined for it. This option lets you set the default type for any credential that has an empty type field in the import file. 8. Enter tags for the credential pair. (Optional)
To enter a tag, start typing the name of the tag you want to use in the Tag field. As you type in the search box, Metasploit Pro automatically predicts the tags that may be similar to the ones you are searching for. If the tag does not exist, Metasploit Pro creates it. 9. Click OK.
The CSV is imported into the project. You can go to the Manage Credentials page to view the imported credentials.
Importing a Manually Created Credentials File
If you have a credentials list that you manually created, you can import it from the Manage Credentials page. The credentials file that you upload must be a CSV file that contains the following header row: username,private_data.
To import a manually created credentials file:
- From within a project, go to Credentials > Manage to access the Manage Credentials area.
- Click the Add button.

The Add Credential(s) window appears. 3. Select the Import option.

- Click the Choose button and navigate to the location of the CSV file you want to import.

The CSV file must contain the following header row: username,private_data.
5. Select the file and click Open.
6. From the Add Credential(s) window, select CSV as the format.

- Enter tags for the credential pair. (Optional) To enter a tag, start typing the name of the tag you want to use in the Tag field. As you type in the search box, Metasploit Pro automatically predicts the tags that may be similar to the ones you are searching for. If the tag does not exist, Metasploit Pro creates it.
- Click OK.
The CSV is imported into the project. You can go to the Manage Credentials page to view the imported credentials.
Importing a PWDump
A PWDump is a text file that contains credentials that have logins associated with them. The PWDump that you upload must be one that was exported from Metasploit Pro. Other types of password dumps are not supported.
To import a PWDump:
- From within a project, go to Credentials > Manage to access the Manage Credentials area.
- Click the Add button.

The Add Credential(s) window appears. 3. Select the Import option.

- Click the Choose button and navigate to the location of the PWDump you want to import.

- Select the file and click Open.
- Select the pwdump format option.
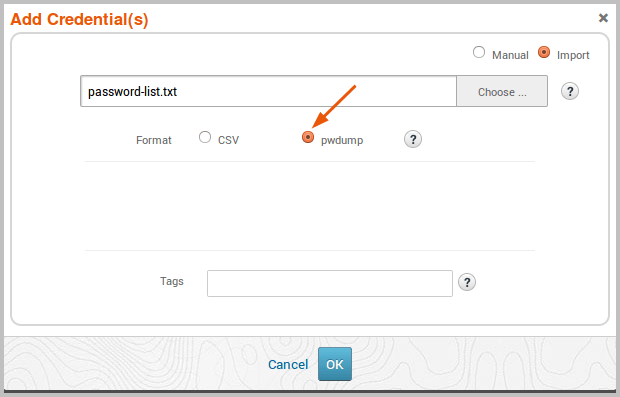
- Enter tags for the credential pair. (Optional)
To enter a tag, start typing the name of the tag you want to use in the Tag field. As you type in the search box, Metasploit Pro automatically predicts the tags that may be similar to the ones you are searching for. If the tag does not exist, Metasploit Pro creates it. 8. Click OK.
The PWDump is imported into the project. You can go to the Manage Credentials page to view the imported credentials.
Exporting All Credentials
There are a couple of ways that you can export all credential data from a project. You can do it at the project level by exporting a workspace ZIP, will contain all of the information stored in the project, such as host data, collected evidence, and reports, as well as a credentials folder that contains the credential data.
If you only want to export credential data from the project, you can export them from the Manage Credentials page. When you export credential data, Metasploit Pro creates the manifest file and automatically compresses it into a ZIP file for you, which enables you to import the file with no additional changes.
To export all credentials:
- From within a project, go to Credentials > Manage to access the Manage Credentials area.
- Click the Export button.
- Enter a name for the file in the File Name field if you want to provide a custom name. Otherwise, you can use the auto-generated file name.
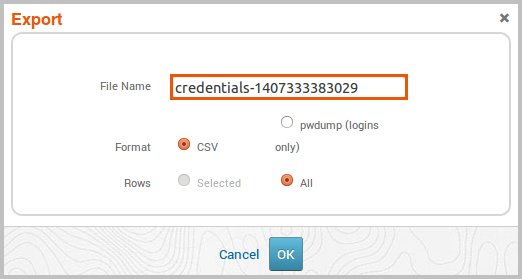
- For the Format option, select CSV.
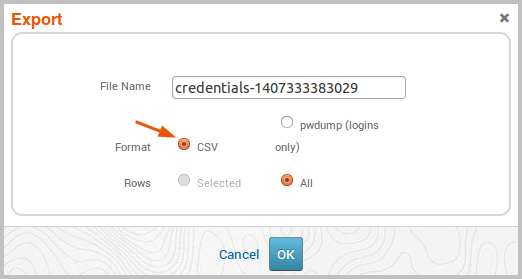
- For the Row option, select All.
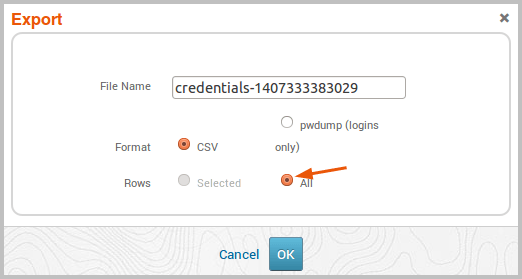
- Click OK to begin the export.
The export will automatically begin. Your system may prompt you to save the file if it is not configured for automatic downloads.
Exporting Selected Credentials
You can export specific credentials from a project from the Manage Credentials page.
- From within a project, go to Credentials > Manage to access the Manage Credentials area.
- Select the credentials that you want to export.

- Click the Export button.

- Enter a name for the file in the File Name field if you want to provide a custom name. Otherwise, you can use the auto-generated file name.
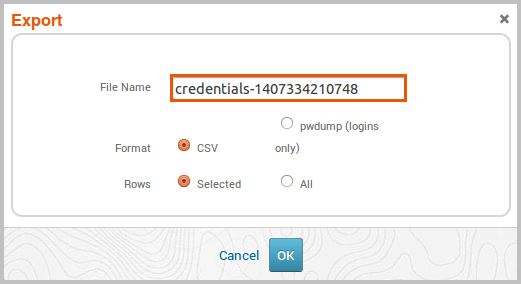
- For the Format option, choose CSV.
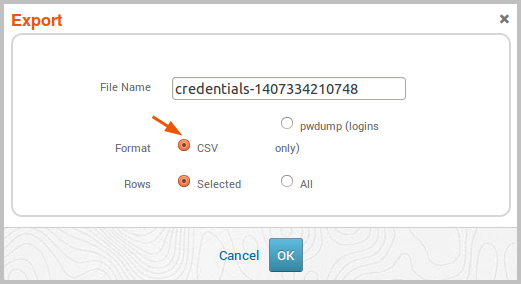
- For the Row option, choose Selected.
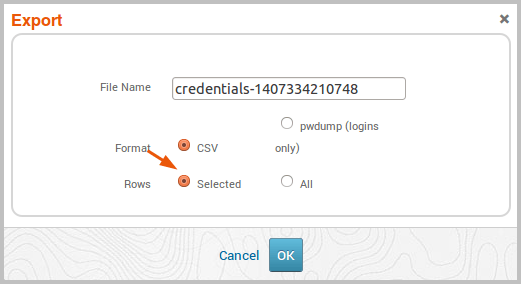
- Click OK to begin the export.
The export will automatically begin. Your system may prompt you to save the file if it is not configured for automatic downloads.
Exporting a PWDump
A PWDump is a Metasploit Pro export type that only exports credentials that have logins. Metasploit Pro exports the PWDump as a text file that can be imported into other projects.
To export a PWDump:
- From within a project, go to Credentials > Manage to access the Manage Credentials area.
- Click the Export button.

- For the Format option, select pwdump (logins only).
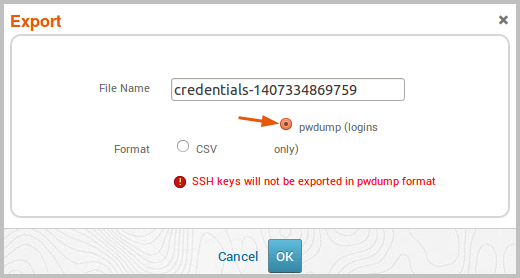
- Click OK to begin the export.
The export will automatically begin. Your system may prompt you to save the file if it is not configured for automatic downloads.
Creating a Credentials CSV File to Import
You can create CSV files to import credentials into a project. For example, if you have a word list or password list that you want to add to a project, you will need to create a CSV file for those credentials. You can use a spreadsheet program, like Microsoft Excel or Google Docs, to create a CSV file.
The CSV file must include the header row username,private_data, which defines the fields in the table. The following image shows an example of a credentials list that was created in Microsoft Excel:
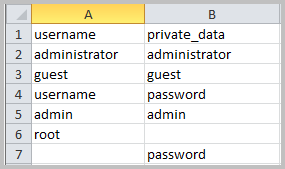
As you can see, the first row contains the required header row. The subsequent rows contain the data specified by each header. If you want to leave the username or private blank, you can leave the field empty.
Cloning and Editing Credentials
Cloning is a useful feature if you want to make a copy of a credential with some minor changes. For example, if you have a credential pair, such as admin:admin, you might want to add a variation, like admin1:admin1. The fastest way to do this would be to clone the original credential pair and tweak the public and private data for it.
A credential cannot be modified after you save it to a project. The only way to edit a credential is to clone and modify it. If there are changes that you need to make to a credential, you will need to clone the credential, edit the clone, save the clone, an delete the original credential.
To clone a credential:
- From within a project, go to Credentials > Manage to access the Manage Credentials area.
- When the Manage Credentials page appears, find the row that contains the credential you want to clone.
- Click the Clone button.

A duplicate of the credential is created and added to the table. Any data that you can modify is displayed in an editable field.

- Edit any of the following fields: public (username), private (password), password type, realm, or origin. You must modify one of the fields because a project cannot contain duplicates of the exact credential entry. You will not be able to save the credential unless the credential is unique. For example, you can have an two entries for admin/admin as long as either the realm or private type is different.
- Click Save when you are done.
The credential is added to the project and viewable from the Manage Credentials page. Deleting Credentials If there are credentials that you no longer need to store in a project, you can delete them. All deleted credentials are permanently removed from the project and cannot be recovered.
- From within a project, go to Credentials > Manage to access the Manage Credentials area.
- When the Manage Credentials page appears, select the credentials you want to delete.
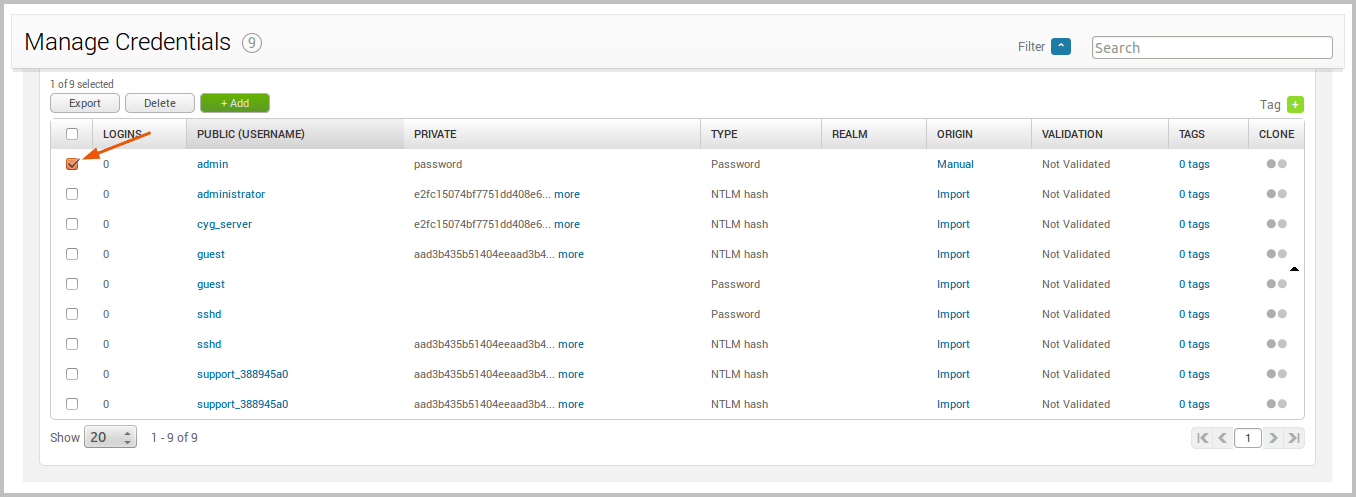
- Click the Delete button.

- When the confirmation window appears, click OK to delete the credentials from the workspace. The credential, including all of its logins, will be removed from the project.
You must be absolutely sure that you want to delete the credential. You will not be able to restore deleted credentials.
