Managing Hosts
A host refers to a device on a network and is represented by its IP address or server name. Hosts are typically fingerprinted, enumerated, and added to a project during a discovery scan, data import, or Nexpose scan.
To view the hosts in a project, you need to go to the Analysis area. All hosts stored in the project will be viewable, searchable, and editable from the Analysis area of the user interface. Adding and Deleting Hosts There are a few ways that hosts can be automatically added to a project: through a Discovery Scan, Nexpose Scan, or import. When you run a scan or import, Metasploit Pro gathers host information and stores it in the project database. If there are specific hosts that you want to add, without running a scan or import, you can manually add them to a project. Or if there are hosts that you scanned or imported that you do not want to include in the project, you can simply delete them.
Adding a Host to a Project
To add a host to a project:
- Select Analysis > Hosts from the Project Tab bar. The Hosts page appears.
- Click the New Host button from the Quick Tasks bar. The New Host form appears.
- Fill out the Name and Address section with the host’s network details. At a minimum, you will need to specify the host name and host IP address.
- Fill out the Operating System section if you know the OS that runs on the host. If you do not have this information, you can skip this step.
You can additionally specify the OS version, OS flavor, and Purpose. These fields are optional.
- Select the Lock edited host attributes option if you do not want the host metadata to be editable. If you select this option, team members and subsequent scans/imports will not be able to modify the host metadata.
- Click on the Add Service link, if you know there is a specific service running on the host that you want to add. You can add as many services as you need.
- Click the Save button when you are done.
Deleting a Host from a Project
To delete a host from a project:
- Select Analysis > Hosts from the Project Tab bar. The Hosts page appears.
- Select the host or hosts that you want to delete.
- Click the Delete button. A confirmation window appears.
- Click OK to delete the host or hosts.
Deleting Hosts
Deleting a host will remove any data associated with it.
Viewing and Editing Host Metadata Each host has metadata that helps you identify its network details and its operating system. You can view the host metadata to learn more about the identifiable attributes for a particular host or you can edit the host metadata if there are additional details you want to provide about the host.
Viewing Host Metadata
To view metadata for a host:
- From within a project, select Analysis > Hosts from the Project Tab bar. The Hosts page appears.
- Click on the IP address for the host you want to view the host information for.
- Click on the Edit icon. The Host Information window displays the metadata for the host.
Editing Host Information
To edit the metadata for a host:
- From within a project, select Analysis > Hosts from the Project Tab bar. The Hosts page appears.
- Click on the IP address for the host that you want to edit.
- Click on the Edit icon. The Host Information window displays the metadata for the host.
- Click on the Edit icon for the metadata field you want to add or modify. The field becomes editable.
The following metadata fields can be edited: host address, host name, host MAC address, OS name, OS flavor, OS service pack, and OS purpose.
- Enter the information you want to use in the field. For example, if you know the service pack, you can add it to the SP field.
- Click the Save link when you are done.
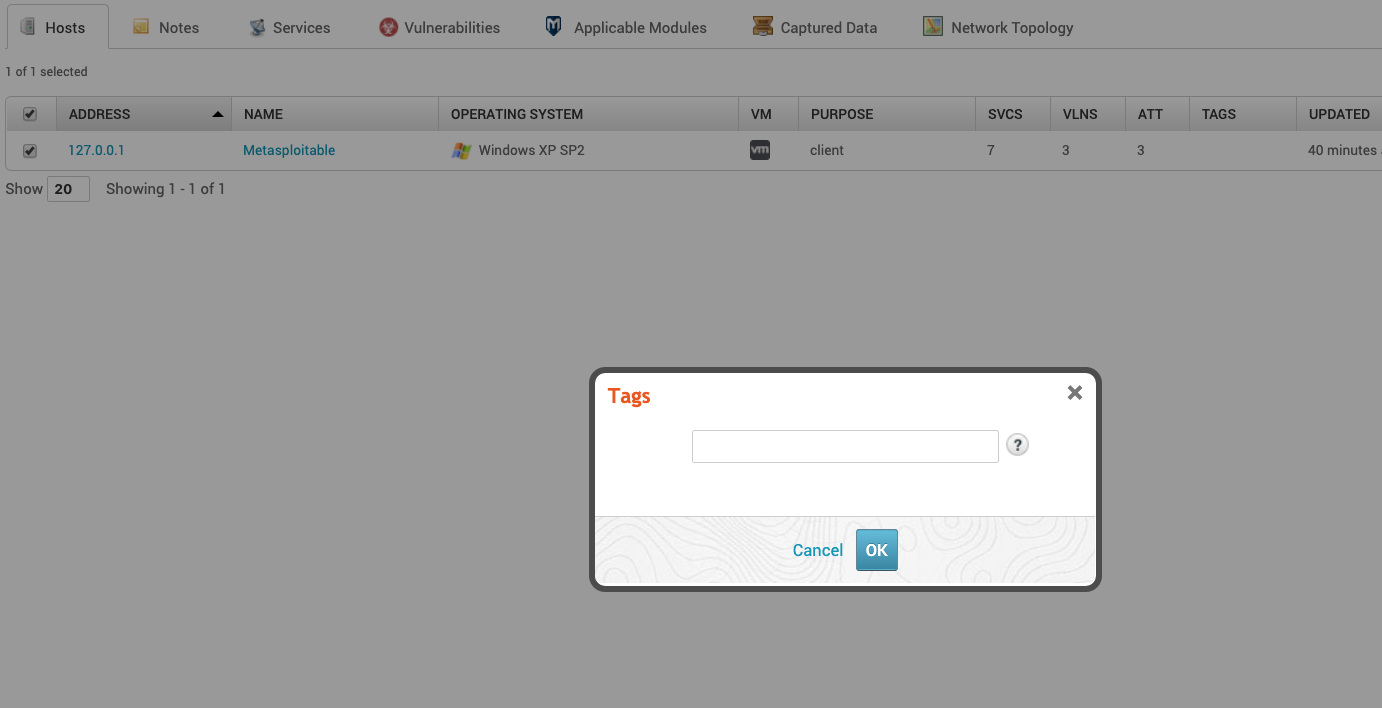
- Click the Done button to close the Host Information window. Tag Hosts Tags are a label that you create to organize hosts. For example you can create a tag ‘High’ and add all high risk hosts to that tag. Click on the tags to see all hosts with that tag.
To create a new tag, select a host and click “Tag Hosts”, then in the box provided create a new tag.
Managing Notes Notes can not be created via the UI, but can be created in Pro Console . To delete a note, select a note then click Delete Notes. Adding, Editing, and Deleting Services The Services list is populated when you run a scan or import hosts into a project. However, there may be cases where you may want to manually modify the services list. You can add, edit, or modify the services list for any host.
Adding a Service to a Host
To add a service to a host:
- From within a project, select Analysis > Hosts from the Project Tab bar. The Hosts page appears.
- Click on the IP address for the host that you want to add a service to. The single host page opens and shows the Services list.
- Click the New Service button. The New Service modal window appears.
- Specify the following information for the service:
- Name - The service name, such as HTTP, DNS, or SMTP.
- Port - The port that the service runs on.
- Protocol - The protocol, TCP or UDP, that the port uses.
- State - The port state can be open, closed, filtered, or unknown.
- Info - Any additional information that you may have about the service, such as the version that is running.
- Click the Submit button when you are done.
Editing a Service
To edit a service:
- From within a project, select Analysis > Hosts from the Project Tab bar. The Hosts page appears.
- Click on the IP address for the host whose services you want to edit. The single host page opens and shows the Services list.
- Click the Edit icon that is located in the same row as the service you want to modify. The Name, Port, Protocol, and State fields become editable.
- Make your changes to any of the editable fields.
- Click the Save link when you are done.
Deleting a Service from a Host
To delete a service from a host:
- From within a project, select Analysis > Hosts from the Project Tab bar. The Hosts page appears.
- Click on the IP address for the host that you want to delete a service from. The single host page opens and shows the Services list.
- Find the service that you want to delete.
- Click the Delete button that is located in the same row as the service. A confirmation window appears.
- Click OK to delete the service. Adding, Editing, and Deleting Vulnerabilities In order to identify potential vulnerabilities that may exist on a target network, you will need to run a Nexpose scan, run a Discovery Scan, or import vulnerability scan data. Metasploit Pro stores the vulnerability information that it finds for each host in the project.
Vulnerabilities can be viewed and managed at the project level or at the host level.
Adding a Vulnerability to a Host
To add a vulnerability to a host:
- From within a project, select Analysis > Hosts from the Project Tab bar. The Hosts page appears.
- Click on the IP address for the host that you want to add a vulnerability to. The single host page appears.
- Click the Vulnerabilities tab. The Vulnerabilities list appears.
- Click the New Vuln button. The New Vulnerability modal window appears.
- Enter a name for the vulnerability in the Name field.
- Click the Add Ref button. The Reference field becomes editable.
- Enter the vulnerability reference ID or URL in the reference field.
- If you have additional references you would like to add for the vulnerability, click on the Add Ref button and repeat the previous step.
- Click the Submit button when you are done.
Adding a Vulnerability Reference
To add a reference ID to vulnerability:
- From within a project, select Analysis > Hosts from the Project Tab bar. The Hosts page appears.
- Click on the IP address for the host that has the vulnerability you want to add a reference to. The single host page appears.
- Click the Vulnerabilities tab. The Vulnerabilities list appears.
- Click the Edit icon that is located in the same row as the vulnerability you want to edit. The Edit Vulnerability window appears.
- Click the Edit icon. The Reference field becomes editable.
- Edit the vulnerability reference ID or URL.
- Click the Submit button when you are done.
Deleting a Vulnerability Reference
To delete a reference ID from a vulnerability:
- From within a project, select Analysis > Hosts from the Project Tab bar. The Hosts page appears.
- Click on the IP address for the host that has the vulnerability you want to delete a reference from. The single host page appears.
- Click the Vulnerabilities tab. The Vulnerabilities list appears.
- Click the Edit icon that is located in the same row as the vulnerability you want to edit.
- Find the reference you want to delete and click the Delete icon. The reference is removed from the list.
If you have additional references you would like to delete, repeat the previous step until you are done.
- Click the Submit button when you are done.
Deleting a Vulnerability from a Host
To delete a vulnerability from a host:
- From within a project, select Analysis > Hosts from the Project Tab bar. The Hosts page appears.
- Click on the IP address for the host that has the vulnerability you want to delete. The single host page appears.
- Click the Vulnerabilities tab. The Vulnerabilities list appears.
- Click the Delete icon that is located in the same row as the vulnerability you want to remove. A confirmation window appears.
- Click OK to delete the vulnerability. The vulnerability is removed from the list.
Deleting a Vulnerability from All Hosts
To delete a vulnerability from the project:
- From within a project, select Analysis > Vulnerabilities from the Project Tab bar. The Vulnerabilities page appears.
- Click the Grouped View button in the Quick Tasks bar. The project displays the individual vulnerabilities in the project.
- Select the vulnerabilities you wan to delete from the project.
When you delete vulnerabilities from the grouped view, it removes them from all of the hosts that currently have them.
- Click the Delete Vulnerabilities button in the Quick Tasks bar. A confirmation window appears.
- Click OK to continue with the deletion.
Adding a Comment
Comments are a great way to make notes in the application about hosts and vulnerabilities. To add a comment, either click in the empty box or click on the three dots to open a bigger window. Viewing and Accessing File Shares
Viewing SMB File Shares
To view the SMB file shares that are available for a host:
- From within a project, select Analysis > Hosts from the Project Tab bar. The Hosts page appears.
- Click on the IP address for the host whose SMB file shares you would like to view. The single host page appears.
- Click the File Shares tab. The Notes page appears and shows the notes for the host.
Viewing NFS Exports
To view the NFS Exports that are available for a host:
-
From within a project, select Analysis > Hosts from the Project Tab bar. The Hosts page appears.
-
Click on the IP address for the host whose SMB file shares you would like to view. The single host page appears.
-
Click the File Shares tab. The File Shares page appears and shows the shares available for the host. Viewing Exploit Attempts for a Host To view the exploit attempts that have been made against a host:
-
From within a project, select Analysis > Hosts from the Project Tab bar. The Hosts page appears.
-
Click on the IP address for the host whose exploit attempts you would like to view. The single host page appears.
-
Click the Attempts tab. The Attempts page displays all exploit modules that have been run against the host. Viewing Modules that Are Available for a Host
To view the modules that can be run against a host:
- From within a project, select Analysis > Hosts from the Project Tab bar. The Hosts page appears.
- Click on the IP address for the host whose matched modules you would like to view.
- Click the Modules tab. The Modules page appears and displays all the possible modules that can be run against the host.
Decoding the Module Readiness States
Readiness states analyze the current inputs and known information about the host and a selected module. A readiness state is then displayed to indicate module viability when used against the host. There’s a hierarchical order to the states.
- Ready for Test - Indicates all required options have defaults to target the host.
- Requires Credentials - Indicates the module requires credentials to target the host.
- Missing Required Options - Indicates the module requires options not available in the project.
Various options may be required to successfully configure a module.
Example options a module may require:- TARGETURI - Many web applications or network services have do not have a default installation URI.
- COOKIE - Authenticated modules may require a user provided custom web
cookievalue. - SECRET/SALTENC - Modules may rely on previously gathered information such as a common secret key or salt value used during encryption of artifacts.
- Missing Compatible Payload - Indicates the module is not compatible with configured payload options. (Only applies when payload filtering is configured for the view.)
- Requires Session - Indicates the module can be used only if a session exists on the host.
- Needs target action - Indicates the module requires action on the target to be used against the host.
Actions vary from simple tasks like a user opening an email to more complex actions such as specific admin function to occur in the targeted application before module delivered code would launch. - Module not evaluated - Indicates the module was not evaluated for the host. Only
exploitmodules are currently evaluated.