The Campaign Page
Campaign Dashboard
The Campaign Dashboard contains the interfaces and tools that you need to set up social engineering campaigns. It provides access to the campaigns, target lists, and resource files that are in a project.
To learn how to create a campaign, visit Create a New Campaign.
Campaign Tasks Bar
When you access the Campaign Dashboard, you will see the Campaign Tasks bar below the main Tasks bar. Each tab in the Campaign Tasks bar represents a major section of functionality within social engineering. Click on the tabs to switch between the campaign configuration, campaign management, and campaign reusable resources.
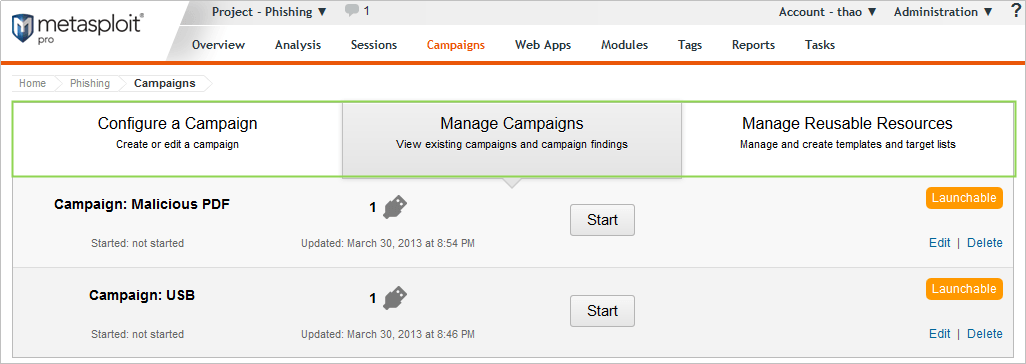
The Campaign Tasks bar contains the following tabs:
- Configure a Campaign - Displays the campaign editor. Use the campaign editor to create new campaigns.
- Manage Campaigns - Shows a list of campaigns that are currently in the project. Next to each campaign listing is a set of action links. Use these action links to edit, delete, reset, preview, and start/stop a campaign.
- Manage Reusable Resources - Provides a management interface for reusable campaign resources, such as email templates, web page templates, target lists, and malicious files.
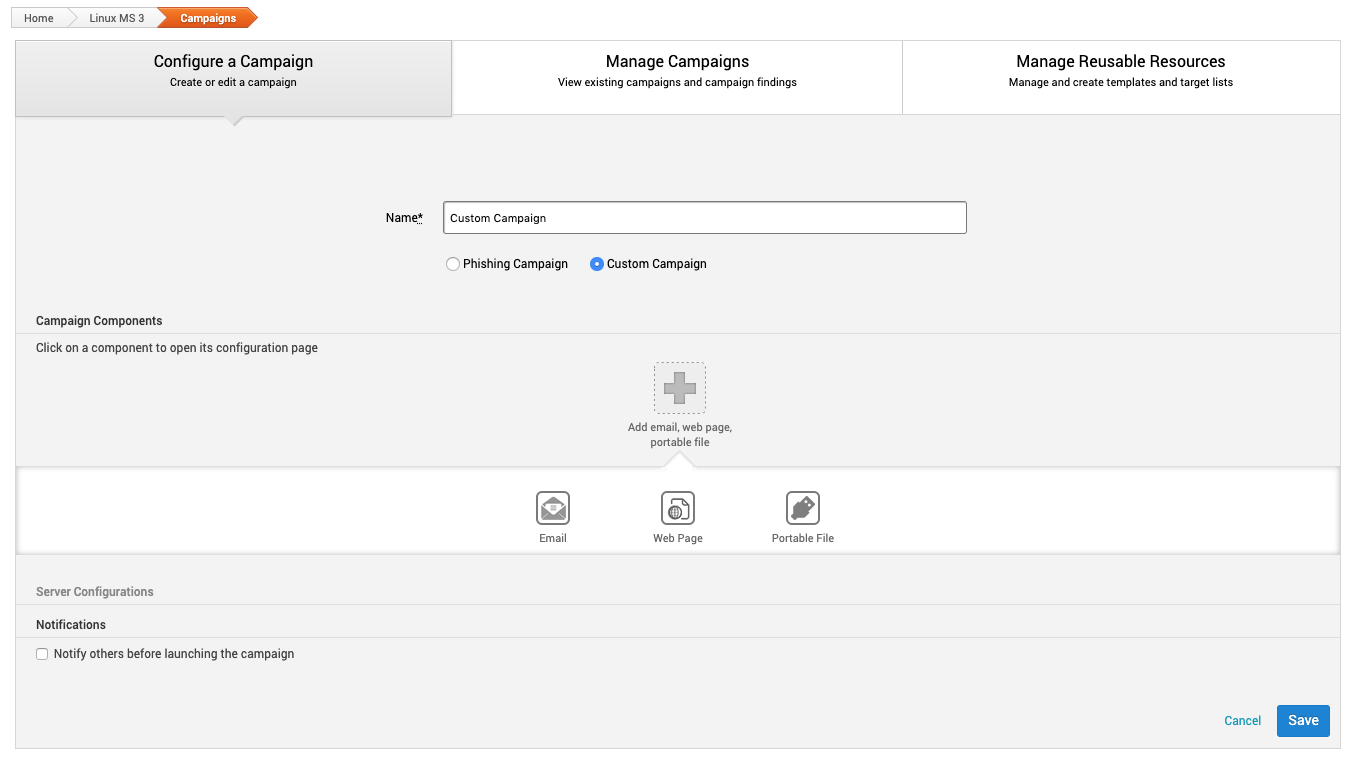
Configure a Campaign
The Configure a Campaign page contains the following settings and options:
- Name - Give your campaign a name. A name is required to save the campaign.
- Phishing Campaign - Run a standard phishing campaign.
- Custom Campaign - Create a campaign that uses a combination of web pages, emails, and files.
Phishing Campaign Components
These are the components for a standard phishing campaign.

Email Campaign Component
There are two screens for configuring the campaign email:
- General
- Content
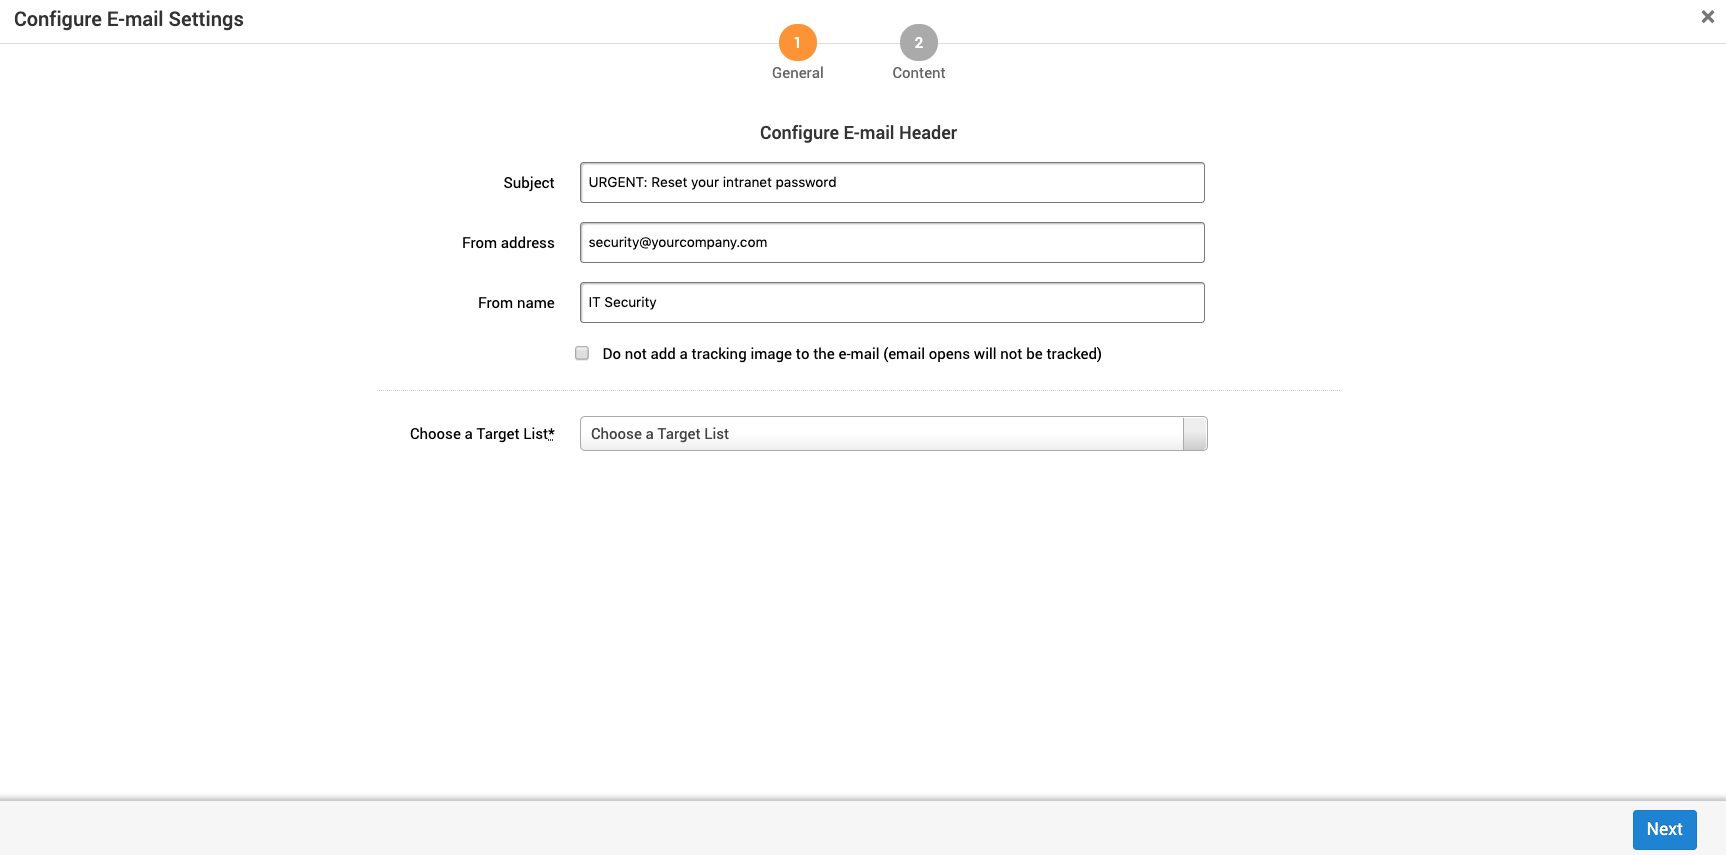
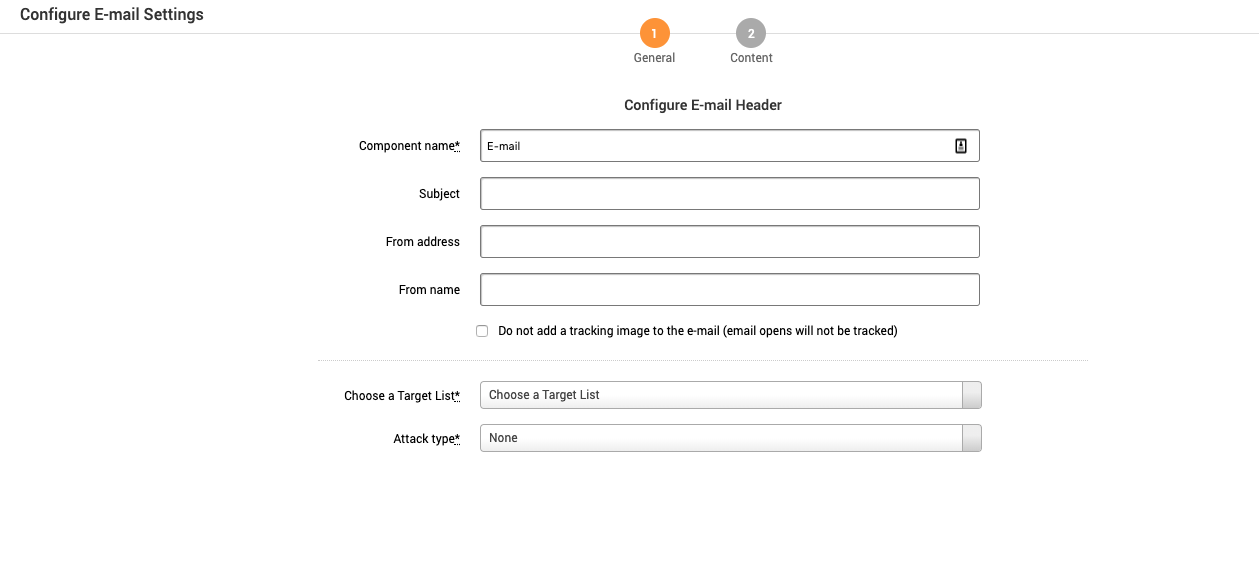
The Configure Email screen has the following general settings:
- Subject -Email subject for the recipient.
- From address - The email address the recipient will see.
- From name - The name the recipient will see in the from area.
- Do not add tracking - If enabled, emails that are opened will not be tracked.
- Choose Target List - The list of recipients to include in the campaign. To use a CSV, the headings must match the following:
- email_address
- first_name
- last_name
To learn more about target lists, see Managing Target Lists.
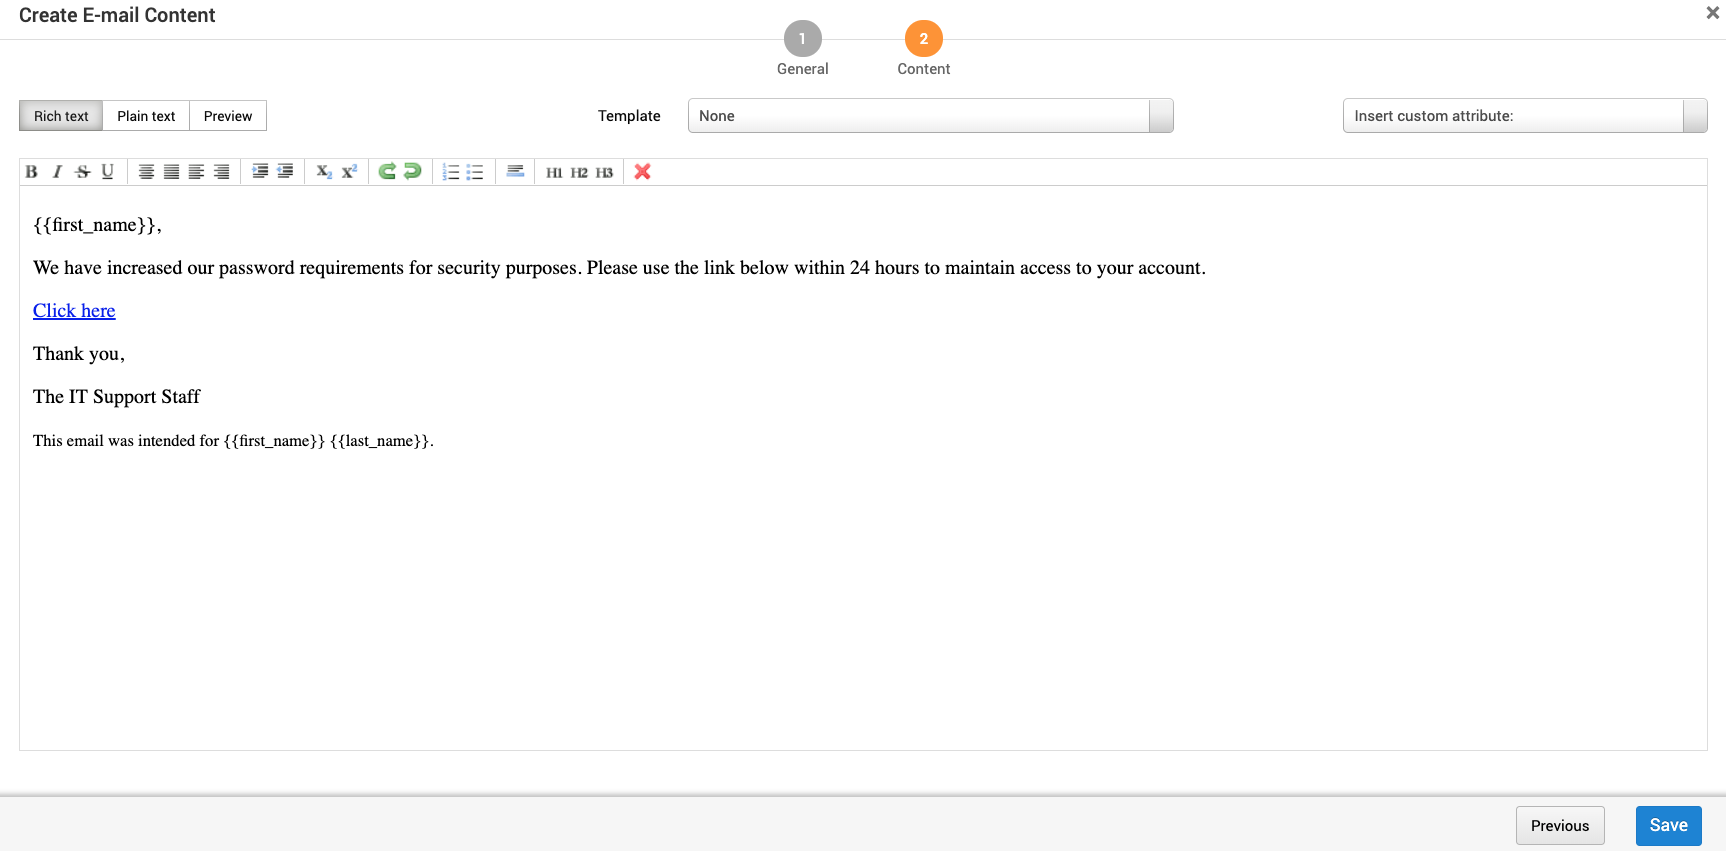
The Create Email Content screen contains:
- Rich Text mode - Create the email content without knowing how to code.
- Plain Text mode - Create the content with an HTML editor.
- Preview mode - View an approximation of what the email will look like. This can vary depending on email client and browser.
- Template - A reusable HTML shell that contains a boilerplate can be shared between campaigns in a project. You can create and use a template to quickly generate web page or email content for a campaign. Add templates under Manage Reusable Resources.
- Insert custom attribute - Add a custom attribute such as
email_addressthat is replaced with a per target value during email generation.
Landing Page Campaign Component
There are two screens for configuring the landing page:
- Settings
- Content
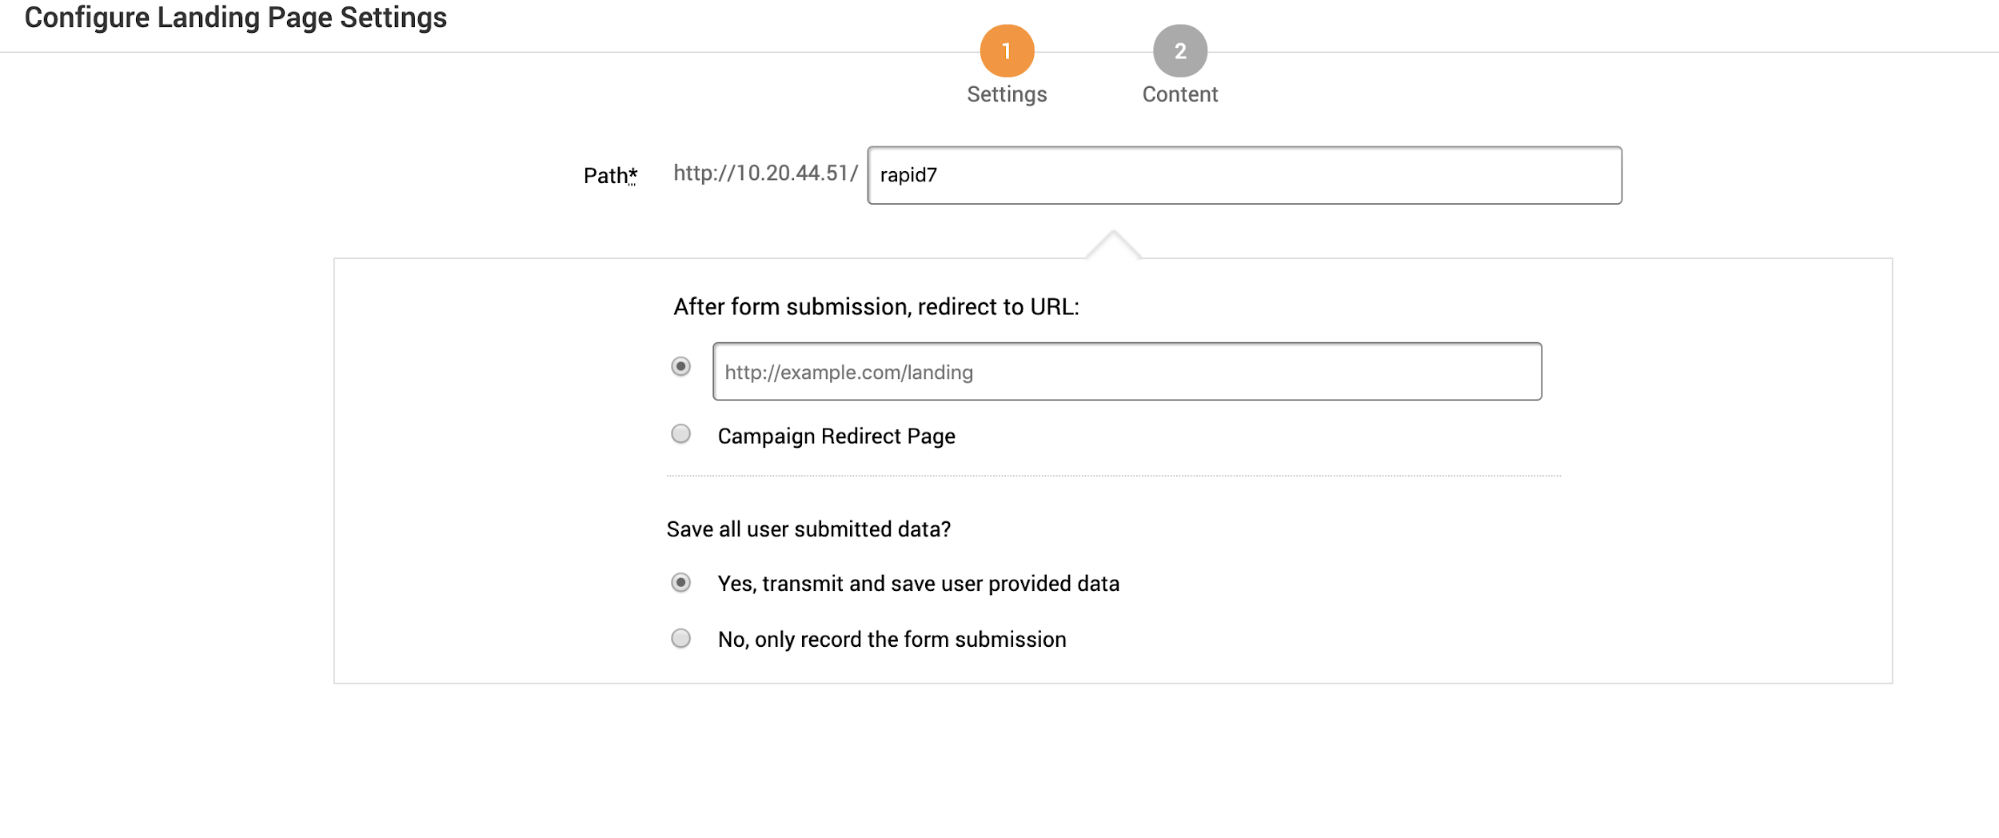
The Landing Page Settings screen has the following options:
- Path - Website URL
- After form submission, redirect to URL:
- Redirect to a custom URL.
- Redirect to page standard Metasploit Pro page. This page cannot be edited.
- Save all user submitted data?
- Save any data provided by the user. This can be username, password or other information entered on the site.
- Only record the information entered in the forms.
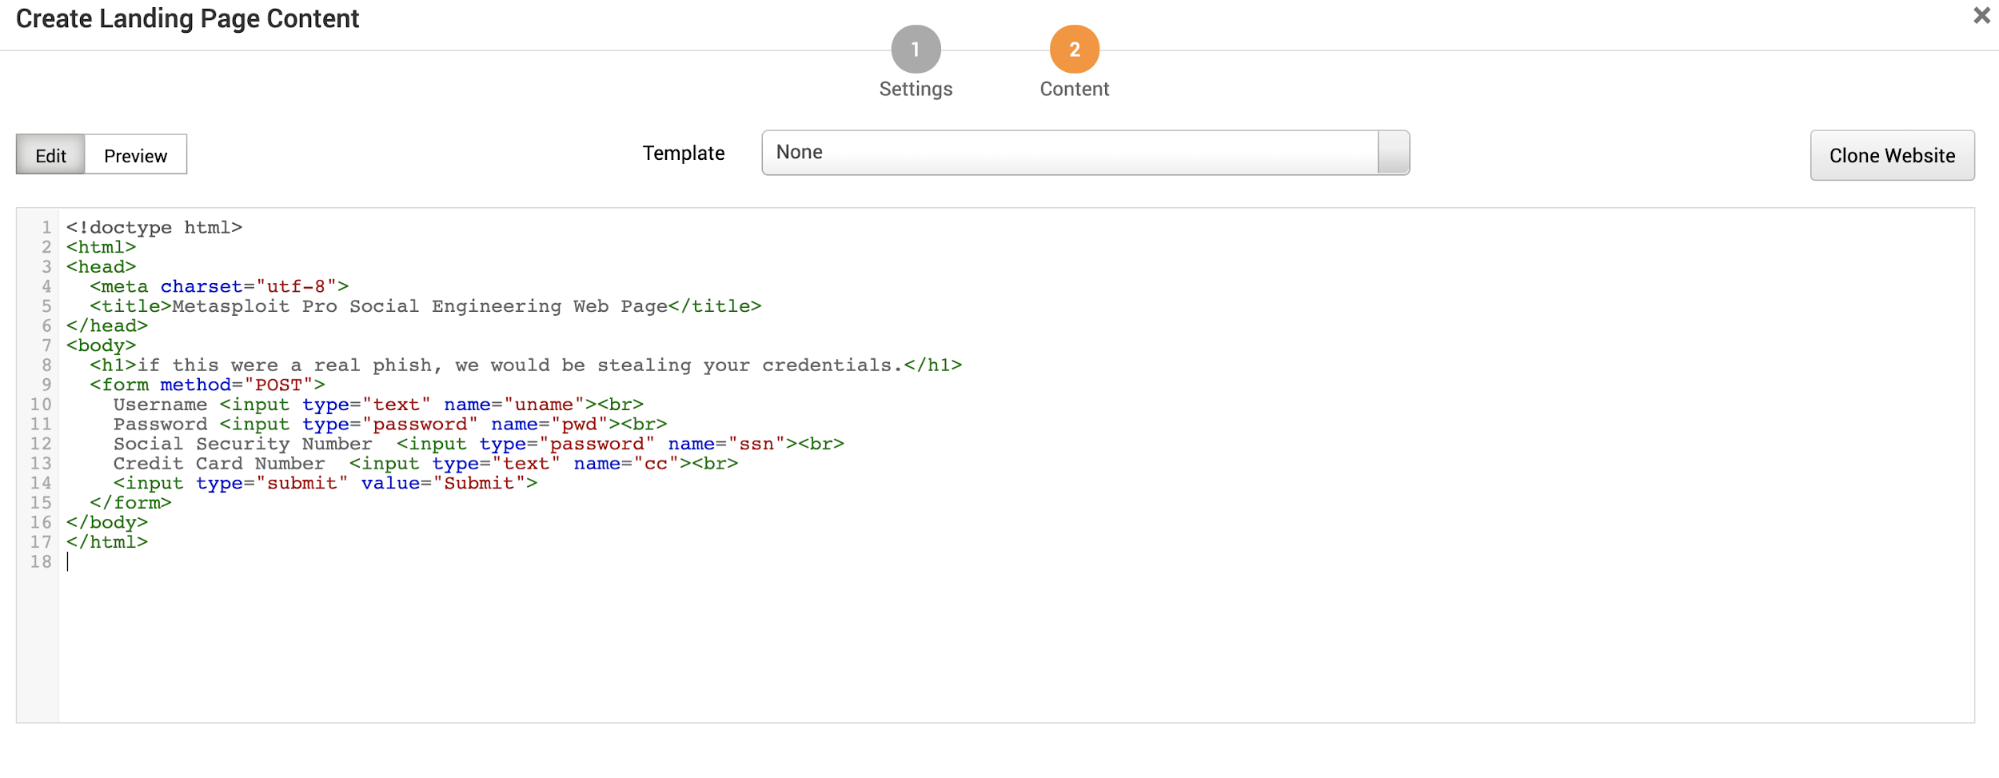
The Landing Page Content screen has the following options:
- Edit mode - Edit the landing page using HTML.
- Preview mode - Display an approximation of what the landing page will look like.
- Template - Use an existing template. Add templates under Manage Reusable Resources.
- Clone Website - Clone a website to use as a landing page. Use this to clone your existing landing page.
- URL to clone - URL to copy
- Strip JavaScript - When cloning remove JavaScript.
- Set referrer - A header that identifiers the address of the webpage. The webpage can see where the request originated.
- Set user agent - A request header that contains a string that allows the network to identify the operating system, application type and software version of the requesting agent.
- Resolve relative URLs - A relative URL is only linked from that page. For example a “Back to Top” link or section links.
Redirect Page Campaign Component
This section only becomes available after the landing page has been fully configured.

The Redirect Page Content screen contains the following setting:
- Path - The path the redirect page is located. This is where the email recipient will be redirected to after submitting the form.
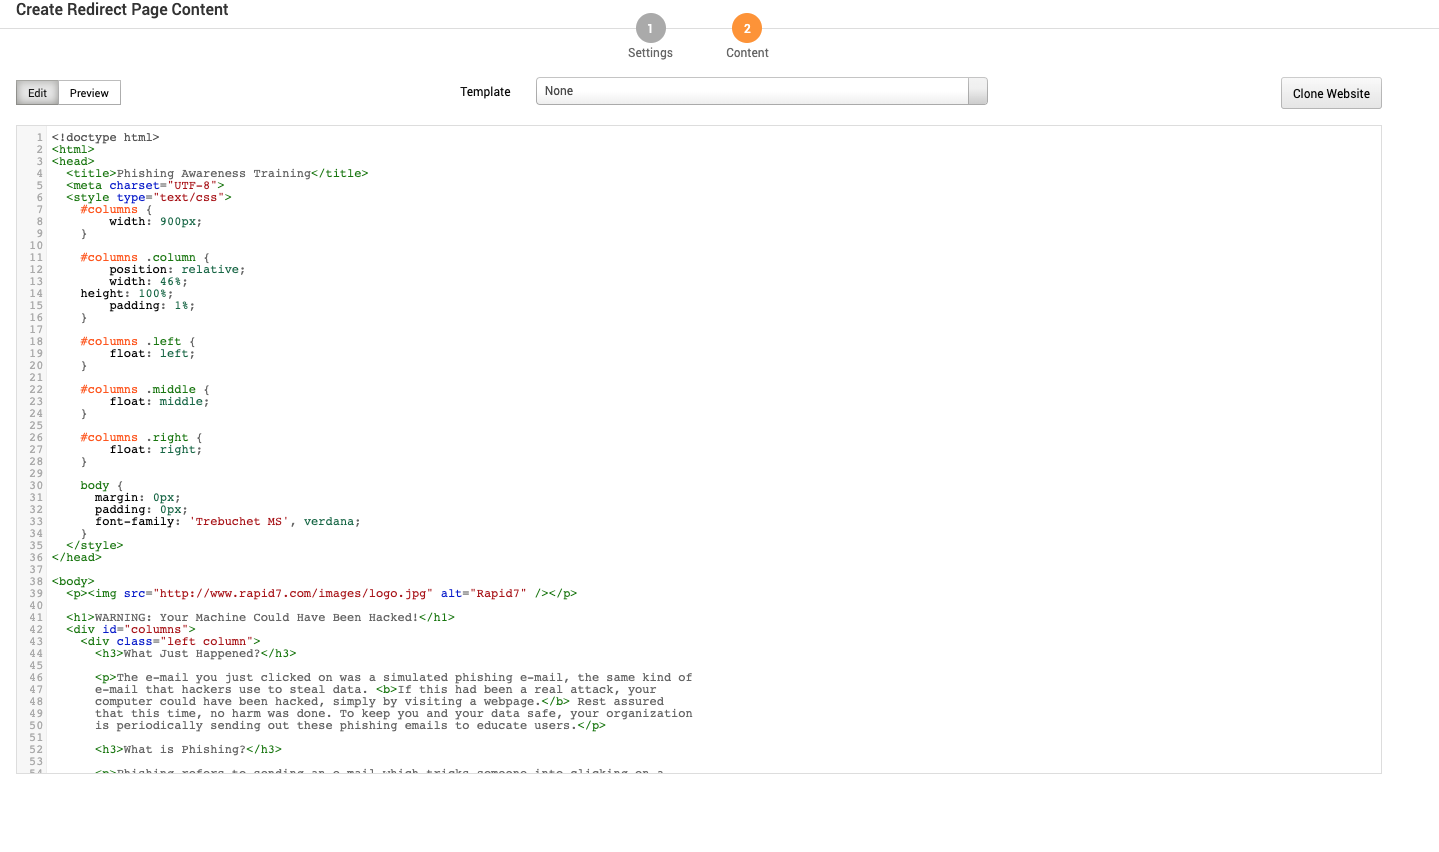
The Redirect Page Content contains the following options and settings:
- Edit - Edit the HTML of the site recipients are redirected to after entering form information.
- Preview Preview the entered HTML.
- Template - Use an existing webpage template.
- Clone Website - Clone a website to use as a landing page. Use this to clone your existing landing page.
- URL to clone - he website you want to spoof
- Strip JavaScript - Remove JavaScript when cloning.
- Set referrer - A header that identifies the address of the webpage. The webpage can see the origin of the request.
- Set user agent - A request header containing a string that allows the network to identify the operating system, application type, and software version of the requesting agent.
- Resolve relative URLs - A relative URL is only linked from that page. For example, a “Back to Top” link or section links.
Custom Campaign Components
To add multiple web pages or create a USB drop, create a custom campaign. To add components, click the plus sign.
Custom Campaign Email
There are two screens for configuring the custom campaign email:
- General
- Content
The Custom Campaign Email screen has the following general settings:
-
Component Name - Automatically populated based on the component chosen. Do not edit this name.
-
Subject - Email subject for the recipient.
-
From address - Email address the recipient will see.
-
From name - The name the recipient will see in the from area.
-
Do not add tracking - If enabled, emails that are opened will not be tracked.
-
Choose Target List -The list of recipients to include in the campaign. To use a CSV, the headings must match the following:
- email_address
- first_name
- Last_name
To learn more about target lists, see Managing Target Lists.
-
Attack Type - If the email does not need to be malicious, it can be left as none.
- None
- Attach File
The following options are only available if “Attack Type” is “Attach File”.
- Zip Attachment - If the file attached should be zipped.
- Attachment File Name - The name of the attached file.
- File generation type- Type of file attachment.
- .exe agent - Metasploit Pro will generate a file to be attached once the campaign is launched.
- File format exploit - Choose from a list of exploits that target file types such as .doc or .pdf.
- User supplied file - Upload your own file. If you need a file, you can use the Payload Generator .

The Create Custom Email screen has the following content settings:
- Rich Text mode - Rich text editors are also known as WYSIWYG editors. The rich text editors provides a way to customize email without knowing how to code.
- Plain Text mode - HTML editor.
- Preview mode - An approximation of what the email will look like. This can vary depending on email client and browser.
- Template - A reusable HTML shell that contains boilerplate can be shared between campaigns in a project. You can create and use a template to quickly generate web page or email content for a campaign. Add templates under Manage Reusable Resources.
- Insert custom attribute - Add a custom attribute such as
email_addressthat is replaced with a per target value during email generation.
Custom Campaign Web Page
There are two screens for configuring the custom campaign web page:
- Settings
- Content
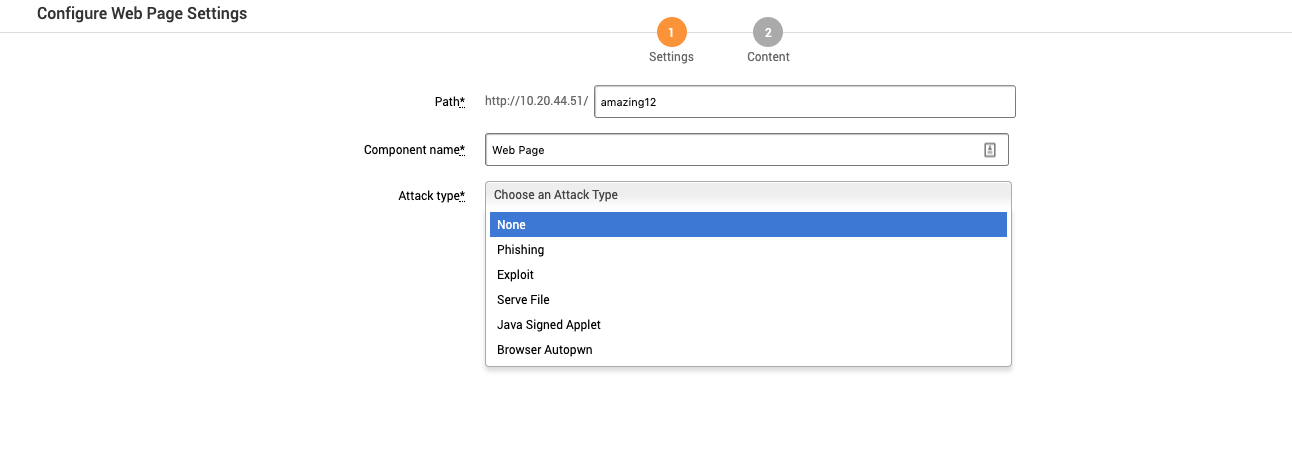
The Configure Web Page screen has the following settings:
- Path - Server port.
- Component Name - This is automatically populated based on the component chosen. Do not edit this name.
- Attack Type - The type of attack the web page will use. Each attack type has its own configuration options. For an explanation of each attack type see About Social Engineering.
- Phishing
- Exploit
- Serve File
- Java Signed Applet
- Browser Autopwn
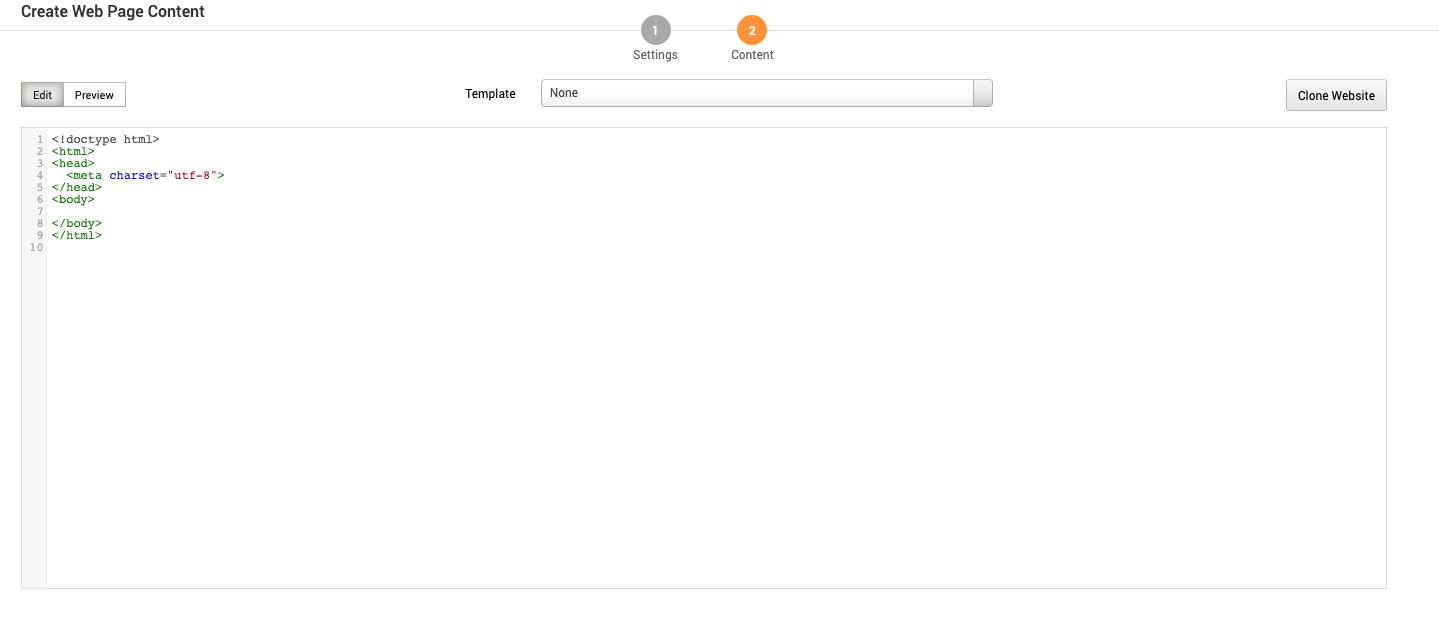
The Create Web Page Content screen has the following settings:
- Edit - Edit the landing page using HTML.
- Preview - An approximation of what the landing page will look like.
- Template - Use an existing template. Add templates under Manage Reusable Resources.
- **Clone Website - **Clone a website to use as a landing page. Use this to clone your existing landing page.
- URL to clone - URL to copy
- Strip JavaScript - When cloning remove JavaScript.
- Set referrer - A header that identifiers the address of the webpage. The webpage can see where the request originated.
- Set user agent - A request header that contains a string that allows the network to identify the operating system, application type and software version of the requesting agent.
- Resolve relative URLs - A relative URL is only linked from that page. For example a “Back to Top” link or section links.
Custom Campaign Portable File
A portable file can be loaded on a USB drive for someone to plug into their computer.
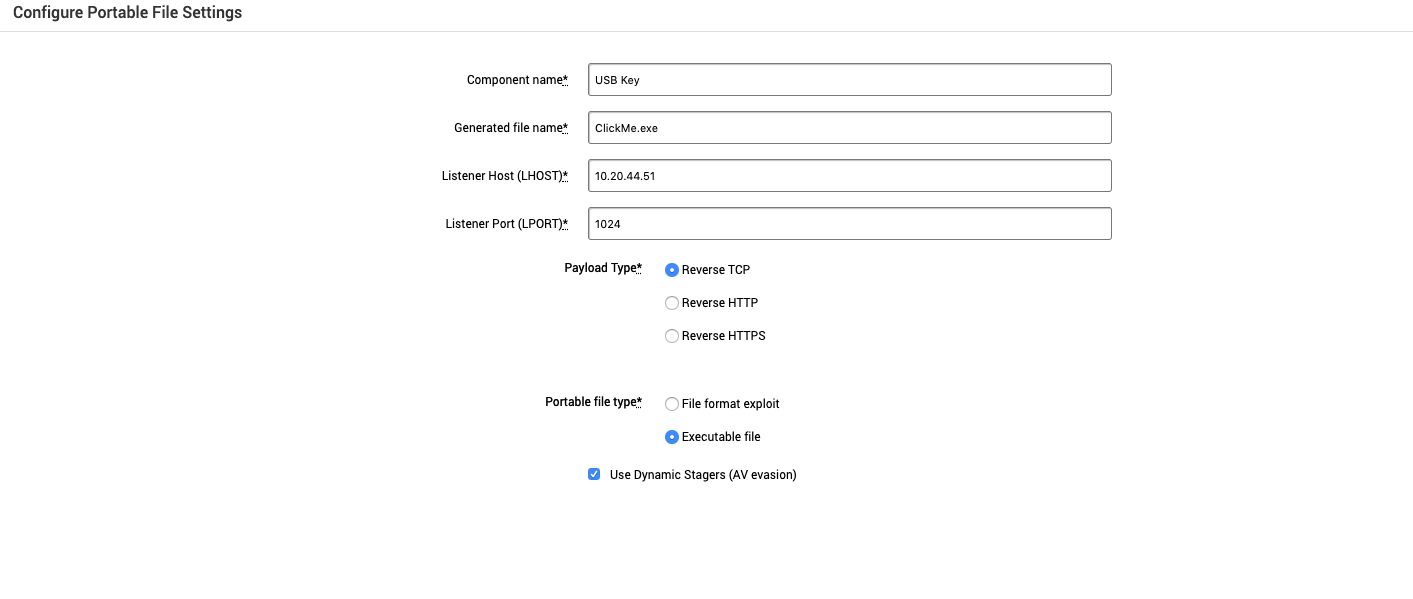
The Configure Portable File Settings screen has the following fields and options:
- Component Name - This is automatically populated based on the component chosen. Do not edit this name.
- Generated file name - The name of the downloaded file generated.
- Listener Host (LHOST) - Listener host being used to wait for the payload to be triggered.
- Listener Port (LPORT) - Listener port being used to wait for the payload to be triggered.
- Payload Type - The type of payload the generated file will use.
- Reverse TCP - The target host will open a port to the listener host.
- Reverse HTTP - The target host makes an HTTP request to the listener host.
- Reverse HTTPS - The target host makes an HTTPS request to the listener host.
- Portable File Type - The type of portable file.
- File format exploit - Exploit a target host by specific file types such as
.docor.pdf. - Executable file - Exploit a target host using a
.exefile.
- File format exploit - Exploit a target host by specific file types such as
- Use Dynamic Stagers (AV evasion) - Evade antivirus detection.
Server Configurations
Social engineering campaigns require that you have a server available to send emails or host the landing page.
E-mail Server
Configure an email server to send emails.
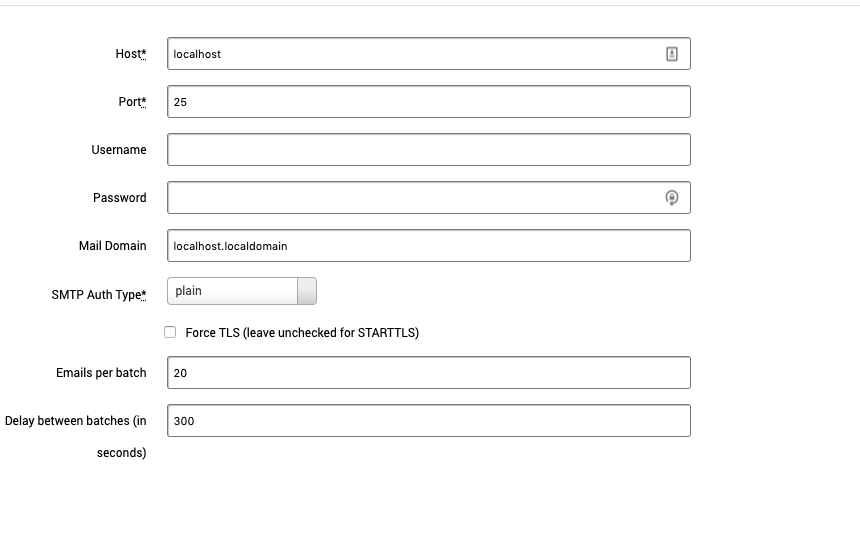
The Email Server Configure screen has the following settings:
- Host - Server host address
- Port - Server port
- Username - Email server username
- Password- Email server password
- Mail Domain - The domain name of the email. For example, mail.mybusiness.com
- SMTP Auth Type
- plain
- login
- cram_md5
- Force TLS (leave unchecked for STARTTLS)
- Emails per batch - Number of emails to send in a batch
- Delay between batches - Delay between batches in seconds
Web Server
Configure a web server to host the landing page.
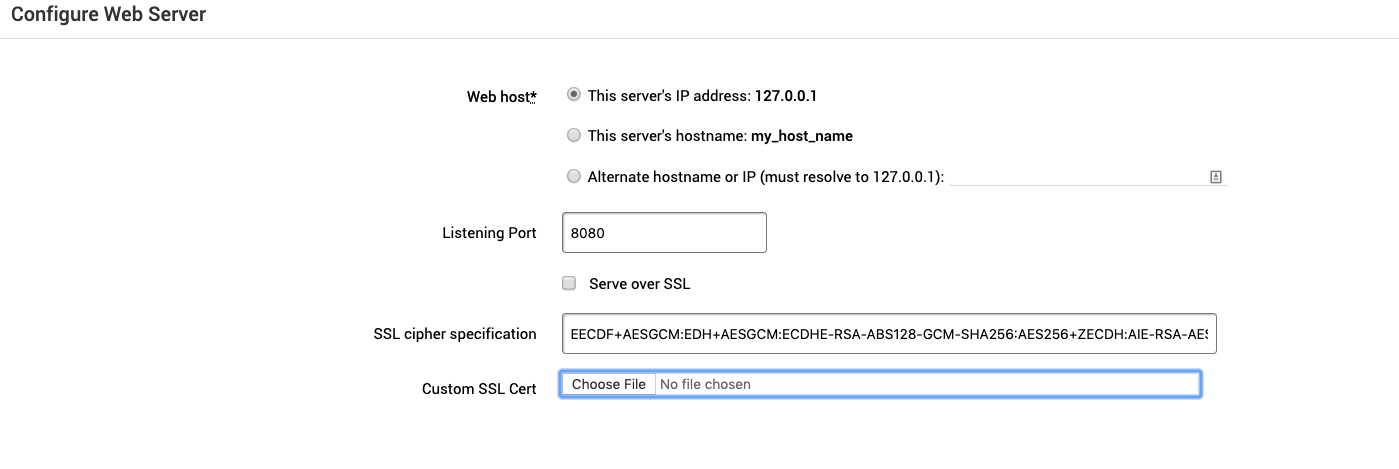
The Configure Web Server screen has the following settings:
- Web host - Choose a web server host.
- Listening Port - Enter a port for the web host to listen on.
- Server over SSL - Enable if the server is hosted using SSL.
- SSL cipher specification - The default specification can usually be left as is. See https://www.ibm.com/support/knowledgecenter/en/SSEQTJ_8.5.5/com.ibm.websphere.ihs.doc/ihs/rihs_ciphspec.html to learn more about configuring a cipher.
- Custom SSL Cert - Upload your custom SSL certificate .
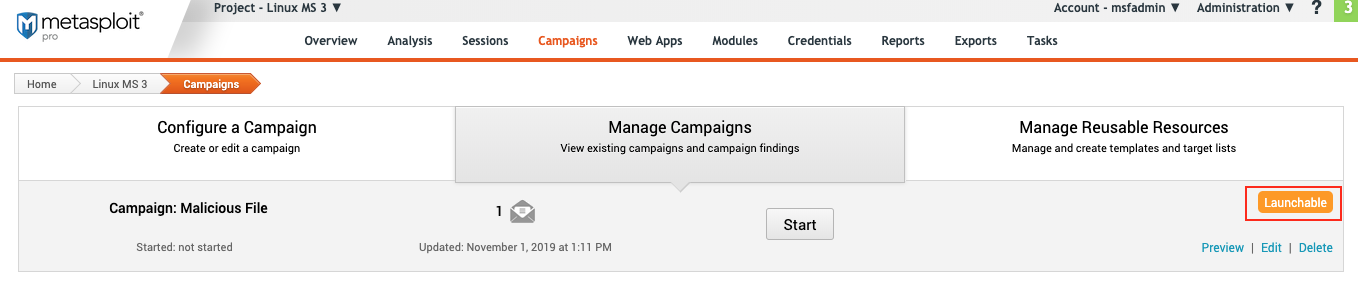
Manage Campaigns
Manage any existing campaigns. After a campaign is named, it will appear on the “Manage Campaigns” screen.
On the Manage Campaigns page, you can find:
- Campaign Name - Name of the campaign from the create campaign step.
- Date Started - The date the campaign was launched.
- Type - The type of campaign. The campaign type represented by an email, usb or webpage icon. If there is more than one type in a campaign, they will be listed in execution order.
- Last Updated - The date the campaign was last updated.
- Campaign State - The current status of the campaign.
- Action Links - Campaign actions available.
Campaign States
The state describes the current status of a campaign.
The following states are available for a campaign:
- Unconfigured - The campaign does not contain any components or contains components that have not been configured.
- Preparing - The campaign is getting ready to run.
- Launchable - The campaign is ready to be launched.
- Running - The campaign is online.
- For campaigns that have a web page, this means that the web page is online and accessible to target machines that can reach the Metasploit instance.
- For campaigns that contain an email, this means that Metasploit Pro has attempted to send an email to the target list through your mail server.
- For campaigns that contain portable files, this means that the handler is ready and waiting for incoming connections from target machines.
- Finished - The campaign is no longer active.
- For campaigns that have a web page, this means that the web page is no longer accessible and cannot be viewed by anyone.
- For campaigns that contain portable files, this means that the handler is no longer listening for incoming connections.
Action Links
Each campaign has a set of action links that are available for you to use. Depending on the state, certain links are available.

The following action links are available to each campaign:
- Start - Launch the campaign.
- Stop - Stop the campaign.
- Preview - Generate a preview of an email and web page.
- Reset - Reset the statistics and data in a campaign.
- Edit - Edit the current configuration for campaign components.
- Delete - Remove the campaign and its data from the project.
- Findings - View project findings.
Manage Reusable Resources
Manage any templates, file or email lists that can be reused for campaigns.
Reusing Resources
Email and web pages can not be reused. A template can be created to reuse campaign resources again.
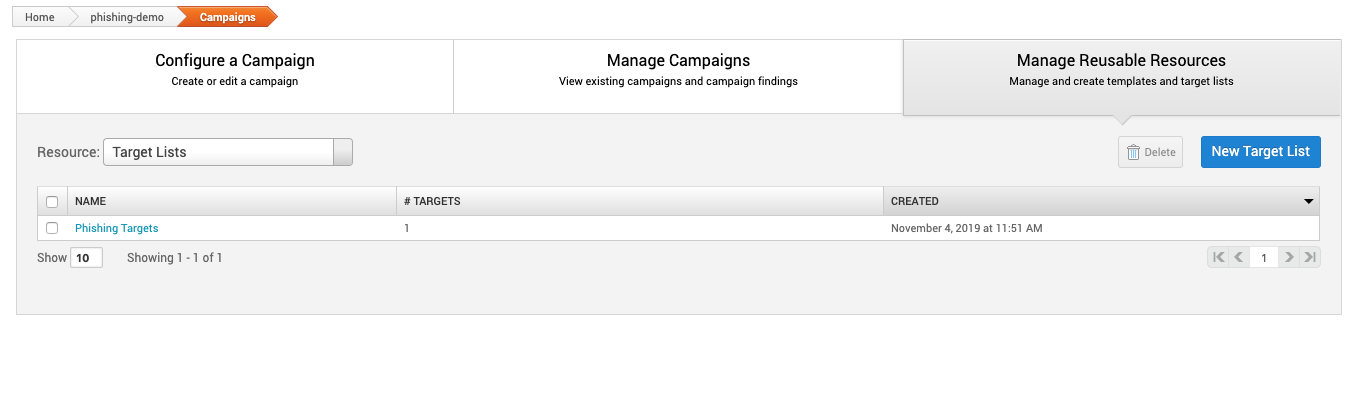
The following resources are available to each campaign:
- Resource
- Target Lists - A list of email address. See Managing Target Lists for more information.
- Email Templates - A list of email templates.
- Web Templates - A list of html web page templates.
- Malicious Files - A list of malicious files uploaded.
- Delete - Delete the selected resource.