Uploading Custom SSL Certificates
Using SSL is one way that you can gain trust from a site visitor. SSL authenticates and verifies the identity of the site that the visitor is trying to access, and it encrypts any data exchanged with the site. This just means that a secure link has been established for the session and the visitor can trust the data transmitted by the site. All secure sessions use an SSL certificate, which is usually digitally signed by a trusted authority and used to let a web browser know that the identity of the domain has been validated.
When you build a social engineering campaign, you can configure the web server to use SSL. If SSL is enabled, the Metasploit web server uses a self-signed certificate, which unfortunately, shows up in the browser as being untrusted. To make your web page appear to come from a trusted source, you will need to use a valid SSL certificate instead of the self-signed Metasploit certificate.
You can obtain an SSL certificate from a certification authority (CA). Please make sure that it is an X.509 certificate that has a .pem file extension.
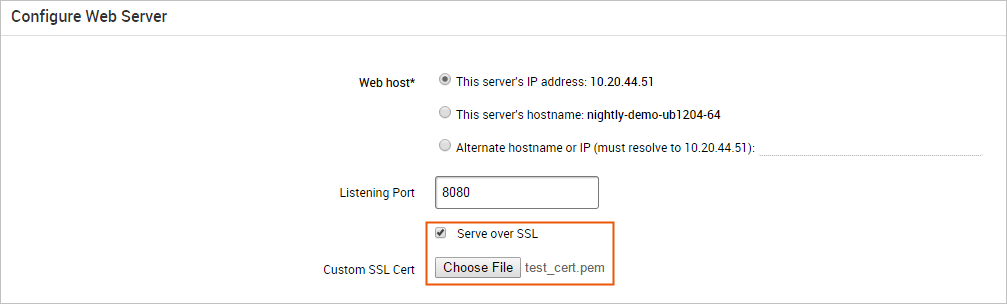
When you configure the web server for a social engineering campaign, there is an option to upload a custom SSL certificate. You simply need to enable the Serve over SSL option and upload the SSL certificate you want the server to use, as shown below:
To upload and use a custom SSL certificate:
- From within a project, select Campaigns.
- When the Campaigns page appears, go to the Configure a Campaign tab to create a new campaign or go to the Manage Campaigns tab to choose an existing campaign.
- From the campaign configuration form, click the Web Server icon.
- From the Configure Web Server form, enable the Serve over SSL option.
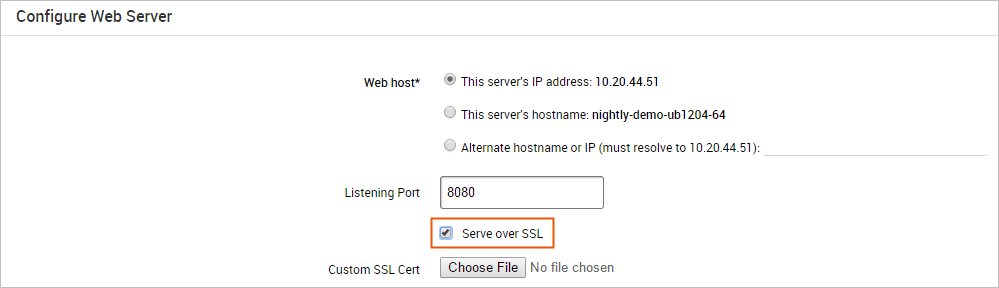
- Click the Choose File button next to the Custom SSL Cert option.
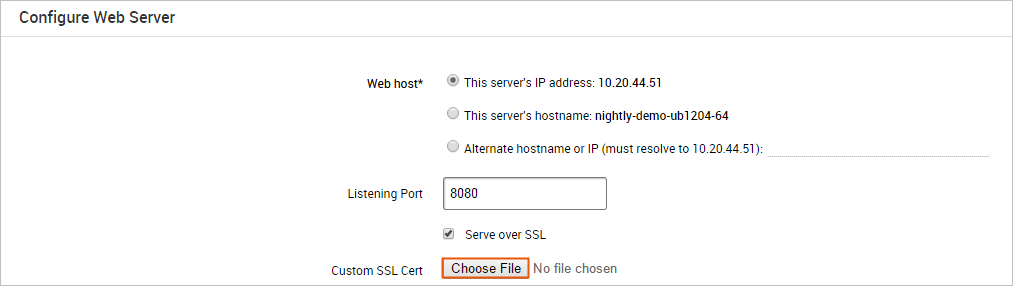
- Browse to the location of the X.509 certificate and select it.
- Click Save to close the web server configuration page.
To test the certificate, you will need to launch the campaign and go to the URL you set up for the web page. The URL will look something like this: https://10.20.44.51:8080/landing . When the web page appears, verify that the SSL certificate that appears is the one that you uploaded.
If you do not know the URL for the web page, do not launch the campaign yet. You will need to find the web page’s name, URL path, and the web server’s listening port.
The first thing you need to do is go to the web page’s settings to view its URL path. To access the web page’s settings, click on the Web Page icon located on the campaign configuration page. The Configure Web Page Settings form appears, as shown below:
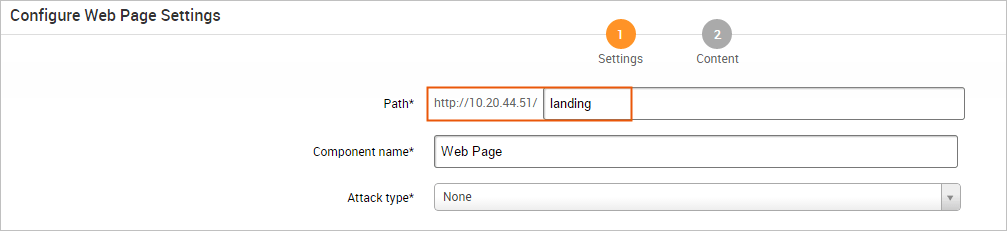
The Path field shows the name and path that you assigned to the web page. Now that you know the path and name, you need to go to the web server’s settings to find its listening port. To access the web server’s settings, click on the Web Server icon located on the campaign configuration page.

Now that you have the web page name, path, and web server port, you can figure out the URL that you can use to test the web page. The resulting URL will be something like https://10.20.44.51:8080/landing .