Validating Vulnerabilities Discovered by Nexpose
The Vulnerability Validation Wizard provides a guided interface that walks you through pulling Nexpose vulnerabilities data into a project and exploiting them.
There are a couple of ways that you can bring Nexpose vulnerability data into a project through the Vulnerability Validation Wizard:
- Importing Existing Sites - You can choose multiple sites from which you want to import hosts. Metasploit Pro pulls all of the hosts and their associated vulnerability information from the selected sites and stores their information in a project. Metasploit Pro only imports vulnerabilities for which it has matching exploit modules. For more information on how to import and exploit vulnerabilities with the Vulnerability Validation Wizard, jump to Importing and Exploiting Imported Nexpose Data.
- Running a Nexpose Scan - You can specify the hosts that you want to scan for vulnerabilities. Metasploit Pro creates a new site on Nexpose and adds the hosts to them. Nexpose scans the hosts for vulnerabilities. After the Nexpose scan completes, Metasploit Pro imports the vulnerabilities for which it has matching exploit modules. For more information on how to scan for vulnerabilities and exploit them with the Vulnerability Validation Wizard, jump to Scanning Nexpose Assets and Exploiting Potential Vulnerabilities. Importing and Exploiting Nexpose Vulnerabilities
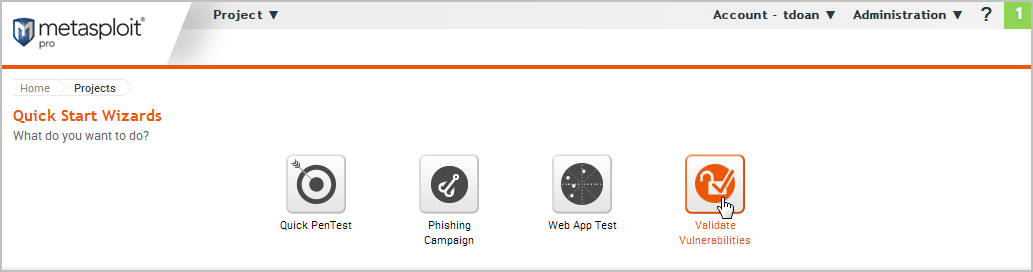
- Log in to the Metasploit Pro web interface.
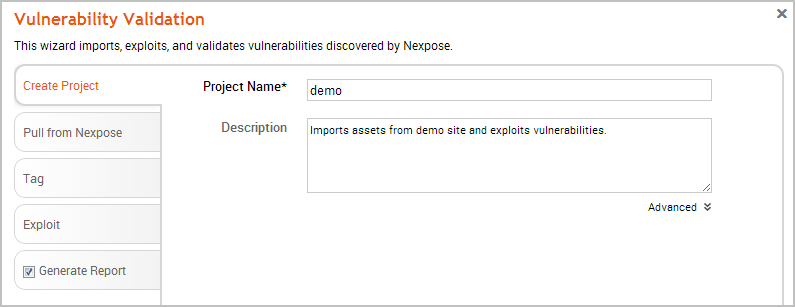
- When the Projects page appears, find the Quick Start Wizards and click on the Validate Vulnerabilities widget. The Validate Vulnerabilities Wizard opens and displays the Create Project page.
- In the Project Name field, enter a name for the project. The project name can contain any combination of alphanumeric characters, special characters, and spaces. You can also provide a description for the project, which typically explains the purpose and scope of the test. This field is optional.
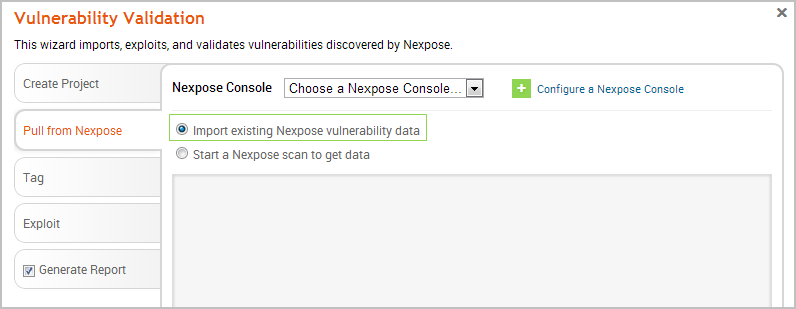
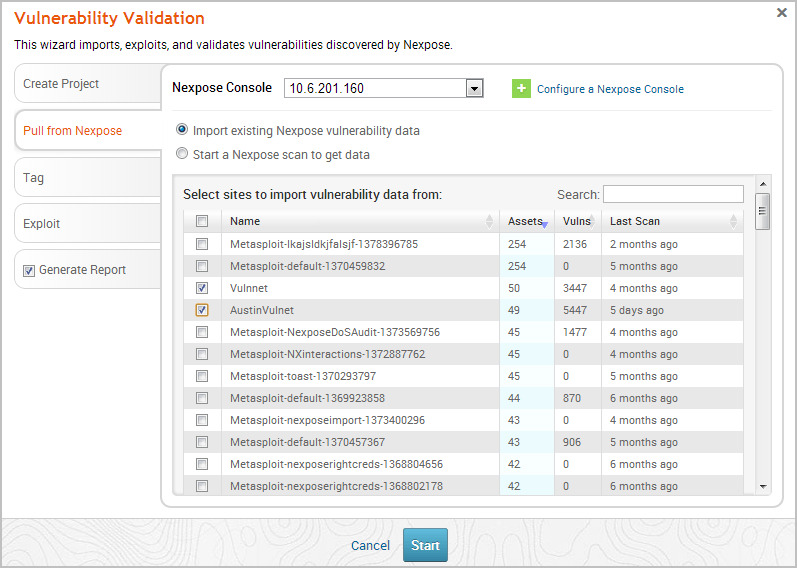
- Click on the Pull from Nexpose tab. The Nexpose Consoles page appears.
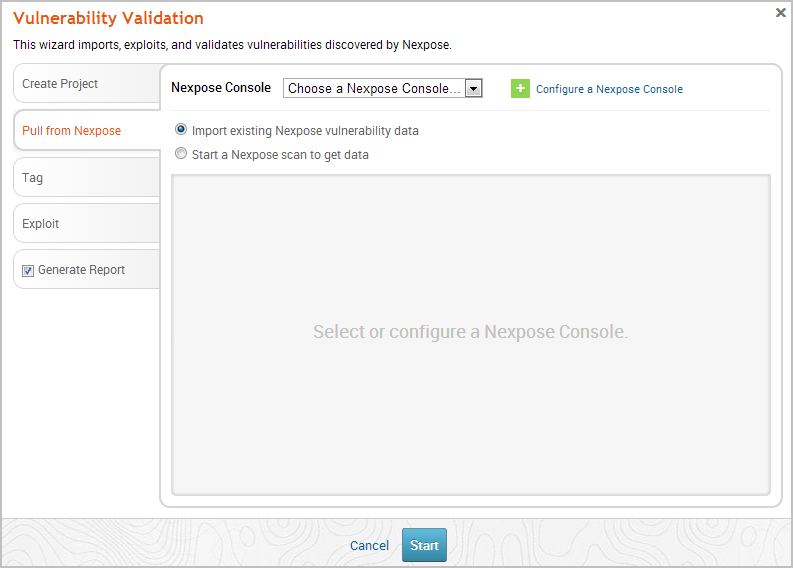
- Verify that the Import existing Nexpose vulnerability data option is selected.
- Click the Choose a Nexpose Console dropdown and select the Nexpose Console from which you want to import sites. After you select a console, the wizard displays the list of sites that you can import.
- From the sites list, select the sites that you want to import into the project. You can use the select all checkbox to choose all of the listed sites, or you can select the sites individually.
Metasploit Pro imports all assets from the site. For each asset, Metasploit Pro pulls and displays the IP address, operating system, MAC address, OS flavor, vulnerability name, and vulnerability references.
- After you select the sites you want to import, click on the Tag tab and select the Tag option.
Tags are a useful tool if you want to easily create Nexpose asset groups in Metasploit Pro. If you do not want to tag assets, go to Step 10.

- Select the Automatically tag by OS option if you want to tag each host with its operating system.
If this option is enabled, Windows hosts will be tagged with os_windows, and Linux hosts will be tagged with os_linux.
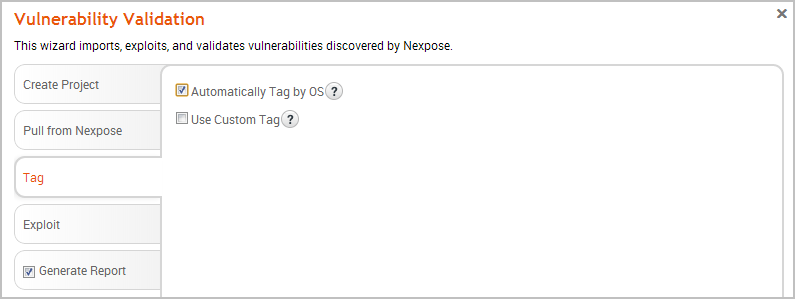
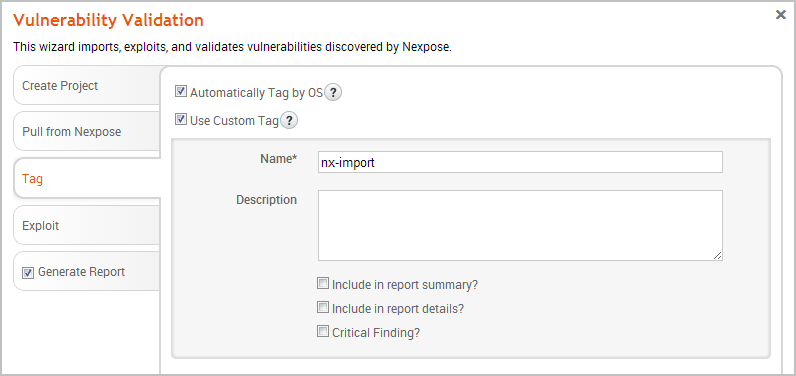
- Select the Use custom tag option if you want to tag each host with a user-defined tag. If this option is enabled, the Vulnerability Validation Wizard displays the fields and options that you can use to define a custom tag.
- After you configure the tagging options, click on the Exploit tab. The Auto-Exploitation page appears.
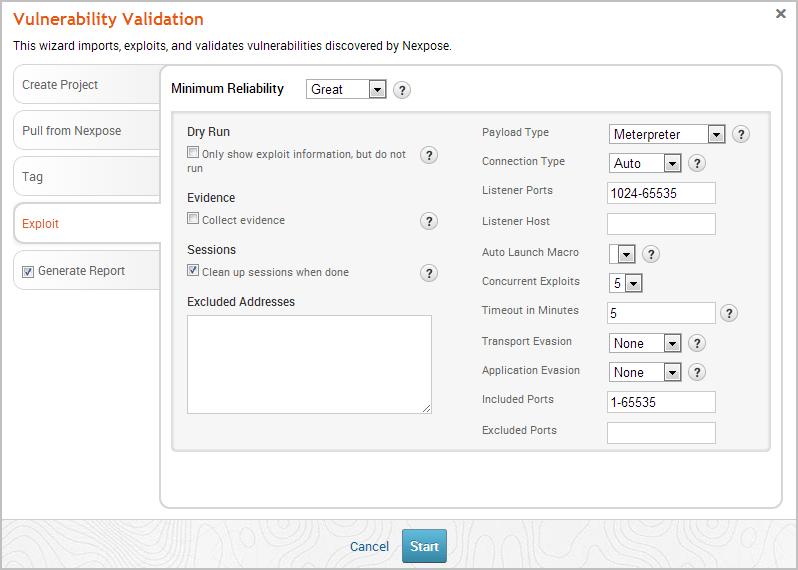
- Click the Minimum Reliability dropdown and choose the module ranking you want to use. You should choose Great or Excellent.
- Click the Generate Report tab if you want to include an auto-generated report at the end of the vulnerability validation test. If you do not want to include a report, deselect the Generate Report option and skip to the last step.
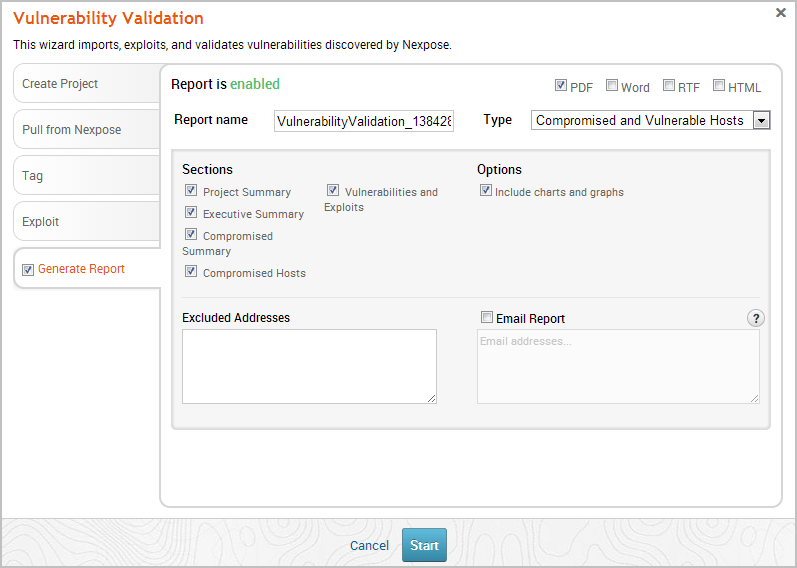
- Enter a name for the report in the Report Name field, if you want to use a custom report name. Otherwise, the wizard uses an auto-generated report name.

- Select whether you want to generate the report in PDF, RTF, or HTML. PDF is the preferred and default format.

- Click the Type dropdown and select the report type you want to generate. You can choose the Audit report or the Compromised and Vulnerable Hosts report.
- From the Sections area, deselect any sections you do not want to include in the report. Skip this step if you want to generate all the report sections.

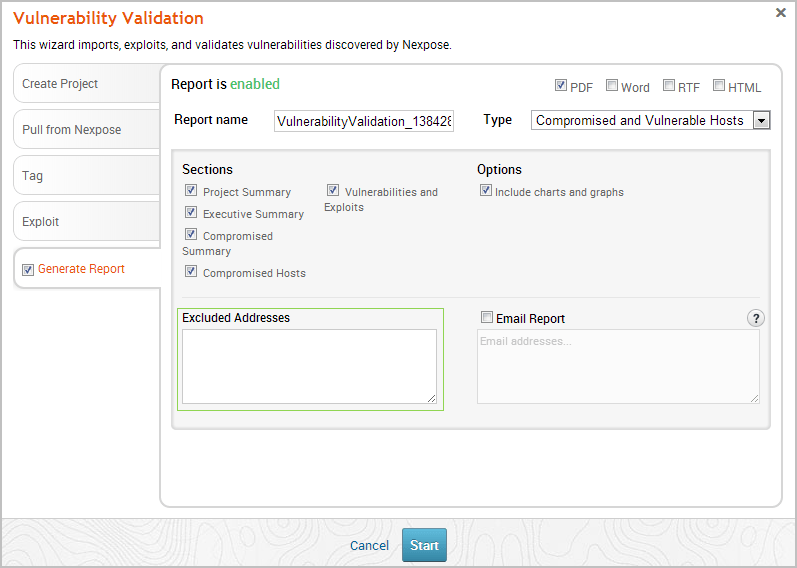
- Enter any hosts, or assets, whose information you do not want included in the report in the Excluded Addresses field. You can enter a single IP address, a comma separated list of IP addresses, an IP range described with hyphens, or a standard CIDR notation.
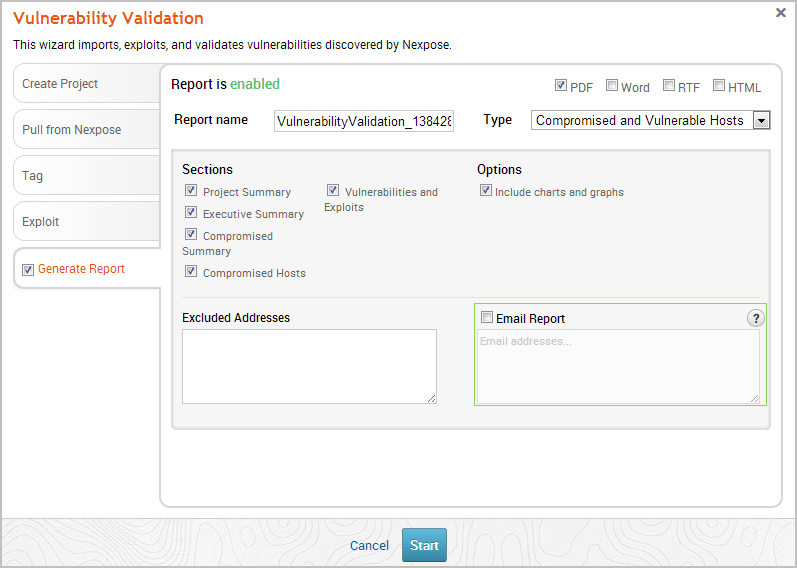
- Select the Email Report option if you want to email the report after it generates. If you enable this option, you need to supply a comma separated list of email addresses.
If you want to email a report, you must set up a local mail server or email relay service for Metasploit Pro to use. To define your mail server settings, go to Administration > Global Settings > SMTP Settings.
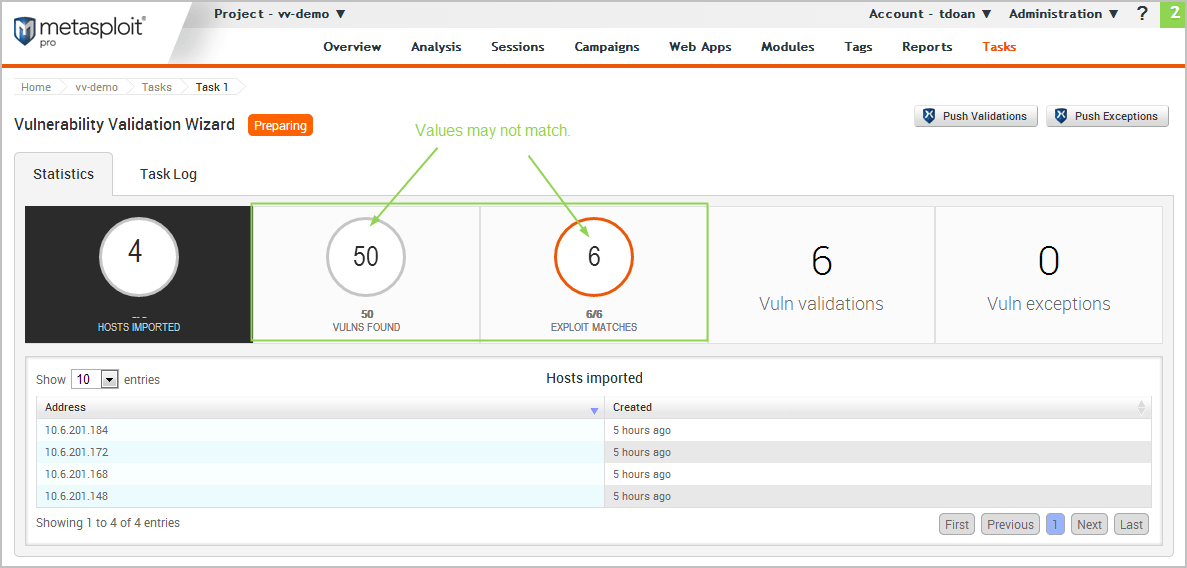
- Click the Launch button. The Findings window appears and shows the statistics for the test.
Matching Metasploit Exploits to Nexpose Vulnerabilities
Metasploit Pro only matches vulnerabilities from Nexpose for which it has remote exploit modules. However, since Nexpose includes all local exploits, auxiliary modules, and browser exploits when it matches vulnerabilities to modules, this number may not match the number of vulnerabilities imported from Nexpose.
This is important to remember when you are looking at the Findings window. You will see a different number of vulnerabilities imported than number of exploit matches.
Scanning Nexpose Sites and Exploiting Vulnerabilities
- Log in to the Metasploit Pro web interface.
- When the Projects page appears, find the Quick Start Wizards and click on the Validate Vulnerabilities widget. The Validate Vulnerabilities Wizard opens and displays the Create Project page.
- In the Project Name field, enter a name for the project. The project name can contain any combination of alphanumeric characters, special characters, and spaces. You can also provide a description for the project, which typically explains the purpose and scope of the test. This field is optional.
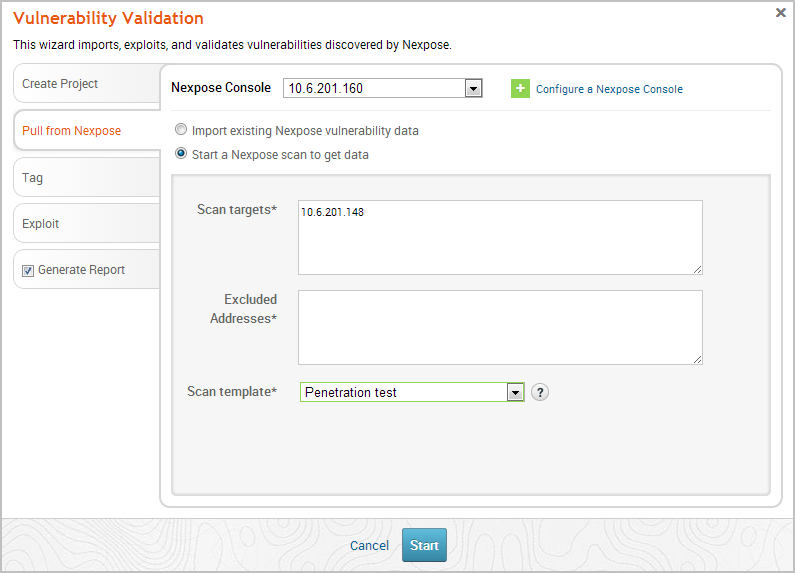
- Click on the Pull from Nexpose tab. The Nexpose Consoles page appears.
- Select the Start a Nexpose Scan to get data option.
- Click the Choose a Nexpose Console dropdown and select the Nexpose Console that you want to use to scan for vulnerabilities. The scan configuration page appears.
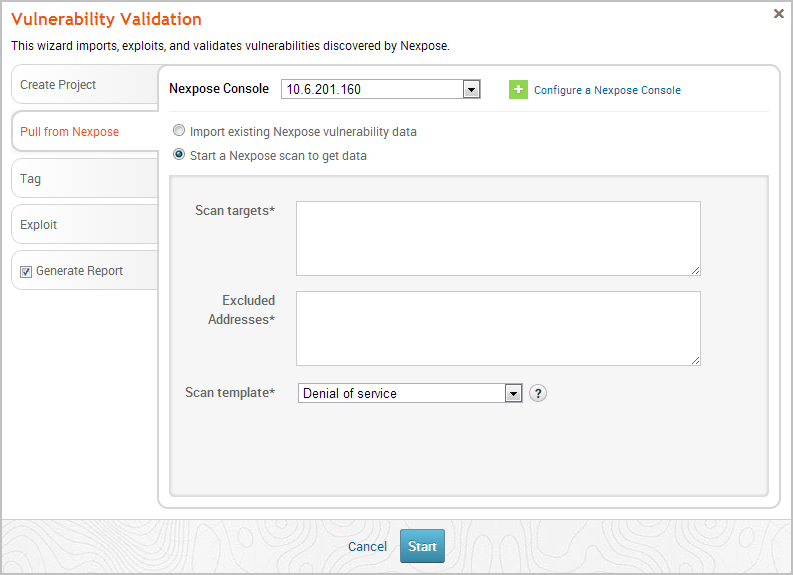
- Enter the host addresses, or assets, that you want to scan in the Scan targets field. You can enter a single IP address, a comma separated list of IP addresses, an IP range described with hyphens, or a standard CIDR notation.

- Click the Scan template dropdown and select the template you want to use.
A scan template is a predefined set of scan options. There are a few default ones that you can choose from. For more information on each scan template, please see the Nexpose documentation .
- Click the Tag tab.
If you do not want to tag assets, go to Step 13.
- Select the Automatically tag by OS option if you want to tag each host with its operating system.
If enabled, hosts will be tagged with os_linux or os_windows.
- Select the Use custom tag option if you want to tag each host with a user-defined tag. If this option is enabled, the Vulnerability Validation Wizard displays the fields and options that you can use to create a custom tag.
- After you configure the tagging options, click on the Exploit tab. The Auto-Exploitation page appears.
- Click the Minimum Reliability dropdown and choose the module ranking you want to use. You should use Great or Excellent.
- Click the Generate Report tab if you want to include an auto-generated report at the end of the vulnerability validation test. If you do not want to include a report, deselect the Generate Report option and skip to the last step.
- Enter a name for the report in the Report Name field, if you want to use a custom report name. Otherwise, the wizard uses an auto-generated report name.
- Select whether you want to generate the report in PDF, RTF, or HTML. PDF is the preferred and default format.
- Click the Type dropdown and select the report type you want to generate. You can choose the Audit report or the Compromised and Vulnerable Hosts report.
- From the Sections area, deselect any sections you do not want to include in the report. Skip this step if you want to generate all the report sections.
- Enter any hosts, or assets, whose information you do not want included in the report in the Excluded Addresses field. You can enter a single IP address, a comma separated list of IP addresses, an IP range described with hyphens, or a standard CIDR notation.
- Select the Email Report option if you want to email the report after it generates. If you enable this option, you need to supply a comma separated list of email addresses.
If you want to email a report, you must set up a local mail server or email relay service for Metasploit Pro to use. To define your mail server settings, select Administration > Global Settings > SMTP Settings.
- Click the Launch button. The Findings window appears and shows the statistics for the test.