Task chains enable you to automate and schedule the execution of a series of repetitive tasks that you need to perform regularly, such as scans and bruteforce attacks. A task chain defines the tasks that will run, the settings for each task, and the conditions required for the execution of those tasks. You create a task chain by adding the tasks you want to it, configuring the settings you want the tasks to use, arranging the tasks in the order you want them to run, and defining the schedule that it should follow.
Create a Task Chain
A task chain defines the tasks that will run, the settings for each task, and the conditions required for the execution of those tasks. You create a task chain by adding the tasks you want to it, configuring the settings you want the tasks to use, arranging the tasks in the order you want them to run, and defining the schedule that it should follow.
In this walkthrough we are going to create a task chain that discovers a target host, exploits any vulnerabilities found, opens a session, collects evidence and creates a Collected Evidence Report. Then we will schedule the task to run weekly.
- From within a project, select Tasks > Chains from the Project tab bar. The task chains list appears.
- Click the New Task Chain button.

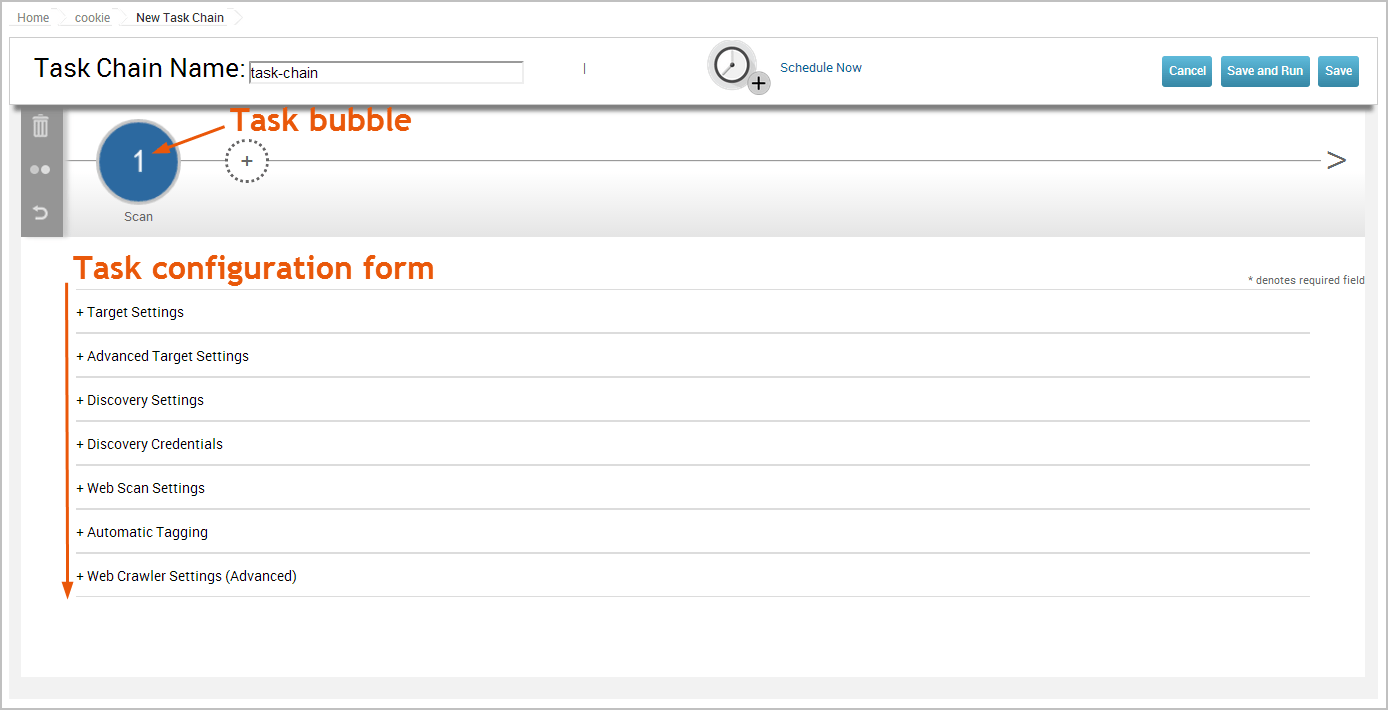
- On the “New Task Chain” page enter a name for the task in the “Task Chain Name” field.

- Click the ’+’ button to add a task.

- A task list drop down will appear. Select Scan from the list.

Task Chain Order
Tasks can be input in any order and as often as you want. A task chain can be run with just one task.
A new task bubble appears on the task chain and the task configuration page displays below the task chain.

Configure the settings for the target you have in mind. In this walkthrough, we are using the default scan settings and the target is configured for the project.
For the remaining tasks, we will follow the same steps as four and five.
-
Click on the ‘+’ button.
-
Choose **Exploit **from the drop down list.
Exploit will try and exploit any vulnerabilities found during the discovery scan and open a session on the target host.
For the task configuration, make sure the **Payload Settings **match those below:
- Payload Type - Meterpreter
- Connection Type - Auto
- Check “Use Dynamic Stagers for EXE Payloads (AV evasion)”. This setting will avoid antivirus detection.
Adjust any other settings needed for your host.
-
Click on the ‘+’ button.
-
Choose **Collect Evidence **from the drop down list. If a session is opened during a task chain, evidence is collected. There is no configuration needed for this.
-
Click on the ‘+’ button.
-
Choose **Report **from the drop down list.
-
In the “Report” configuration, change the “Report Type” to “Collected Evidence”.
-
In the ‘Sections” configuration, check each section for the report.
Reports
When adding reports to a task chain, make sure the sections are checked, otherwise the report will be empty.
-
- Click on the ‘+’ button.
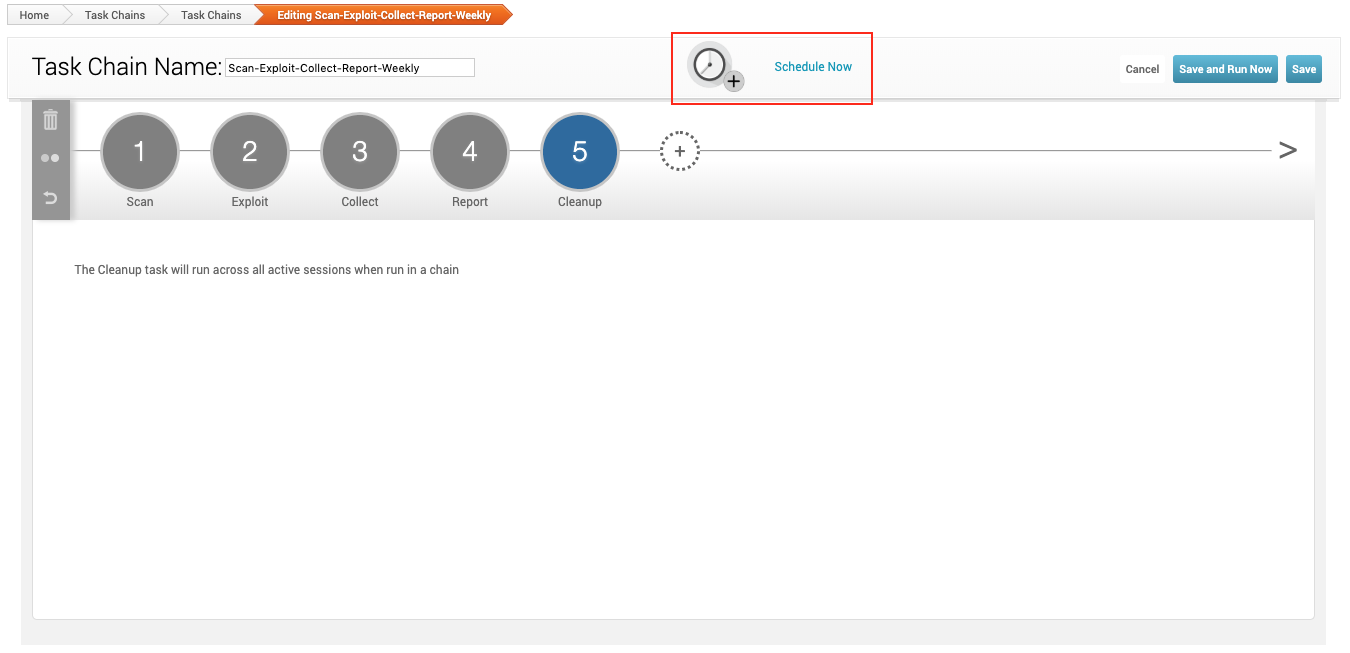
- Choose **Cleanup **from the drop down list. This will cleanup any open sessions.
- At the top of the “Task Chain” screen, select Schedule Now.

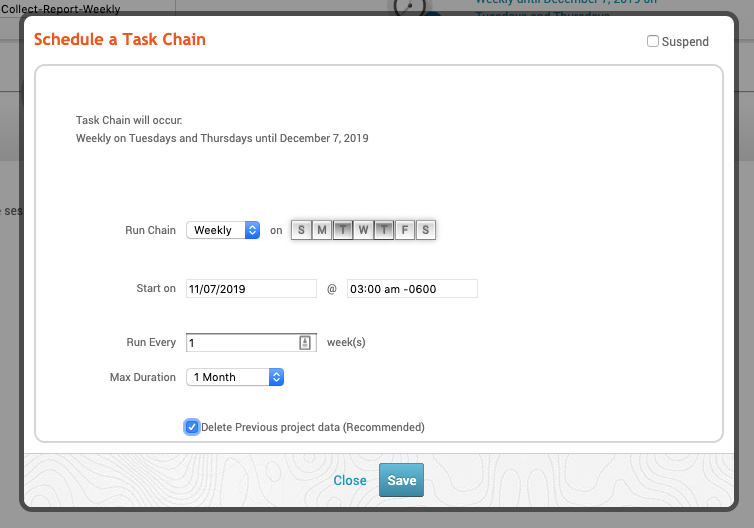
In the example below, our schedule is set to run weekly, every Tuesday and Thursday starting on November 7th at 3am. It will run every week for one month.
“Delete Previous project data” will remove any and all data stored in the project, including hosts, collected evidence, session information, reports, and credentials will be wiped from the project. Enable this option only if you want to start the task chain with an empty project. Data cannot be recovered after it has been cleared from the project.

- Click **Save. **If you want to run the task chain right away, click **Save and Run Now. **
To recap, we created a task chain that will scan for hosts, exploit found vulnerabilities, collect evidence, and generate a Collected Evidence Report, and then clean up any open sessions. It will also run this task twice a week for a month. Using task chains for automation can help streamline your workflow.