HTTP Requests
You can use the HTTP Requests plugin with any RESTful services you want to add to Automation (InsightConnect), or with the REST APIs of existing Automation (InsightConnect) plugins. The HTTP Requests plugin allows you to integrate services that aren’t yet available as Automation (InsightConnect) plugins or customize actions that our plugins don’t currently support. Learn more about RESTful services at https://restfulapi.net/ .
Automation (InsightConnect) supports the GET, POST, PUT, PATCH, and DELETE HTTP methods with the REST plugin.
While the HTTP Requests plugin is useful for addressing plugin needs that Automation (InsightConnect) doesn’t yet support, we don’t recommend using the HTTP Requests plugin for services that use OAuth authentication and authorization. OAuth processes require multiple authentication tokens and would need multiple HTTP Requests plugins to appropriately connect the API service to Automation (InsightConnect).
Collect HTTP Requests Plugin Configuration Information
Every API will have different requirements, but you will always need the API request client URL (cURL) to configure the HTTP Requests plugin. The API service documentation will help you understand what methods the API supports, what JSON output the API provides, and any required configuration details you will need to integrate the service with Automation (InsightConnect).
API documentation is sometimes referred to as developer documentation. Visit the service’s website or support portals for more information.
Configure an HTTP Requests Plugin Connection
To configure an HTTP Requests plugin connection, add a new connection from the Connections under Settings > Plugins & Tools, or during plugin configuration within a workflow. Next, configure the connection parameters to the following values:
Passing Credentials as Headers
If you need to pass any type of credential or API key for authorization, be aware that the header values are not currently encrypted.
| Connection Parameters | Acceptable Values |
|---|---|
| Authentication Type | There is a number of Authentication Types to choose from, including: Basic Auth, Digest Auth, Bearer Token, Rapid7 Insight, OpsGenie, Pendo, and Custom which allows you to generate your own authentication headers. For more information about the Custom Authentication method, please refer to Custom Authentication section below. |
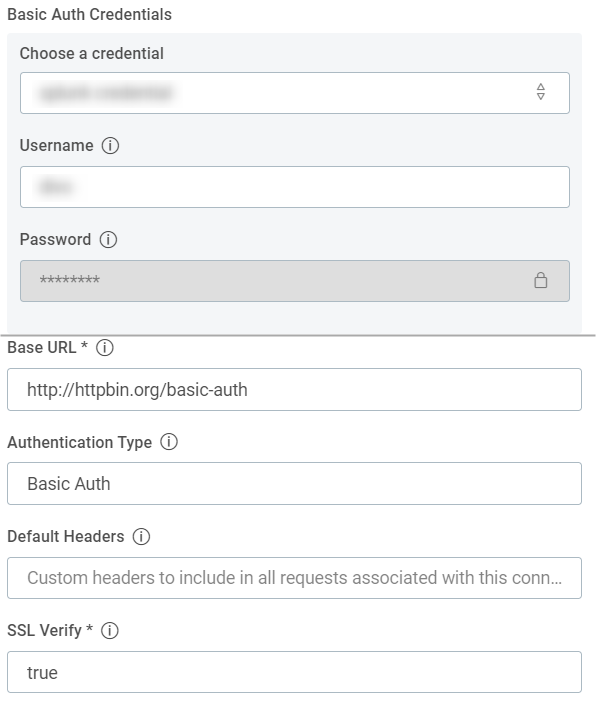
| Basic Auth Credentials | Any username or password required for the API service you want to use, as strings. This field is required if you chose Basic Auth or Digest Auth as the Authentication Type. |
| Base URL (required) | The API’s base URL up to and including the last required forward slash (before resource-specific paths), as a string. This is a required field. |
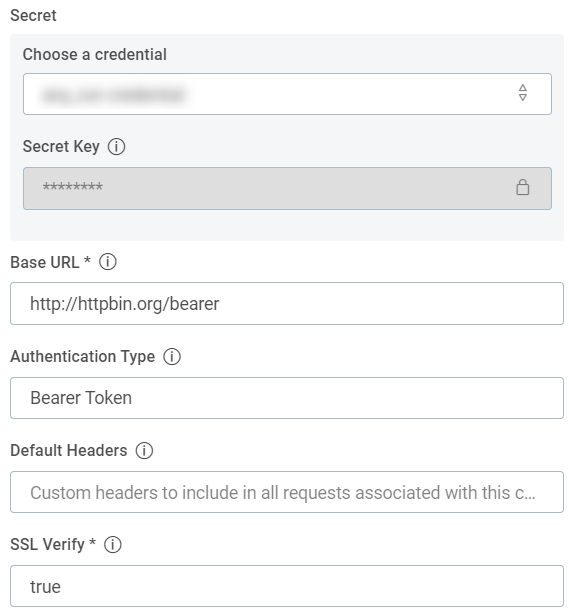
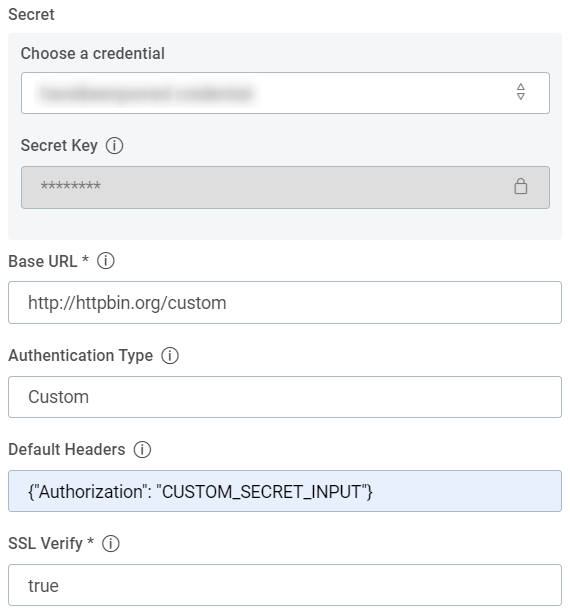
| Default Headers | Any API headers in JSON that you need for the action. The plugin will use these by default unless overwritten by any action-specific headers you specify. This field is required when using the Custom type for the Authentication Type. To pass an encrypted key as a header value, enter your key in the Secret Key input and set the value of the header in the field to CUSTOM_SECRET_INPUT instead of the secret key value. The plugin will replace CUSTOM_SECRET_INPUT with the encrypted key stored in the Secret Key input when the plugin runs. |
| Secret Key | Any credential secret key, as a string. This field is required if using Bearer Token, Rapid7 Insight, OpsGenie, or Pendo as the Authentication Type or when using CUSTOM_SECRET_INPUT in the Default Headers field for the Custom Authentication Type. |
| SSL Verify (required) | Boolean values: true if you want to verify SSL certificates, false if you don’t. |
Custom Authentication
You can create your own authentication headers by choosing the Custom Authentication in the Authentication Type field. Create your header as a JSON object in the Default Headers field. Note that any values including credentials passed into this field are not encrypted. If you need to pass a custom header with a secret credential, enter CUSTOM_SECRET_INPUT as shown in the following example instead of entering your authentication secret value (such as API Key, Secret Key, Password):
{
  "x-api-key": "CUSTOM_SECRET_INPUT"
}
Next, add your header authentication value to Secret Key field. This will ensure that your sensitive information is being stored as a secret within Automation (InsightConnect). When running the plugin, it will replace CUSTOM_SECRET_INPUT text within the authentication header with the value of Secret Key.
Configure HTTP Requests Plugin Actions
When adding an HTTP Requests plugin action step to a workflow, you need to select or configure a connection, then configure step input fields for the action.
Every action corresponds to an HTTP method. Acceptable values for each input variable option are as follows:
| Input Variable | Acceptable Values | Actions Using the Input Variable |
|---|---|---|
| Route (required) | The path to the resource without the base URL included, as a string. |
|
| Headers | Any API headers in JSON, including API keys, that you need for the action. Headers added in the step input will override default headers in the HTTP Requests plugin connection. You can leave this blank if you know the connection you’re using for the action is correctly configured for the HTTP method. |
|
| Body | Payload to submit to the server when making the HTTP Requests call |
|
Sample HTTP Requests Plugin Configuration
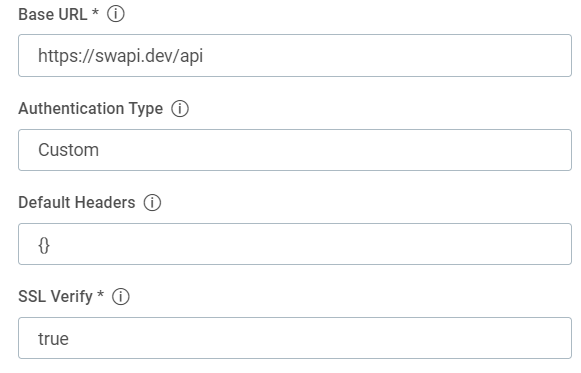
To show you what correctly formatted Base URL-route pairs look like, we’ll use the Star Wars API from https://swapi.dev/documentation as an example.
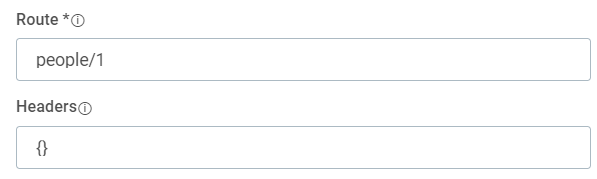
The full path to the object containing data on Luke Skywalker is found at the URL http https://swapi.dev/api/people/1. The base URL is described in the Star Wars API documentation as https://swapi.dev/api/, so we know that the route should be anything in the full URL following that. The route for plugin configuration is people/1.
For further help, refer to the following sample screenshots.
Sample Connection Configuration for Star Wars API
Sample Plugin Input for Retrieving Luke Skywalker Entity
Other Sample Connection Configurations
Basic Auth
Bearer Token
Custom
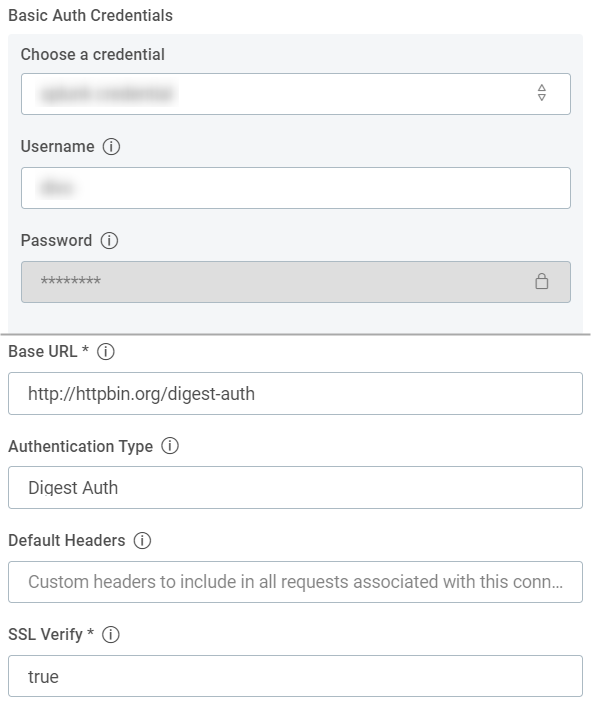
Digest
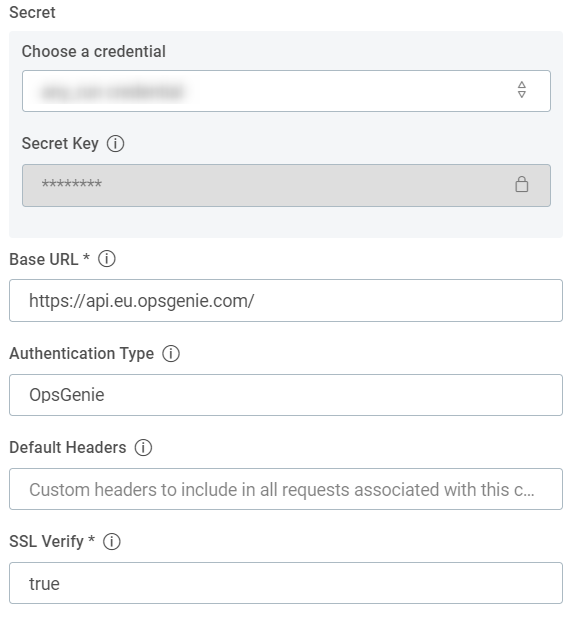
OpsGenie
Pendo
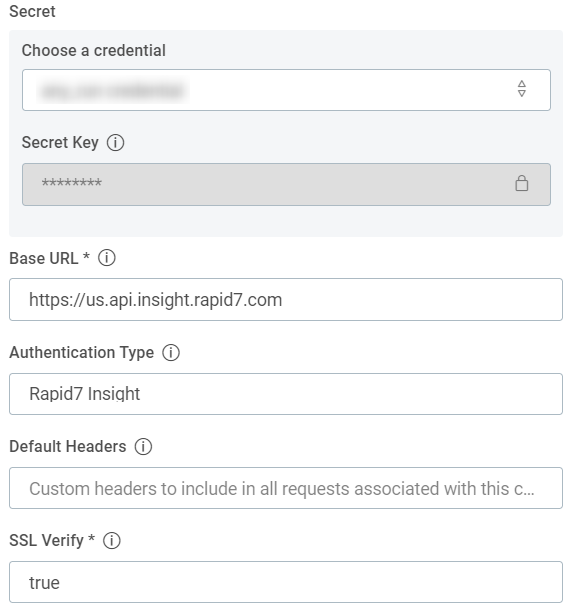
Rapid7 Insight
Test HTTP Requests Plugin Configurations with Postman
You can use the Postman client to test your configuration values before activating your workflow. This is especially useful for APIs that require authorization or authentication.
Download the Postman app at https://www.getpostman.com/products . The free Postman plan is sufficient to test APIs with.
To test the HTTP Requests plugin with the API you chose:
- In Postman, select the HTTP method for your HTTP Requests plugin action in the dropdown to the left of the “Enter request URL” field.
- Copy the full cURL for the API request (base URL + route) and paste it into the “Enter request URL” field.
- If your API requires an API key, enter or paste in the name of the key into one of the open cells under the “Key” column of the “Params” tab. Then paste in the key value, or token, into the corresponding “Value” column cell. The API key name should match what you entered into Automation (InsightConnect) as an API header.
- Click the blue Send button to send the request.
- Check the output in Postman. If you see something unexpected or receive an error message, visit your API’s documentation for troubleshooting help.
If you test your base URL and route and receive unexpected output in Postman, your API might require a final forward slash at the end of your route. In the example above, SWAPI does not require a final forward slash for people/1, but some APIs will not correctly send data without it.