Jira
Jira Server integrations end-of-life
Effective August 19, 2024, Rapid7 will no longer provide support for Jira Server integrations with Vulnerability Management (InsightVM) Remediation Projects. This decision follows the official end-of-life announcement by Atlassian for Jira Server, which occurred on February 15, 2024. Jira Cloud support is available and will continue to be supported. Atlassian Data Center is not supported and there are no imminent plans to support it.
Read Atlassian’s announcement at: https://www.atlassian.com/blog/announcements/farewell-to-server
The Jira plugin for Automation (InsightConnect) allows you to create, modify, update, and search for issues in your Jira Software environment as well as manage users and trigger workflows on new ticket creations.
To use the Jira plugin in Automation (InsightConnect), you must either set up a Jira API Key when using Jira Cloud, or use service/user account credentials when using Jira on-prem and then configure the connection in Automation (InsightConnect). The Jira plugin supports Jira Software, Jira Server, and Jira ServiceDesk. For more information on the functionality of the Jira plugin, see the Extension Library listing .
Create an API Key in Jira
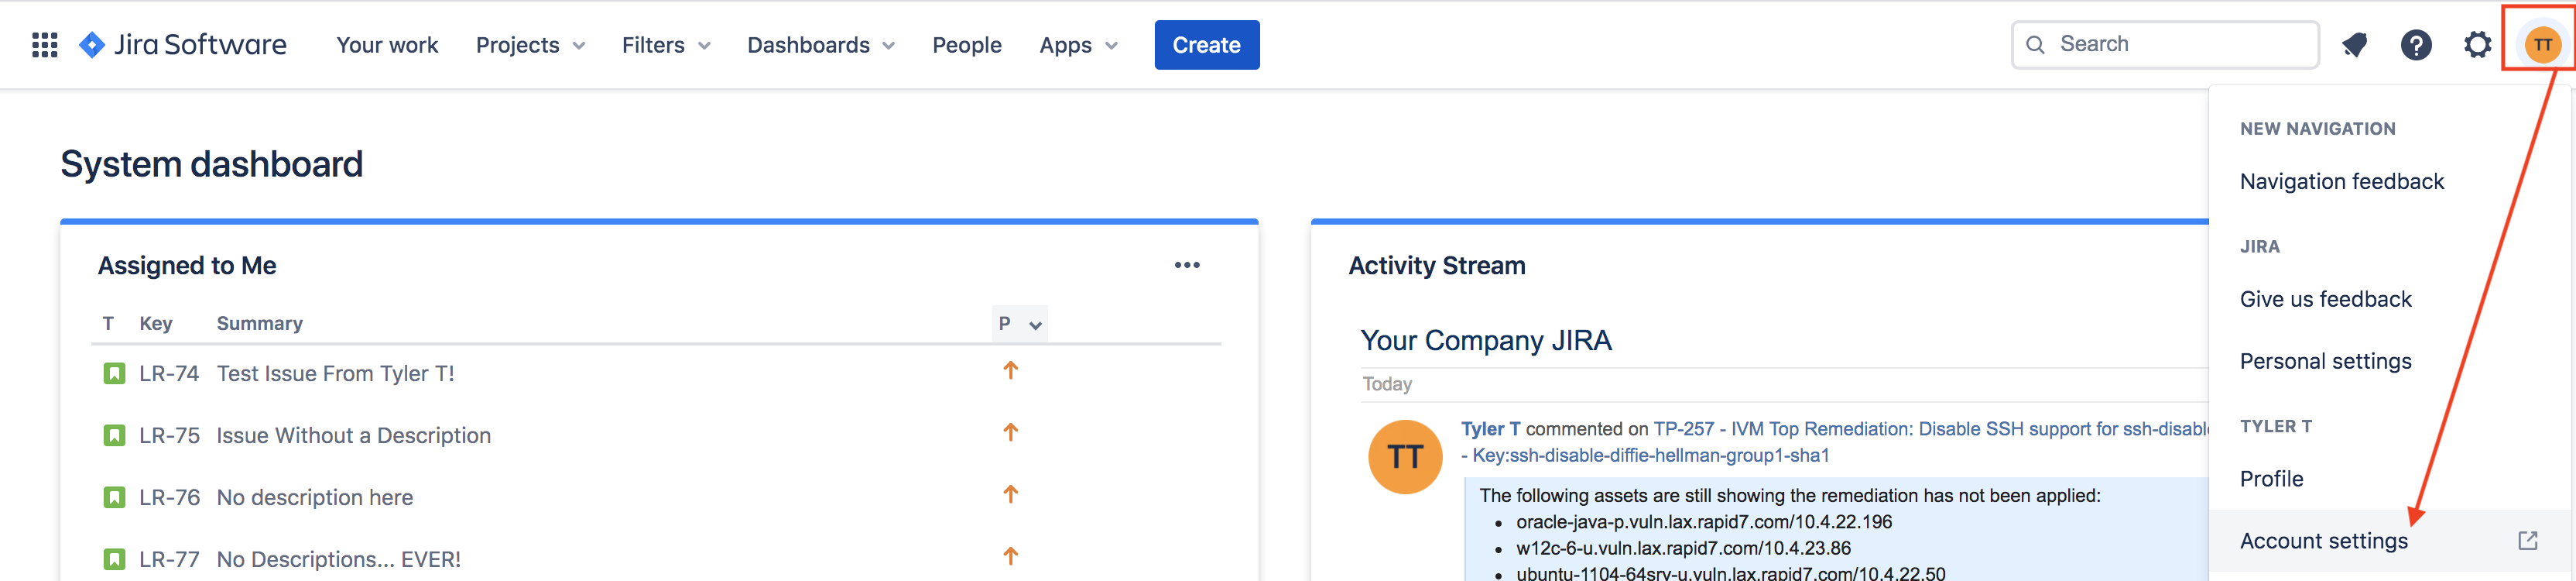
The process is the same whether you use Jira Software or Jira ServiceDesk. Begin by selecting the icon for your account profile in the upper-right corner and click Account Settings.
Account settings in Jira Software:
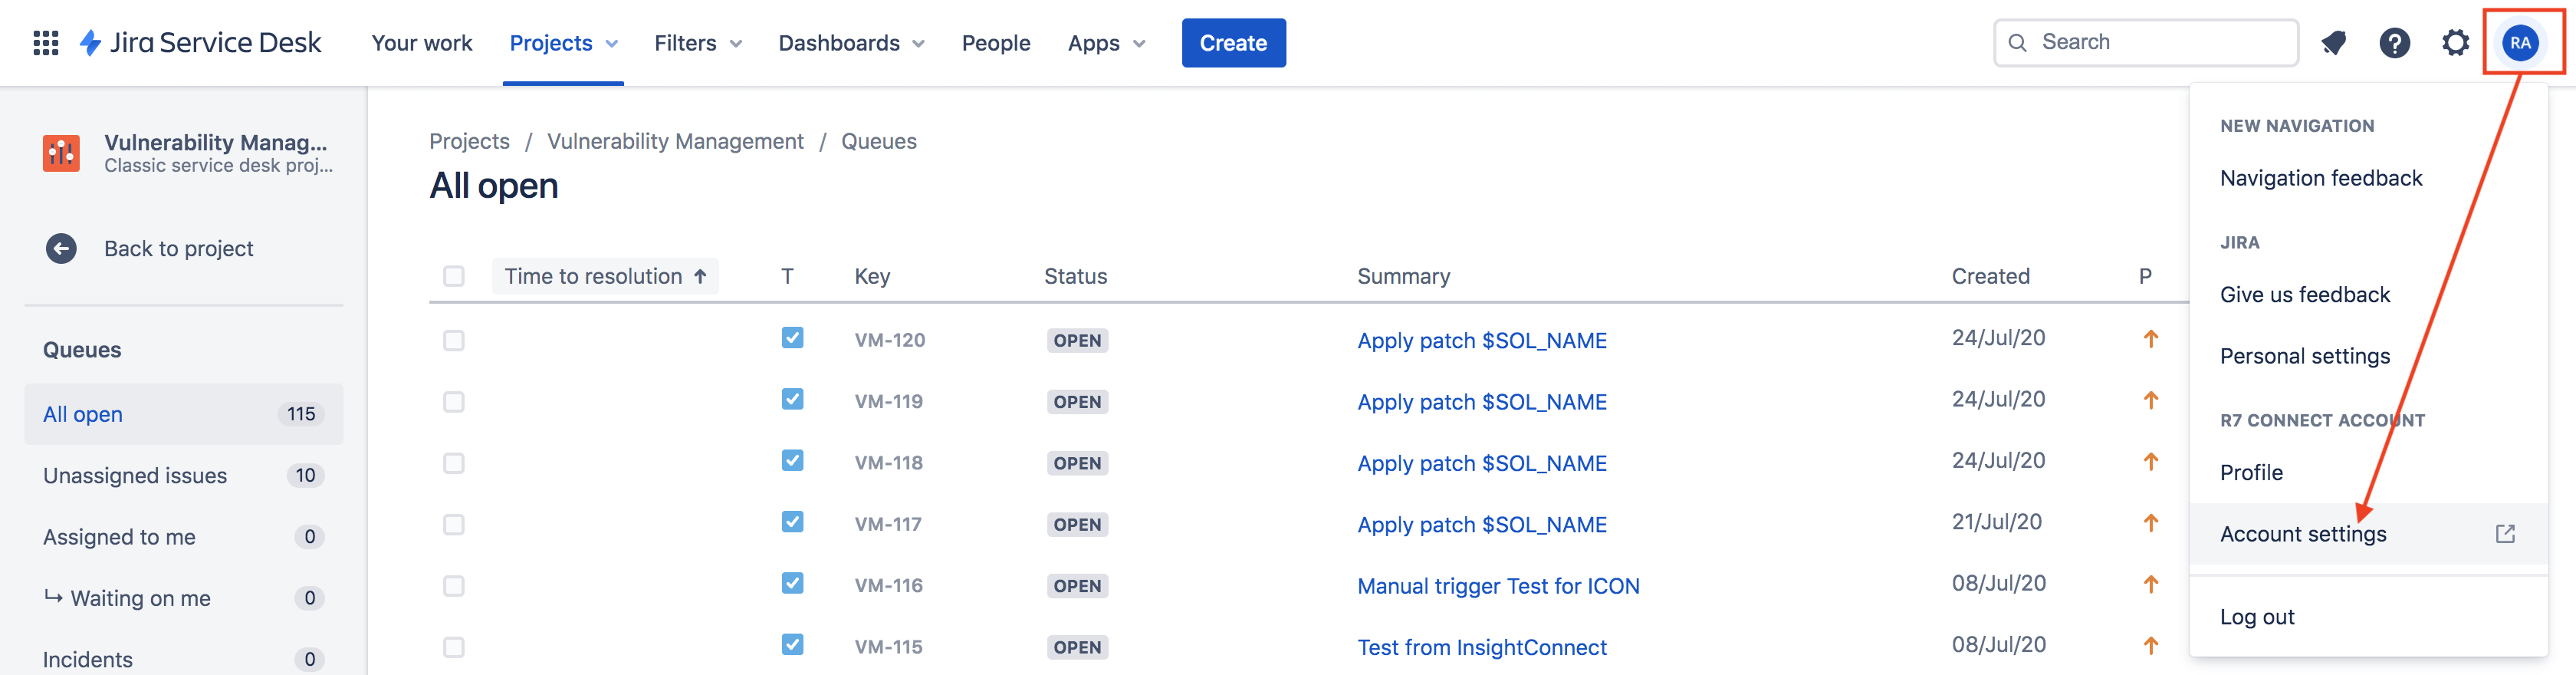
Account settings in Jira ServiceDesk:
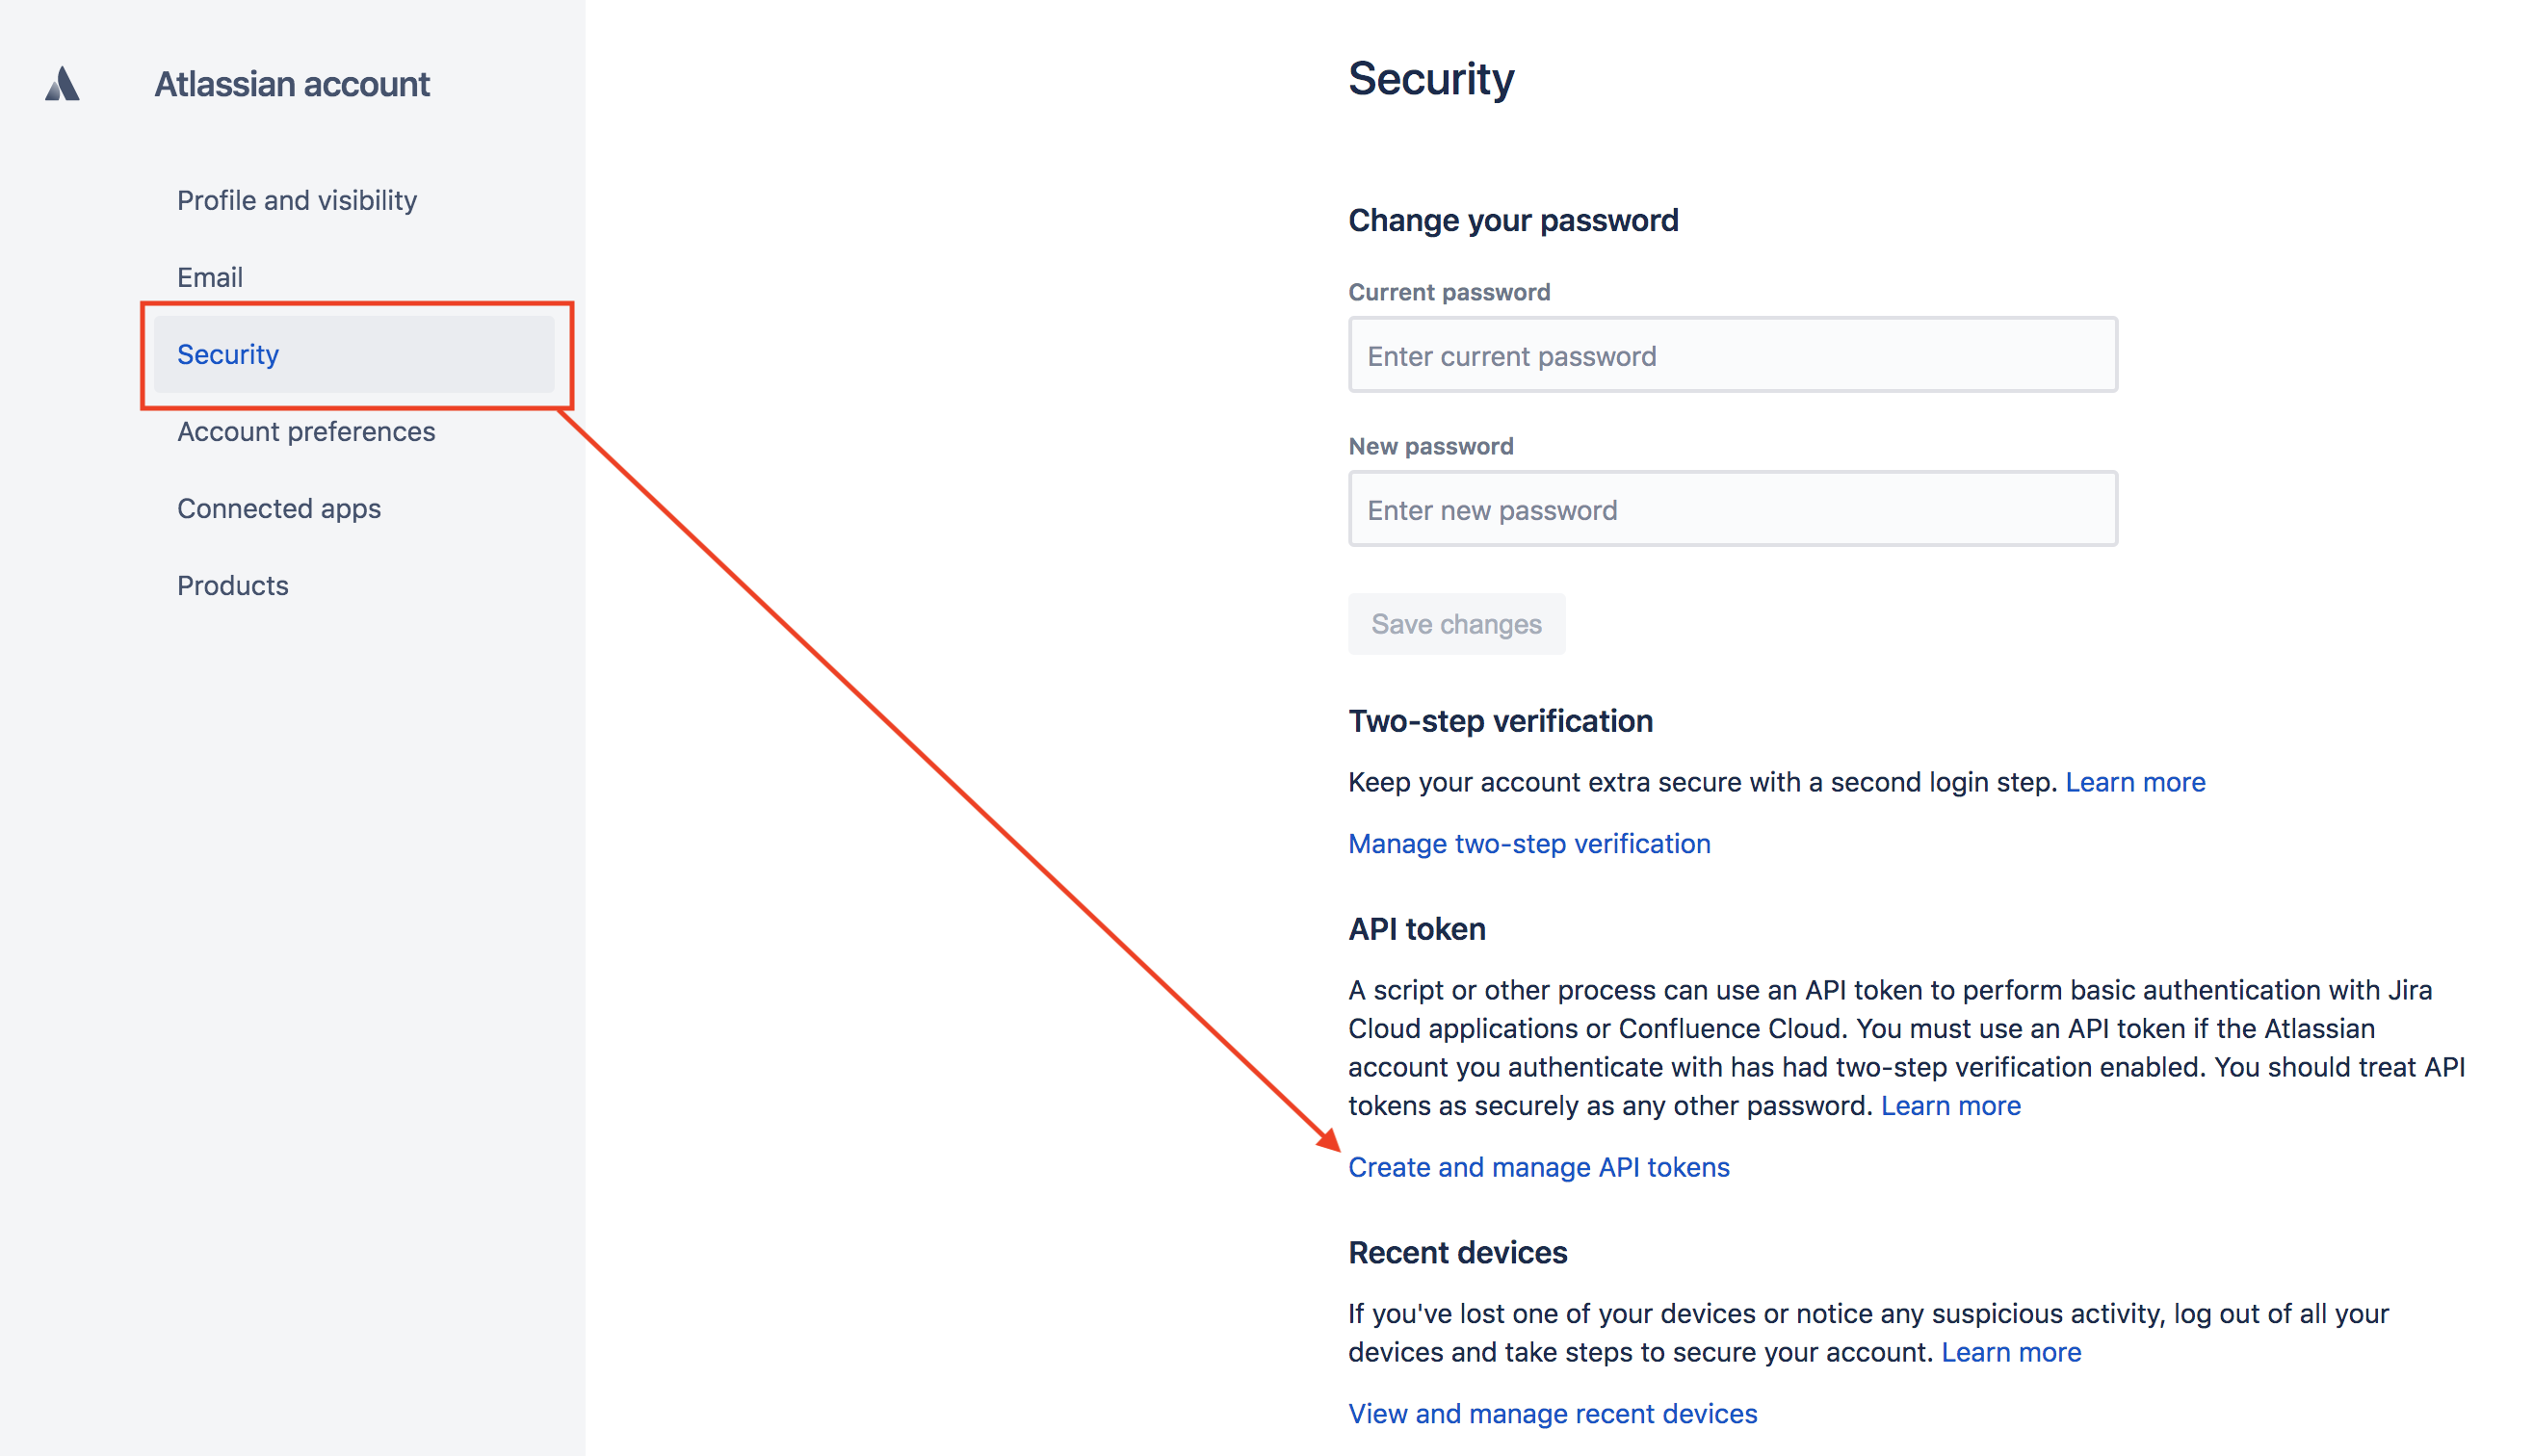
Next, click Security on the left menu and click Create and manage API tokens.
Click Create API token on the API Tokens page to create a token for use with Automation (InsightConnect).

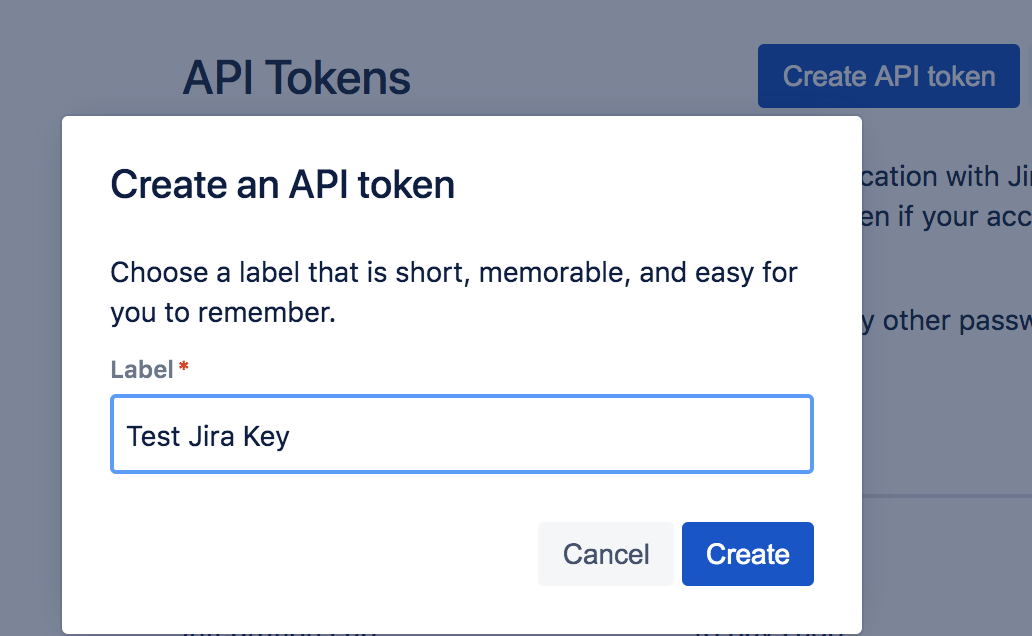
Choose a name for your API token that will indicate its purpose and help you keep track of it, then click Create.
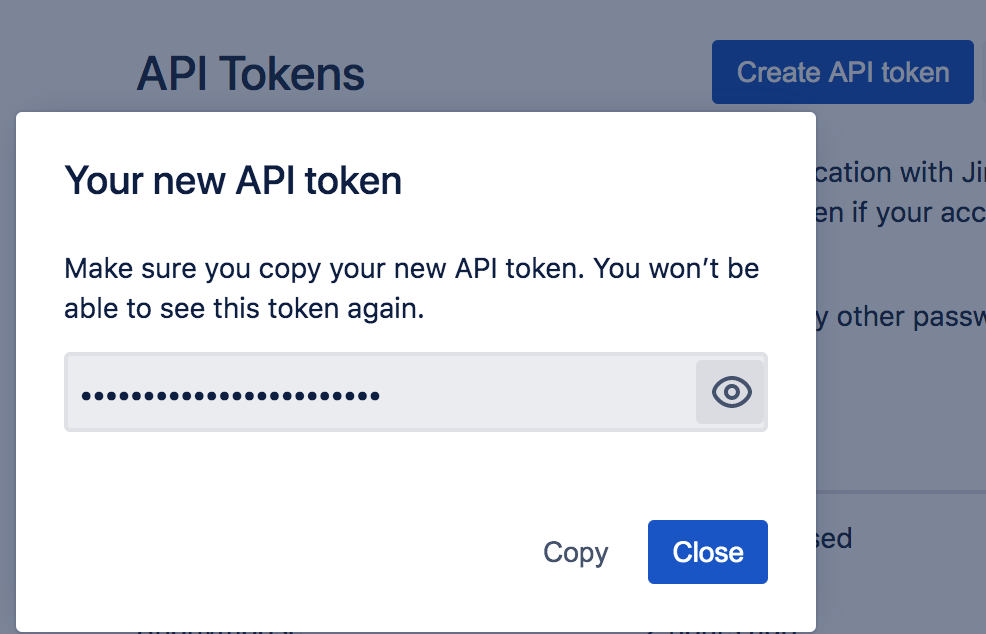
Now that the token has been created, click Copy to add it to your clipboard so you can paste in the Jira plugin connection configuration in Automation (InsightConnect).
Configure the Jira Connection in Automation (InsightConnect)
Pivoting over to Automation (InsightConnect), open the connection configuration for the Jira plugin.
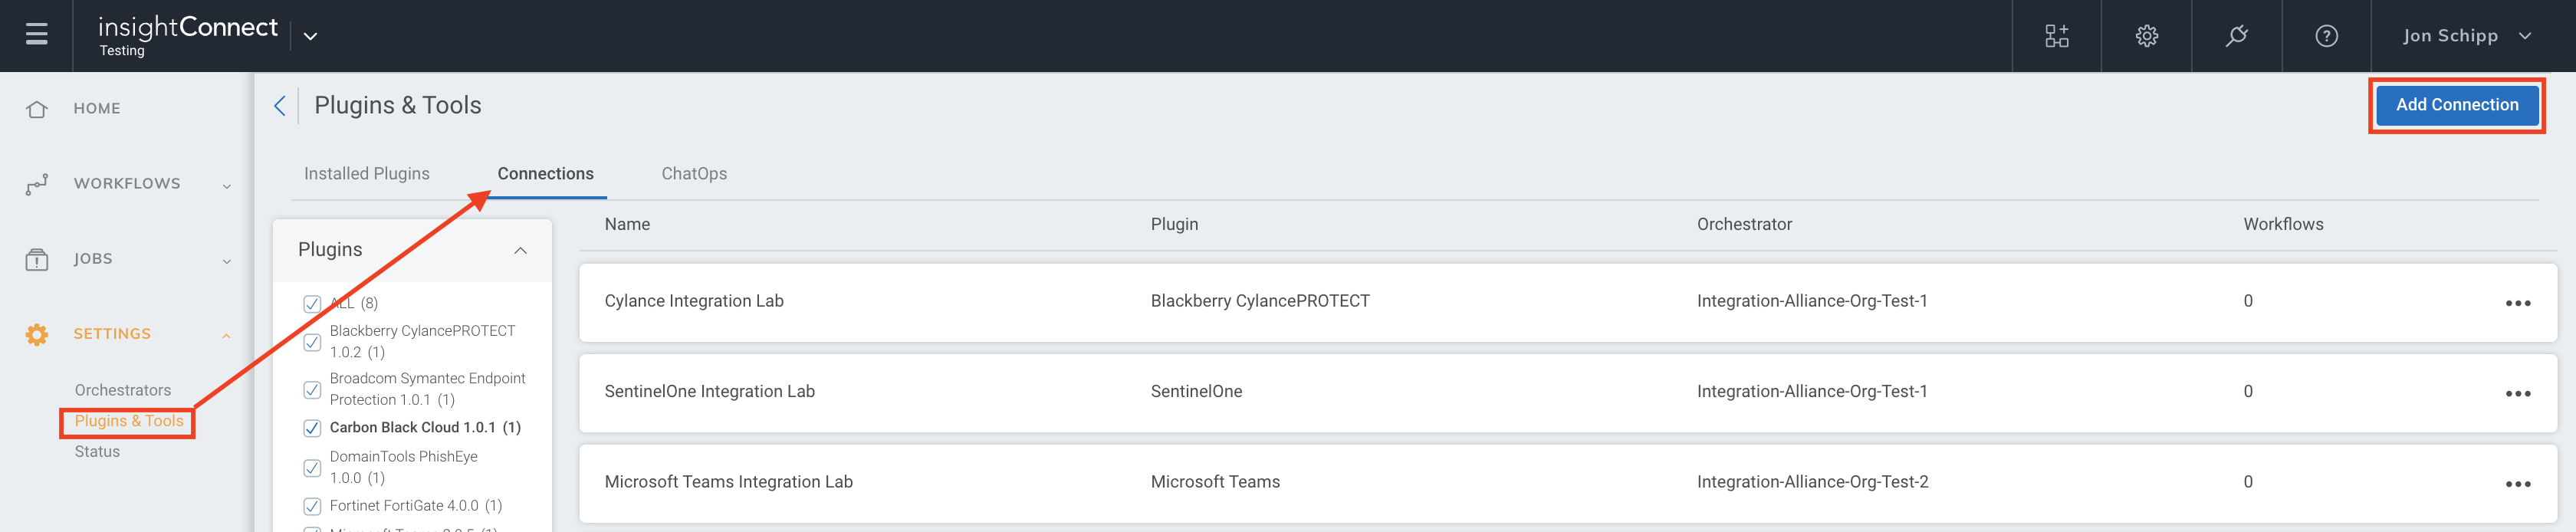
You can do this when selecting the Jira plugin during a workflow building session or by creating the connection independently by choosing Plugins & Tools from the Settings tab on the left menu. On the Plugins & Tools page, select the Connections tab and click Add Connection in the upper-right corner.
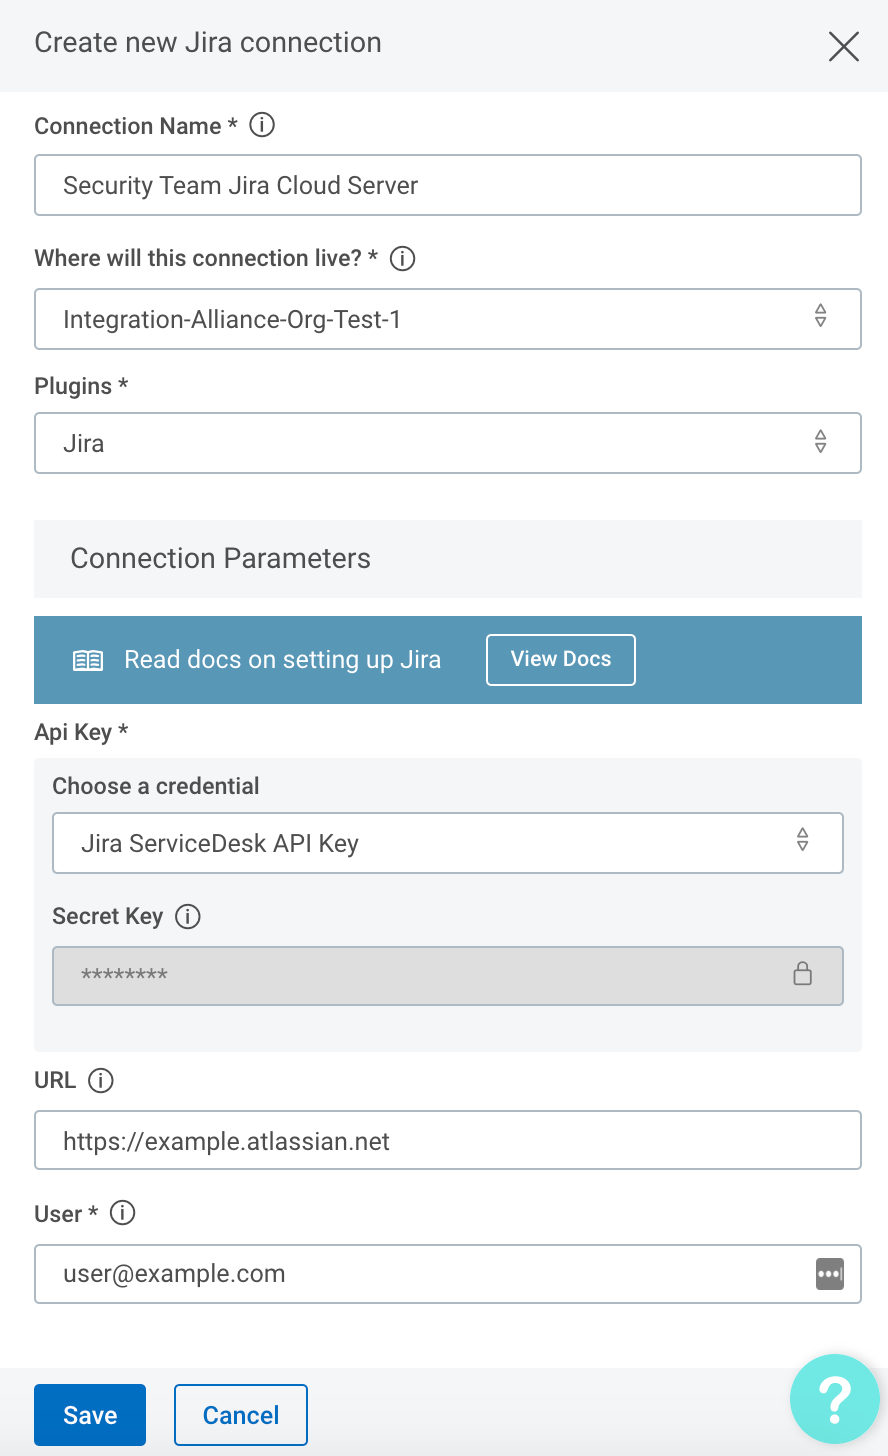
Now it is time to configure the connection for the Jira plugin. Give a unique and identifiable name to the Connection, select where the plugin should run, and choose the Jira plugin from the list. If it’s not available, then import the plugin from the Installed Plugins tab.
At this point, it’s time to configure your Jira credentials and server information which is necessary for Automation (InsightConnect) to automate your processes with Jira.
When using Jira Cloud, in the API Key field, create a credential and paste in the Jira API token that you copied earlier.
When using an on-prem Jira server, create a credential and enter your service/user account password into the API Key field.
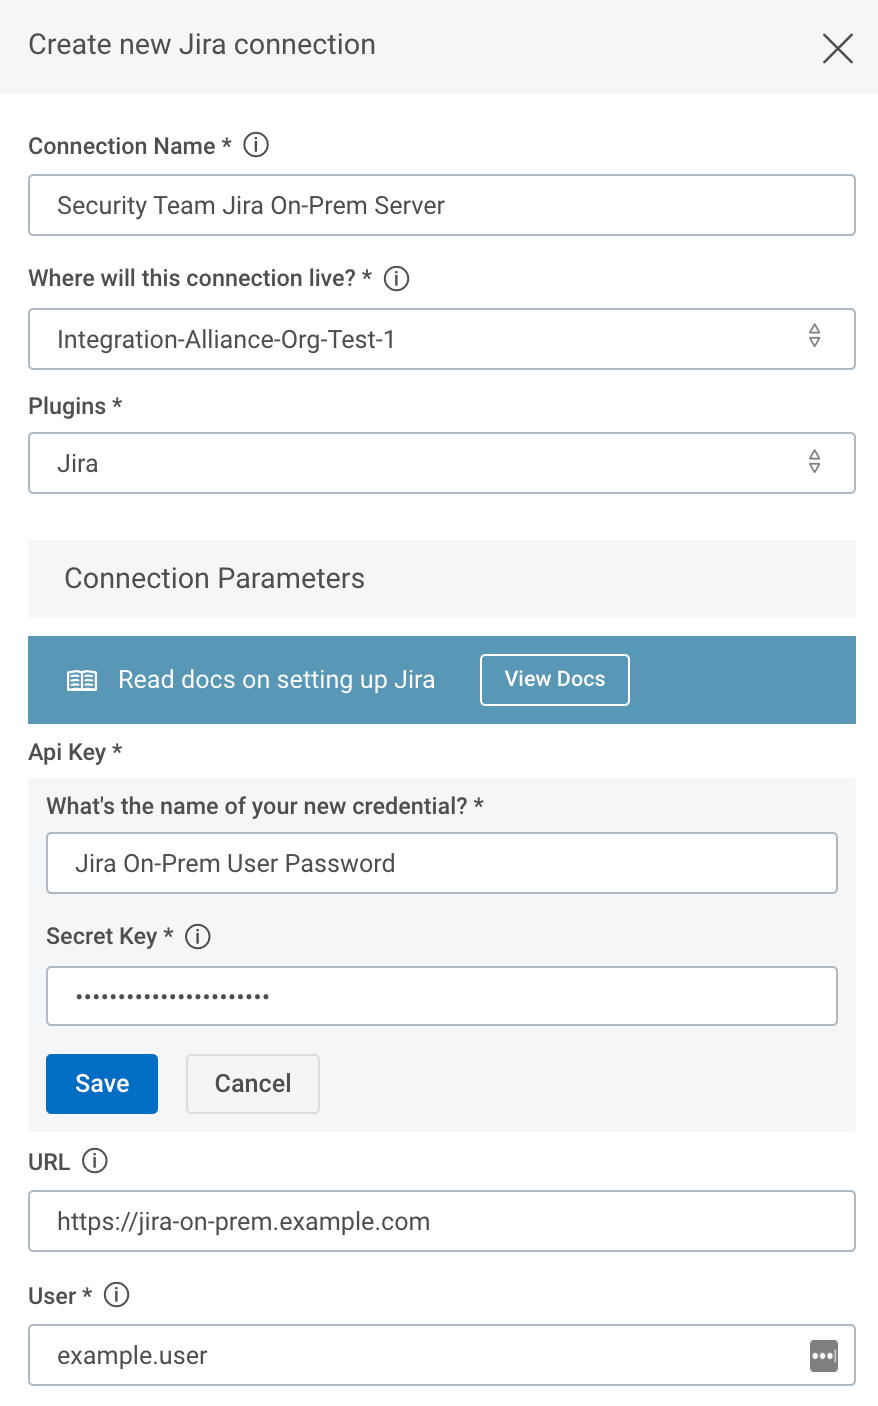
In addition, add the URL of the Jira software to orchestrate and the user email address for Jira Cloud or the username for on-prem Jira server.
Save the connection, and the connection test will attempt to authenticate to the Jira server. A blue circle on the Connection tile indicates that the Connection test is in progress.
Test in Progress

Success
If there is no circle, the connection succeeded and you’re ready to begin orchestrating your processes with Jira.

Failed
A red circle indicates that the connection test failed. If this occurs, check your connection details (including the server URL and credentials) before trying again.

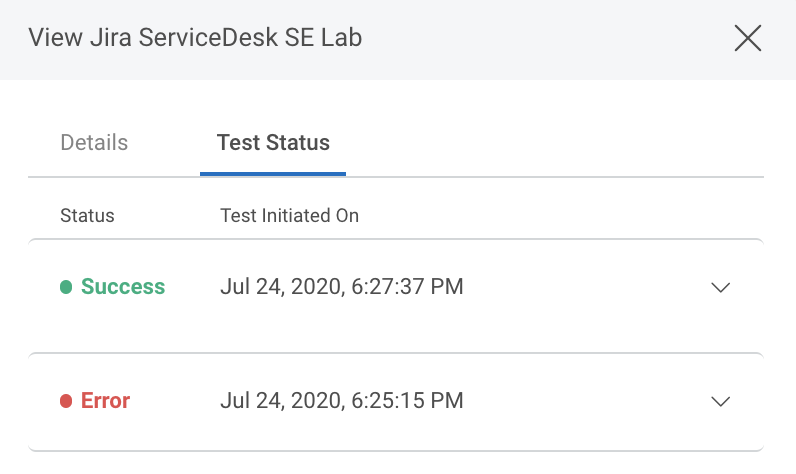
The log may contain useful troubleshooting information. First, click View to see a list of your recent connection tests.

Under the Test Status tab, expand the dropdown for the test that encountered an error to view its log.