Fortinet FortiGate
Automate the management of your firewall by isolating hosts from your network and modifying address objects and groups using the Fortinet FortiGate plugin for Automation (InsightConnect). Additionally, use this plugin to view your existing policies on your Fortinet FortiGate Firewall .
To use the Fortinet FortiGate plugin, you must use an existing Fortinet FortiGate account or create a dedicated account to configure the connection in Automation (InsightConnect). For more information on the functionality of the Fortinet FortiGate plugin, see the Extension Library listing .
Firewall Blocking Use Case
A common use case for the Fortinet FortiGate plugin plugin is to quickly respond to threats by blocking them at the firewall. This is accomplished through the management of address objects in address groups. To begin, you must have an existing Fortinet FortiGate deny-all firewall policy in place with a predefined address group assigned to the policy. As threats are detected, you can leverage the Fortinet FortiGate plugin to block malicious hosts from your network by adding malicious addresses to the predefined address group, and unblock hosts by removing addresses from the predefined address group. Using the Fortinet FortiGate plugin and firewall functionality in the way described allows for a safe and flexible policy management of large groups of dynamic addresses.
You can build your own workflow to accomplish this use-case and many more, or you can choose from a number of out-of-the-box prebuilt workflows for firewall blocking to get up and running quickly. These are available on the Rapid7 Extension Library .
Create a new Fortinet FortiGate user account
If you wish to create a separate Fortinet FortiGate plugin user account to use with Automation (InsightConnect), follow the steps below.
- Open you Fortinet FortiGate server address and log in to Fortinet FortiGate with a username and password - the user you are using, requires access to manage users on your firewall.
- From the left hand menu, select System and then Administrators.
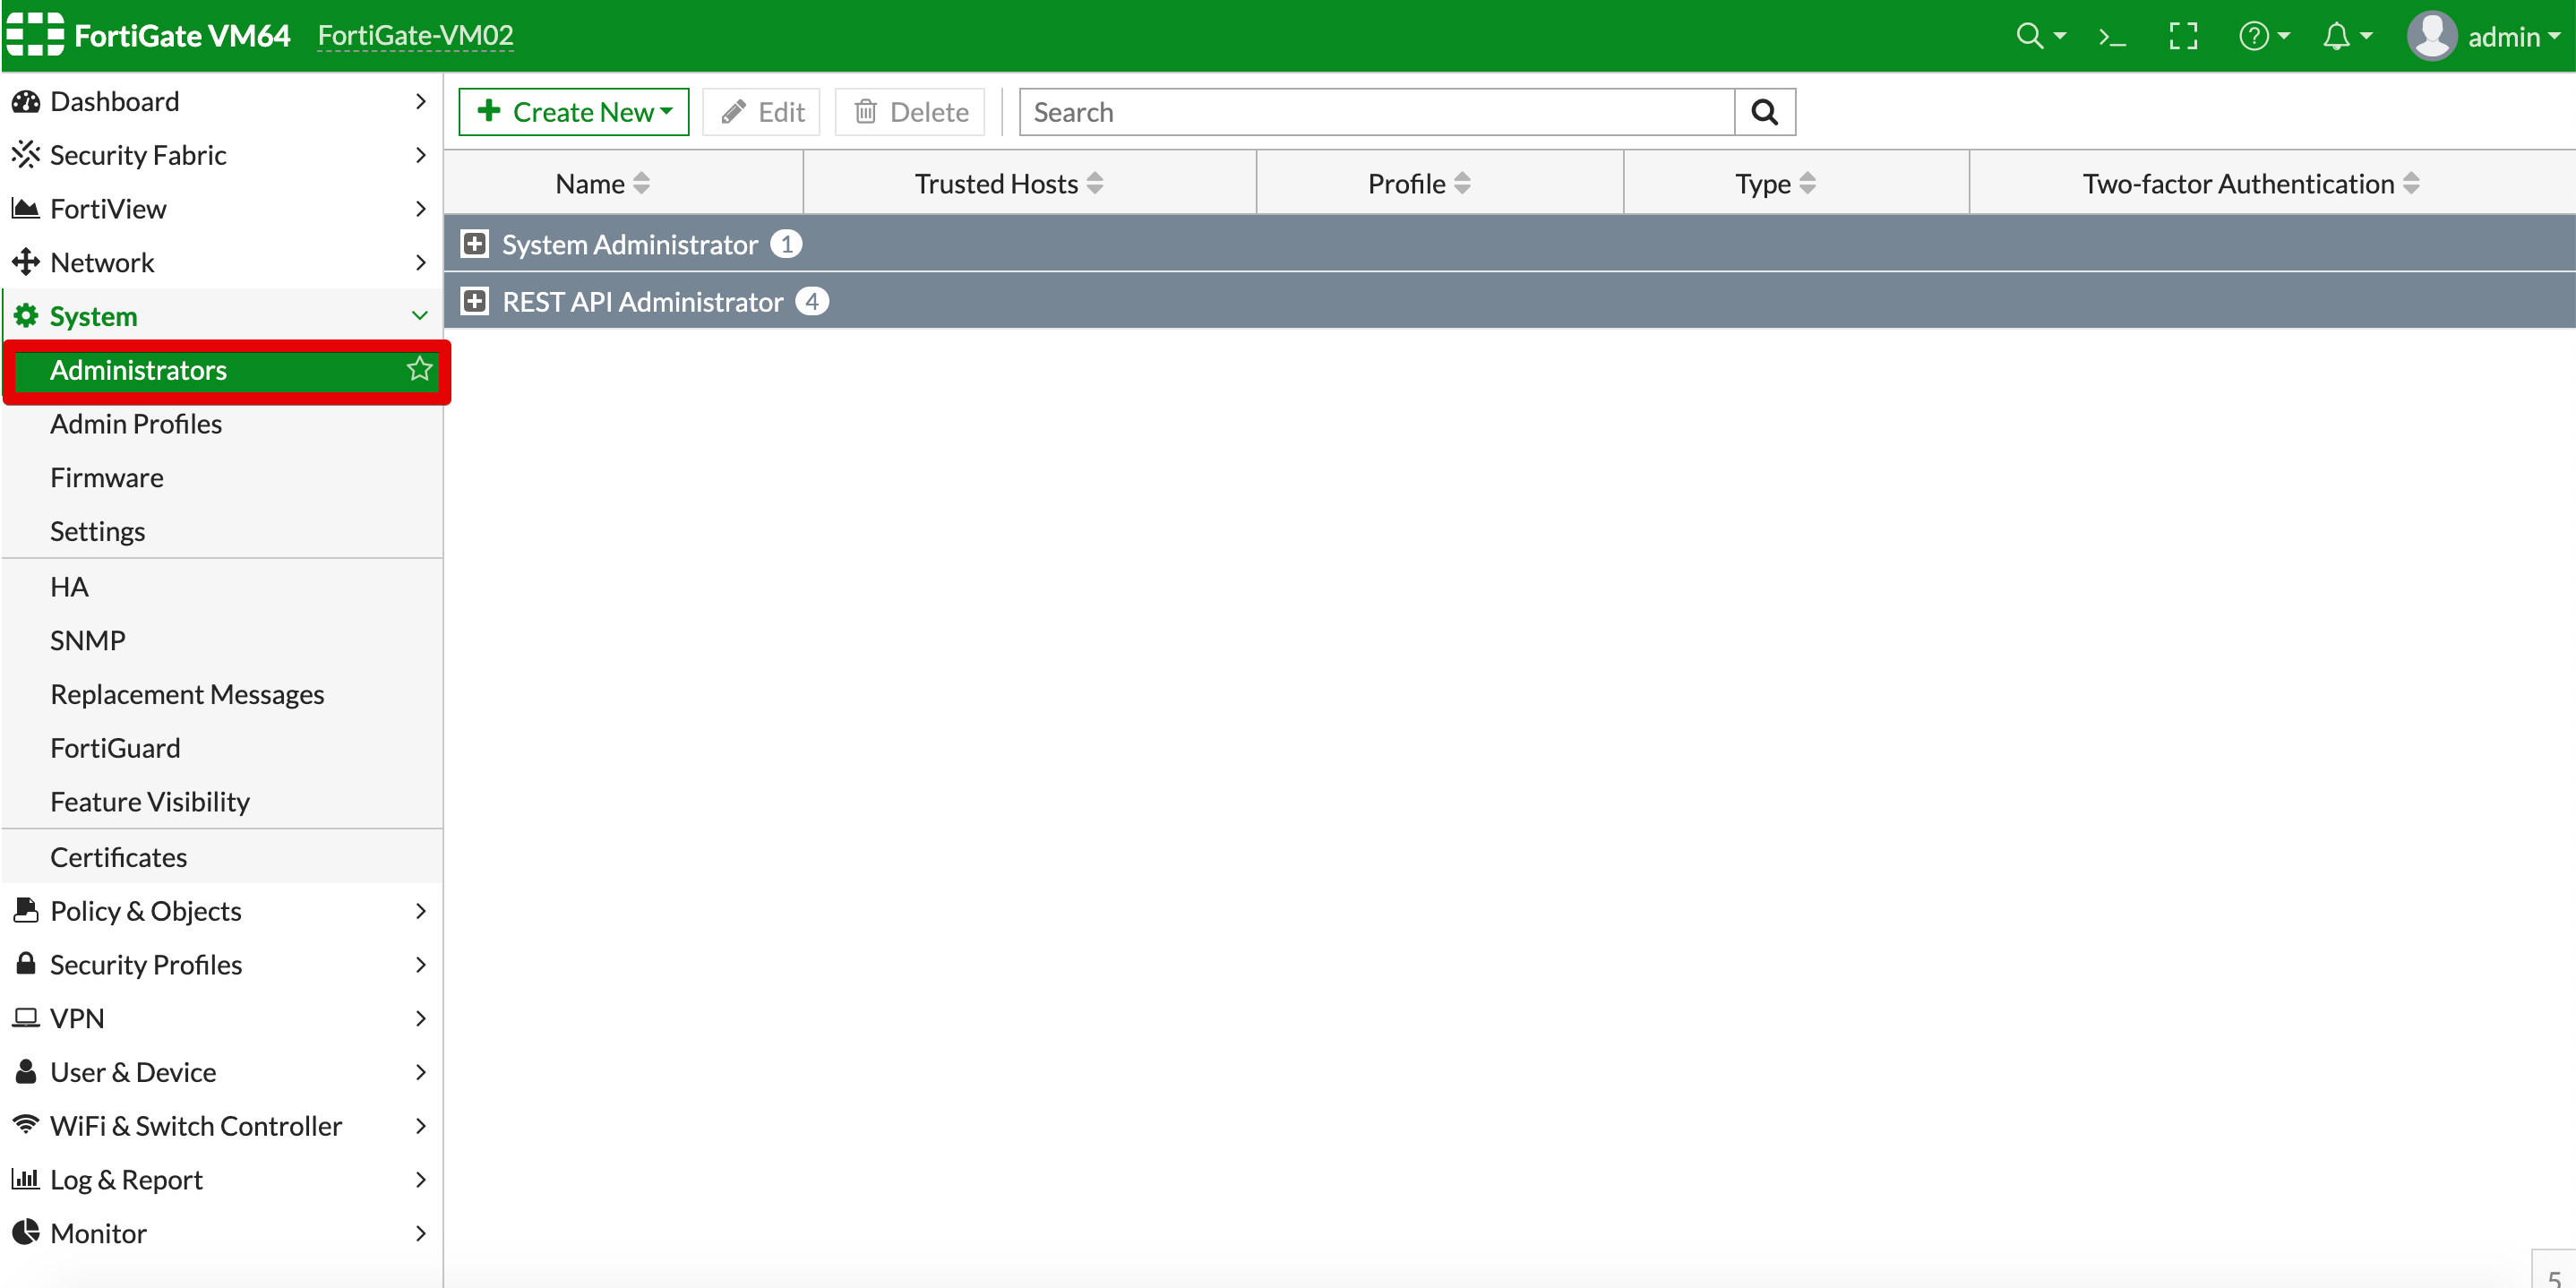
- Select Create new.
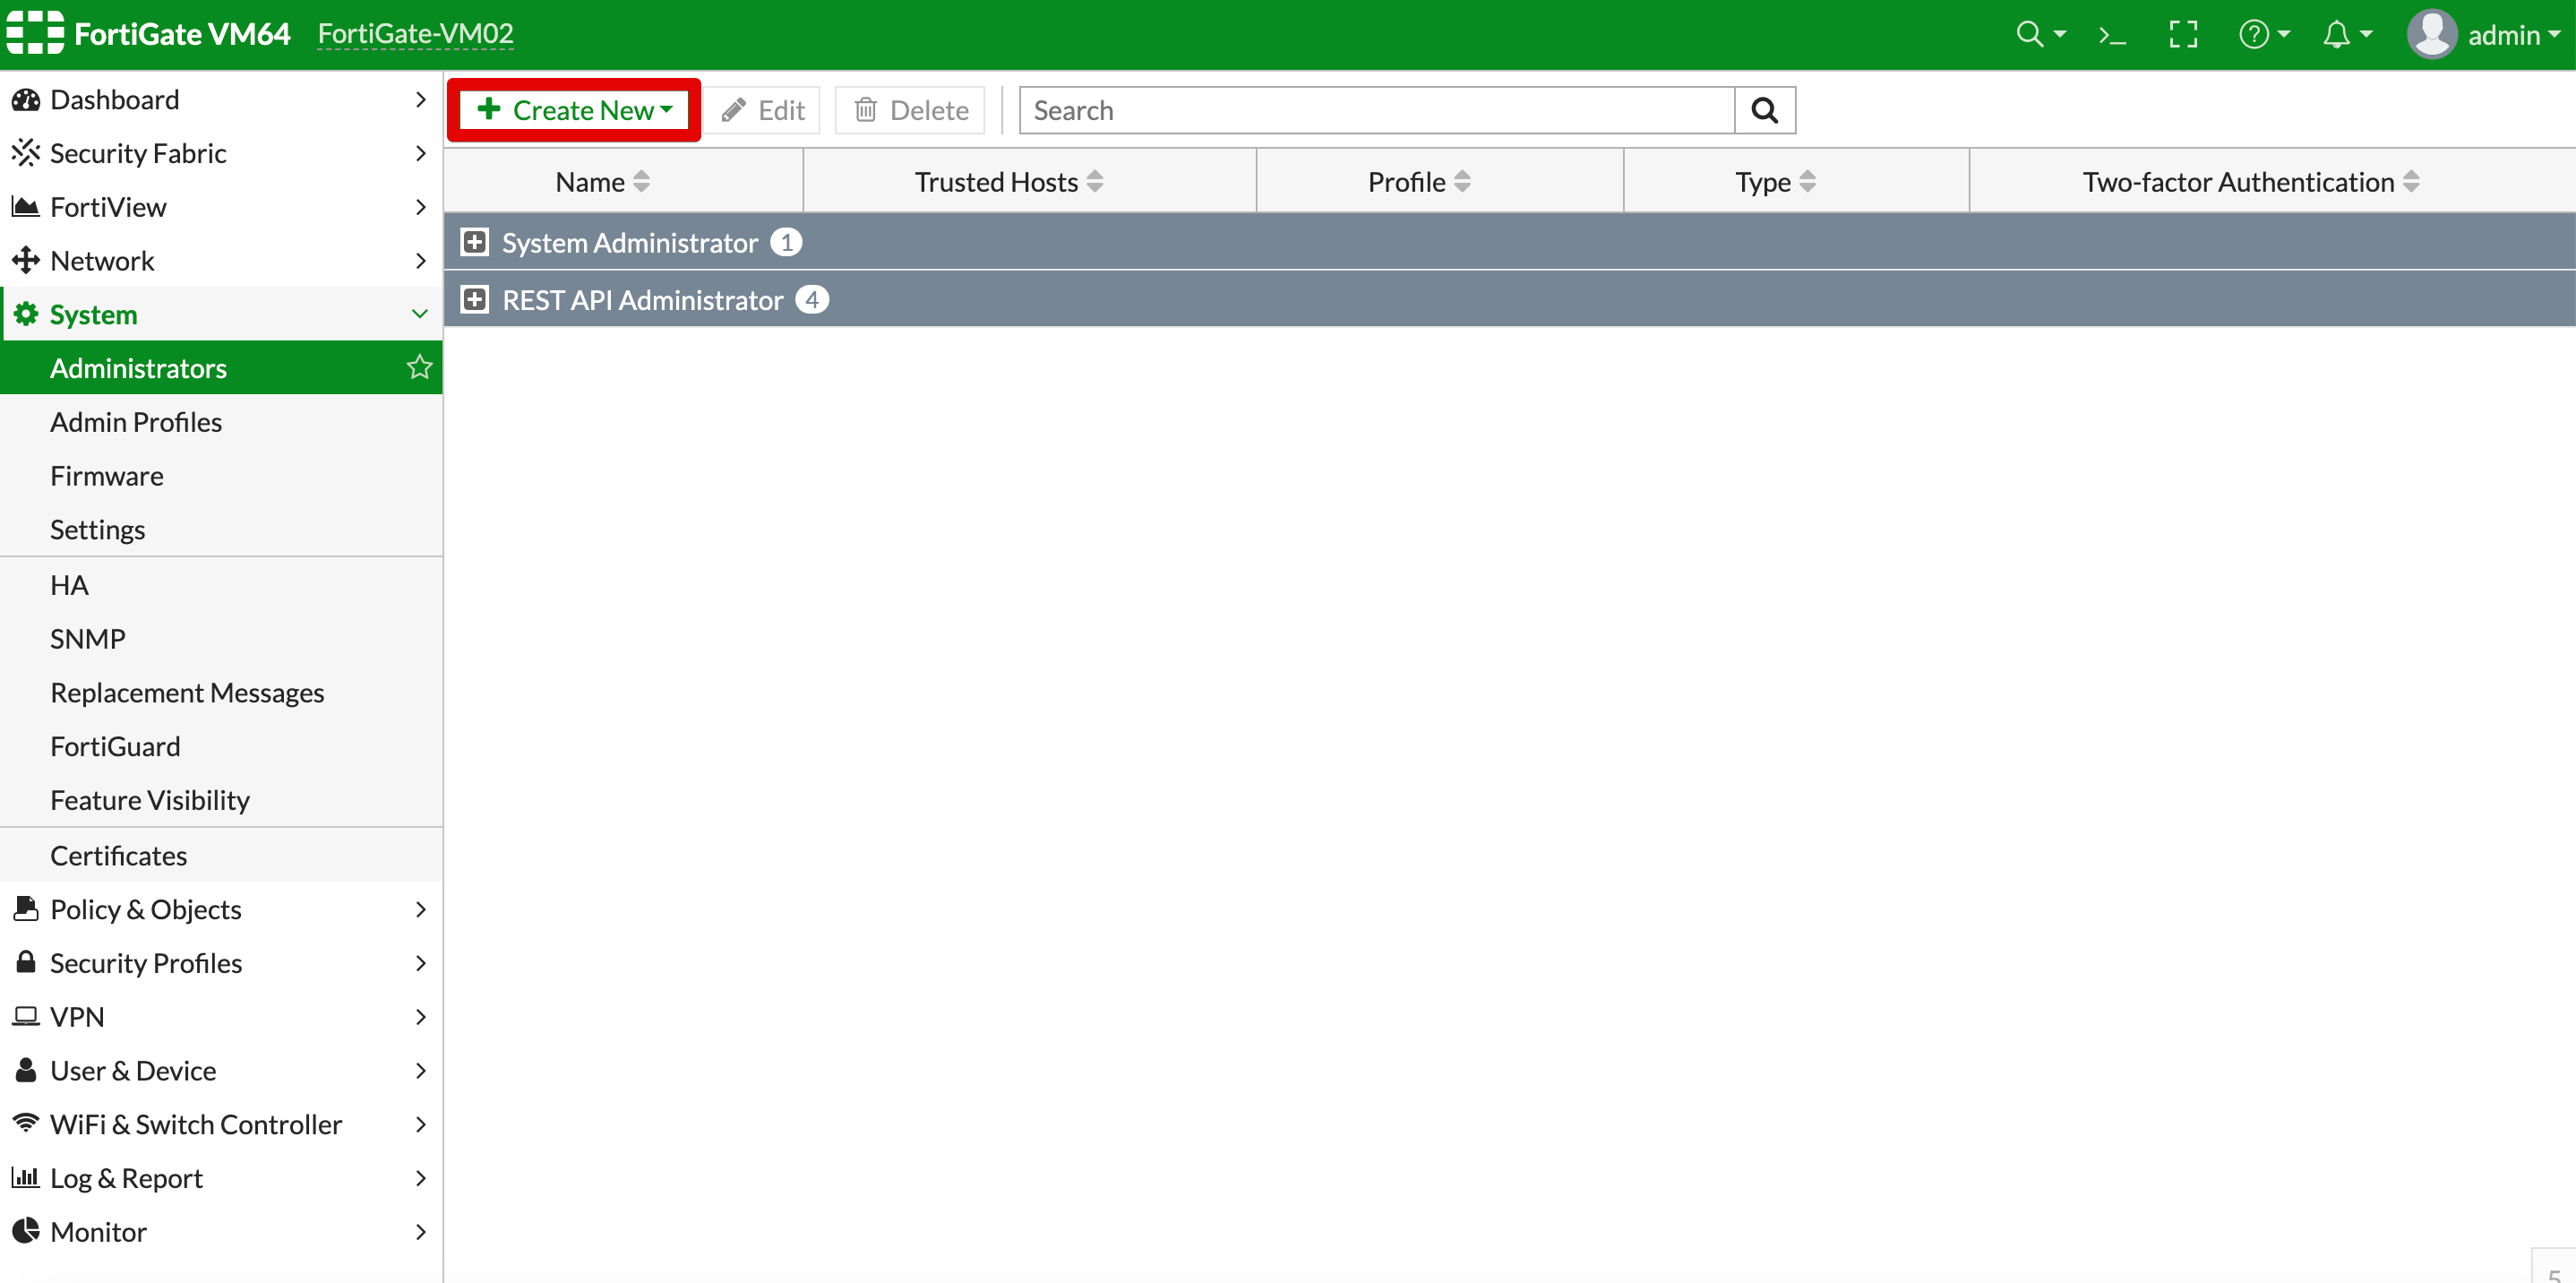
- From the Create new dropdown select REST API Admin.

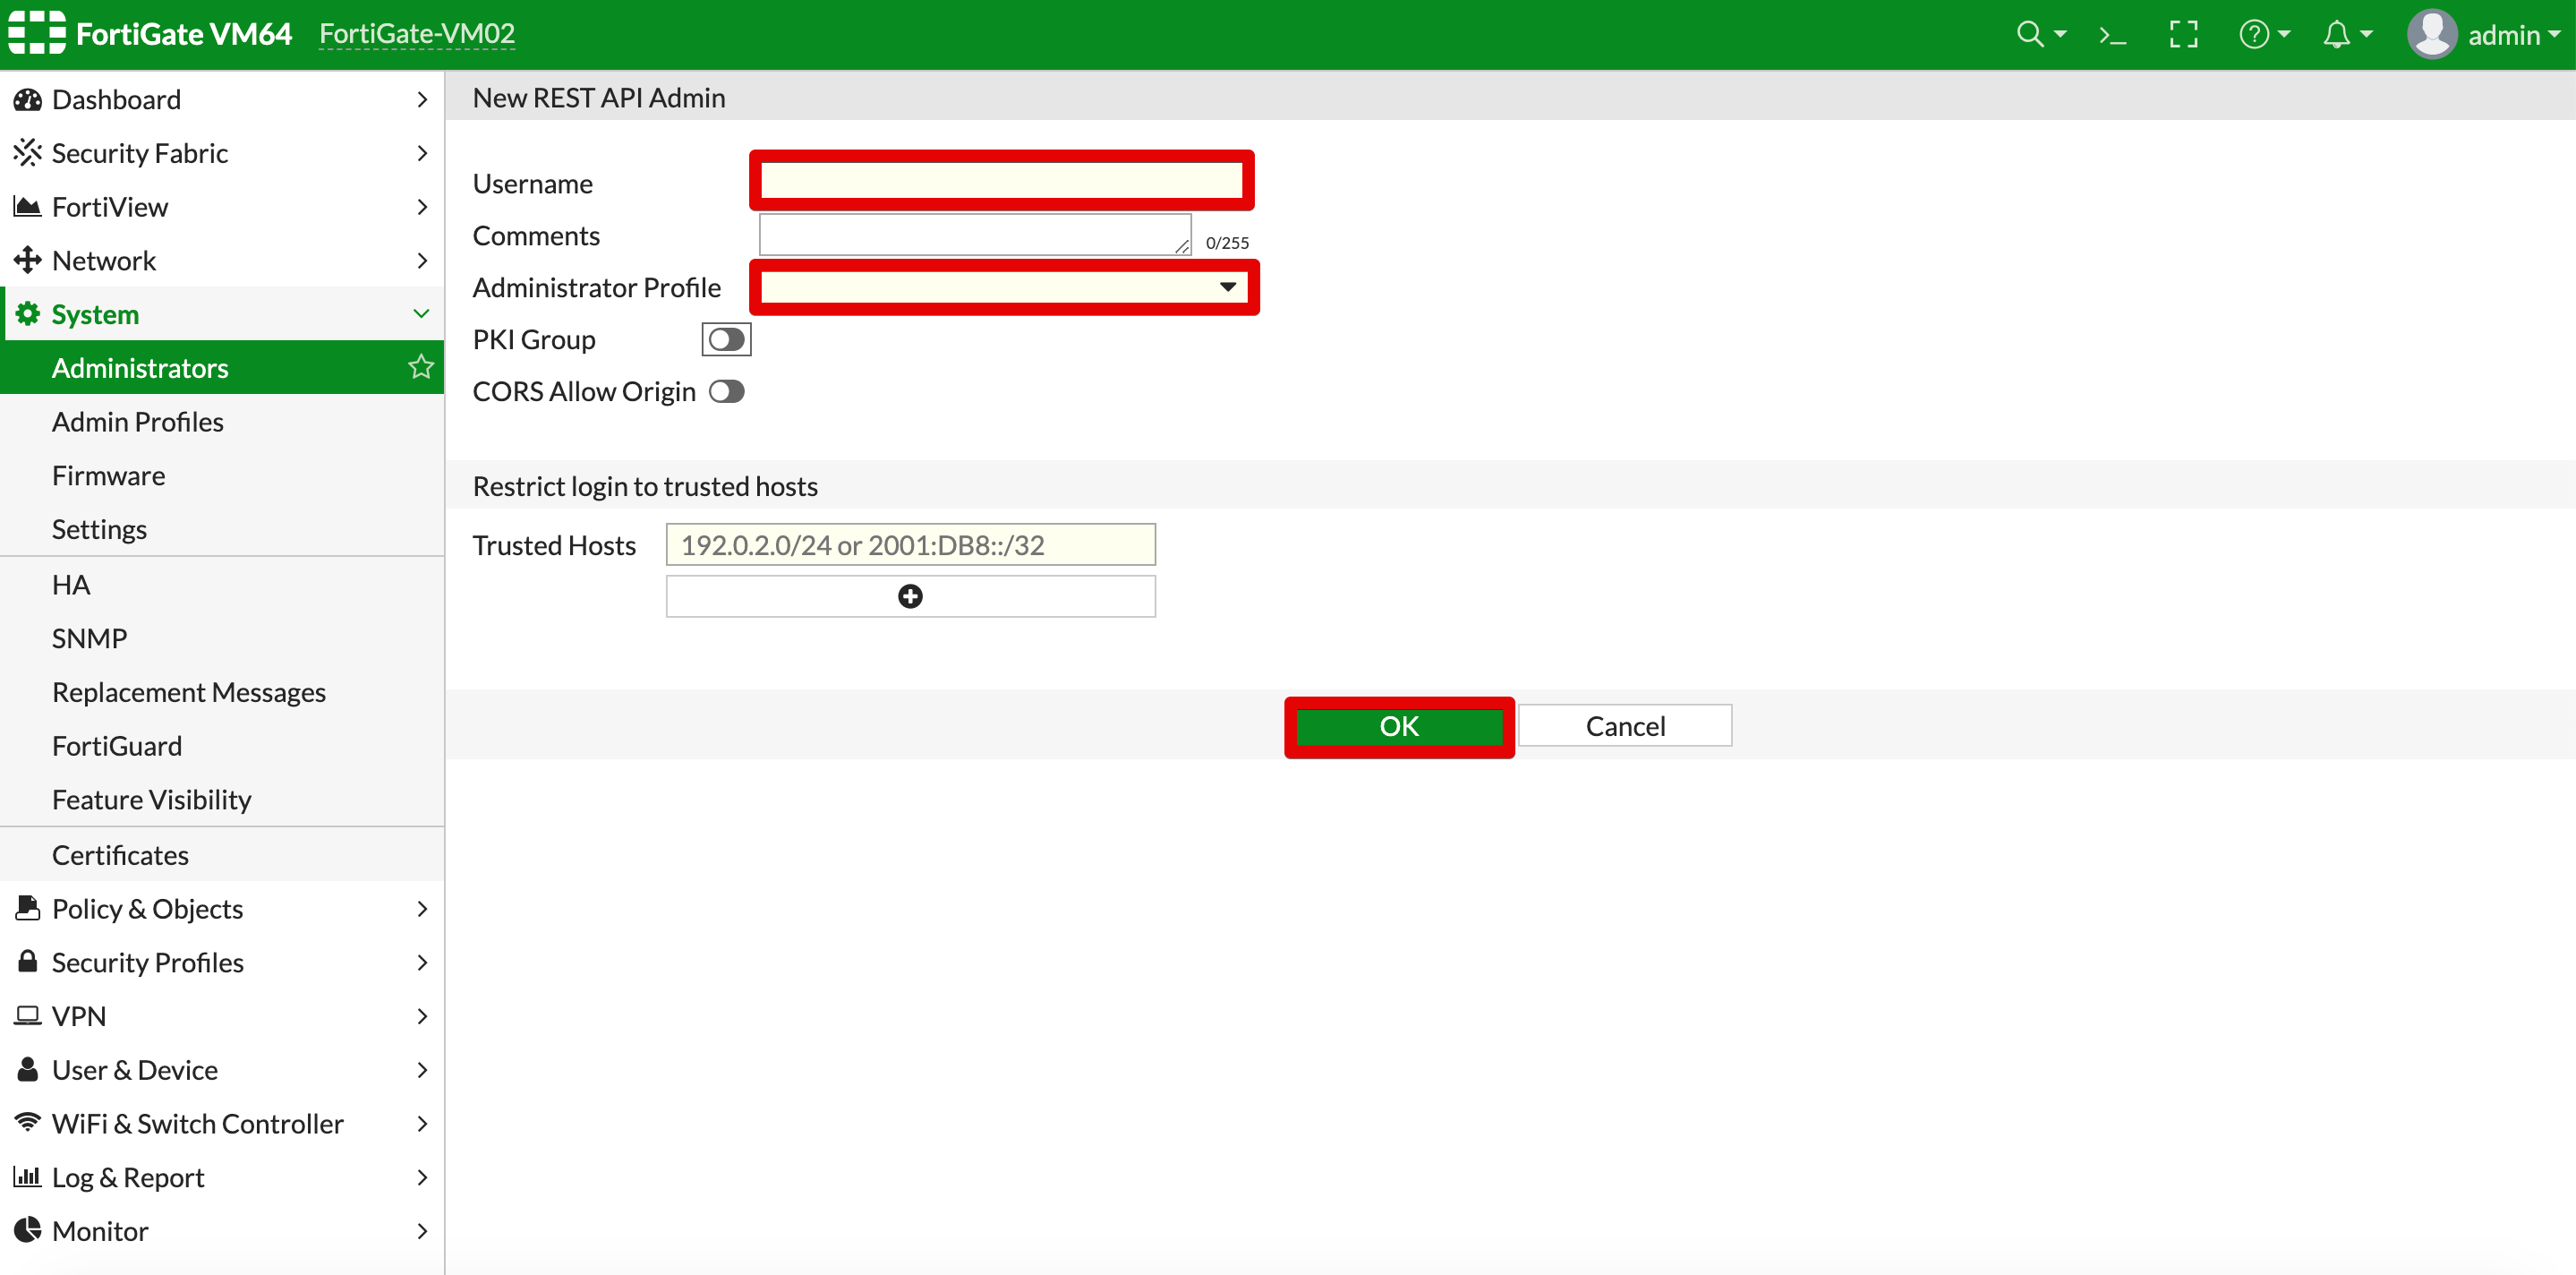
- You have to set a username for the API administrator account and select its profile. You can use an existing profile and create a new one and limit permissions to what the plugin will be used for.
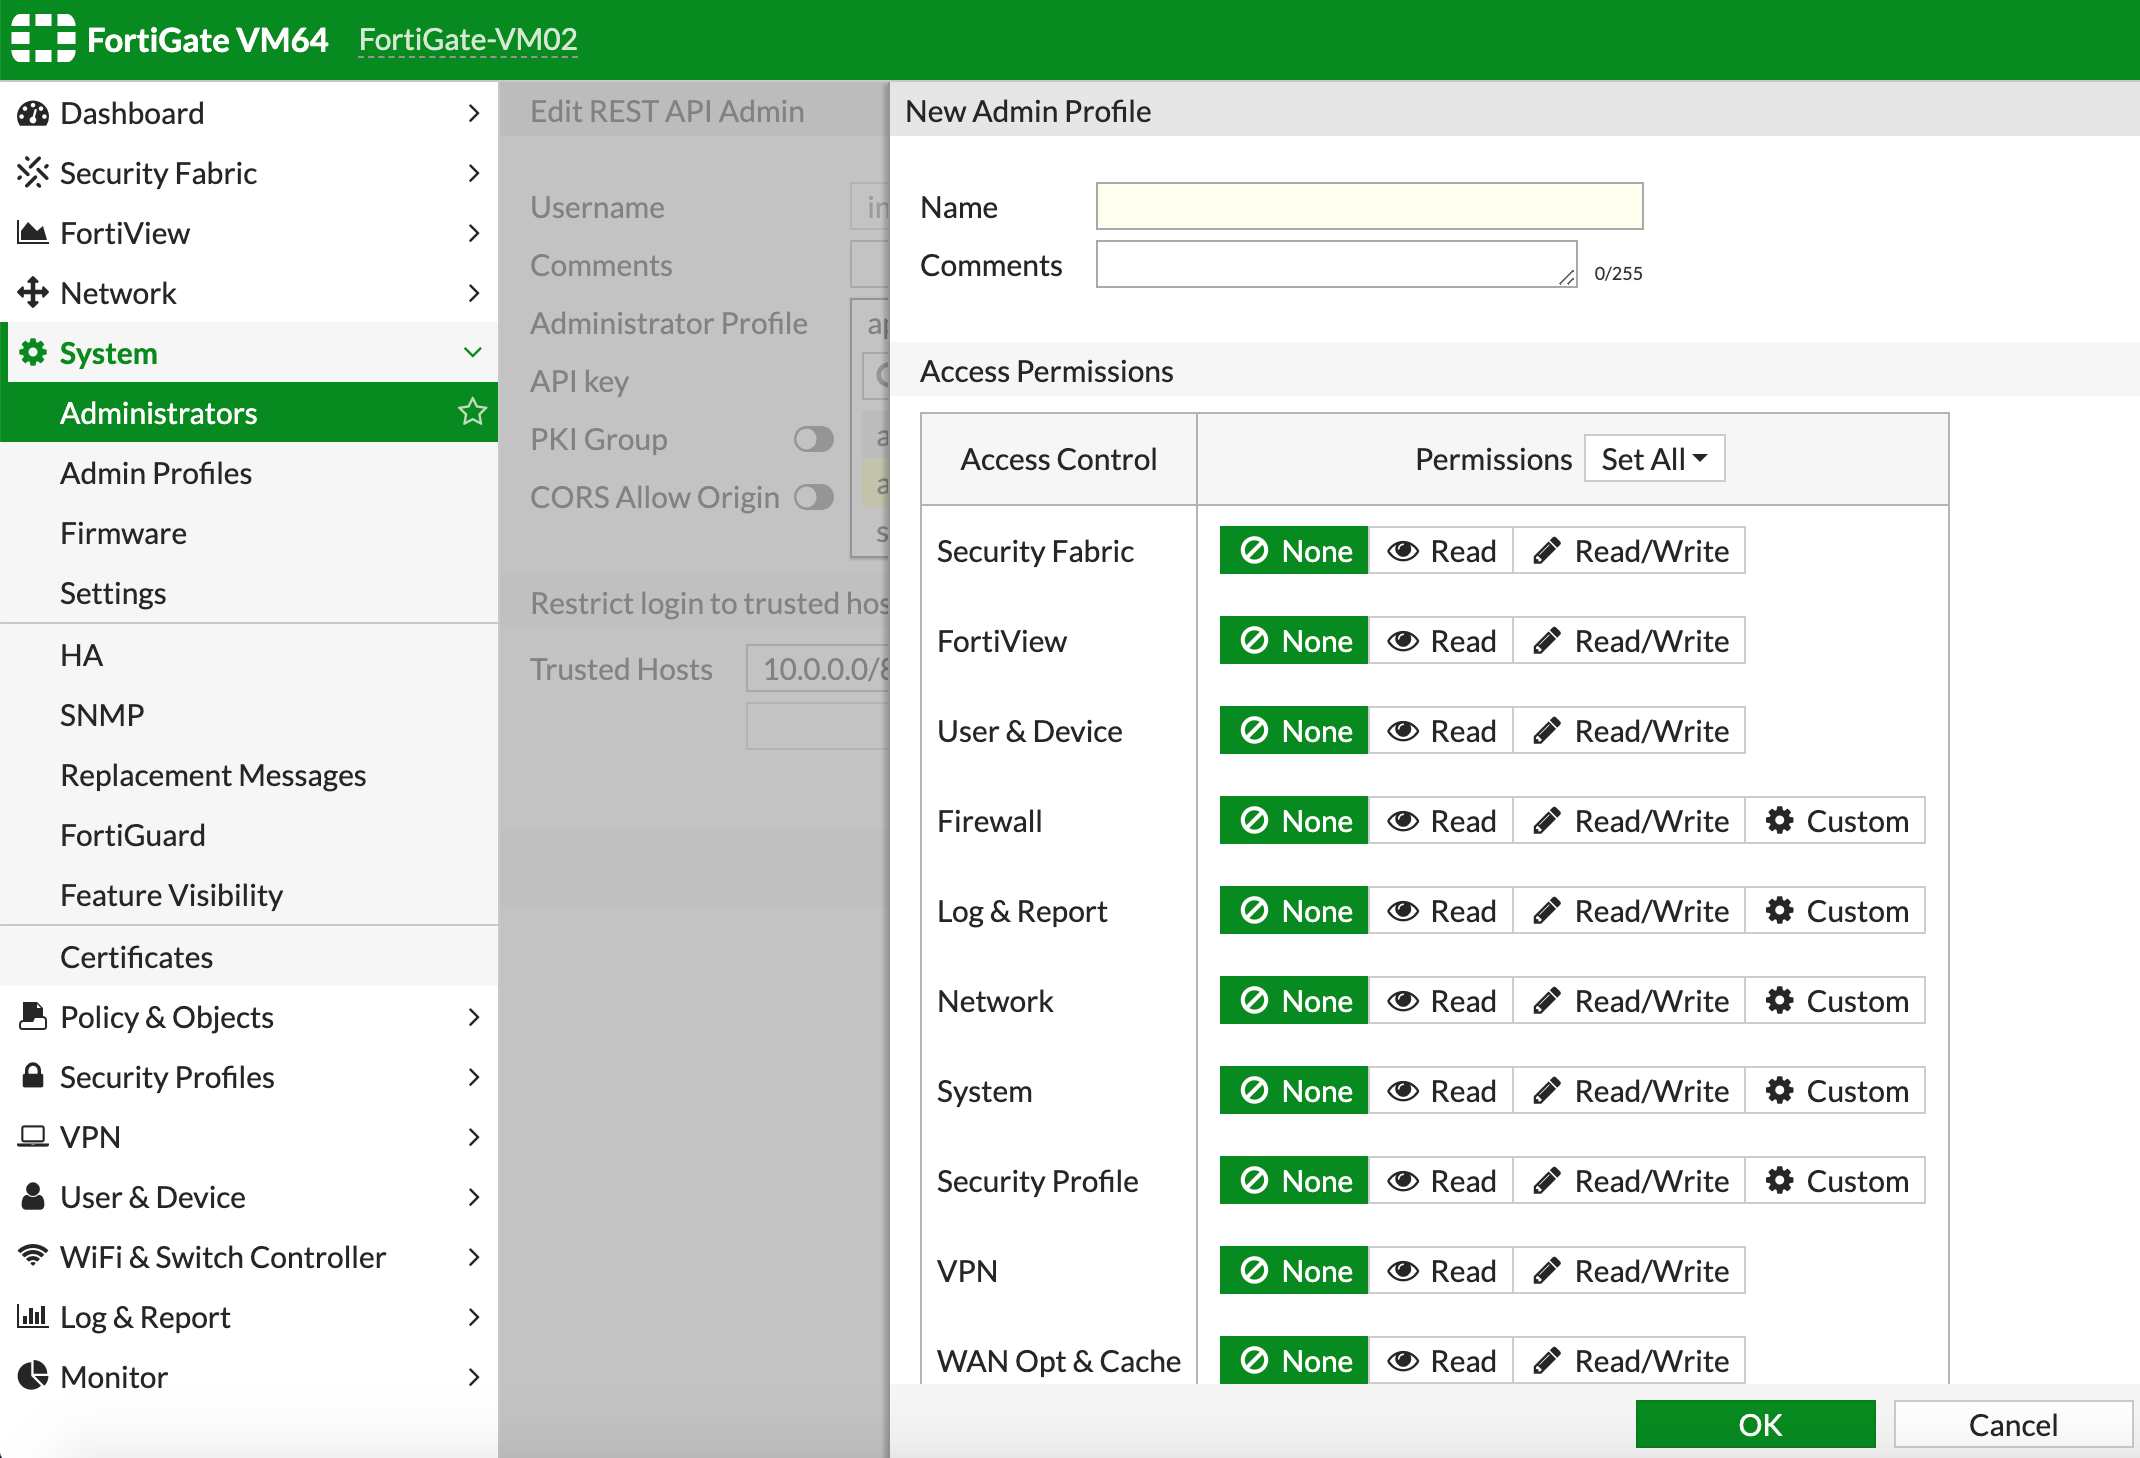
If you decide to create a new profile, select add from the Administrator Profile dropdown.
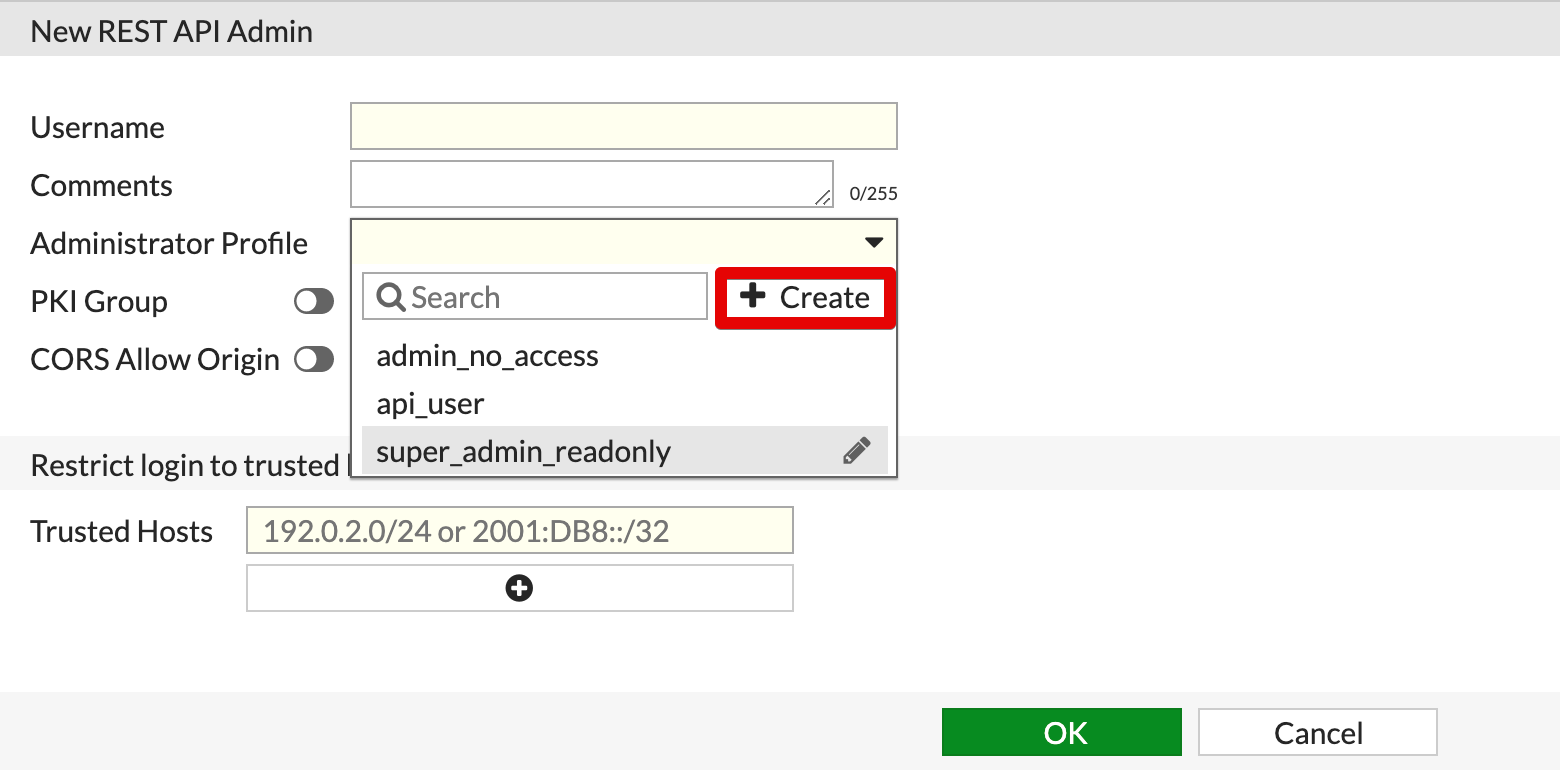
If you decide to create a new profile, assign it a name and give it appropriate permissions. Optionally, you can provide a description of what this profile is allowed to do and where it’s used. The plugin actions require a minimum of Firewall Read/Write permissions.
-
Click OK to create the new profile.
-
It is recommended to add trusted hosts for the IP addresses of your Automation (InsightConnect) orchestrators are deployed. This will ensure that no-one outside of the specified IP address range or CIDR will be able to access your Fortinet FortiGate Firewall using that API key.
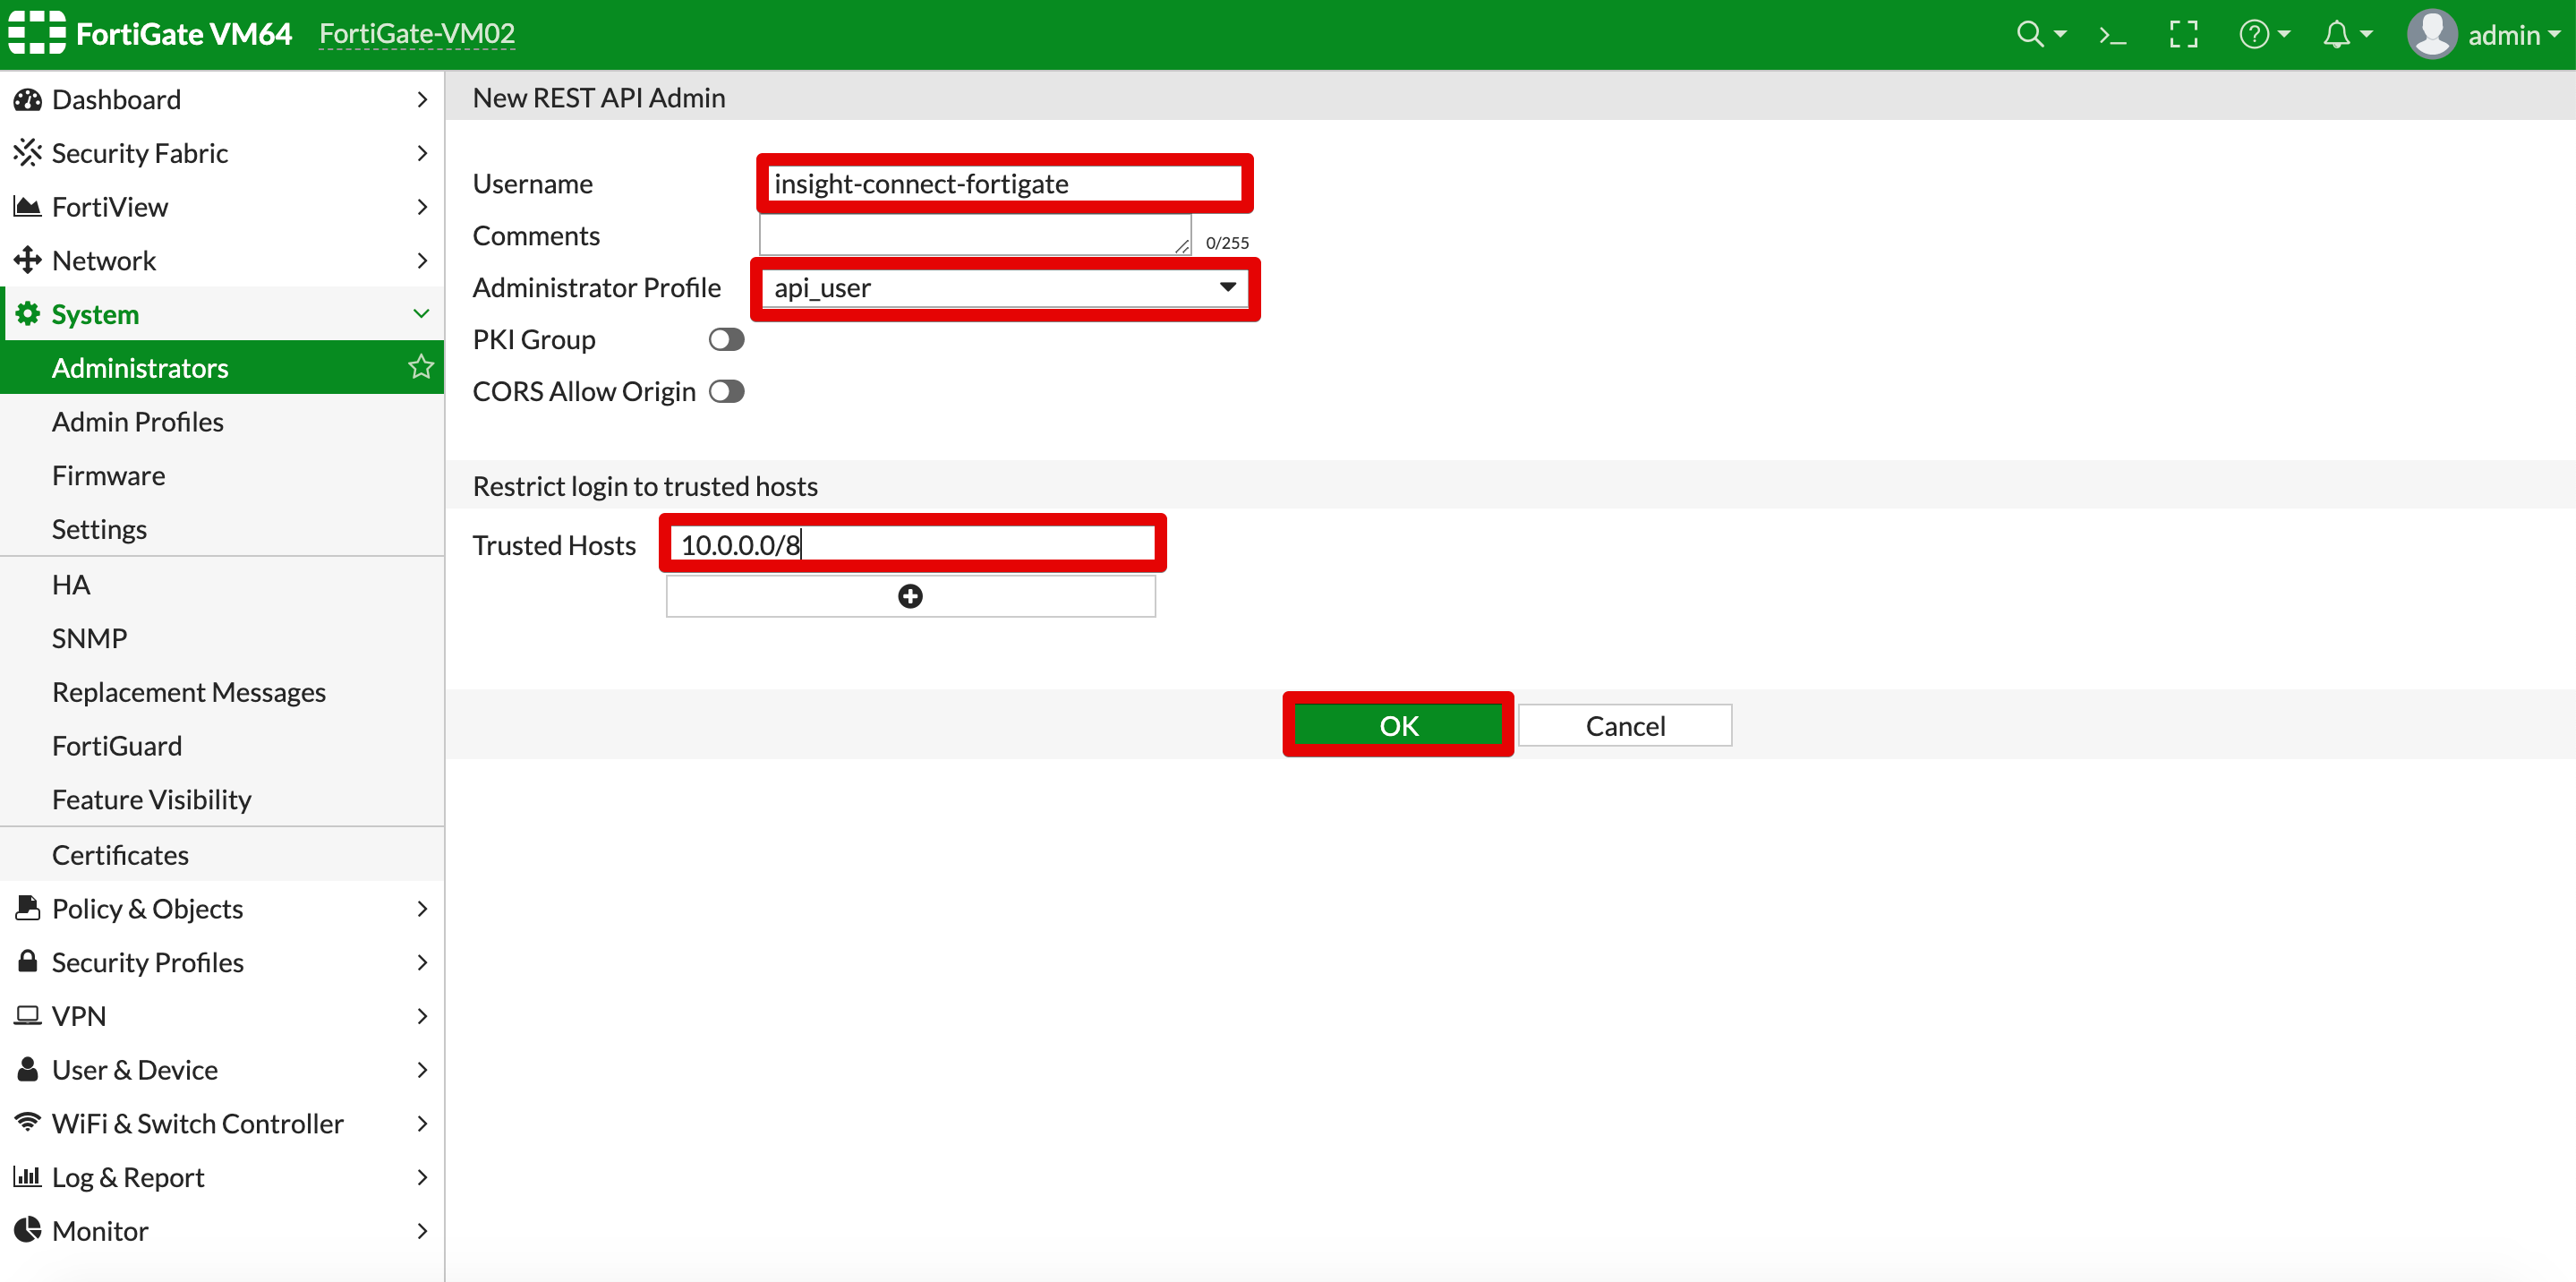
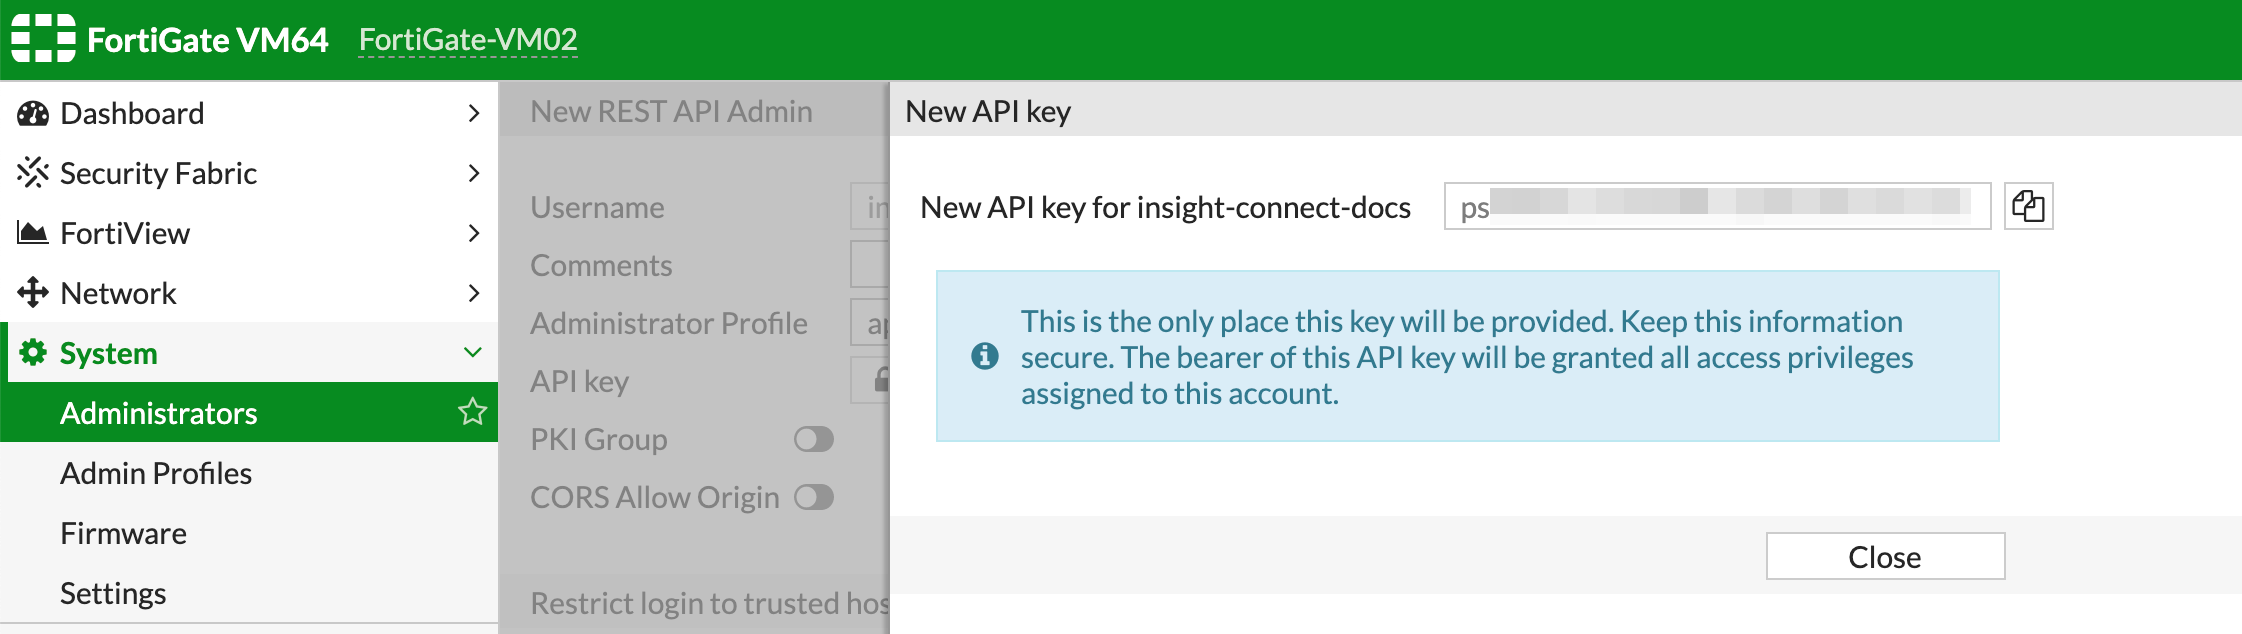
- Next, click OK to create the new user. You will be shown your API key - make sure you take a copy of that - this will be required in Automation (InsightConnect) configuration steps.
Configure the Fortine FortiGate connection in Automation (InsightConnect)
Now that you’ve created your user in Fortine FortiGate, you can configure the Fortine FortiGate connection in Automation (InsightConnect) to use the plugin.
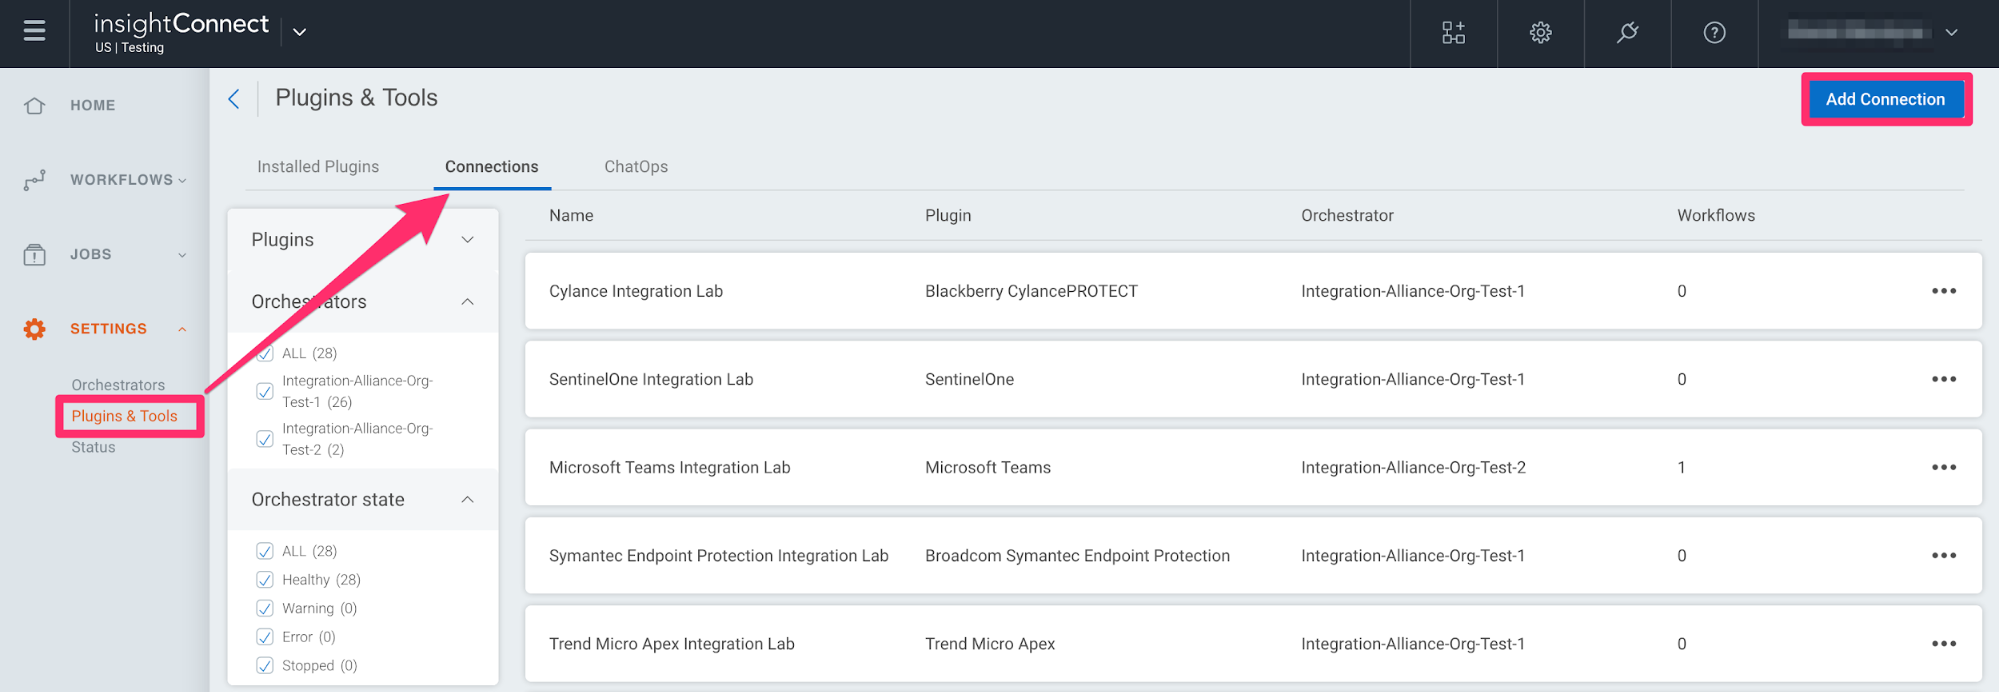
- In Automation (InsightConnect), open the connection configuration for the Fortinet FortiGate plugin.
- You can do this when selecting the Fortinet FortiGate plugin during a workflow building session, or by creating the connection independently by choosing Plugins & Tools from the Settings tab on the left menu. On the Plugins & Tools page, select the Connections tab and click Add Connection in the upper-right corner.
-
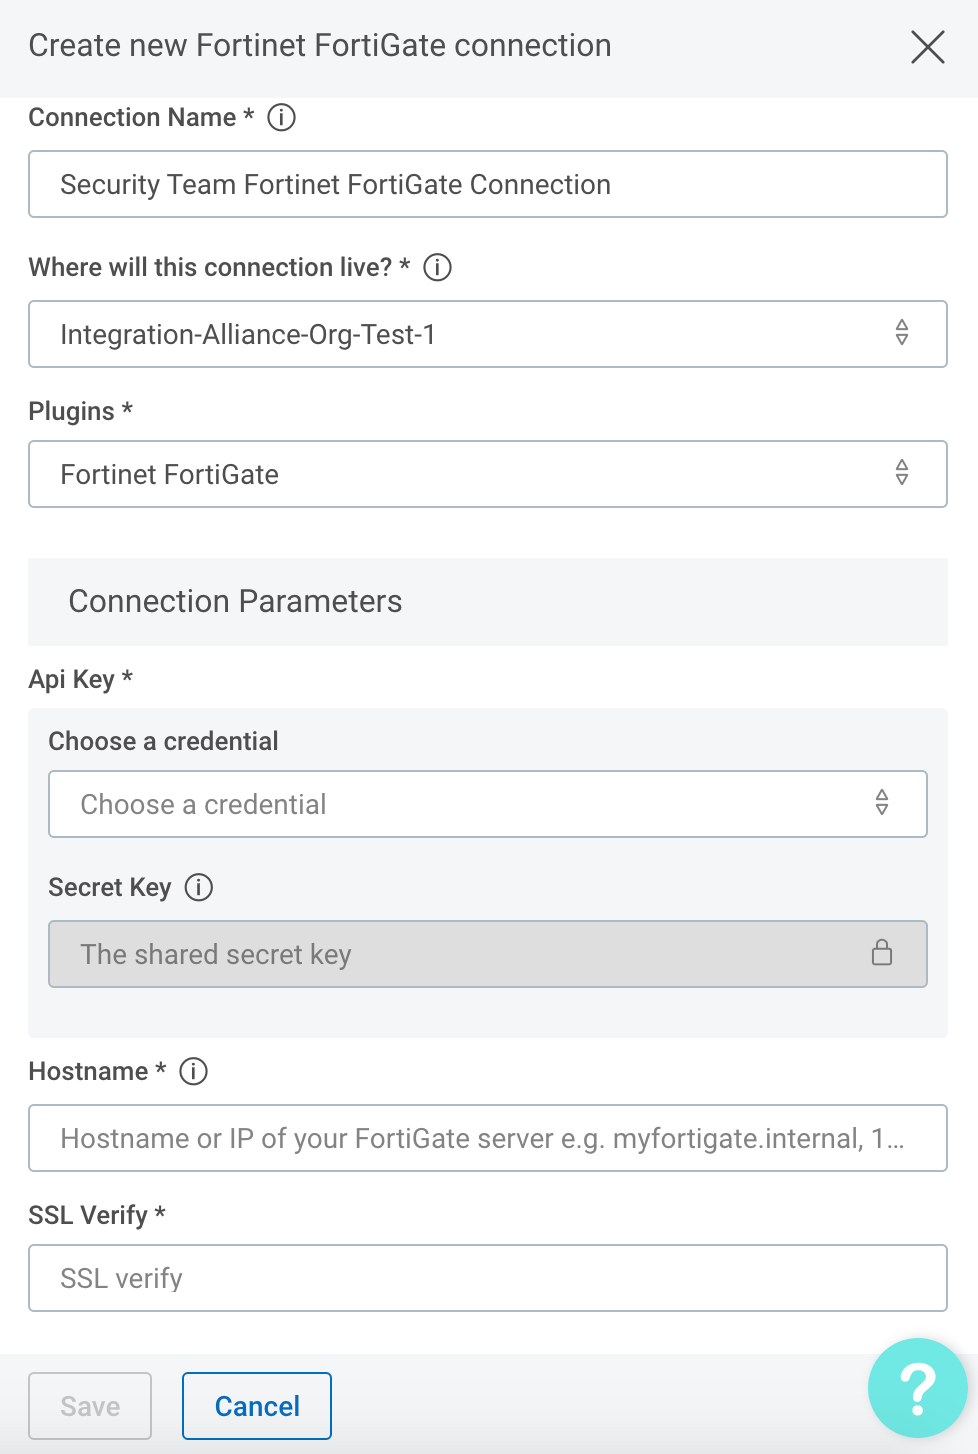
Configure the connection for the Fortinet FortiGate plugin.
- Give the connection a unique and identifiable name, select where the plugin should run, and choose the Fortine FortiGate plugin from the list. If it’s not available, import the plugin from the Installed Plugins tab.
-
Configure your Fortine FortiGate credentials.
- In the API Key field, select credentials to an existing Fortinet FortiGate account or enter the API Key for a newly created Fortinet FortiGate API user.
- In the Hostname field enter the full URL (e.g.
https://fortigate-vm02.example.com), hostname (e.g.fortigate-vm02.example.com), or IP address (e.g.198.51.100.1:8000) with optional port to your instance of Fortinet FortiGate.
Test your connection
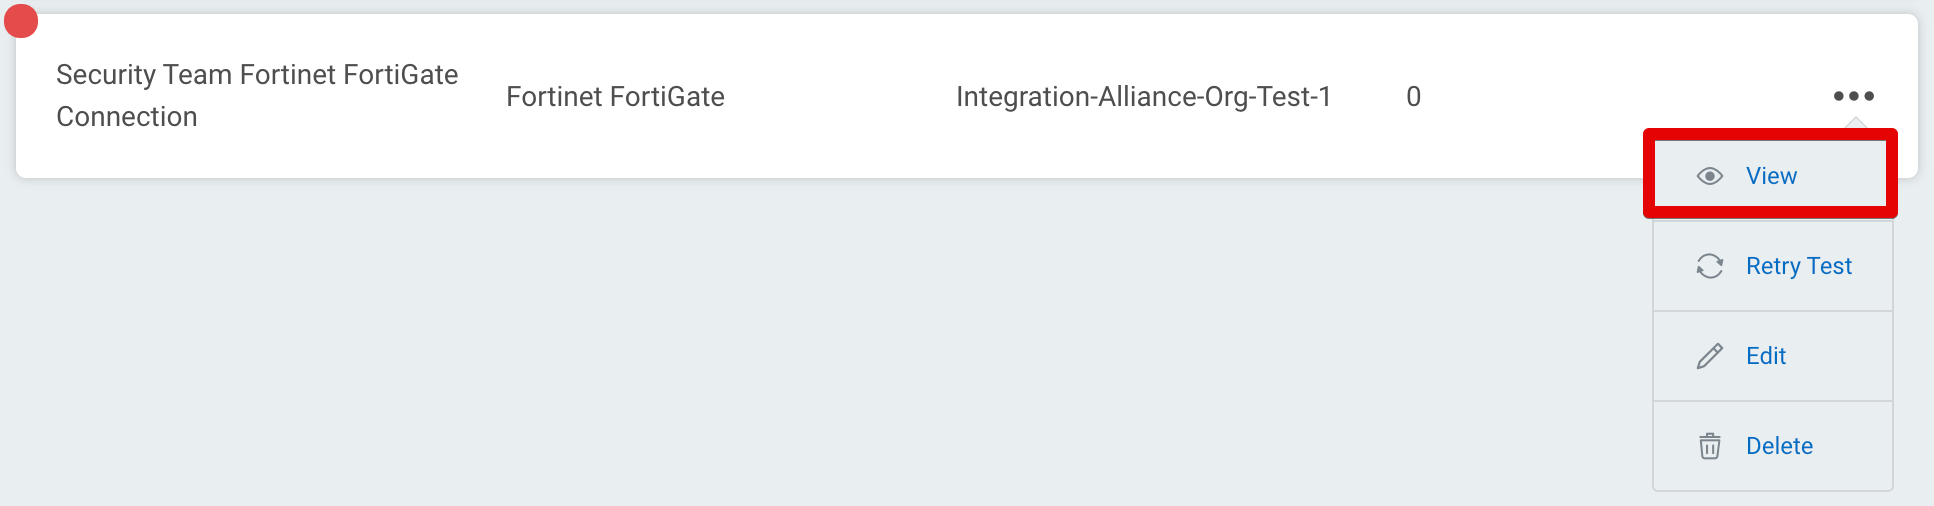
When you save the connection, the connection test will attempt to authenticate to the specified Fortine FortiGate instance. A blue circle on the Connection tile indicates that the Connection test is in progress.

Successful connection test
If there is no circle, the connection succeeded and you’re ready to begin orchestrating your processes with Fortinet FortiGate.

Failed connection test
A red circle indicates that the connection test failed. If this occurs, check your connection details (including the Check Point NGFW URL, username, and password) before trying again.

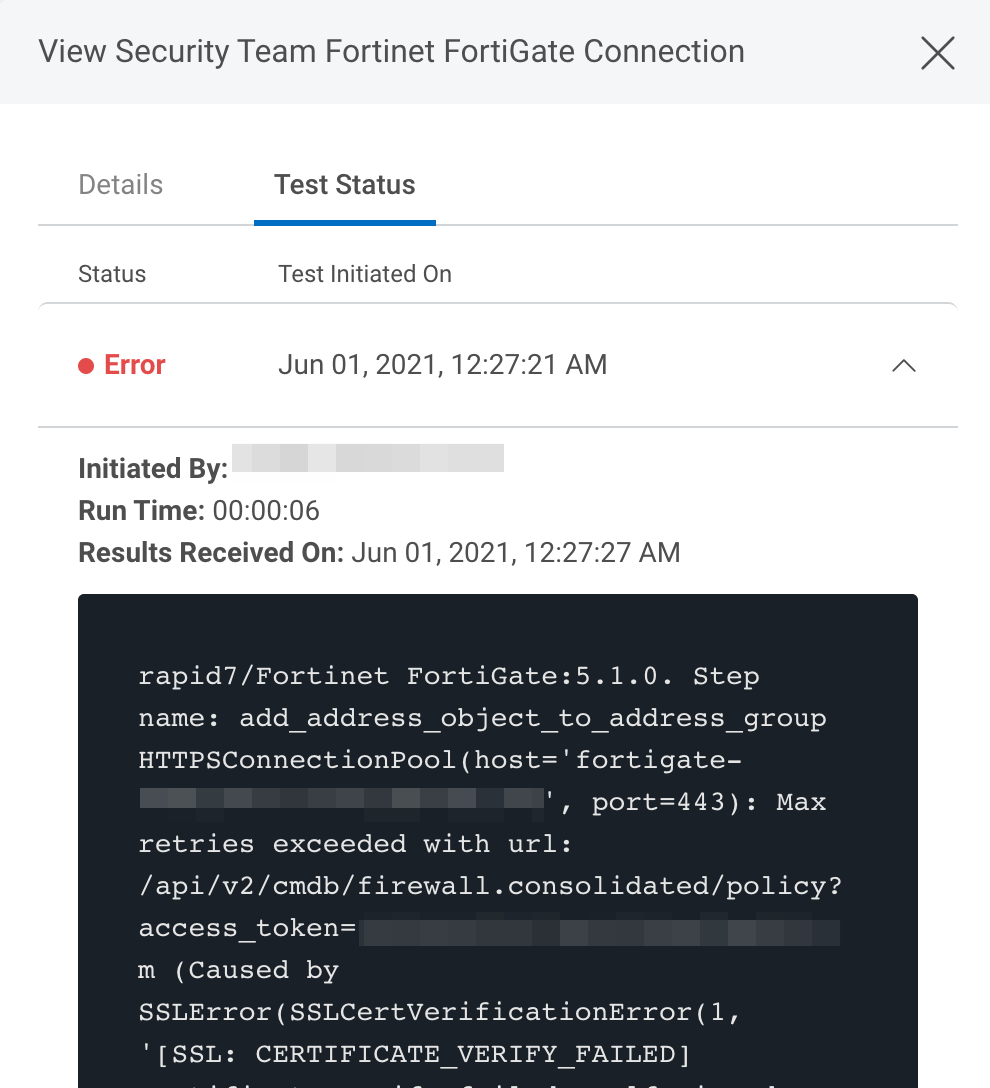
The log may contain useful troubleshooting information. First, click View to see a list of your recent connection tests.
Under the Test Status tab, expand the dropdown for the test that encountered an error to view its log.
Troubleshooting
TLS/SSL Verification
In the example error message above, the SSL Certificate on the Fortigate service failed verification. This could be the result of a self-signed certificate, which can be mitigated by selecting False in the SSL Verify option in the connection. It could also be the result of a certificate that is not in the supported list of CA’s on the orchestrator, which the orchestrator will need to be updated for or a proxy that needs to be configured correctly . It could also be a malicious or expired ticket and the validation failing is intended as the server owner will need to update to a valid certificate.