Install and activate the Rapid7 Orchestrator (Insight Orchestrator)
This page walks you through how to install and activate the Rapid7 Orchestrator (Insight Orchestrator) within Automation (InsightConnect). If you use other Rapid7 Insight products and have already installed an orchestrator for any of them, you do not have to install another just for Automation (InsightConnect)‘s use. One orchestrator will work across all Insight products, but you can install multiple orchestrators if needed to suit your network topology.
Before you begin
- Read the system and network requirements, which contains key considerations, such as the supported operating systems.
- Provision a server that meets the production hardware requirements.
- Decide which installation method works best for you; install the Orchestrator yourself or email installation instructions to your IT team.
Orchestrator placement
When deploying your orchestrator host, consider what you will need to integrate with Automation (InsightConnect). Your orchestrator should be placed in a central location that can easily communicate with on-premises systems such as Active Directory, Vulnerability Management (InsightVM), and firewall management consoles.
The orchestrator should also be able to communicate with cloud platforms like Microsoft Office 365, endpoint detection and response platforms, threat intelligence platforms, and of course the Insight Cloud.
Cross-product installation
If you purchased and have access to Automation (InsightConnect), you can obtain the .ova file or installation script from the product itself or with help from a sales or support representative. It is recommended that you get your file or script from the product to ensure you’re starting with the most recent version.
If you purchased any other Insight product, have not directly purchased a license for Automation (InsightConnect), but are utilizing the built-in automation features powered by the orchestrator, it’s important that you only download the orchestrator using the in-product links to prevent issues when registering.
Install the orchestrator
You can install an orchestrator in one of two ways:
- Email the installation instructions to your IT team
- Install the orchestrator yourself
Email installation instructions to your IT team
- Navigate to the Orchestrator page in Automation (InsightConnect) and click Install Orchestrator.
- From the installation choices in the orchestrator tab, choose Send an email to my IT team.
- A
mailtowindow will open on your machine with the email body pre-filled with installation instructions and download links. - Add your IT team’s email addresses, then send the email.
Do not join the Rapid7 Orchestrator (Insight Orchestrator) to Active Directory
The Orchestrator relies on built-in user accounts to facilitate the installation & ongoing execution of important services. Joining the Orchestrator to Active Directory has been observed to cause interference with local user accounts and groups, leading to improper permissions for Orchestrator services. Therefore, it is not considered a supported configuration to join your Orchestrator to Active Directory.
Install the orchestrator yourself
Depending on your operating system, you can install the orchestrator either by downloading an .ova file or by using a script-based installer package.
The key differences according to operating system are:
- The OVA file is a full Ubuntu version 22.04 virtual machine containing the orchestrator software and dependencies.
- The script installer installs the orchestrator on your existing Ubuntu version 20.04 or 22.04, or a Red Hat Enterprise Linux (RHEL) version 7 or 8 machine.
Install the Ubuntu orchestrator
To install by downloading the .ova file:
- From the Orchestrator page in Automation (InsightConnect), click Install Orchestrator and select Virtual Appliance Installation. Download the Ubuntu
.ovafile. - Import the
rapid7-orchestrator-latest.ovadisk image into the virtual machine (VM) solution of your choice, such as VirtualBox or VMWare. - When the import is complete, boot the machine and log in with the credentials provided:
- Username: rapid7
- Password: changeme
- When the installation is complete, copy the activation key provided.
Change the initial username and password
We recommend you change the password provided to you for initial access to the OS and manage it locally in accordance with your own password management policies.
To install by using a script-based installer package:
Requirements for the Linux shell script installation method
You must provision a new Ubuntu image in alignment with our production hardware requirements to install an orchestrator with a Linux shell script. If you repurpose an existing machine or underprovision disk space, you will get errors later.
All supported methods of running the orchestrator require the presence of Docker Community Edition (CE). When using the script-based installer, the Docker Apt repository and Docker CE engine will be installed on your behalf. No other container engines are supported at this time. More details about this dependency can be found as part of our software requirements.
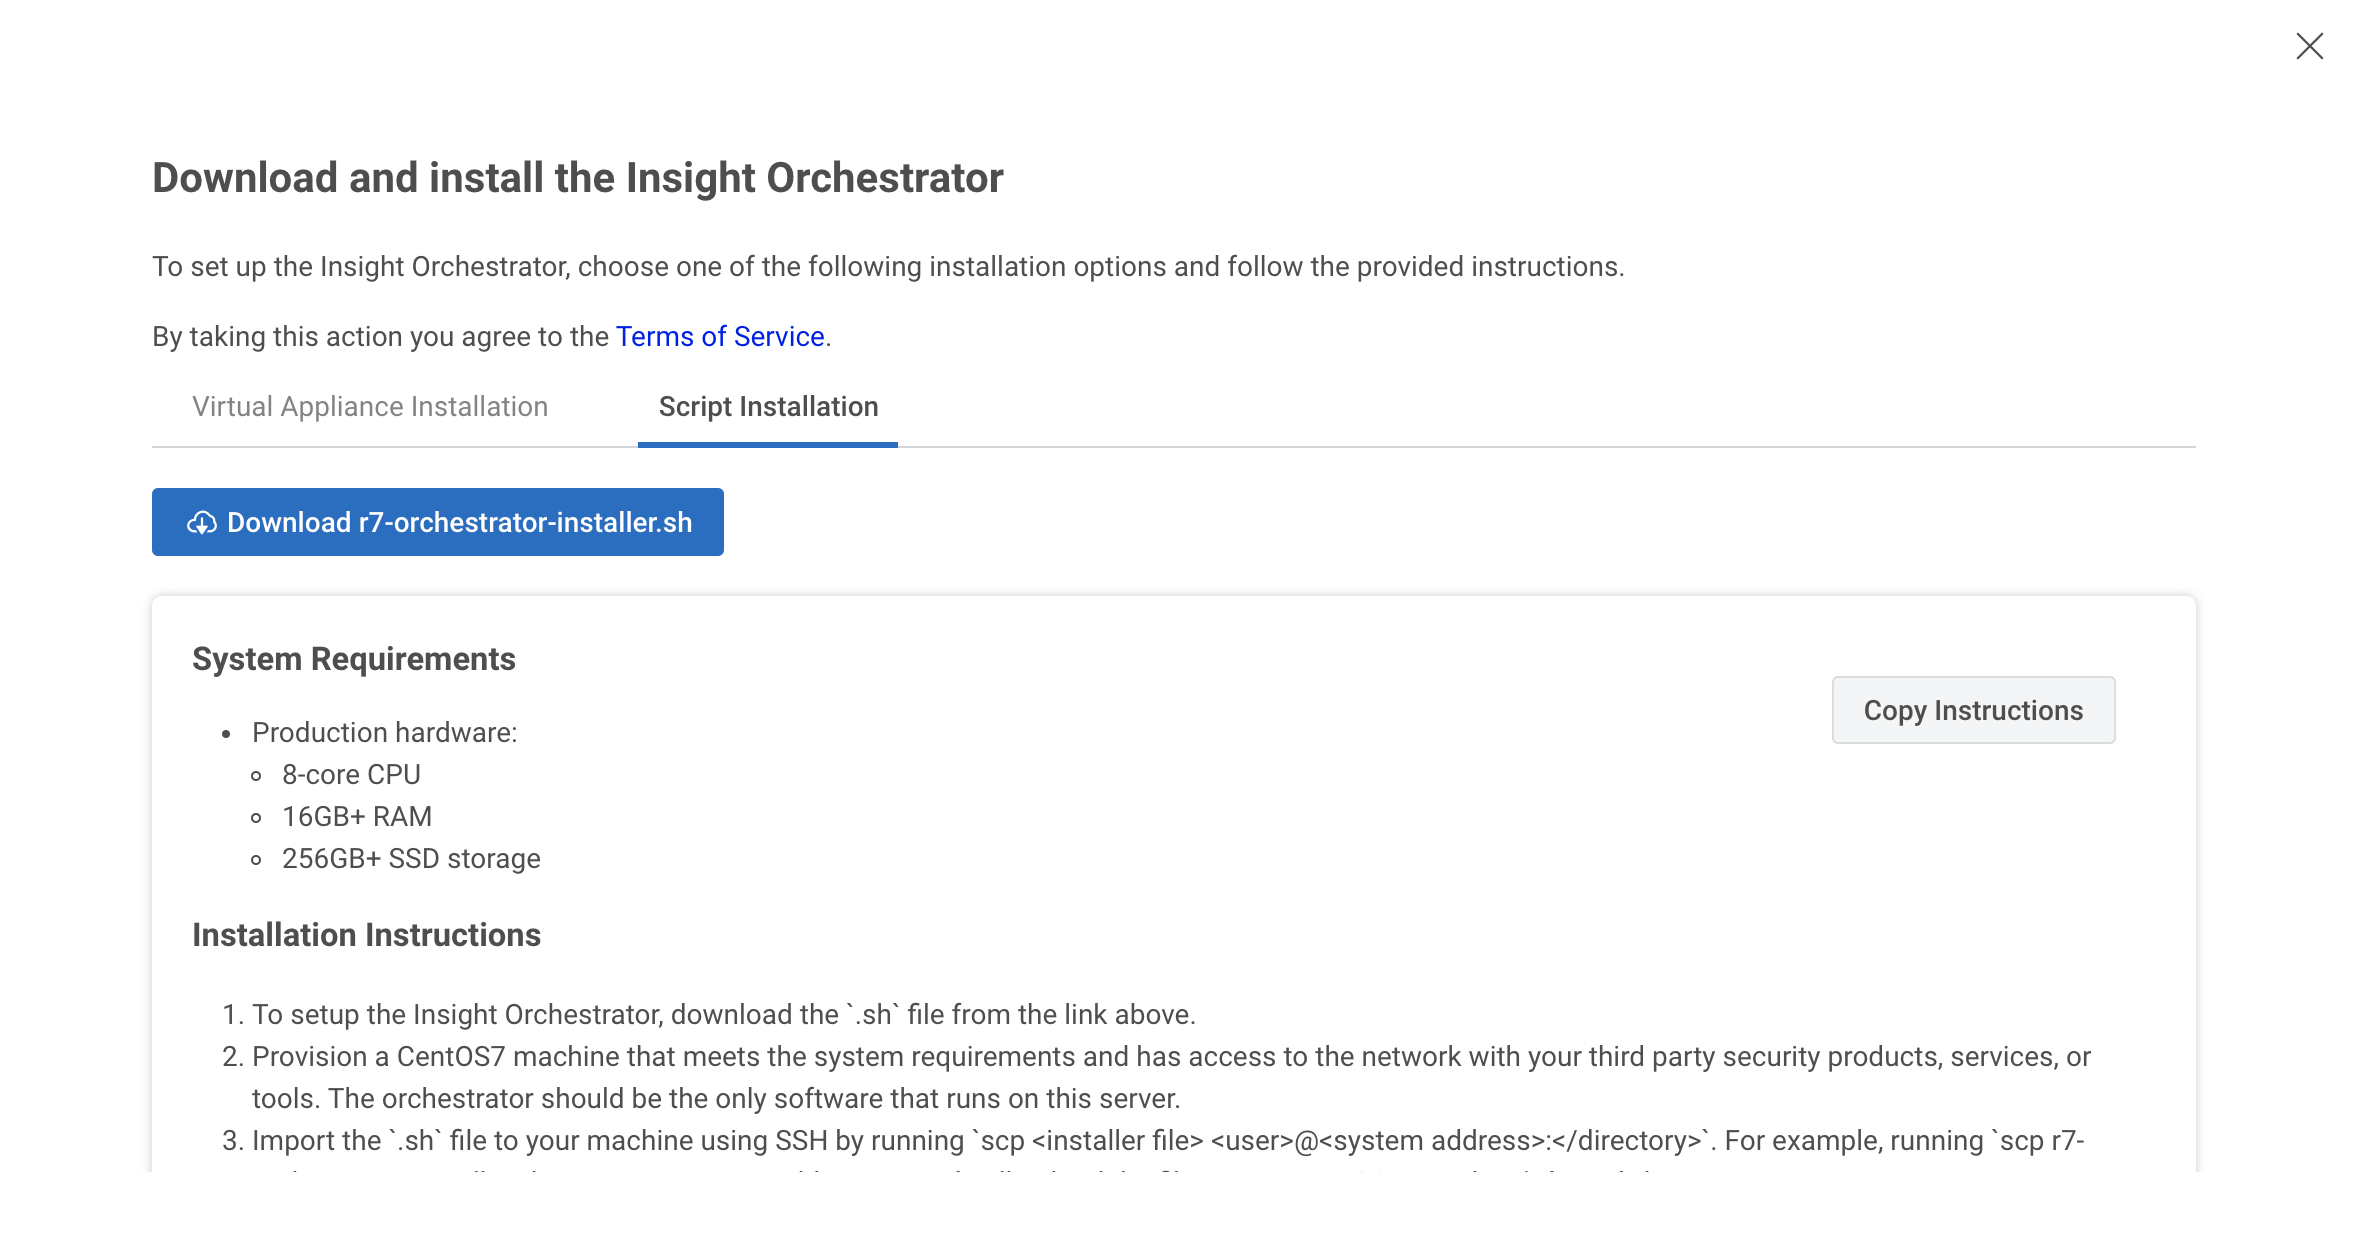
- From the Orchestrator page in Automation (InsightConnect), click Install Orchestrator and select Script Installation.
- Download the
r7-orchestrator-installer.shfile. - Import the
.shfile to your Ubuntu machine with secure shell (SSH) by runningscp <installer file> <user>@<VM address>:<directory>on your local machine. For example, runningscp r7-orchestrator-install.sh <user>@<VM address>:/tmp/will upload the file to your machine’s/tmpdirectory. - In your Ubuntu instance, run
cduntil you are in the directory where you imported the installation file, then change permissions on the installer file by running a command likechmod +x r7-orchestrator-installer.sh. - Run the installer as root with
sudo ./<installer file>. For example, if you copied the file to/tmp, typingcd /tmp && sudo ./r7-orchestrator-install.shwill begin the installation. - Follow the instructions provided in the installer to continue. If you require further assistance, run
./<installer> --helpto view more information. - Run the command
orch-diagnostics. Theorch-diagnosticscommand initiates all of the networking tests needed to ensure a successful orchestrator deployment. If any configurations are incomplete, the command provides instructions on how to resolve failed tests. - When the installation is complete, copy the activation key provided.
Install the RHEL orchestrator
You can install the orchestrator on a machine running RHEL 7 or 8 by using the Linux command line with a script-based installer package.
Requirements for the Linux shell script installation method
You must provision a new RHEL 7 or 8 image in alignment with our production hardware requirements to install an orchestrator with a Linux shell script. If you repurpose an existing machine or underprovision disk space, you will get errors later.
All supported methods of running the orchestrator require the presence of Docker Community Edition (CE). When using the script-based installer, the Docker Yum repository and Docker CE engine will be installed on your behalf. No other container engines are supported at this time. More details about this dependency can be found as part of our software requirements.
- From the Orchestrator page in Automation (InsightConnect), click Install Orchestrator and select Script Installation. Download the
r7-orchestrator-installer.shfile.
- Import the
.shfile to your RHEL 7 or 8 machine with secure shell (SSH) by runningscp <installer file> <user>@<VM address>:<directory>on your local machine. For example, runningscp r7-orchestrator-install.sh <user>@<VM address>:/tmp/will upload the file to your machine’s/tmpdirectory. - In your RHEL 7 or 8 instance, run
cduntil you are in the directory where you imported the installation file, then change permissions on the installer file by running a command likechmod +x r7-orchestrator-installer.sh. - Run the installer as root with
sudo ./<installer file>. For example, if you copied the file to/tmp, typingcd /tmp && sudo ./r7-orchestrator-install.shwill begin the installation. - Follow the instructions provided in the installer to continue. If you require further assistance, run
./<installer> --helpto view more information. - Run the command
orch-diagnostics. Theorch-diagnosticscommand initiates all of the networking tests needed to ensure a successful orchestrator deployment. If any configurations are incomplete, the command provides instructions on how to resolve failed tests. - When the installation is complete, copy the activation key provided.
Configure proxies for orchestrator success
The Rapid7 Orchestrator (Insight Orchestrator) fully supports using proxies in networked environments that mandate them. If your organization uses one, you’ll need to configure your proxy in order for your newly installed orchestrators to run properly.
Activate the orchestrator
After you install your orchestrator and log into the OS, you receive your activation key as a long string of text in the command line.
Copy the activation key into a text file. You will need to use it to activate the orchestrator.
Activation key troubleshooting
If you didn’t copy the activation key after installing your orchestrator, you can retrieve it by using secure shell (SSH) protocol to access your orchestrator’s VM and print the activation key from there.
If you’re having issues copying and pasting your activation key, you can download the key as a .txt file and copy and paste it from there.
To activate an orchestrator, you’ll need to log back into your Insight product. If you don’t have access, send the activation key to an Insight product user and have them follow these steps to complete the activation:
- Go to Settings > Orchestrator.
- Name your orchestrator. Orchestrators in your organization must have unique names. If you try to reuse a name, you will receive an error and won’t be able to activate it.
- Paste your activation key into the Key field.
- Click Activate Orchestrator.
Activation troubleshooting
If you followed the steps to activate your orchestrator, but your activation key doesn’t seem to be working, take a look at our orchestrator activation troubleshooting information for common scenarios and resolutions.