Create a Goal or SLA
This article will give you an overview on how to create a goal or SLA. You will use, sort, and define your data, establish the conditions you want to meet, and save your goal using our 3-step wizard. After building your goal with your parameters, the wizard will tell you the type of goal you created. You can set a goal to track remediation efforts or configure assets. We’ve also provided common use cases and pre-built templates of recommended goals to get you started.
Before you start
In order to create goals, you must have permission to build goals, as well know how to build queries to filter asset and vulnerability data for fine-tuning and faster processing. Visit our Query Operators documentation for operator definitions.
What do I do if I can't create a goal?
If the Create Goal button is disabled (grayed out) this means that you do not have permission to create goals. Reach out to your global administrator for getting access to platform permissions.
There are two ways to access your goals page:
- From the Goals tab in your Vulnerability Management (InsightVM) left menu
- From the Dashboard tab by clicking on View Goal Details on any goal-based widget.
Create a goal from the Goals and SLAs page
To create a goal:
- In the left menu, click the Goals and SLAs icon.
- When the Goals and SLAs page appears, click + New Goal in the upper right corner to launch the wizard.
Create a goal from the dashboard
To create a goal from the dashboard:
- In the left menu, click the Dashboard icon.
- Click + Add Widget in the upper right corner to launch the wizard to add a goal.
- In the left column, click Goals.
- Select the type of goal you want to create.
- Click Add. This action will add a goal widget on your dashboard.
- On the goal widget, click the dropdown menu and select the goal to display it.
Create a goal from scratch
Here’s an overview of the steps:
- Select goal
- Build goal
- Review
Decide the type of goal you want to build
You can create your own goal or customize one of our recommended goals using the goal creation wizard. We’ll walk you through the steps of building your own goal. You can build a goal to either track remediation efforts or asset configuration.
Build a goal to track remediation efforts
Here’s a look at the various fields you’ll need to complete to build a remediation goal.
If you want to track remediation efforts for specific vulnerabilities, follow these steps:
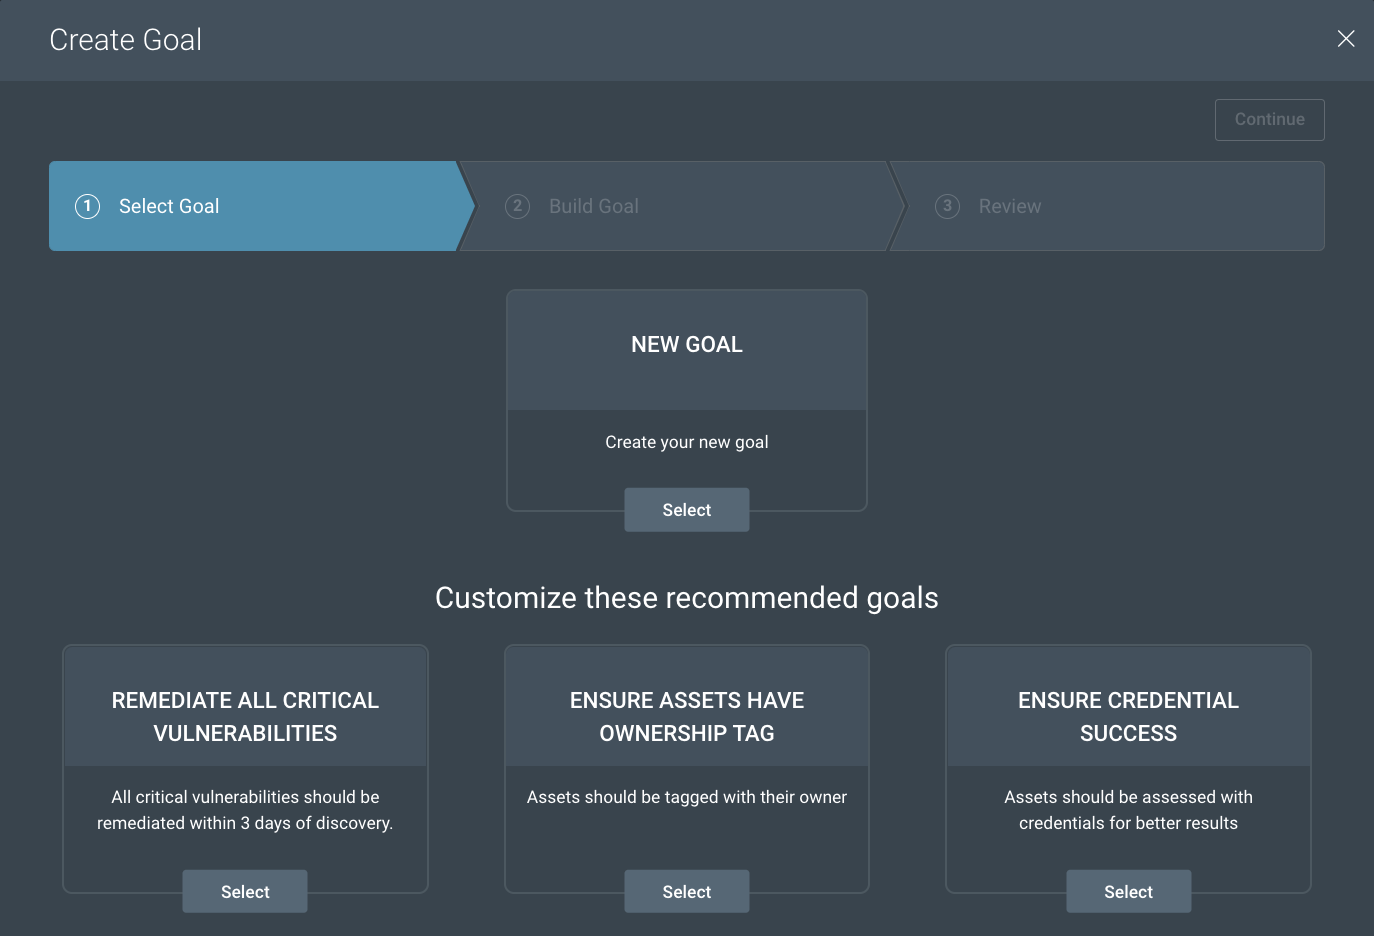
- On the first page of the wizard, select New Goal and click Continue >.
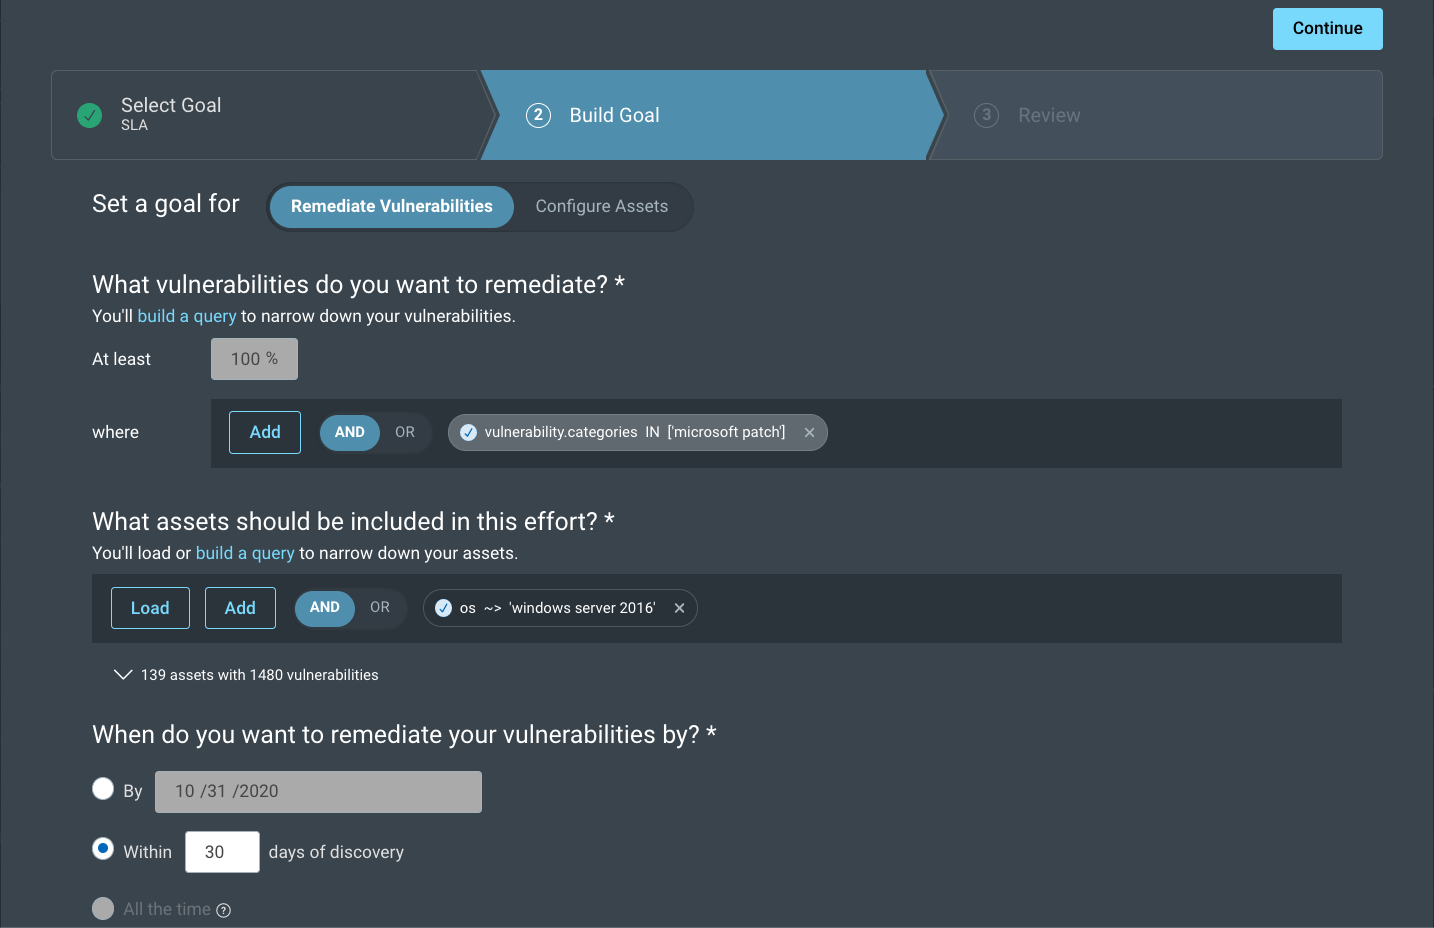
- Click Remediate Vulnerabilities.
- Enter the remediation percentage of the vulnerabilities that you want to accomplish with your goal.
- Click Add to build a query to narrow down the vulnerabilities of your goal.
Better queries make better performing goals
You can use “And” or “Or” operators to add focused queries to target your critical data, resulting in better performance of your goal.
You cannot mix AND or OR in the same query
Note that you can switch to AND or OR at any time, but your choice will apply to the rest of your query. You cannot mix AND or OR criteria together in the same query.
Next, you’ll identify the assets that are affected by these vulnerabilities. You’ll either load an existing query or build a new query following the same process as above.
Asset and vulnerability data will update dynamically when you apply queries
You’ll see the number of assets and vulnerabilities dynamically change (underneath the asset query bar) as you apply or remove queries. Click these numbers to display an asset and vulnerabilities table for an in-depth look at your data.
- Enter values for either of the two options to make it a time bound goal or an SLA:
- Setting a completion date for the goal will make it a time bound goal.The date you want to complete your goal by making it a time bound goal
- Setting a remediation window of a number of days within the discovery date for the goal makes it an SLA.The number of days within discovery making it your own SLA
- Click Continue.
- Review your goal’s details and enter a name and optional description. Use the dropdown menus to assign your goal to a dashboard for easy reference or share your goal with colleague(s).
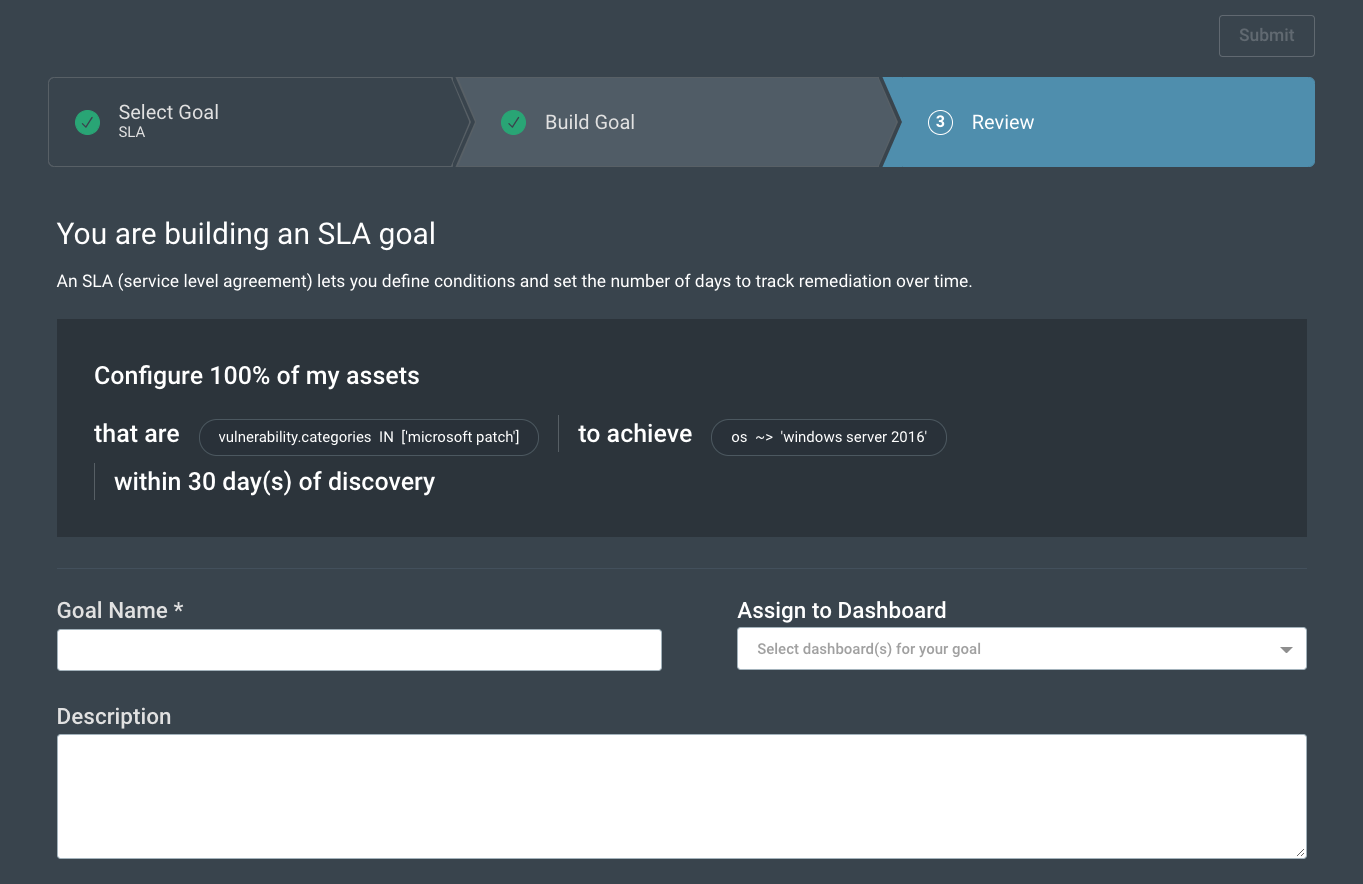
Your new goal and its details will appear in alphabetical order on the Goals tab, on the Goals and SLAs page. This is where you’ll manage your goals.
SLAs must initialize
After creating an SLA, an “Initializing” status might appear in the My Goals table for a few minutes if the system is analyzing a large data scope.
Build a goal to track asset configuration
Here’s a look at the various fields you’ll need to complete to build an asset configuration goal.
Build an asset-based goal if you want to track the way your assets are configured. An example of an asset-based goal is identifying Windows assets that have port 22 open. Follow these steps to create a goal that tracks asset configuration:
- On the first page of the wizard, select New Goal and click Continue >.
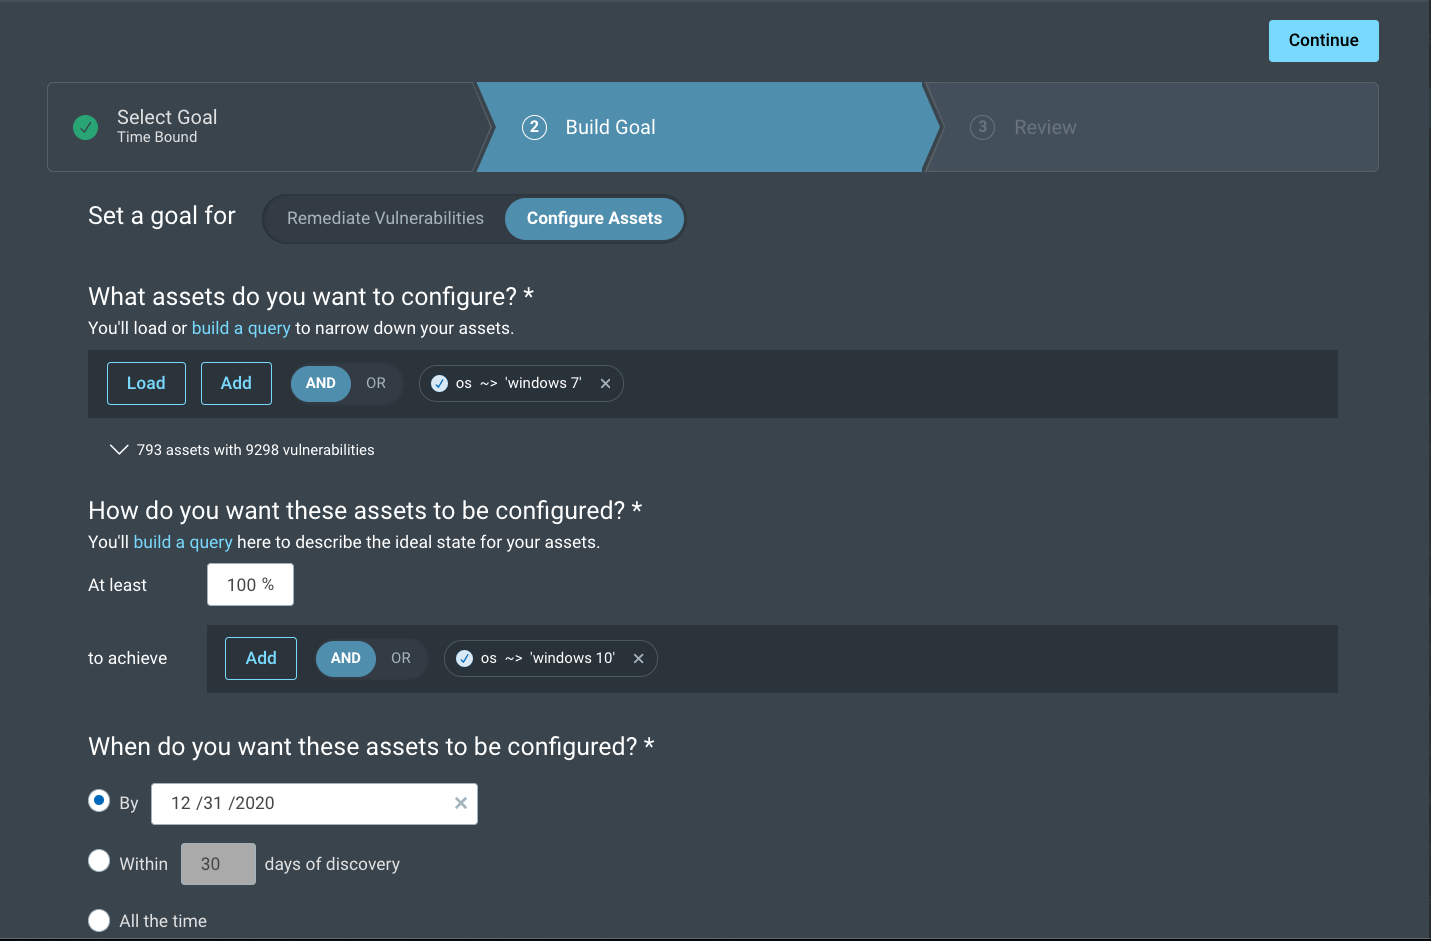
- Click Configure Assets.
- You’ll narrow down your assets by loading an existing query or building a new one by adding criteria.
- Click Load Query to use an existing query.
Load Existing Queries First
If you want to use an existing query, you must first load it before adding new queries. If you Add an existing query after you build a new one, you will reset all of your work.
- Click Add Criteria to build a new query.
Better queries make better performing goals
You can use “And” or “Or” operators to add focused queries to target your critical data, resulting in better performance of your goal.
You cannot mix AND or OR in the same query
Note that you can switch to AND or OR at any time, but your choice will apply to the rest of your query. You cannot mix AND or OR criteria together in the same query.
Next, you’ll describe the ideal state that you want your assets to be configured in. Set a success criteria using a query to better define your goal. Enter the percentage of configured assets that you want to reach your goal by your specified deadline.
- Click Add Criteria to build a query to describe the conditions you want your assets to meet.
- Finally, enter a date or timeframe to complete this goal.
- Click Continue when you are satisfied.
- Review your goal’s details and enter a name and optional description. You can also assign your goal to a dashboard for easy reference.
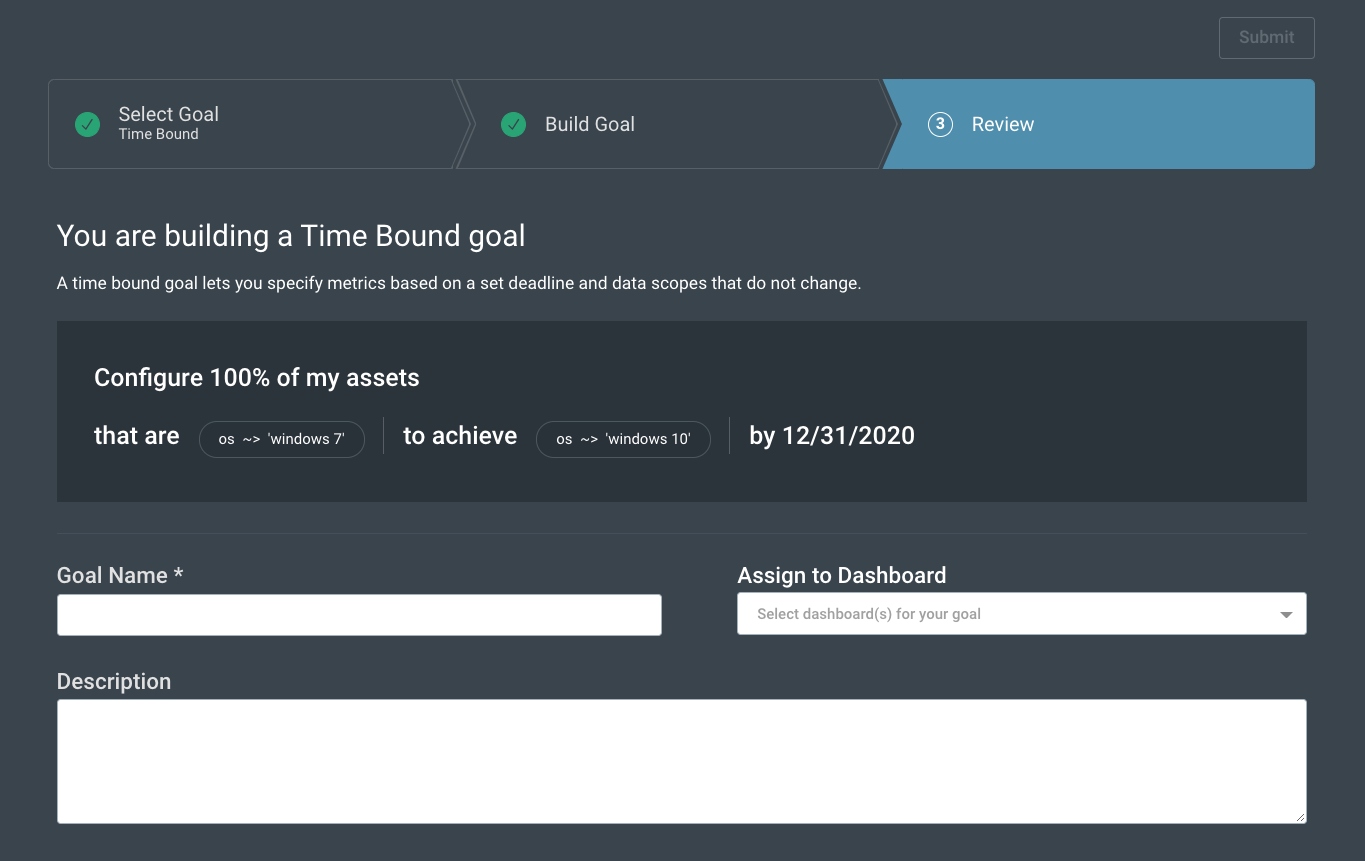
- Click Submit.
Your new goal and its details will appear in alphabetical order on the Goals and SLAs page.
SLAs must initialize
After creating an SLA, an “Initializing” status might appear in the My Goals table for a few minutes if the system is analyzing a large data scope.
Customize a pre-built goal
You can select one of our recommended goals and modify a template to meet your needs. Some of the queries have already been built and you can modify the values to suit your needs:
- Remediate all critical vulnerabilities
- Ensure assets have ownership tag
- Ensure credential success
Add a goal widget on the dashboard
After creating a new goal, you can add it to a widget to any dashboard by following these steps:
- In the left menu, click the Dashboard icon.
- When the dashboard appears, click + Add Widget.
- In the pop-up window that appears, select Goals in the left column.
- Select your desired goal type by checking the appropriate box.
- Click Add. This action will add a goal widget on your dashboard.
- Click the dropdown menu on the goal widget to display existing goals.
- Select the desired goal to populate the dashboard widget with its data.