Creating reports based on SQL queries
You can run SQL queries directly against the reporting data model and then output the results in a comma-separated value (CSV) format. This gives you the flexibility to access and share asset and vulnerability data that is specific to the needs of your security team. Leveraging the capabilities of CSV format, you can create pivot tables, charts, and graphs to manipulate the query output for effective presentation.
Prerequisites
To use the SQL Query Export feature, you will need a working knowledge of SQL, including writing queries and understanding data types.
You will also benefit from an Understanding the reporting data model: Overview and query design, which maps database elements to business processes in your environments.
Defining a query and running a report
- Click the Reports icon in the Security Console Web interface. OR Click the Create tab at the top of the page and then select Site from the drop-down list.
- On the Create a report page, select the Export option and then select the -SQL Query Export_ template from the carousel. The Security Console displays a box for defining a query and a drop-down list for selecting a data model version. Currently, versions 1.2.0 and 1.1.0 are available. It is the current version and covers all functionality available in preceding versions.
- Optional: If you want to focus the query on specific assets, click the control to Select Sites, Assets, or Asset Groups, and make your selections. If you do not select specific assets, the query results will be based on all assets in your scan history.
- Optional: If you want to limit the query results with vulnerability filters, click the control to Filter report scope based on vulnerabilities, and make your selections.

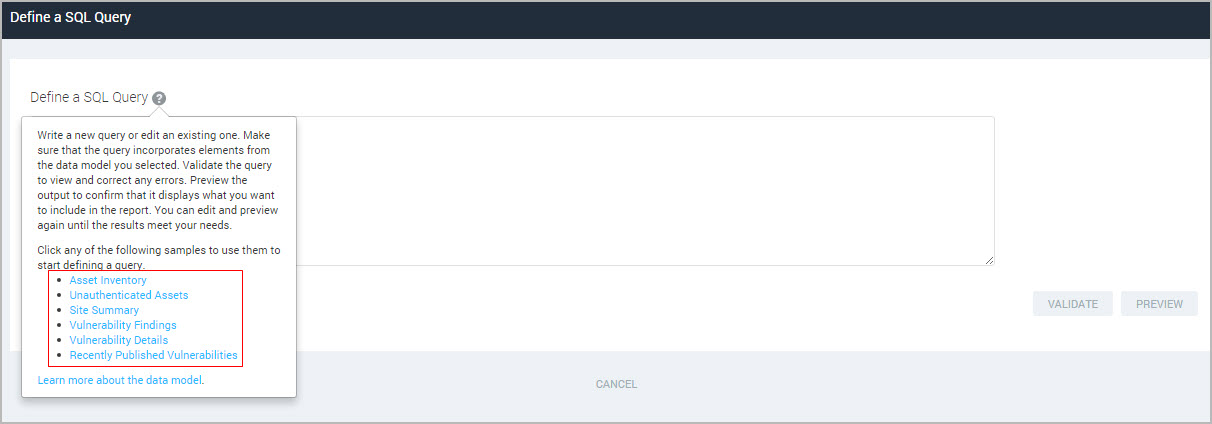
- Click the text box for defining the query. The Security Console displays a page for defining a query, with a text box that you can edit.
- In this text box, enter the query. Tip: Click the Help icon to view a list of sample queries. You can select any listed query to use it for the report.
- Click the Validate button to view and correct any errors with your query. The validation process completes quickly.
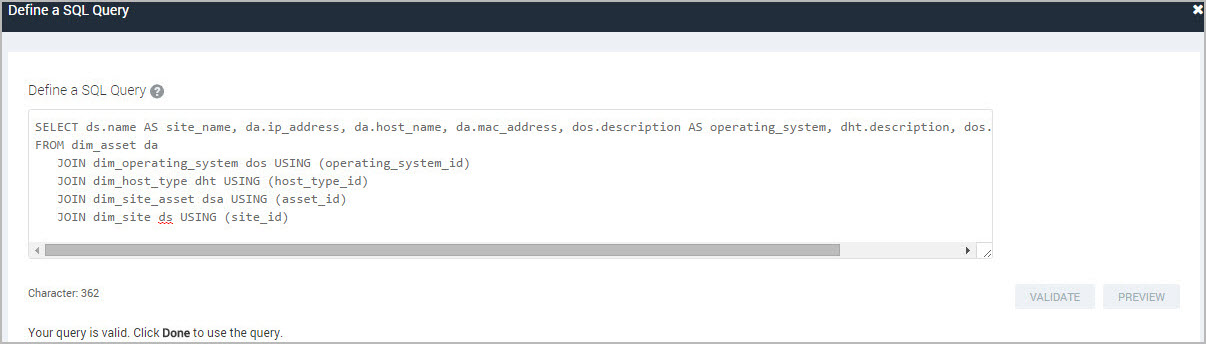
- Click the Preview button to verify that the query output reflects what you want to include in the report. The time required to run a preview depends on the amount of data and the complexity of the query.
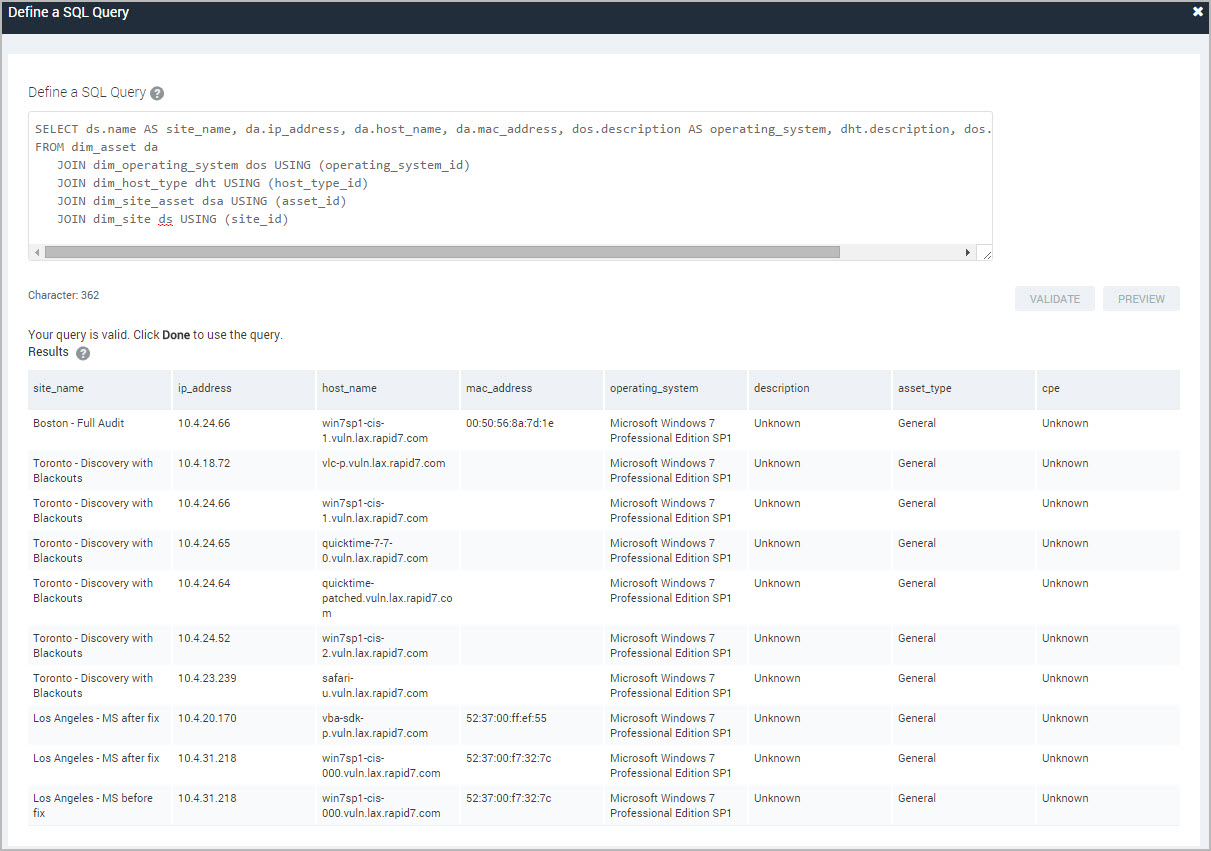
- If necessary, edit the query based on the validation or preview results. Otherwise, click the Done button to save the query and run a report.
If you click Cancel, you will not save the query.
The Security Console displays the Create a report page with the query displayed for reference.
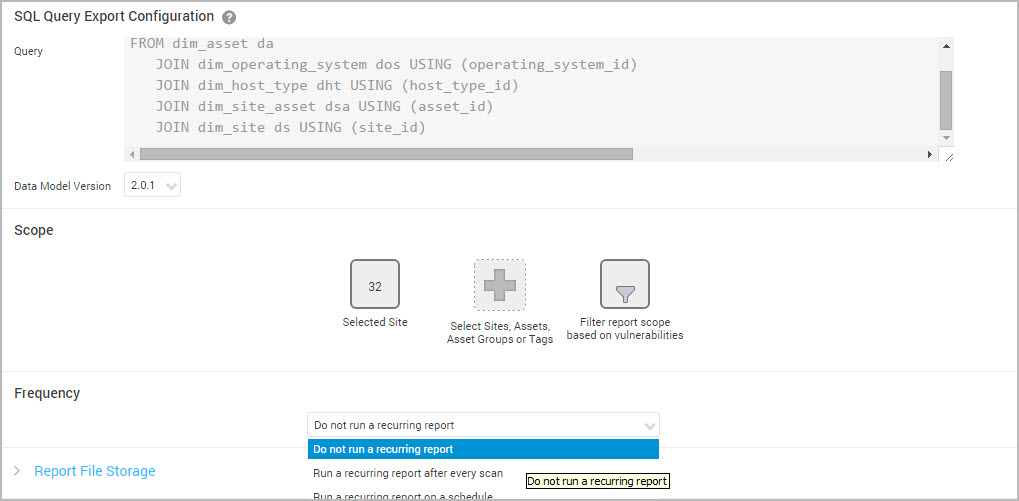
- Click Save & run the report or Save the report, depending on what you want to do.
- For example, if you have a saved report and want to run it one time with an additional site in it, you could add the site, save and run, return it to the original configuration, and then just save.
- In either case, the saved SQL query export report appears on the View reports page.